In this tutorial I’ll be going over a common technique used when building spell effects in games. I like to call them Soulercoasters, but you can name them whatever you like. The effect is a trail that flows along custom built mesh with flat uvs. Like a rollercoaster, you could say. This gives the look of a particle trail while having all the custom complexity of a mesh effect. This kind of effect is great for building weapon slashes, will o wisp style trails and much more. I personally love to use them to add extra detail to rune circles.
Let’s get started!
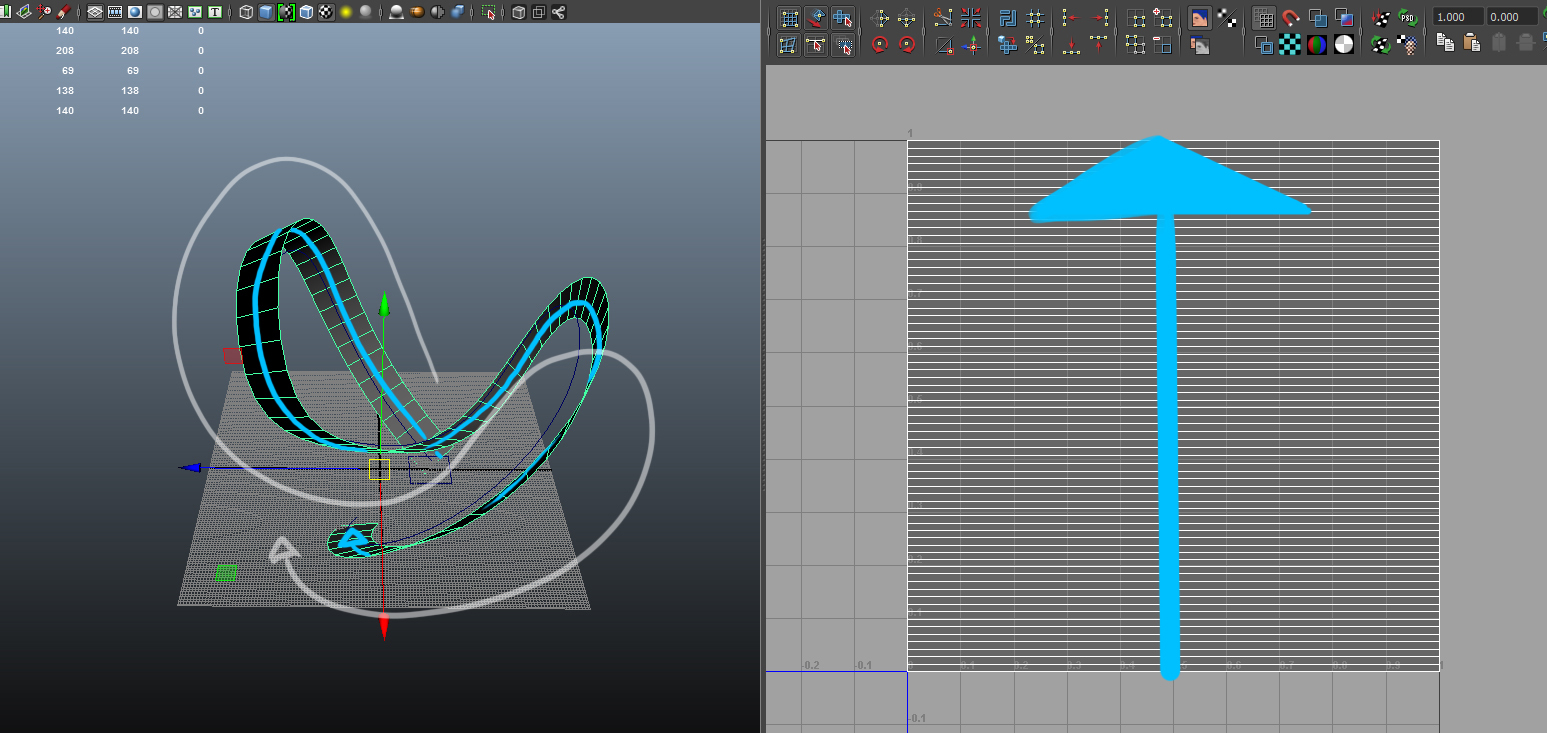
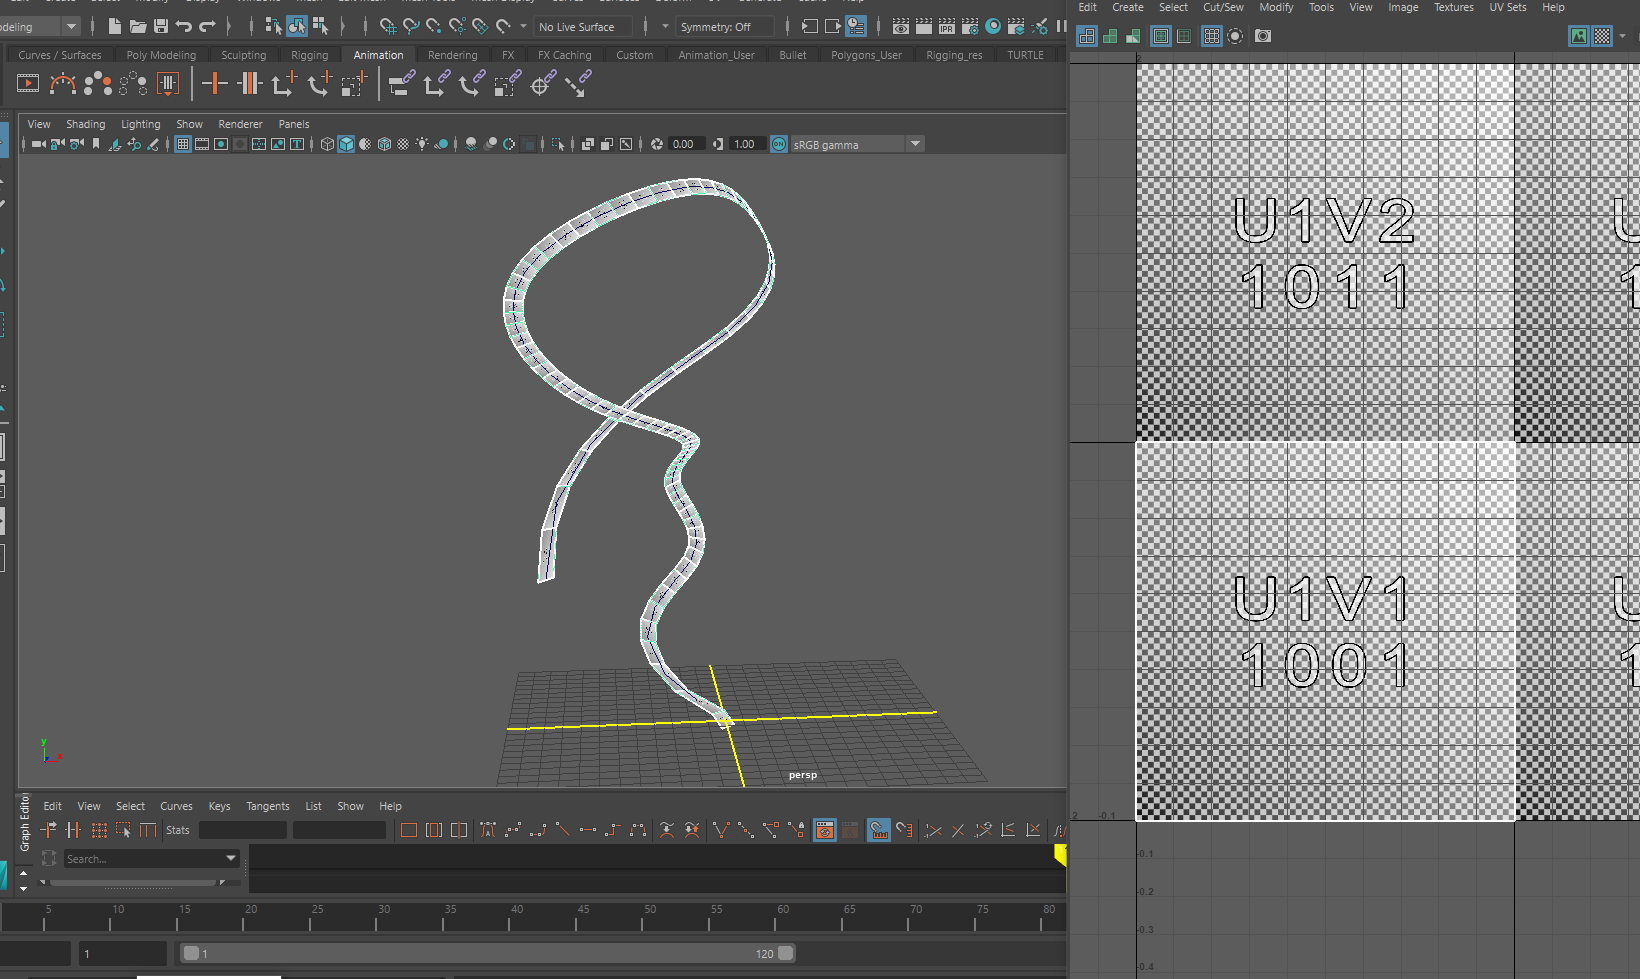
To start we are going to need to create our mesh. If you look to the above example, you can see the kind of mesh I came up with. I will link a youtube tutorial on how to create a mesh similar to this below. To follow this guide I’m writing, all you will need is a stretched out poly plane. The important thing is to have the uvs flat and straight, like the example above. A poly plane will have this by default. But do make sure that the top of your plane is also in line with the top of your uvs! We want to scroll a texture along the mesh, not side to side.
Link on to how to build soulercoaster meshes : https://www.youtube.com/watch?v=75aMoF4lgW4
Once you have the mesh with flat UVs imported into Unreal, we can start on the material side of things.

I will quickly explain the back end of what we will be doing on the uv side of things.
In the example above, I have made a quick diagram to give you an idea of how a texture behaves by default when panned. As you will notice, if you were to pan the texture up, down or to the sides, the texture will tile back onto itself. This is great for tiled textures and the like, but not so useful for what we are trying to create.
Instead, what we need is the texture to be clamped on the x and y axis. What this is essentially doing is taking the last pixels on the top, bottom and sides of the texture and looping them into infinity. This is a great setting to use if you are having issues with your texture bleeding in on itself because of UV distortion. However, that is not what we will be using it for! The plan is to offset our texture below the center frame. Once we have it offset, we can then scroll it up past the center of the frame to an offset of +1. This will cause our texture to appear to scroll along our mesh from one end to the other. If we were to do this without a clamped texture, you would start to see your trail tile back into the bottom of your mesh as soon as it leaves the finishing end. I will post an example of the problem below. This “problem” may sometimes be your desired effect. However, this is not our objective : )
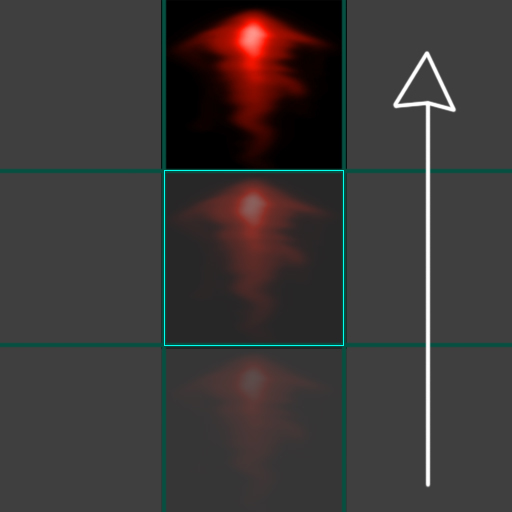
As you see in the example above, once the trail has finished its loop along the mesh, it is already starting to wrap back around. This is not so good for weapon slashes and one off effects.
Now, let’s create our material
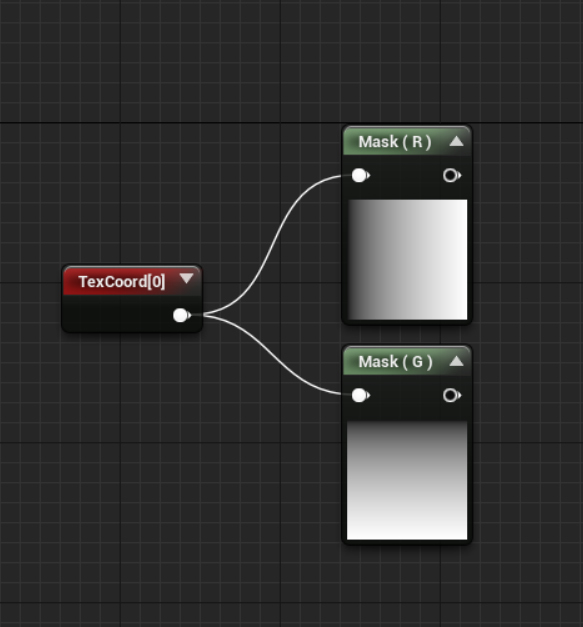
First we need to create a texture coordinate and two component masks. We will be using the component mask to separate the X and Y axis from our coordinates. This is so we can independently offset the coordinates on just one axis (Y axis in this case).
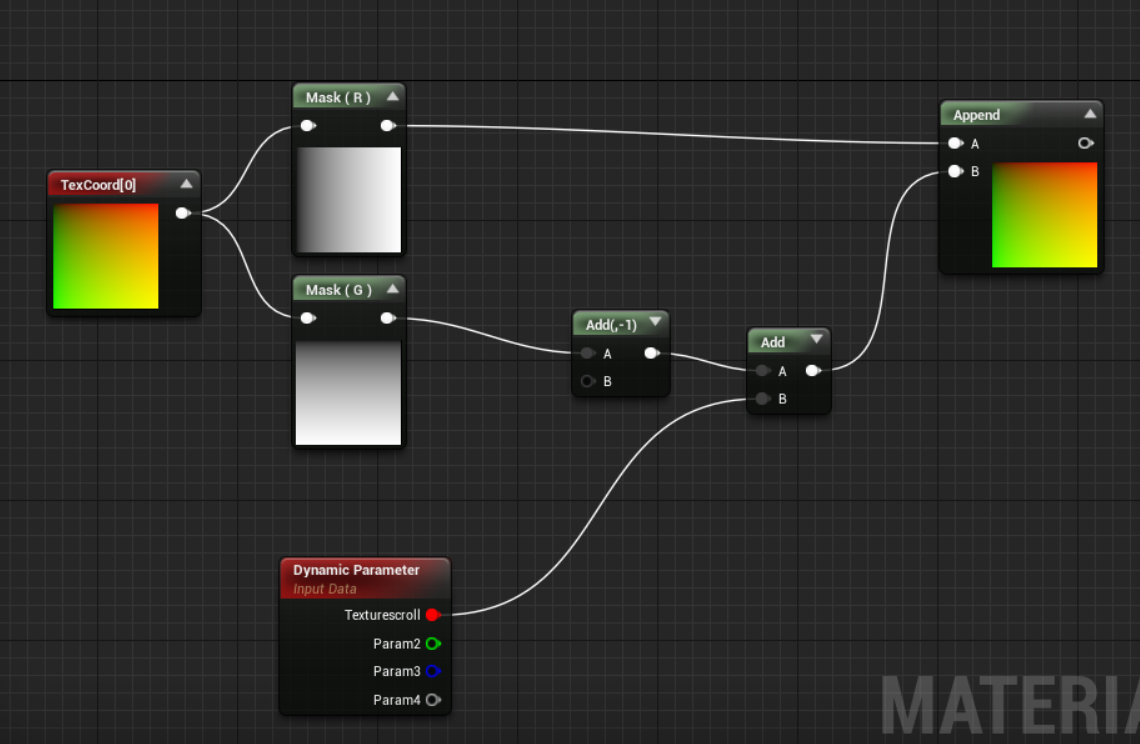
Now we have separated our texture coordinates out into the x and y channel. We can build a simple system using a dynamic parameter to offset then scroll our texture over the particles lifetime. All you need to do is add -1 to your G channel (Y axis). This will shift your clamped texture below the center frame like the examples I showed above. Next we need to combine our dynamic parameter with the output of our last add node, using another add node. If you have read my last tutorial, you will remember add is for offsetting coordinates and multiply is for scrunching. Lastly, we need to rejoin our two coordinates back together so we can plug them into a texture coordinate. To do this, create an append node and plug the final outputs of each of our split channels into it. You now have a two channel uv coordinate again. Now plug this into the back of your texture sample and plug the texture sample into emissive input. We are not done on the material end.
Now to set up our clamped texture.

Import your texture into Unreal. Once you have this imported, double click the texture in the content browser. You should see a menu that looks like the image above. Under the Texture menu, there should be double arrows pointing down on a drop down bar. This is to open the advanced options. Open it up and you will see x and y axis tiling method. Change these from wrap to clamp and save your texture.
Onto the final stretch!
Create your mesh particle emitter and hook up the mesh you want to scroll the texture along.
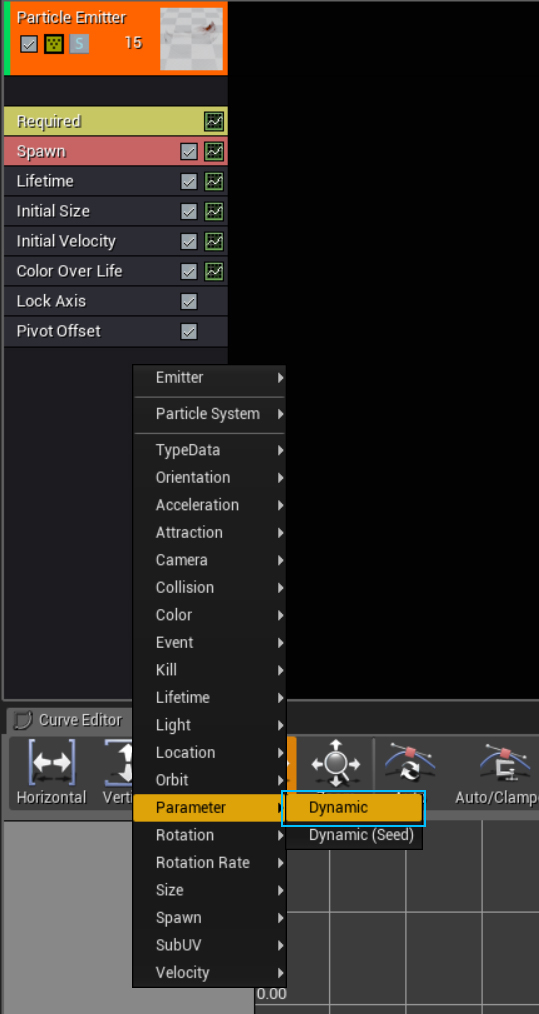
Next we need to add a dynamic parameter to our particle system. To do that, right click on your particle emitter drop down. Navigate down to parameters and select Dynamic.
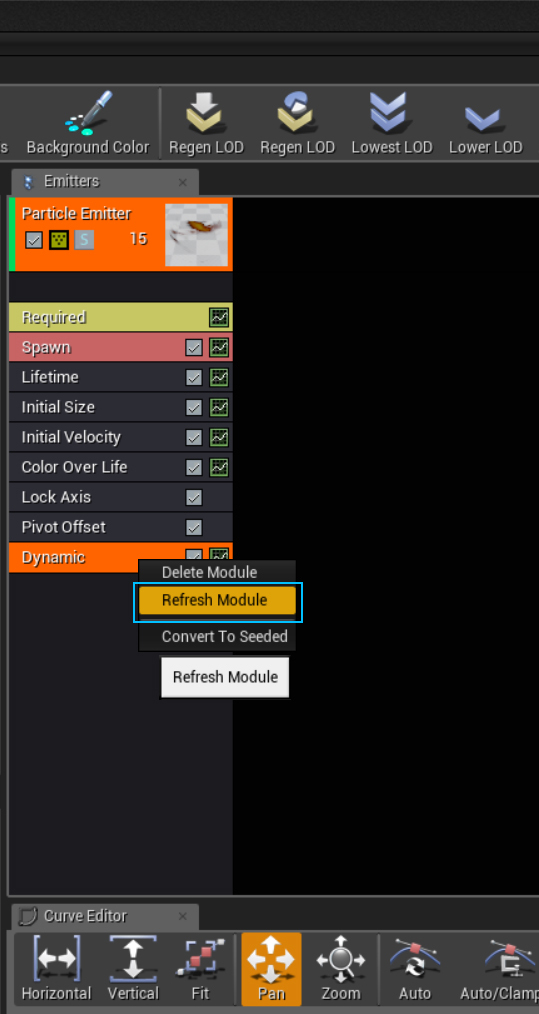
Next, right click on your newly added dynamic parameter and select refresh. This will update the dynamic parameter with the names you entered into your material dynamic parameter. In this instance, I named my red channel texturescroll
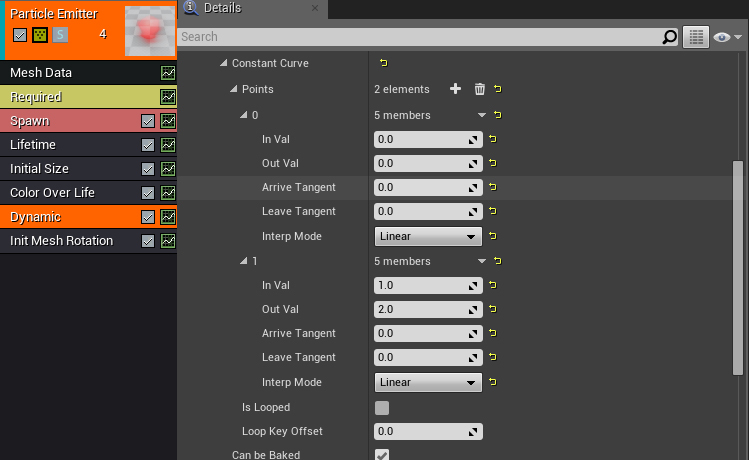
Next we need to look down to our dynamic parameters settings. Open up “0” under your dynamic parameters drop down list. “0” in the dynamic parameter is your red channel. 1,2,3 will be your green, blue and alpha channels respectively.
Under “0” you will see whatever name you set as your dynamic parameters red channel and a bunch of other settings. We need to set our parameter to a constant curve under param value > distribution. Create two points on your curve and set the first in value to zero, and the other to one. Set the first out value to 0 and the second out value to two. What this is going to do is start our texture with an offset of minus one on the Y axis (remember the -1 add). As the particles spawn and follow their lifetime, we will be adding +offset to the textures Y axis. Shifting it up through the bottom of the uvs and out the top. If your texture has clean opacity at both the top and bottom, you should see your texture nicely pan along your mesh and out the top.
And that is it! You can do all kinds of cool effects with these. Try building spirals and different crazy shaped meshes. Scale and squash them, spawn them on random angles and give them different lifetimes. The possibilities are almost endless!
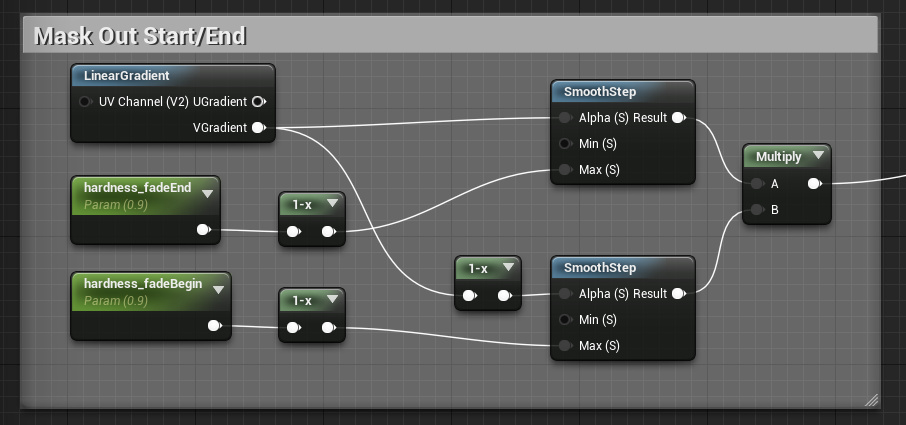
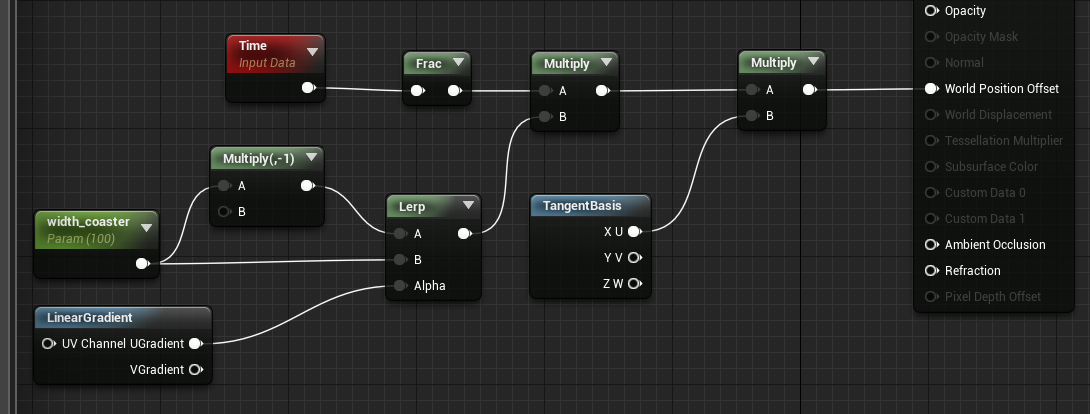
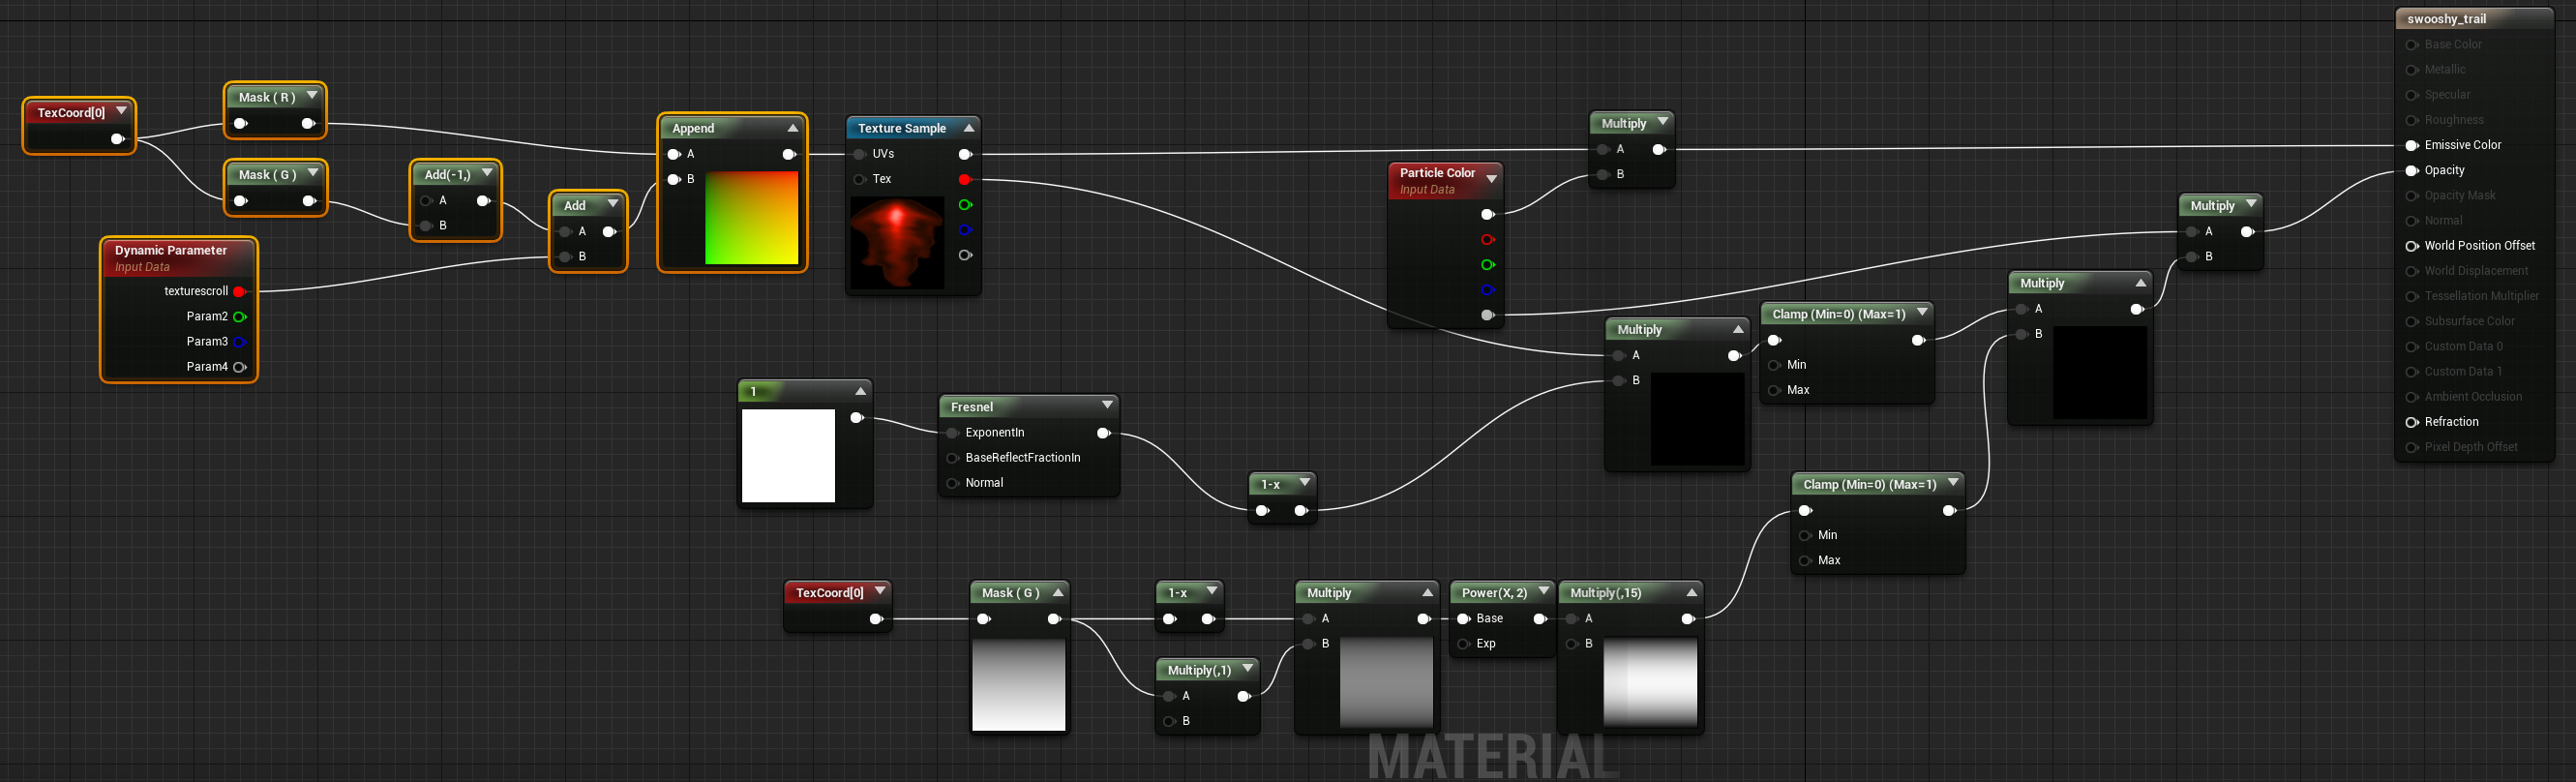
Below I will post my final material network to give you an idea of the kind of additions I like to stick in my trail mesh networks.
Here are some extra examples: