So i just want to make a sketchbook of my progress with UE4 and i’ll try to update my daily progress of whatever i’m up to!
I’ve been using Unity for 2 years mostly for programming, not knowing really what i wanted to do, until i saw Jason’s GDC talk about vfx earlier this year and he opened my eyes to this world!
So now i’m kinda transitioning between Unity and UE4, i don’t have an artistic background (neither 3D modelling nor 2D art) so wanting to become a vfx artist is quite the challenge for me, but i’ll get there!
I’m hungry for knowledge.
Feedback is more than welcome
First particle system made: (bare in mind i had 2 and a half days to learn all i could about Unreal, for a job, and to come up with something, so this was quite the challenge for me)
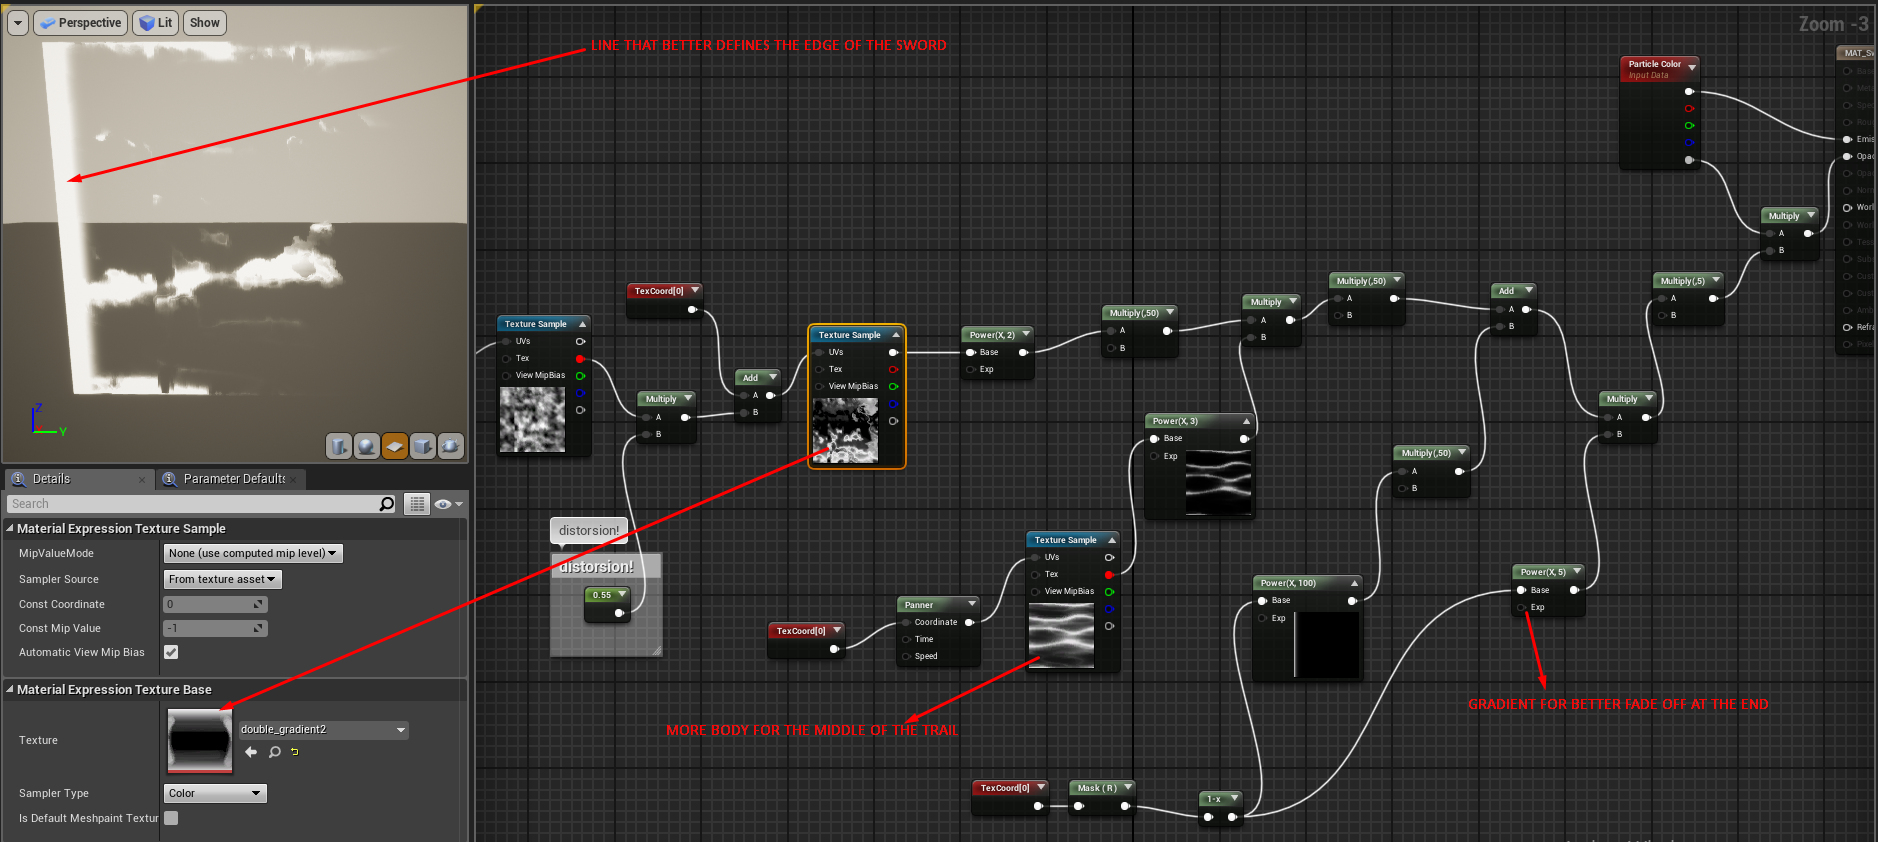
Edited the shader (thanks discord, very cool), so it now has a better fade off at the tail of the effect, and a bright, thin line at the edge of the sword.
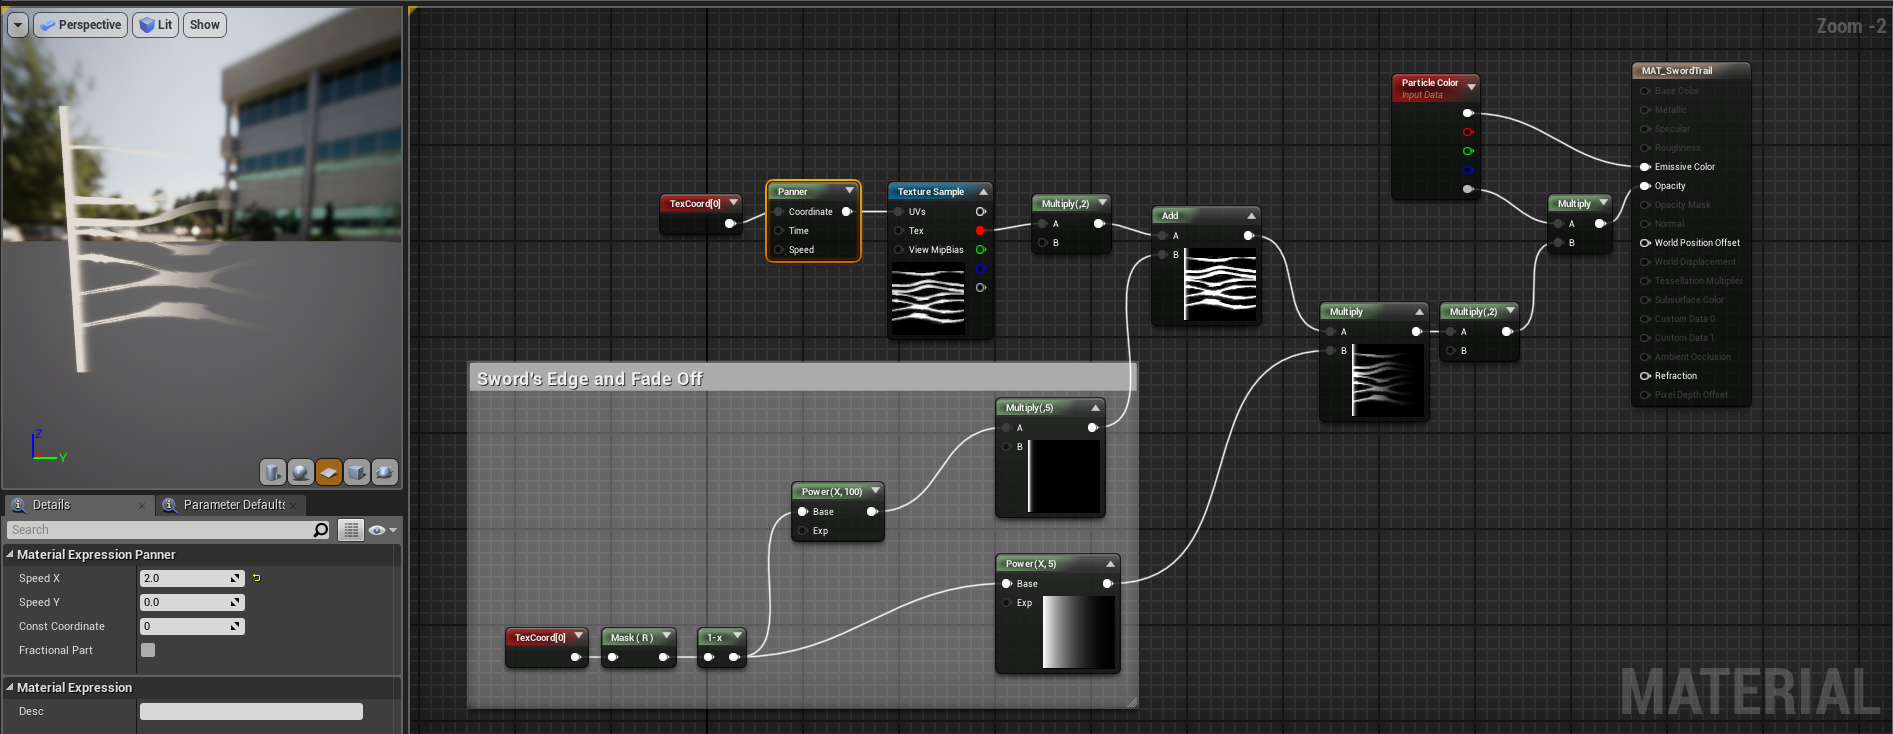
Shader: (maybe not the best right now but it reached that “works and i like it” point)
Difference:
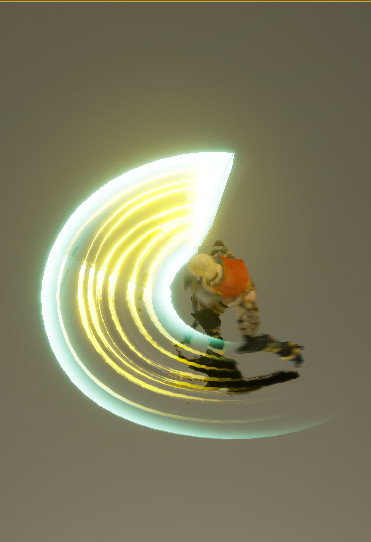
Result!
Also at the end of the day i added some particles:
It’s 11 pm here (monday, 4th of June), tomorrow it’s gonna be a week since i started learning UE4!
But more about today’s progress
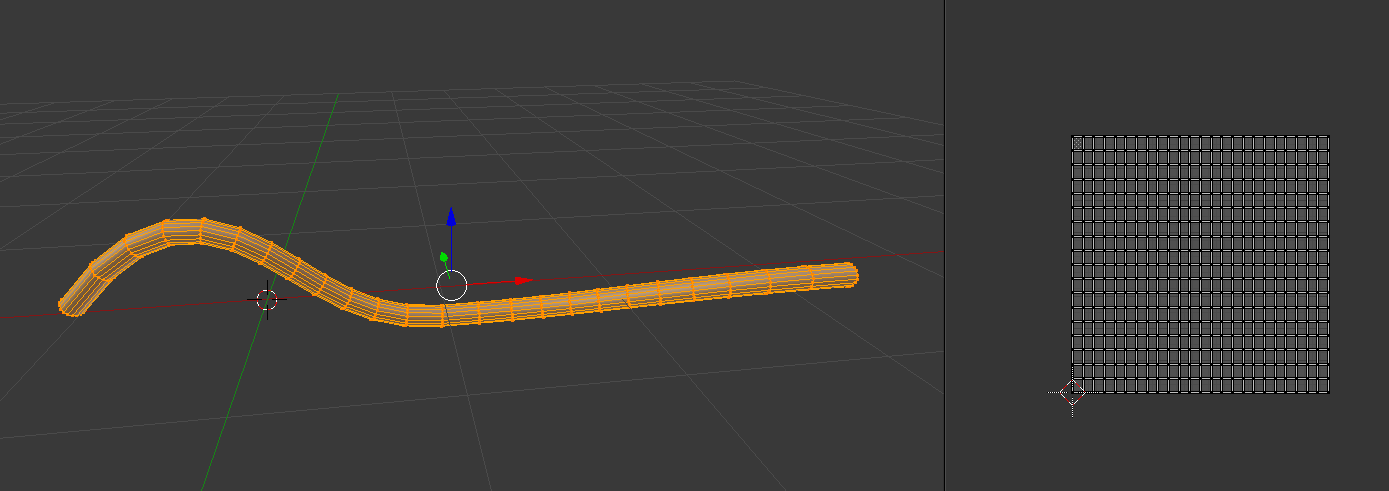
First off this isn’t quite related to UE4 but i learned (finally) how to make curved meshes! It was actually much easier than i thought (the basics atleast), not having any background in 3D modelling software really makes every new thing seem like this huge problem in the way, when it’s actually not that bad, so, if you are someone like me that struggles with new concepts/techniques/stuff, don’t worry you’ll get there , i’ll be looking forward to use them in future effects.
Now, today’s progress, there were 2 major things.
First of, i tried the Vector field tool made by the JangaFX team ( https://jangafx.com/ ), gotta say, some impressive stuff and i got some basic result after some playing around with it:
BARF
But with some tweaking i got a result i liked:
You might be saying “Dude that’s awesome” or maybe “cool”, well let me tell you i ruined it! YUP…well, i tweaked a little too much and can’t remember what made the second gif happen! Haha, gonna try again tomorrow.
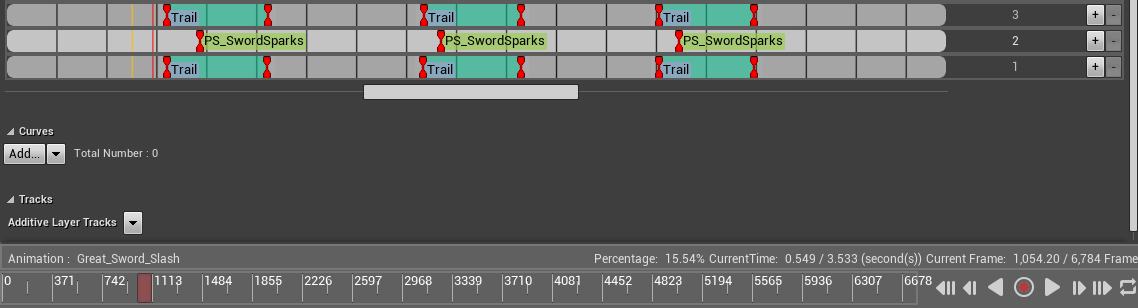
In other news, i added a “middle section” to the trail: (this part of the shader is in the reply above)
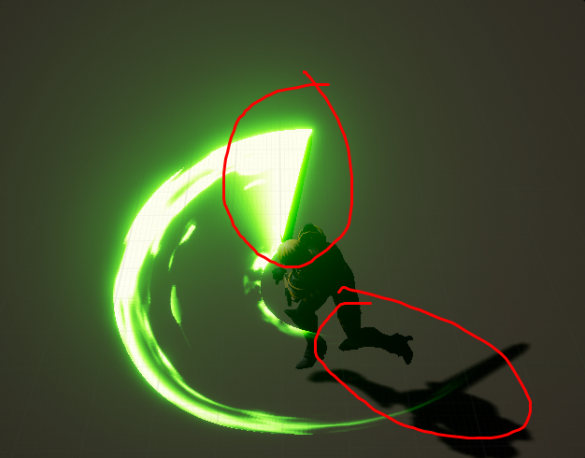
I didn’t want to make the previous respones that long so i continue with this one, i said there were 2 major things today, the second one is…a Dark trail!Yay!
First off, the shader!: (I basically duplicated the first trail material and got rid of some stuff it didn’t need, oh and also changed it from Transluscent to Cutout…or was it called Maked in UE4?)
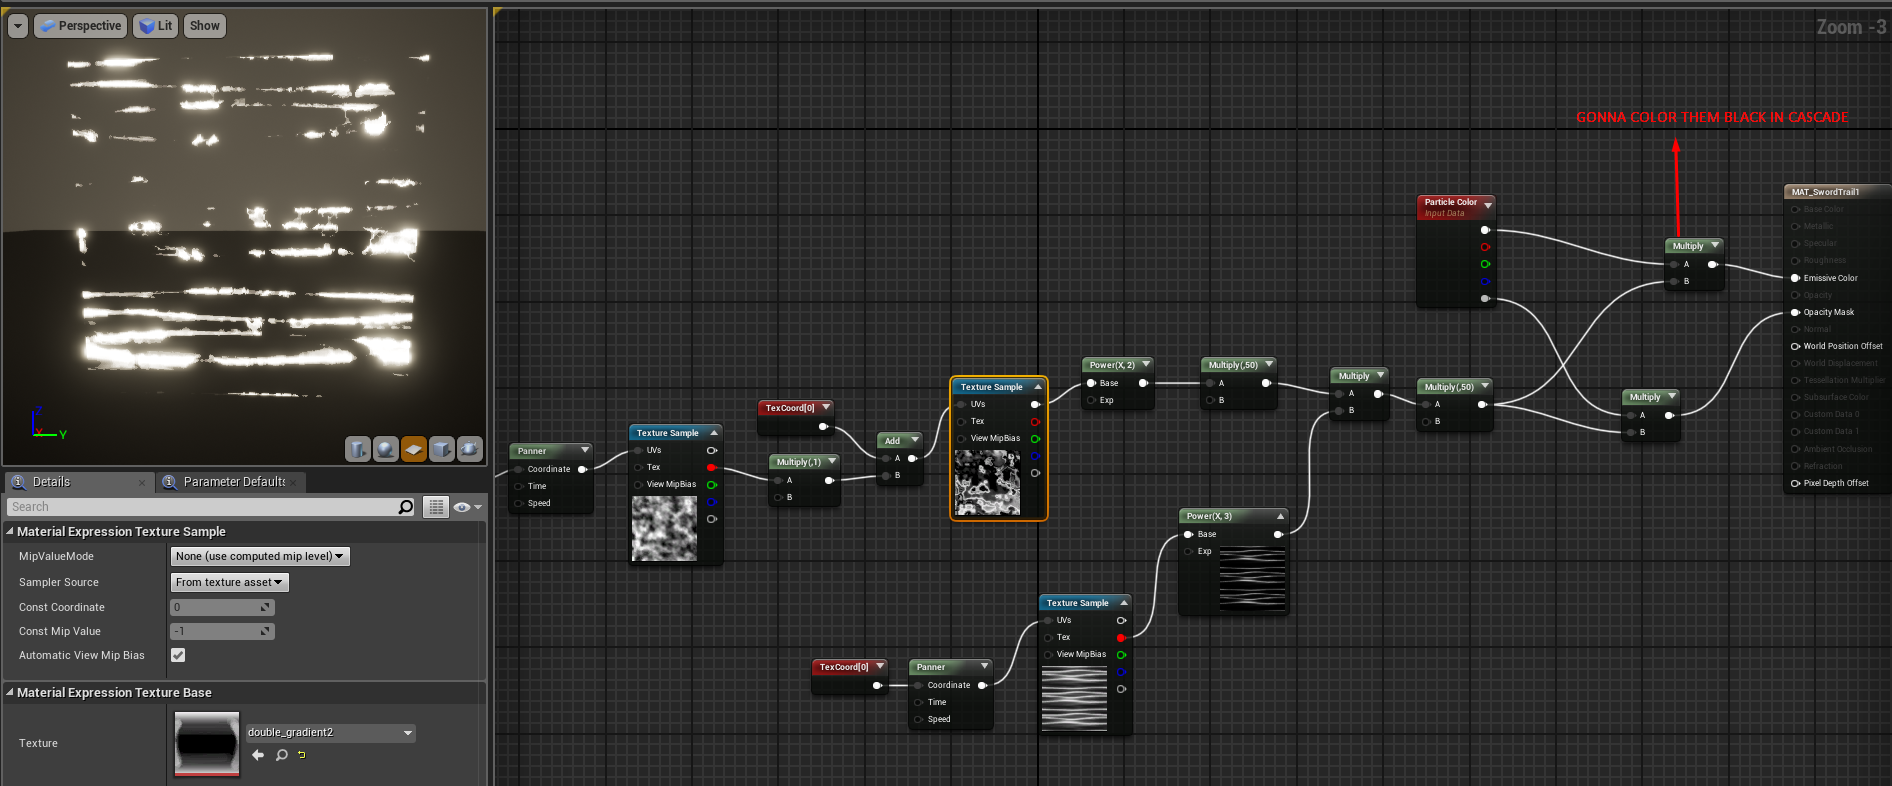
Today my friend @sifa helped me out in making a Refraction shader …spooky, i thought, since i never made a refraction shader.
And i was right to think “spooky” since Unreal got cursed for a couple of hours and basically told us “ya boys you are doing everything right but i don’t wanna work properly so boohoo”. But at the end of the day, we got it working, it was honestly quite easy but, you know, murphy’s law and all that.
Also, this made me see how gritty everything looked, so i pushed my self to improve the materials and the textures, so, here is the new version of the trail:
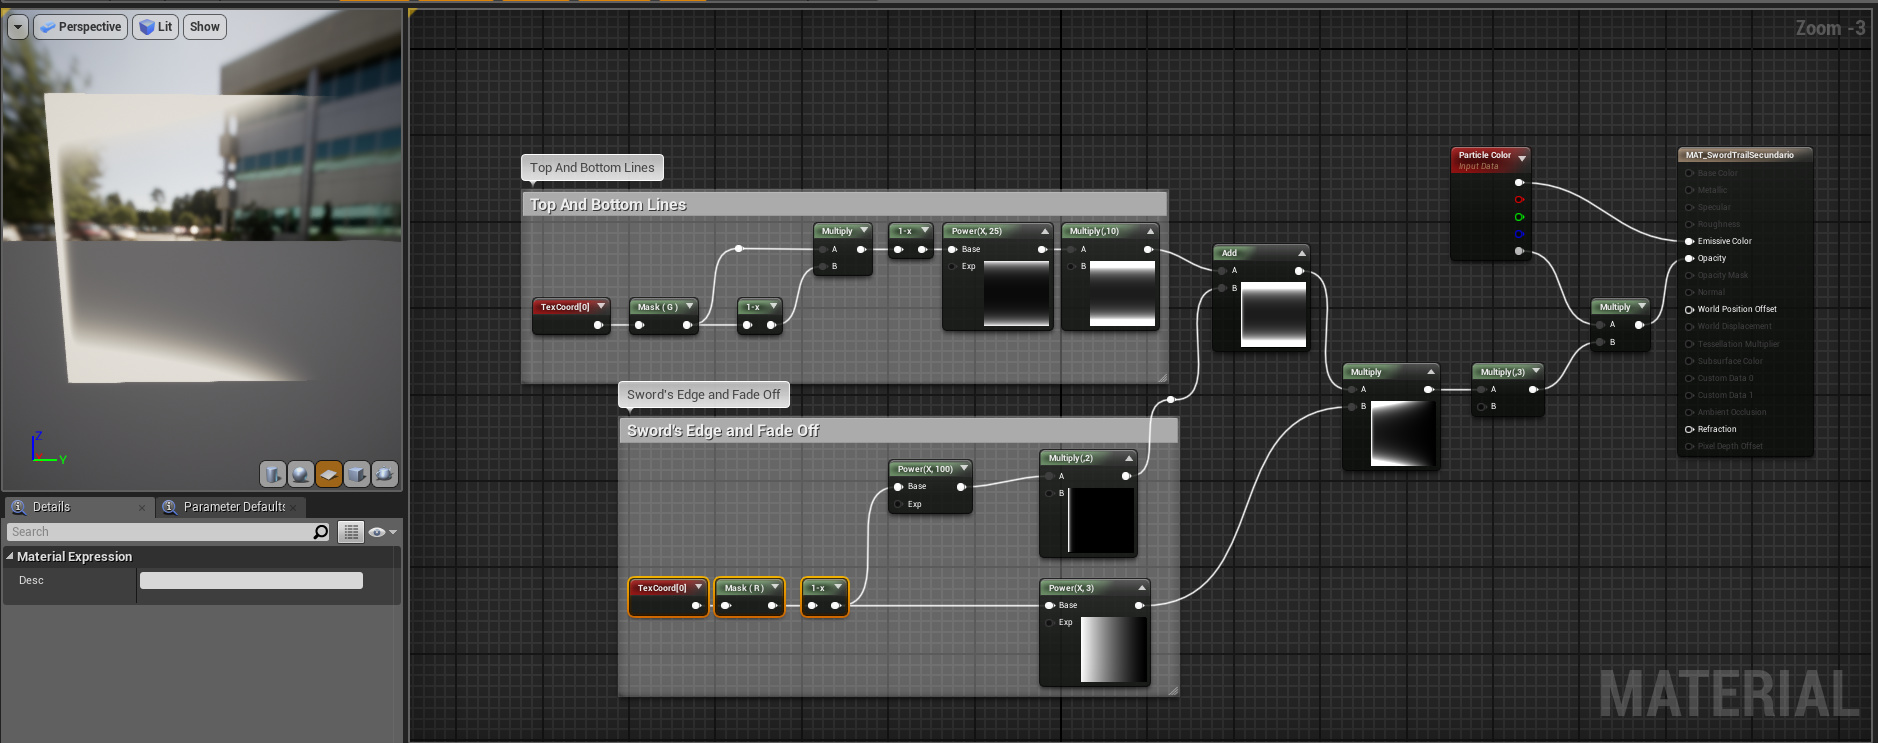
While the secondary color material, now looks like this (before this update, the secondary material was the same as the main one but with some offset):
So now the secondary material indicates the area of the slash a lot more, i think, also this opens up the possibility of getting better color variations since whatever i tried in the last update, the colors were just a moosh of pixels that you couldn’t even tell it was two colors. Again, feedback is more than welcome!
EDIT: Oh! I forgot, some side action for that sweet refraction:
Hello! Well, writing the last update i realized that the colors were still TOO bright and i couldn’t really tell the difference between them, so, i tweaked some stuff…here we go again: (insert CJ’s meme)
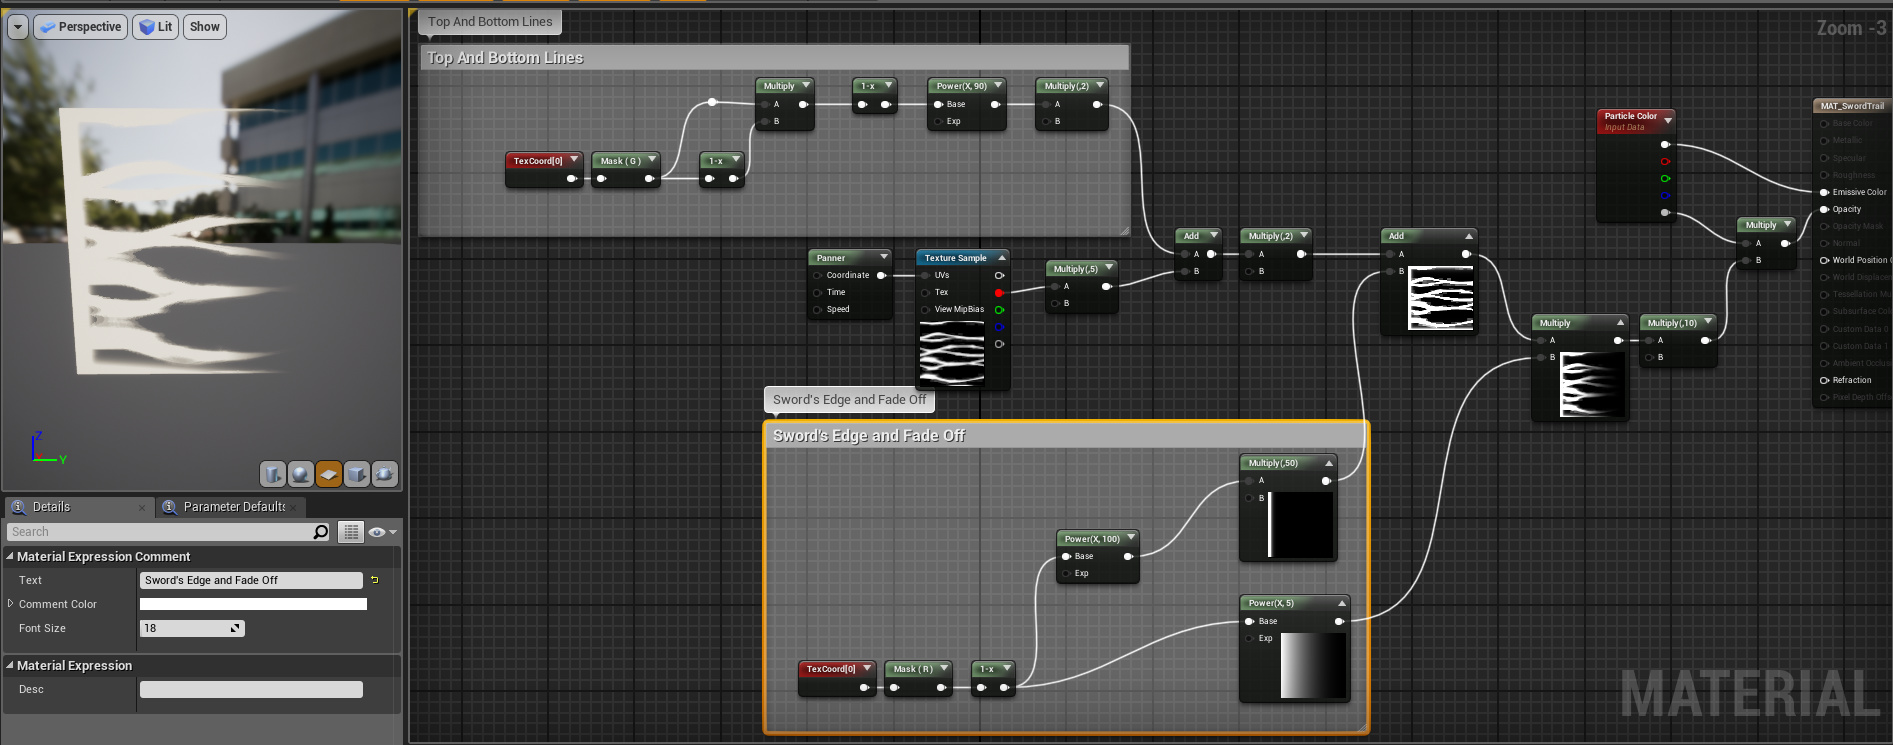
So the main trail had lines at the top and the bottom, which was adding to the secondary color, so i edited the texture a bit, and got rid of the “Top and bottom lines” section:
Hey man, great progress! I’m glad you’re sticking to it and working daily, keep it up
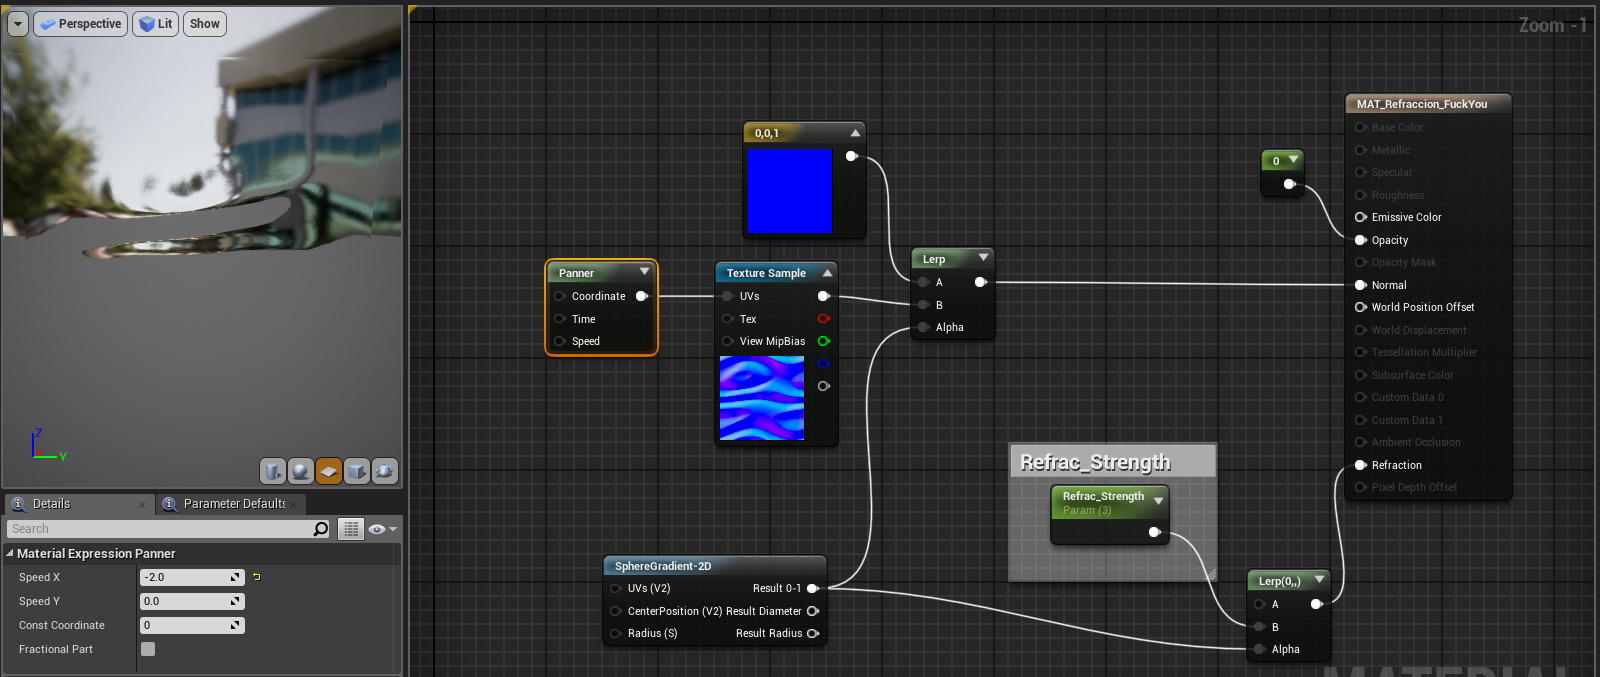
Side note : The sphere gradient thing for the refraction was just to test things together and debug why yours wasn’t working and wanted to show you a way to use distortion with particle scaling (I saw it on Glad’s tutorial), you might want to try it without the gradient and fade it in/out using particle colour alpha.
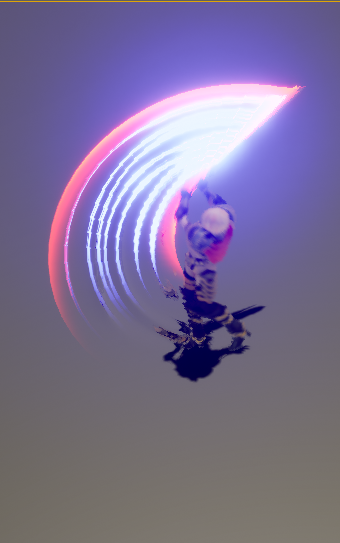
I had a bit of free time today and i had this idea for an “Arrow shot” effect.
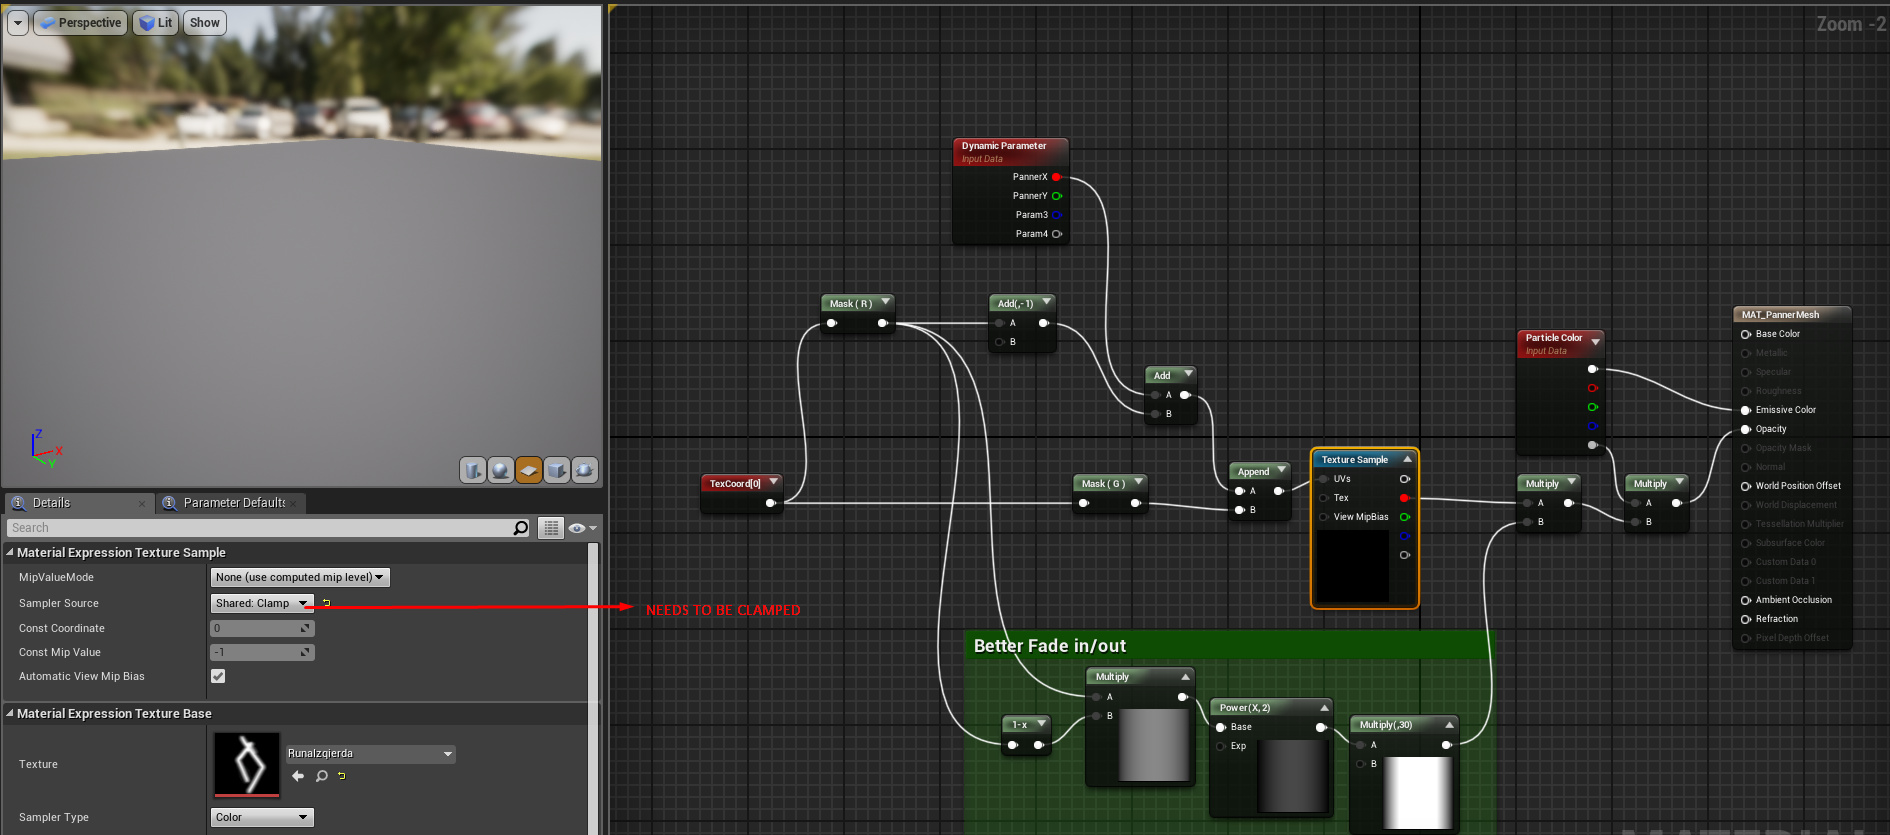
I’m at work so i’ll post screenshots of the material and the mesh later. But basically i’m using a curved mesh and panning a clamped texture over it (thanks to this tutorial: VFX Basics - Mesh Soulercoasters, also thanks sifa). I spawn a bunch of those, with a random initial rotation on the Y axis. And this is what i got so far after 1 or 2 hours of tweaking around:
(This would be the buildup)
Also, i don’t know if it’s the gif or the website, but here the curves look kinda static
EDIT:
Well, here is the panning material, and the curved mesh:
So, last night when i got home i was about to go to sleep but i got an idea to keep this going, the idea was “How on earth do i make one animation start when the other ends?” (I had 3 animations from Mixamo, one for the arrow draw, one for the arrow “charge” and the last one was the release, but they were separate!) (oh and also i changed the model since Sylvanas was giving me trouble with some animations )
Said animations separated:
And so, with some initial google search i found that you can transition between animations either with the State machine, or a Blend pose by int node in the Anim graph, but those weren’t what i required. So after 3 or 4 hours of not achieving what i wanted, i asked in an UE4 server what could this be and went to sleep. Today someone answered that maybe i should try the Animation Montage …it was literally drag and drop the animations…but oh well, at least i started to get into blueprints a bit.
So now it looks like this:
But enough of this, this is supposed to be for vfx
Well, i finished it.
I think i bit more than i could chew, this was a bit frustrating of a process. Learned a lot from this and i’m happy with how it turned out.
At the last moment it went through a little variation in timing (thanks discord, once again )
First final wip:
Last and final wip:
Also i made a little video showing different angles with higher quality here
Hey man, good job. You went through it and toughed it out and had fun. You challenged yourself and went a bit further than you thought you could and finished it. That’s important. Keep doing this consistently and you’ll level up in no time