I’ve been doing some experimenting lately and wanted to show you some of my results. Shannon Berkes comment about using the shit out of gradient mapping made me think about how to use it inside the engine with particles. I think this is super useful and offers new possibilities color-wise.
I’m certainly not the first one to try this, but i’ve never seen someone post anything about it, so i made a small tutorial on how to do it in UE4.
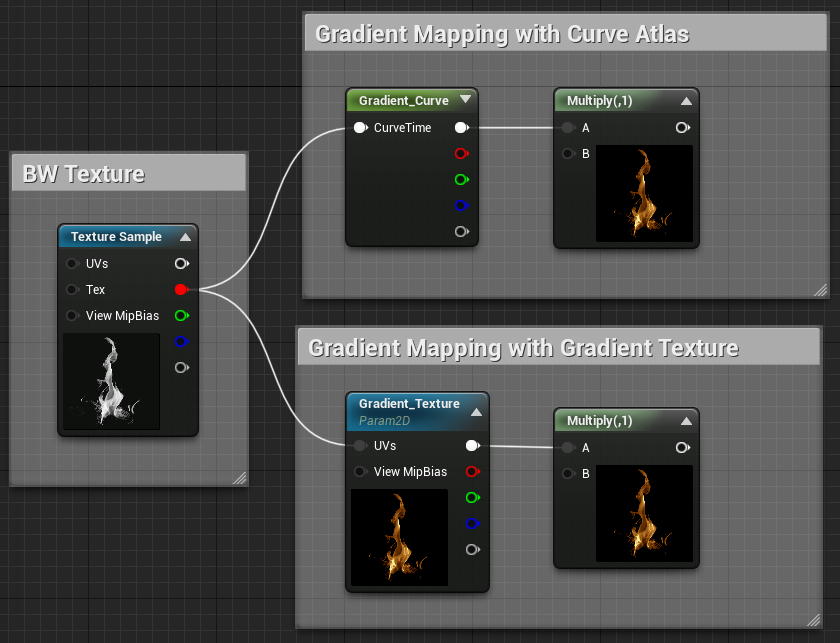
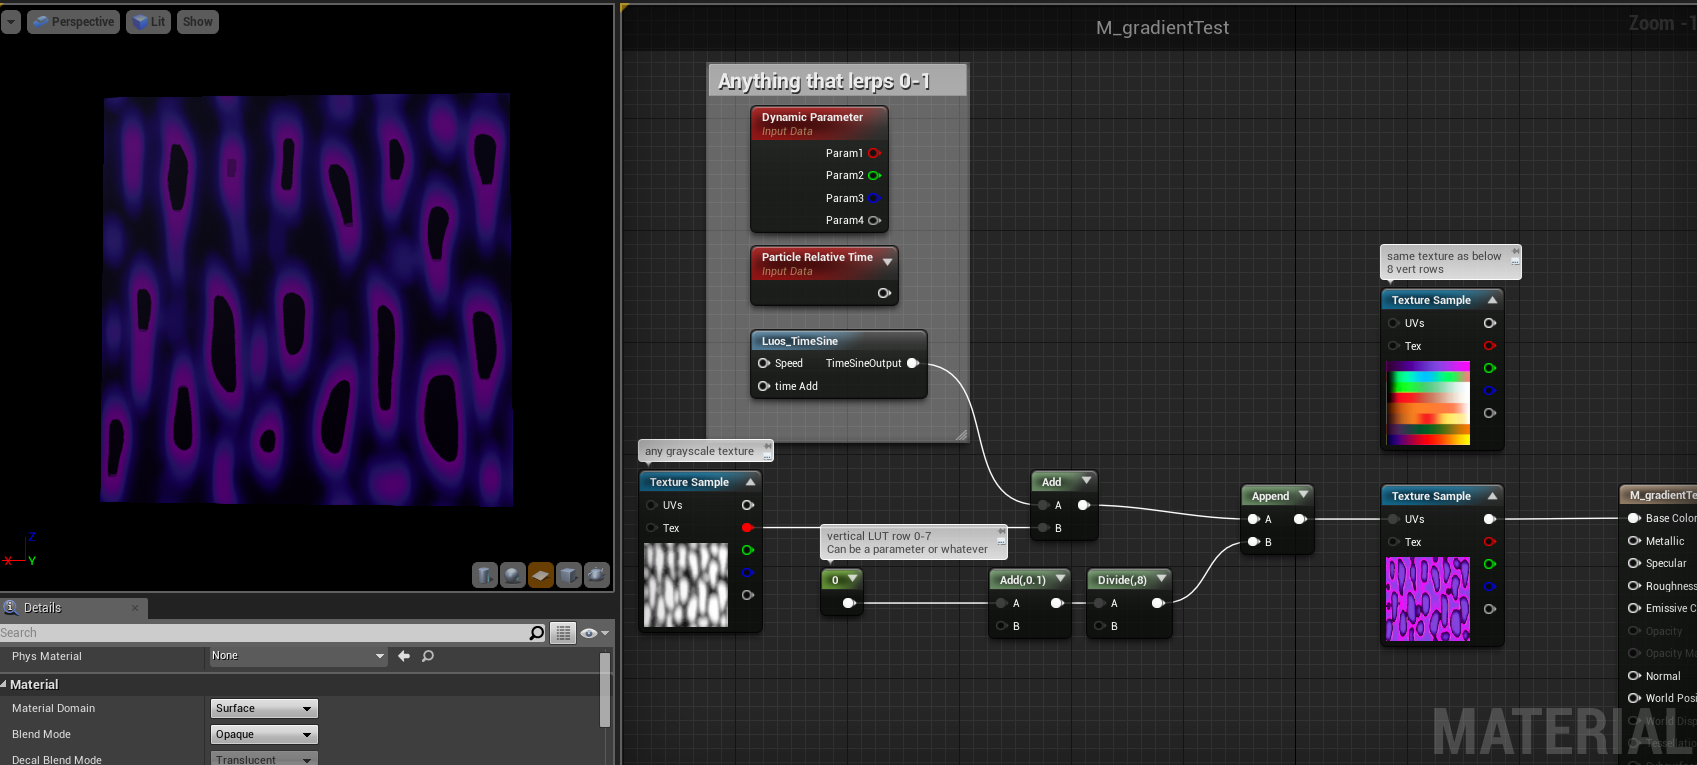
This is the basic material setup for UE4:
Not the best example, but you can see some of the gradient mapping in action here:
Changing gradiens inside Unreal via the new CurveAtlas feature:
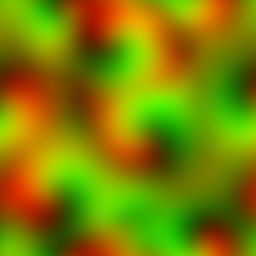
And here is a simpler example, in which I use random gradients to change the color of each particle. It’s just two mesh particles with some noise texture panning applied to it. GIF fires several times before looping, notice the slight variations in color each time the effect fires
I’m still experimenting on this, so far my thoughts on it in summary:
PRO:
More color variation without the loss of detail
Particles not bound to one particular color texture
Less memory needed than with a regular color texture
CONTRA:
Sometimes difficult to map the gradient colors exactly to what you have in mind
Particle shader is more complex
Do you guys ever used gradient mapping for vfx? Any ideas on this topic, pros cons?
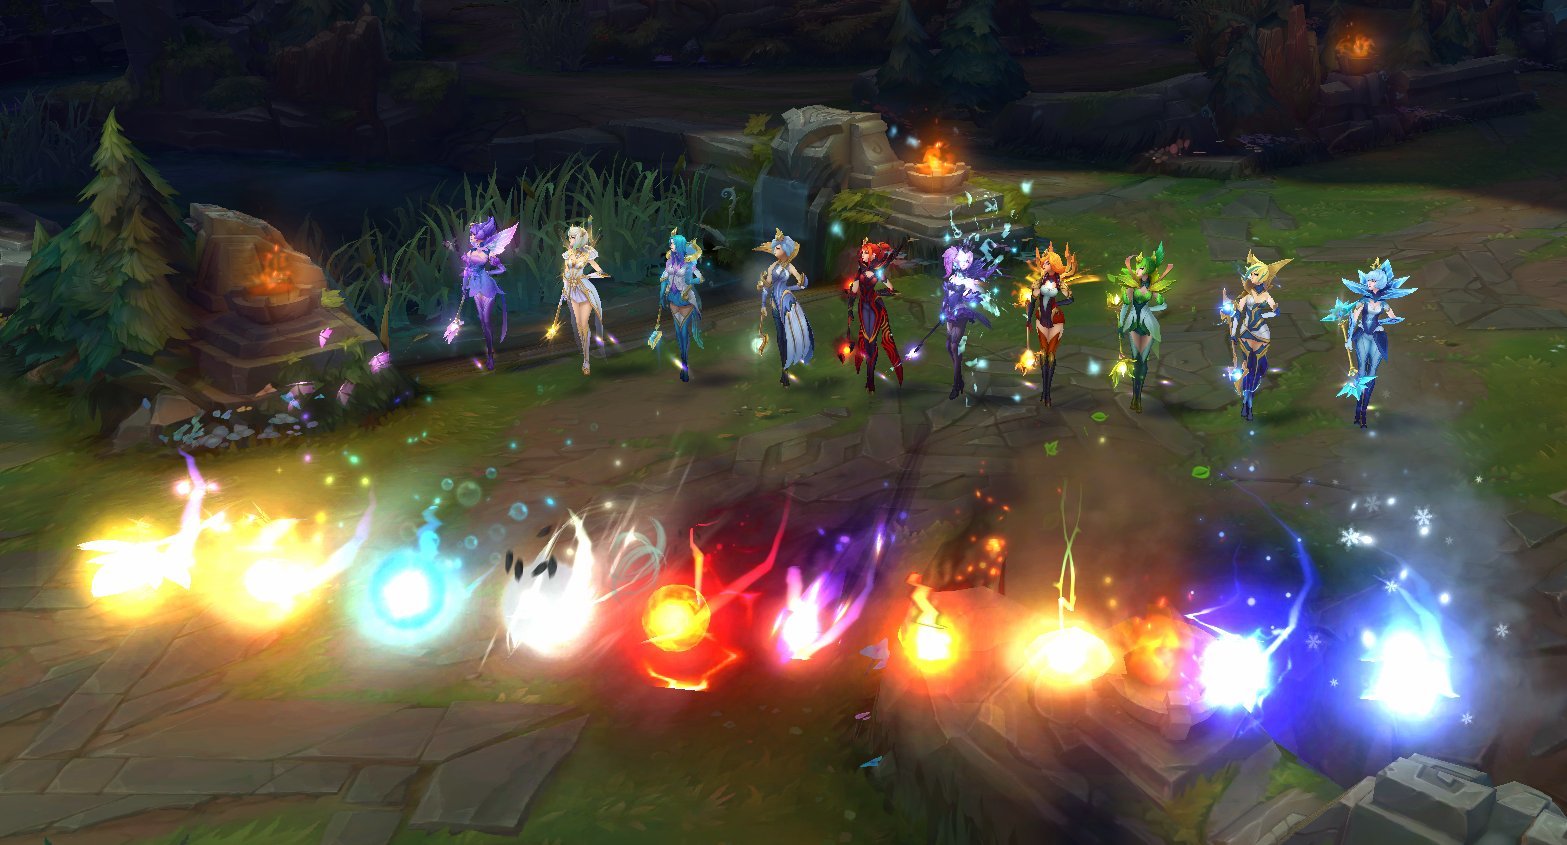
Woooooo ya! They are also called Look Up Tables or LUT’s for short when using in their color bar form Really fun to play around with and REALLY nice for saving memory for recoloring FX like you said! We’ve just gained additional support for them to remap the greyscale values on LoL when Elementalist Lux came out ~
Really really handy, and provide more color depth than having a white texture and adjusting the hue over it’s lifetime.
From my experiences on LoL we’ve moved away from using gradient maps for lifetime as we have the ability to key frame color, which ends up being marginally cheaper as we don’t have an additional texture lookup. It’s also faster to iterate instead of resaving out a new color map every time.
@TobiasTobasco It looks like you’re using them mainly to remap color over lifetime yes? Have you tried the grey scale remapping way too?
I use it all day every day. I have it set to I can remap the incoming pixel color on the U and then drive up and down the V using shader color and vertex color. This allows me interpolate between remap values over time and space. I remap the alpha in the same way. Using angle or depth based falloff drives the remap as well which can be used for some neat tricks (cheap shiny spiderwebs in Skyrim, Liberty Prime laser surface scanning in Fallout).
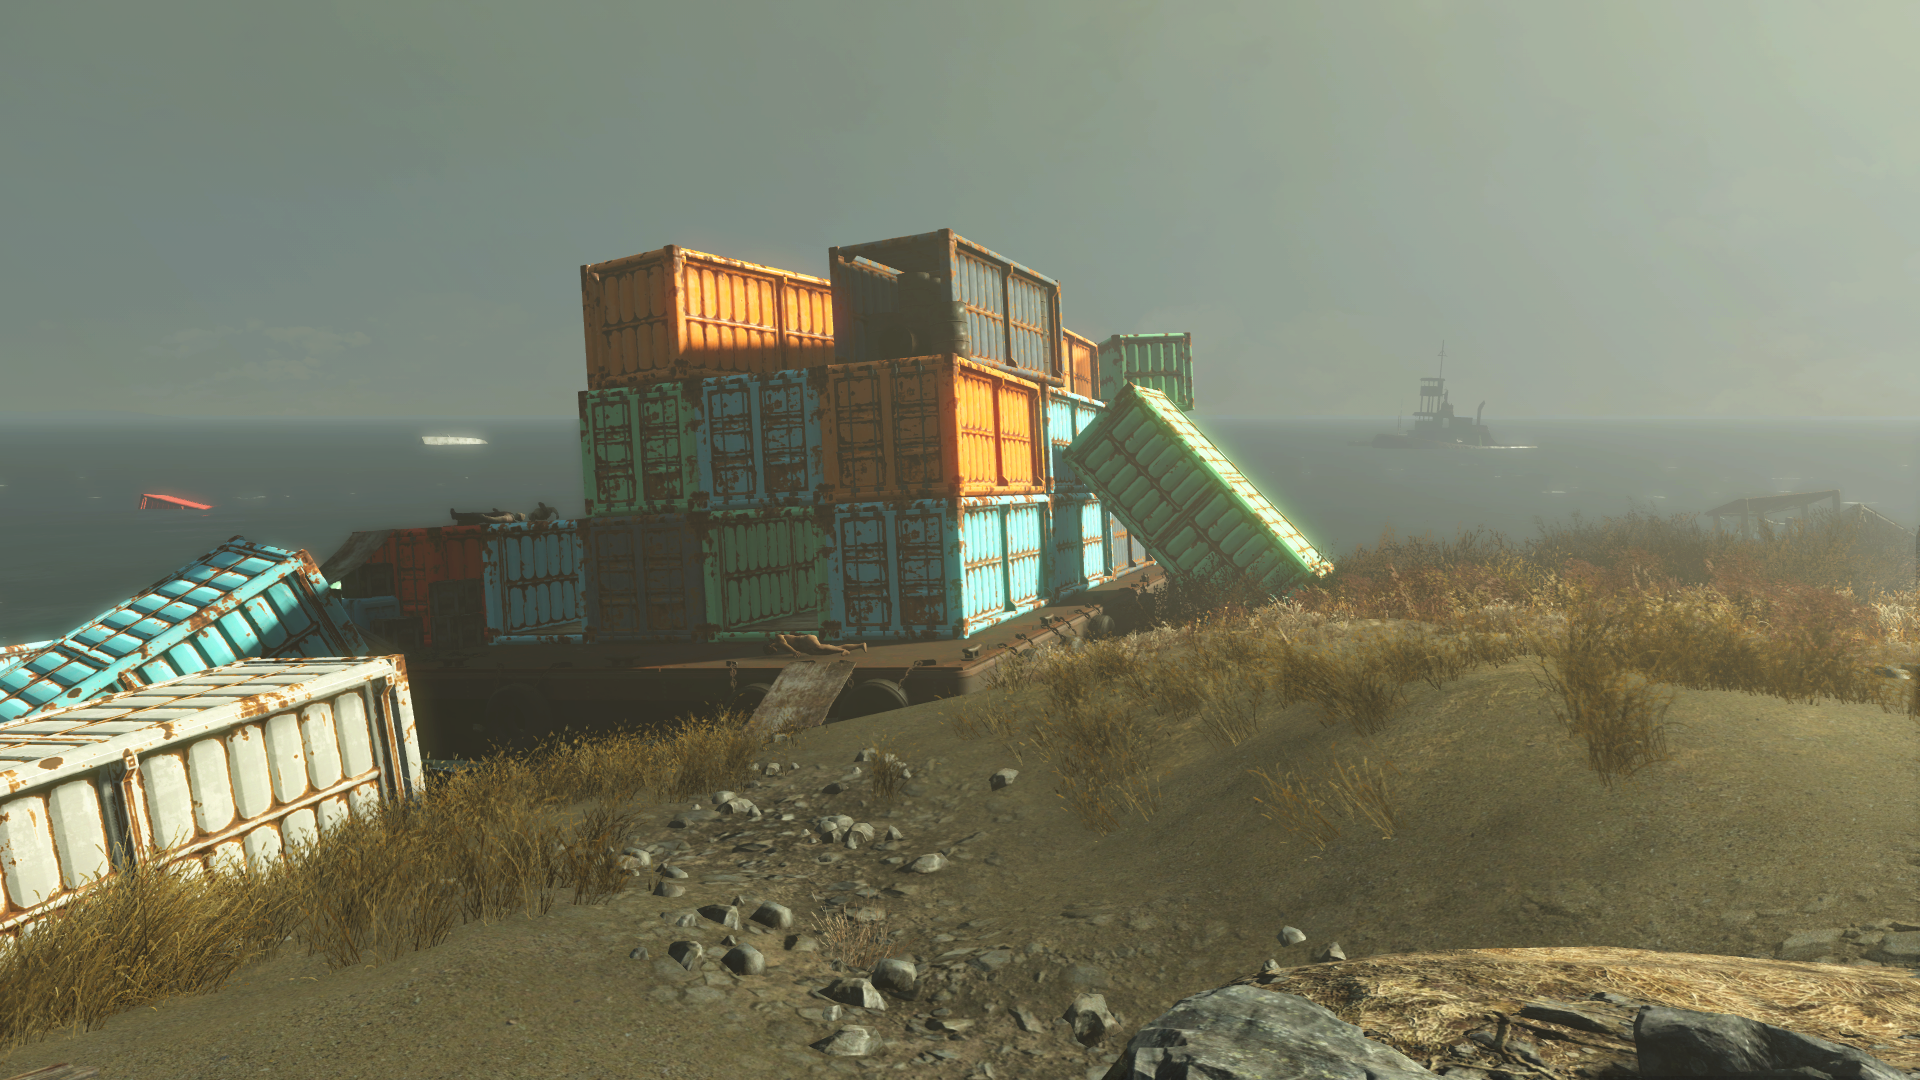
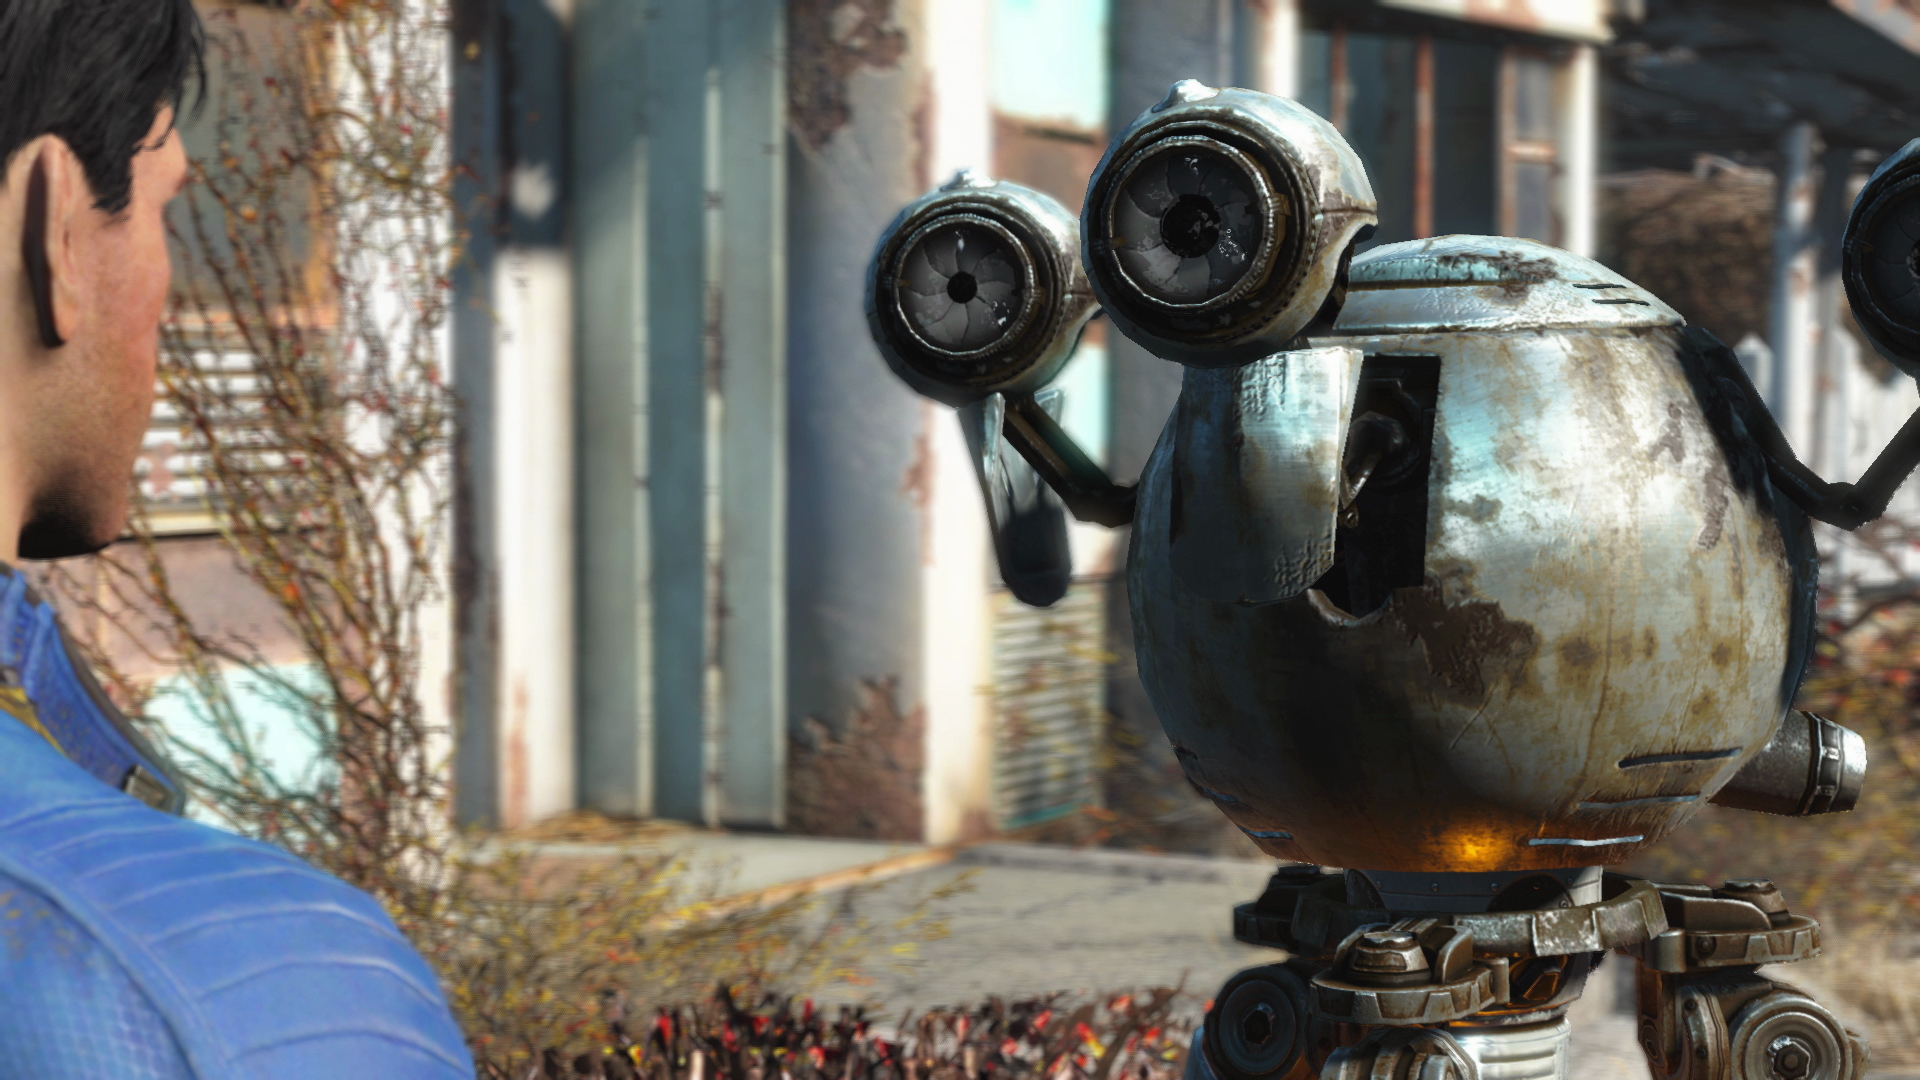
I also had the programmers add it to our lit shader. Certain assets used it on their diffuse and smoothness maps. For the lit shader we subtracted vertex and shader color rather than multiply so we could have multiple gradients on one sheet and maintain the offsets. Variants of the meshes would contain alternate vertex coloring to give variation in rust and dirt levels. This allowed us to make loads of variation from a few small gradient textures and a few alternate meshes. You can put every singe color of crate or robot part in the same scene for the same memory cost as 2-3.
Here are a few lit assets that used the technique. Special thanks to the members of the FB group who helped me get the the banding issues I was having early on in the lit explorations:)
while you can store four textures in RGBA, A takes up the same amount of memory as RGB combined.
so for simple grayscale mask-merging its actually better to just use RGB.
This also has an issue as RGB is compressed together, so one channel will affect the other and can create nasty artifacts.
That said, if you need a really, really crisp grayscale you can use the alpha channel for that one, or (and I tend to do this more often as of late) only put a grayscale texture in either alpha or red and set ue4’s compression to Alpha.
This results in a very crisp grayscale texture and removes RGB all-together.
Dynamic particle parameters do not work with gpu particles, you could suggest using particleRelativeTime, or a well known workaround, use one of the channels of the particlecolor node. (which then might need a hueshift node if you still need to control color)
I have been using this technique myself for quite a while, and while not as sophisticated… this works fine in most cases:
gif:
Gif of two other LUT rows:
Note: The “Luos time Sine” node is literally a time and a remapped sine. im just that lazy.
yup - used it for all sorts of things but i’ve found it most useful for fire - do all your alpha erosion etc. in greyscale then just combine a particle colour and a gradient at the end. really helps to get a consistent colour between different fire flipbooks and lets you do really fast iteration on every effect simultaneously (god forbid you want to makes something slightly more yellow and have to edit 5-10 colour over life nodes!)
Great tutorial and examples with explanation! I am excited about gradient mapping myself
I made a short test with 2D lookups. Fallout 4 use them really cleverly, that’s why I got inspired to test it out myself. A dynamic parameter drive the Y axis on the gradient (2D) exactly as you show in the tutorial.
I think working with gradients like this require some tools in the Engine for comfort. Iterating on a gradient in Photoshop is a pain. It’s especially painful when expanding the gradient another dimension (2D) where the alpha change too.
A gradient tool inside an editor that generate the LUT would be useful I think. Realtime feedback is quite useful in this case.
I realised that creating source textures is a little more difficult too. Base texture should be Linear (not sRGB) and use a number of levels of Grey-scale. Max number of Grey-scale levels is determined by the size of your gradient (256 levels of Grey = 256 Gradient)
Some info I came up with:
Main “Diffuse” texture can be compressed using BC5 two channel Greyscale
Gradient can be saved with resolution 1x256 to disable mipping
Particles might look weird on certain distances because of unfortunate Mips of “Diffuse” texture
@Ludvig Do you have any examples of tools that help with the texture generation? I’ve been using a blackbody gradient to get more variety out of our explosions, and generating and iterating over the textures is definitely the most frustrating part.
As a warning, this is quite expensive on mobile due to how mobile GPUs pre-cache texture lookups, similar to why you should avoid per pixel texture distortions on mobile. Read up on dependent texture reads if you’re curious, this isn’t a “don’t use them”, just a “be warned it’s going to be slower than you think”.
Also, a completely random story about look up textures. For Super MNC we had our scene color grading look up textures in one single package. We also prefixed all our packages with an S to differentiate them from built in packages and older MNC (prefixed with an H since the project name was “Hostile”). The result was a lot of benign looking packages like SEffects.pkg, SGeneric.pkg, SEnvironment.pkg, etc.
Great discussion guys, i’ll add your remarks to the post, for future refrence!
@ShannonBerke Ah crazy, i always wondered how you handle the massive amount of different FX for all the skins
I use it for mainly for color variation inside one emitter. I like when the effects look slightly different each time they fire, because of the random gradient ‘selection’. The lifetime gradient thingy i use only for special occasions. Can you explain what you mean exactly with greyscale remapping? You remap your initial texture to a different greyscale texture, then remap to colors again?
Oh nice, this seems super useful! I love these little trickeries, people never really talk about.
@Travis Aehm I think there’s no difference except the github version is a slightly older version. If i remember correctly, i tweaked this slightly for the image version. I need to port this to 4.15 (with reroutes!) anyway, then i’ll update the code.
Exactly this, i did some test with flames and fire and it works fantastically!
Yep, that’s my problem exactly… It works great (nice example test btw), but to really use this efficiently during production, some engine extensions to generate gradients would be awesome.
I’ve always used it one way or another, though when working for mobile sometimes I’d just bake that into the textures. Currently I’m working on PC and my materials are mostly grayscale masks with a gradient map at the end. Helps keeping things consistent!
I’d love some insight on these flammes if you’re willing to share!
I’d do it with smoothstepped upward scrolling noisy textures with gradient mapping - is it along this idea?
Of course! I have a static flame shape, a different one for each flame. Just a very cartoony, straight flame and I scroll this flowmap on it, upwards: https://realtimevfx.com/uploads/default/original/2X/a/a30731017bc30be42dc88b8565da517a0314b01b.jpg
It’s the same flowmap for every flame, I just scale it differently. I have exposed the flowmap influence for each axis to have some finer control, and I can also mask the influence with a grayscale texture. I do have a couple noises overlaid on top, scrolling upwards as well, but they make like 5% difference, it’d work just as well without them!
My shader does have an alpha erosion, threshold kind of thing as well but I can’t remember if I’m using it in this case.
We abuse the crap out of gradient mapping for our game’s VFXs but we do have custom tools in Unity.
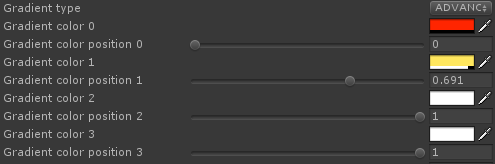
We have built-in mapping within the shader, supporting up to 4 color points:
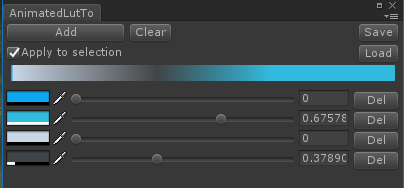
But since that is expensive to be a run-time thing, especially on mobile, we have a dedicated LUT tool that can build/save/load LUTs with a live preview on a selected object. So you end up with with a very small PNG:
That’s very clever, cool tool But it surprises me that using a LUT is cheaper since it results in a dependent texture read and I’ve been told to be afraid of those on mobile. Maybe it’s only a problem on older mobile specs?
In general, you are right, afaik texture read would be more expensive. But, these LUTs are very small (256x1px) so they easily fit the gpu’s cache so in that case they should be more performant then the actual shader math which is needed for the mapping to work.
And you are also right for the older spec phones, this would probably not be a good idea on iphone 4s and lower.


