I also need to start offering more explanation in my videos. I feel I’m presenting Niagara in a way that seems very different from Cascade. I don’t want people to get the wrong idea about its true purpose and my twisted usage of it.
Just started with Niagara just a couple days ago… learning curve is a b***** but it seems well worth it! I hope to post some vids to the same quality as Mr.Cannabis in the near future!
Also, if anyone could help me find ways to digest data from audio tracks, that would be much appreciated!
Already sent you this info to steyrboy, but posted here in case anyone else is interested.
The Niagara team said they plan on releasing an audio data interface but that it likely won’t be available until 4.21. (If I remember correctly, don’t quote me.)
If you’re not willing to wait, there are a number of options:
There are plenty of data interface examples in the source, so you could write your own to support audio. (Waste of effort if it’s coming down the pipe already.)
Use the experimental Backchannel class to feed OSC messages from external DAWs. This seems like a better alternative than the older OSC community plug-in. I did a ‘hello world’ test using this plugin a while back but haven’t coupled it with Niagara yet.
Once OSC is hooked up, you can use your iPad to control parms.
Use the new audio engine to drive values on a (Niagara) System which forwards those values to the Emitter.
Use Houdini CSV to export FFT results to curve?
In other news, I’m looking for a part-time gig. I need a 2nd job to make ends meet. Sadly, not much of a market for making weird things. But if you know of something that might be a good fit, send me a PM. Cheers!
I can try the Houdini/CSV route. Is there no easy way to access things like Emitter.NumInstances in Blueprint? If not, I’ll just fake it for the time being.
Niagara is now available as Early Access. This means that we are far enough along in development that we want to share it with our customers and get as much feedback as possible before it becomes a standard engine feature.
Redesigned User Interface
New Modules. All of Niagara’s modules have been updated or rewritten to support commonly used behaviors in building effects for games.
GPU Simulation. We now have GPU simulation working on DX11, PS4, Xbox One, OpenGL, and Metal. Vulkan and Switch are currently not supported.
CPU Simulation & Compilation. CPU simulation should work properly for PC/PS4/Xbox One/OpenGL (ES3.1)/Metal. Vulkan and Switch are currently not supported.
I was able to spawn particles from particles by adding a location event module to the first emitter and then a event handler to the second emitter. The event handler needs to be set to Spawned Particles execution mode and have a receive location module attached to it. So that works for two emitters in the same particle system. I’m not sure if you can have one particle system communicate with another particle system.
@cannabis.cod3r Great intro tutorial video! It brought me here.
One example of some initial confusion that your video got me past: It was not obvious to me at the start that you needed to “Make new” variables everywhere. My initial impression was that variables that should be in scope should show up in a list to select from.
But, the real reason for me posting this is to ask if anyone has any insight into how/when we can access a DataInterface for sampling Textures/RenderTargets? It’s not there right now in the preview, as far as I can see. Can we expect to see it soon or might it be worthwhile to hack together at home?
You need to attach Generate Location Event on Particle Update of parent emitter, also add Event Handler Properties on Event Handler of child Emitter. Then you have to chose parent emitter at ‘Source’ on Event Handler Properties.
Receive Location Event is optional module.
I am not sure why it has leaked smoke particles on the world center.
Getting Actor Position, and using that as force center.
When player makes impact ( with sample cascade explosion), noise strength and range multiply by 10.
Definitely it works.
Some modules don’t work for GPU for now such as Mesh Location, is it correct?
I’ve got some simplified, and hopefully easy to digest info on how to create something similar to what @Wataru has created. I’ll be using simple shapes, and no fancy meshes… but feel free to replace with what you want. This is meant for people who are fairly new to Niagara (like I recently was) but will require a little bit of know-how from toying around beforehand.
Before adding the stuff below, there are a few basic things you want to do like turn off the Spawn Rate module and replace with a burst emitter with the amount of particles you want. Remove the default forces that are applied to the Update and Spawn modules (but keep “Solve Forces and Velocity” module for Curl Noise). Add your Curl Noise Force to the Update module and make sure it works before you add all the stuff below. I’m using a lifetime of 4 seconds and size of 1 for all particles.
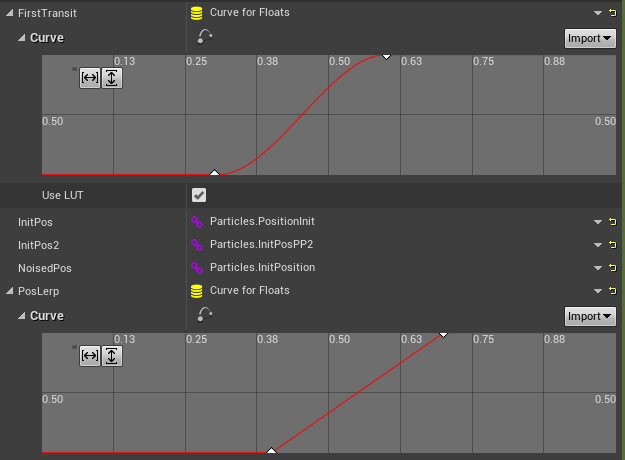
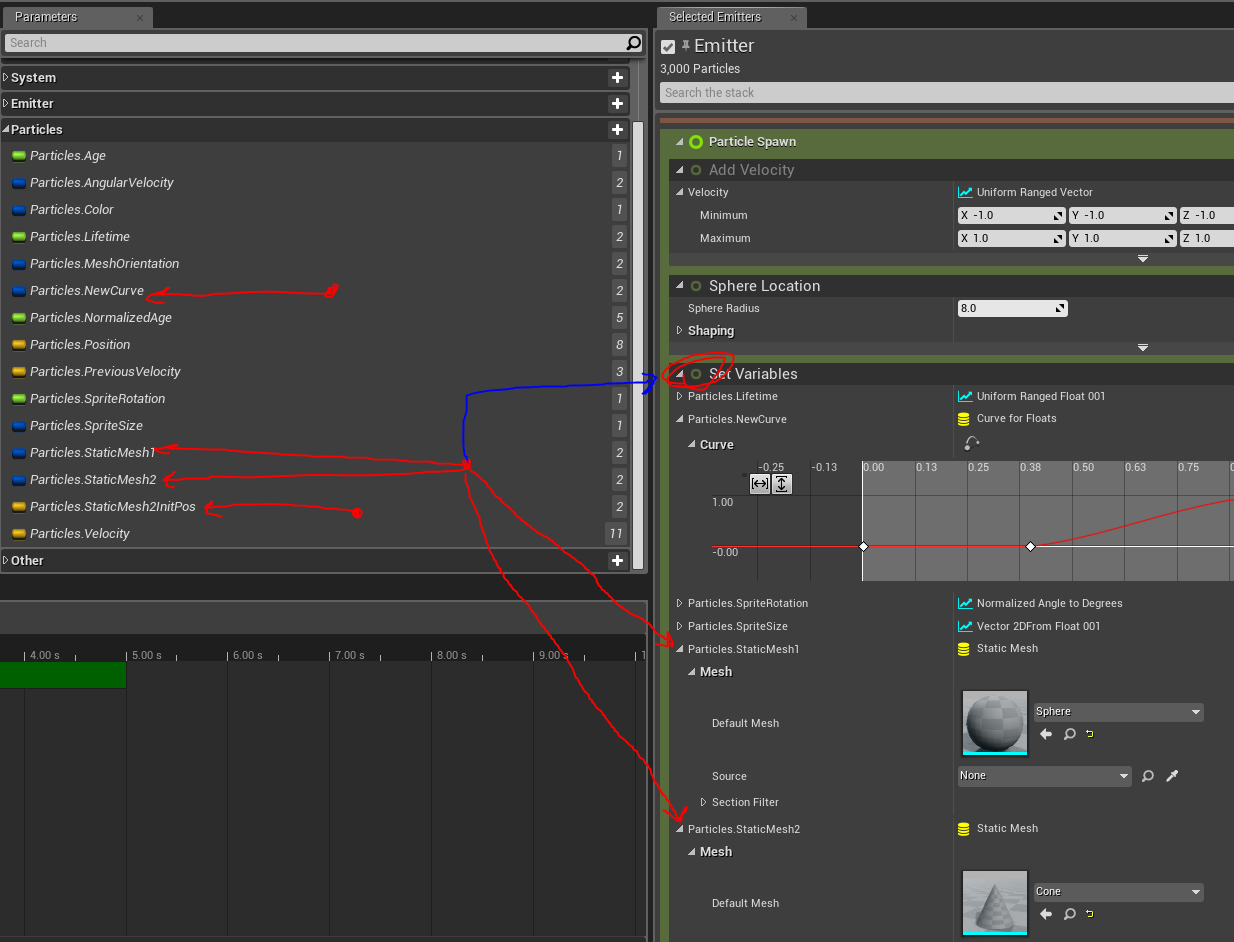
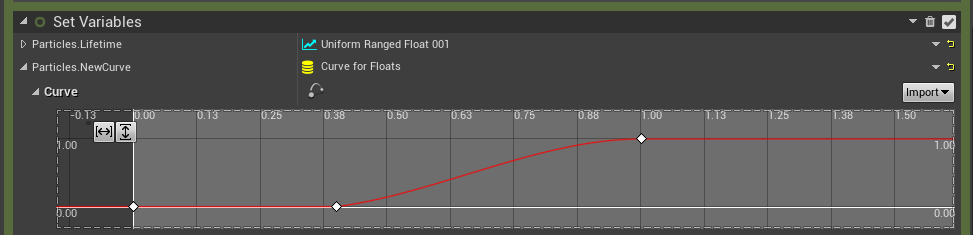
The first thing to do is add the two Static Mesh variables you wish to morph from, and to, labeled Particles.StaticMesh1 and Particles.StaticMesh2 below (using the + in the top-right of this field) into your emitter. Also add the Particles.NewCurve (Will show as “Curve for Floats” in context menu… also, bad name, I know) and Particles.StaticMesh2InitPos variables. Once those variables are created, drag the NewCurve, StaticMesh1, and StaticMesh2 variables into the “Set Variables” module under the Particle Spawn category (blue arrow). The category header will be outlined with a green dotted box while dragging. You can now access these variables in your Niagara Module Scripts (don’t forget to set your meshes after adding).
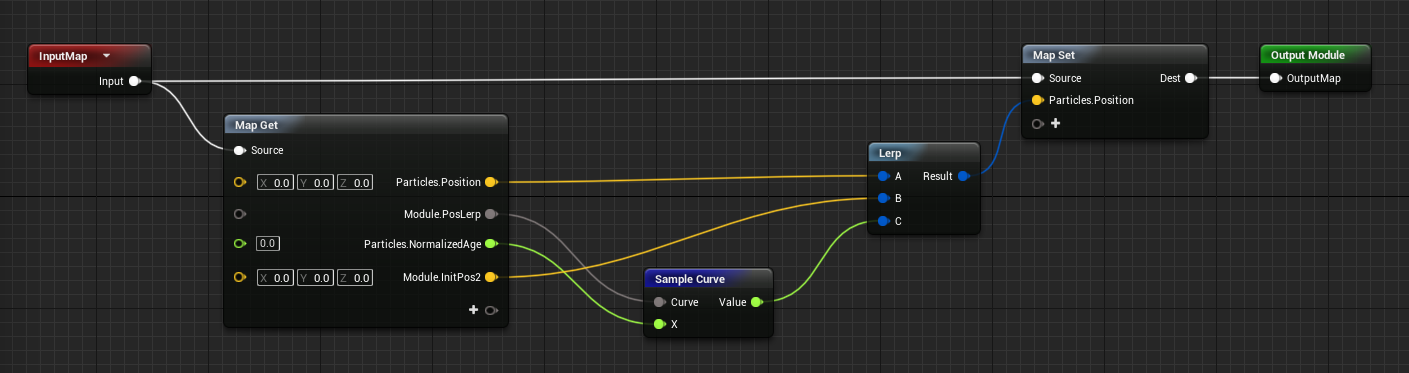
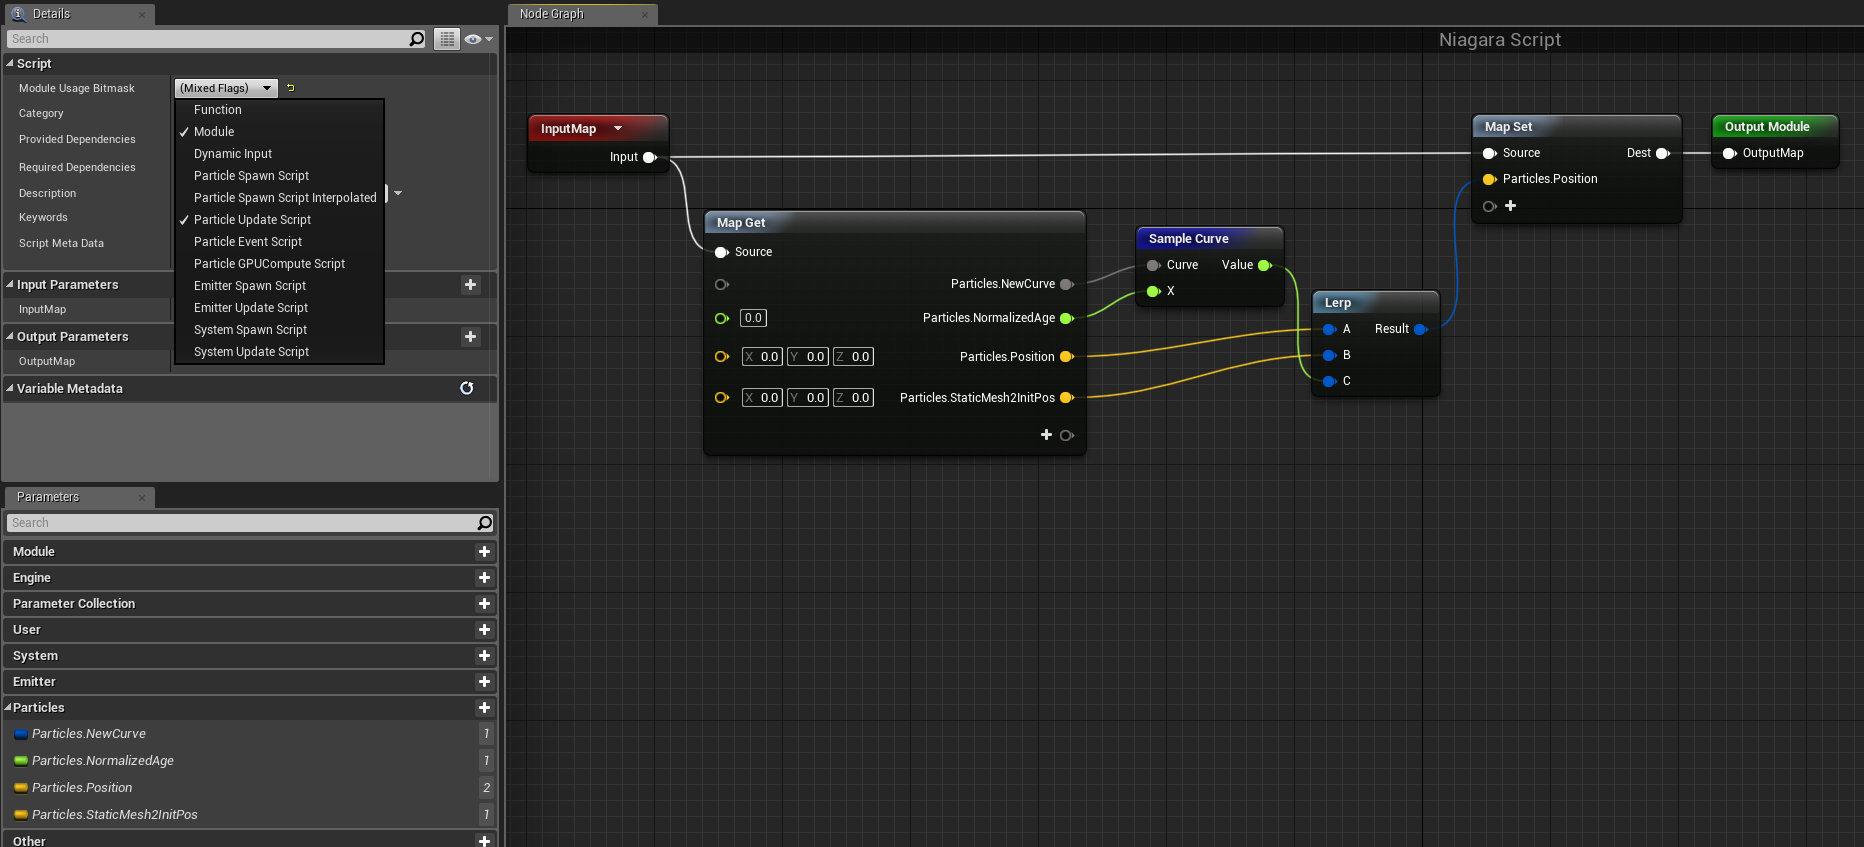
Below is a screen-cap of my Spawn script. This is simply assigning a random point on a tri to spawn on initially for each particle (Particles.Position). It is also saving off a random point on a tri of the 2nd mesh that we will lerp to in the Update module using the Particles.StaticMesh2InitPos variable that was created in the emitter. Note: Even though you created these variables in the Emitter already, they will not show up automatically and you will have to expand the “Particles” category, click “Make New”, then select the correct variable type (in this case Vector and Static Mesh) and assign it the exact name as listed in the emitter. Use the + at the bottom to make these variables. This will need to be done on the “Map Get” as well as the “Map Set” nodes.
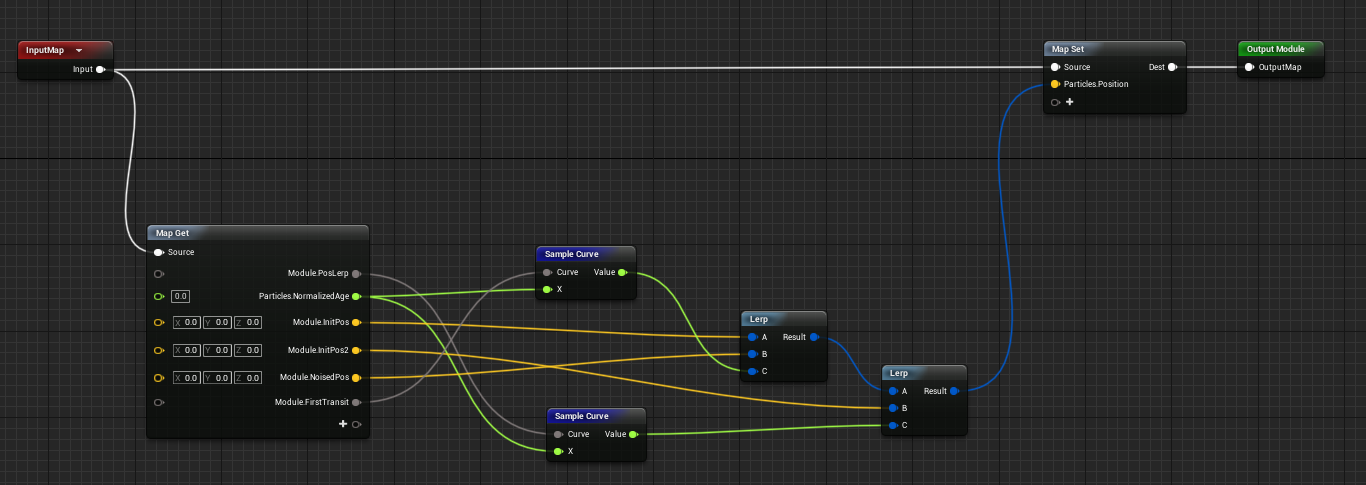
My update module script is fairly simple, it is just lerping the particles from their current positions (Pin A) back to the stored location set in the spawn module (Pin B) based on their normalized lifetime (Pin C). The following curves and their timing are important, as I am triggering the Curl Noise Force to eject the particles away from their initial position in the emitter, then the update script will lerp them back to their new home after using the “NewCurve” data.
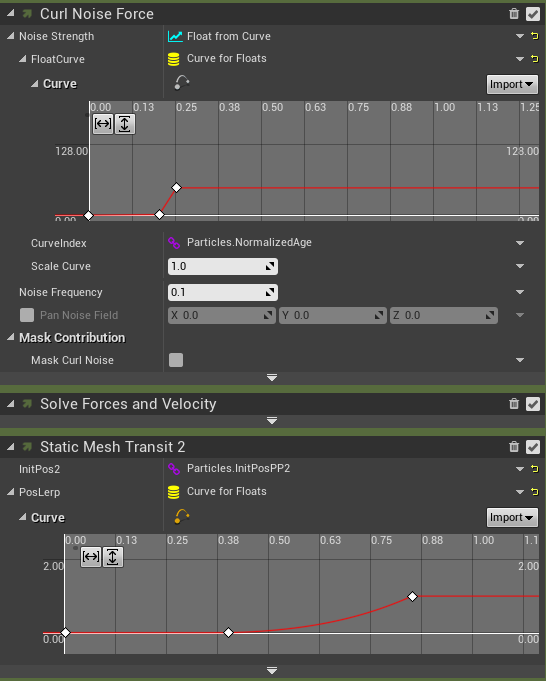
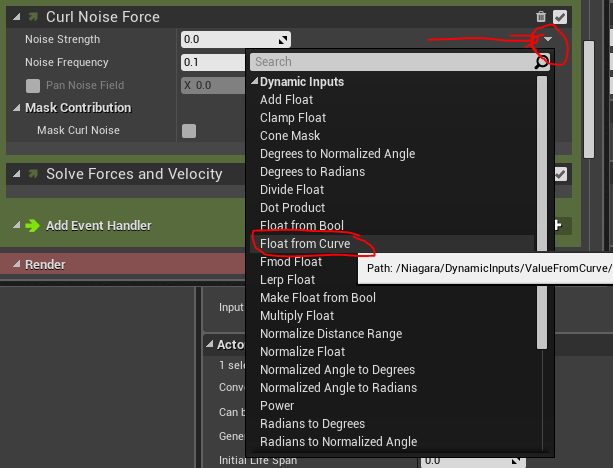
The screenshot below shows the Curl Noise Force module and the curve I’ve added to briefly add force. Take note of the timing on the top of the curve, and the force value on the left side.
I hope this info helps newcomers to Niagara. If this is too confusing I can just make a video walking through all the steps from beginning to end. I’ve also added my end-result assets to the link here for anyone to toy around with:


")