THUMBNAIL
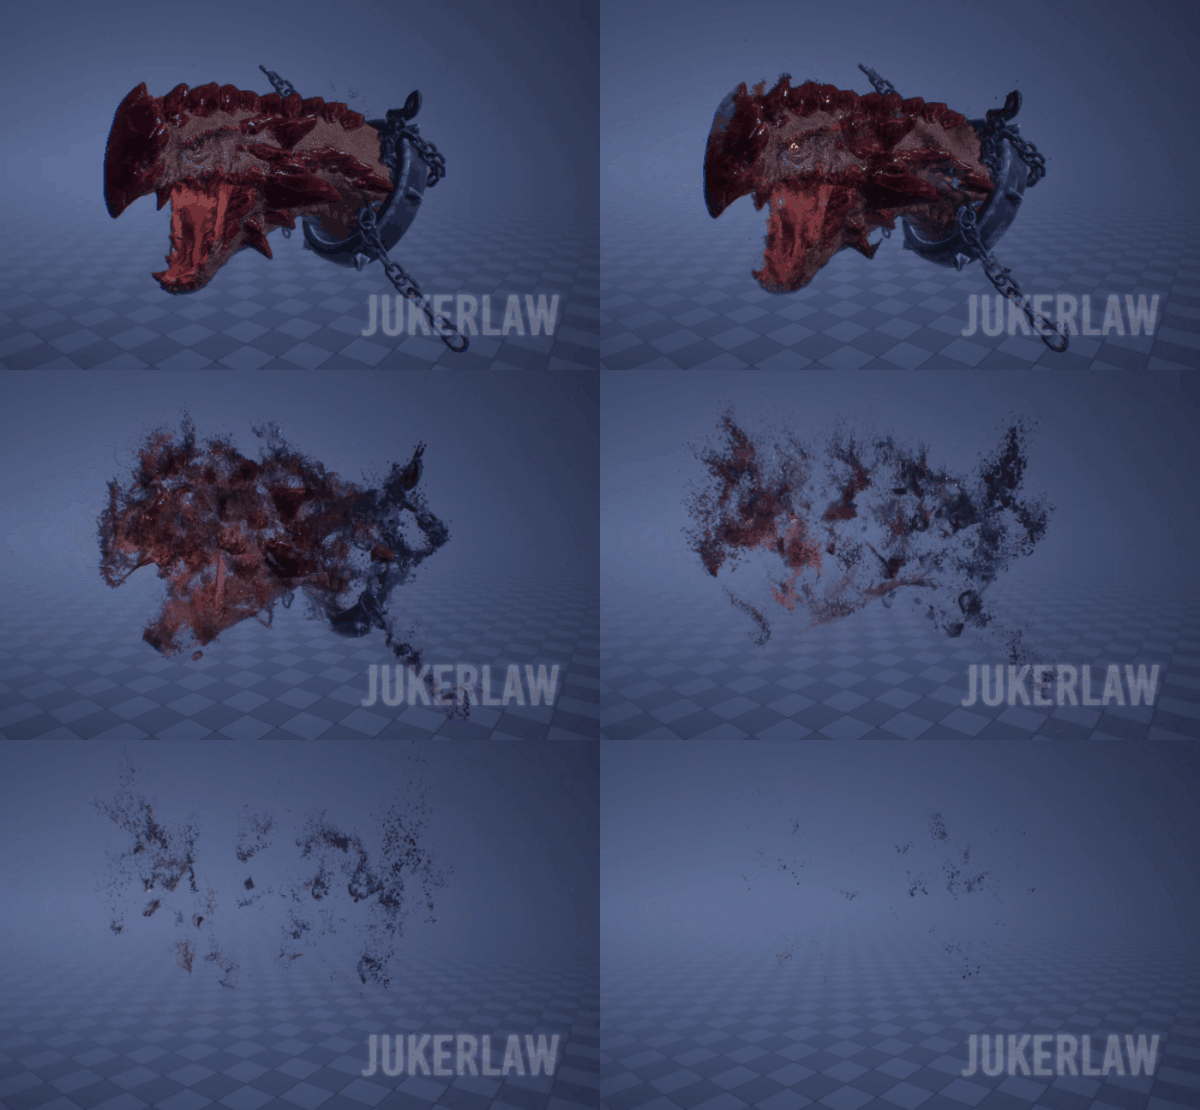
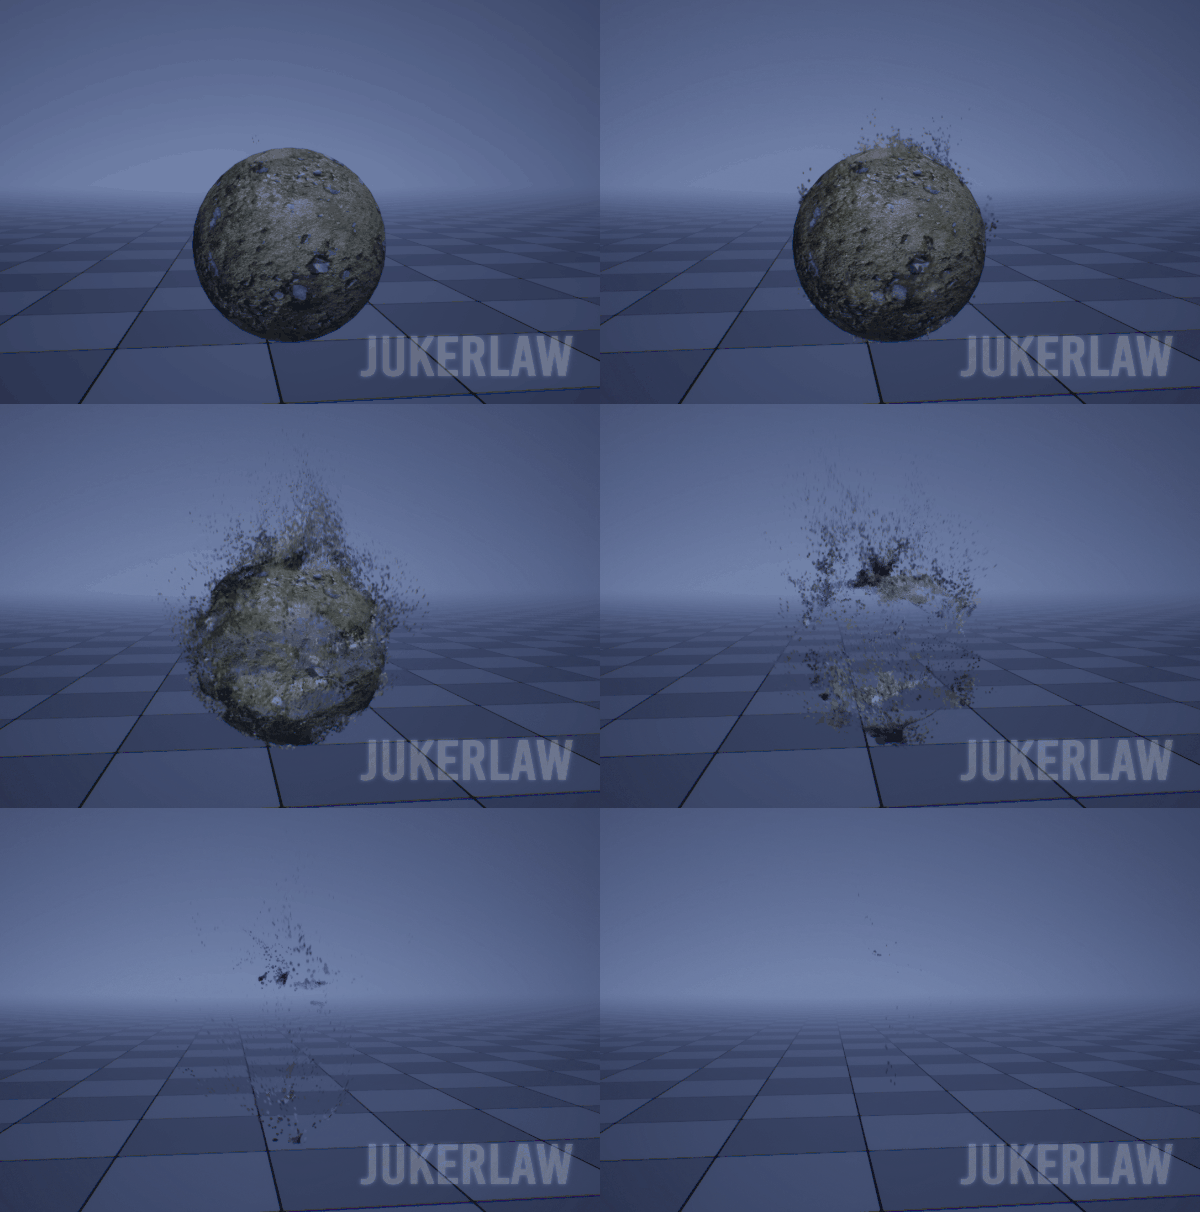
Dissolve effects are undeniably cool and widely used in the VFX field, I’d like to share a straightforward technique I use to dissolve a static mesh into dust.
— MATERIAL SETUP —
-
-
- OVERVIEW —
- OVERVIEW —
-
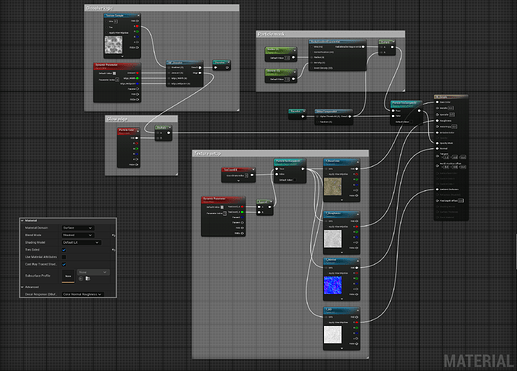
For this effect, we just need one master material, which is used for the material of the static mesh. Then, create a material instance of this for the motes dissolve effect.
- Dissolve Logic:
A texture sample is used as gradient mask.
A dynamic parameter is used to control the dissolve amount and edge thickness dynamically in Niagara System.
- Particle Mask
Mainly used to mask out if material is used for particle motes. This can be replaced by a round texture instead.
- Texture Setup
Simple textures setup for replacing static mesh’s texture.
A dynamic parameter is used to control static mesh triangle UV when used for particle motes.
- Material Settings
The material domain is set to Surface, and the blend mode is Masked for controlling the visibility based on the dissolve logic.
Two-sided rendering is enabled to ensure proper rendering of both sides of the mesh.
The dissolve function is custom-built, and you can check it out here Dissolve technique!. Keep in mind that you can also create your own dissolve function tailored to your needs.
— NIAGARA SETUP —
-
-
- OVERVIEW —
- OVERVIEW —
-
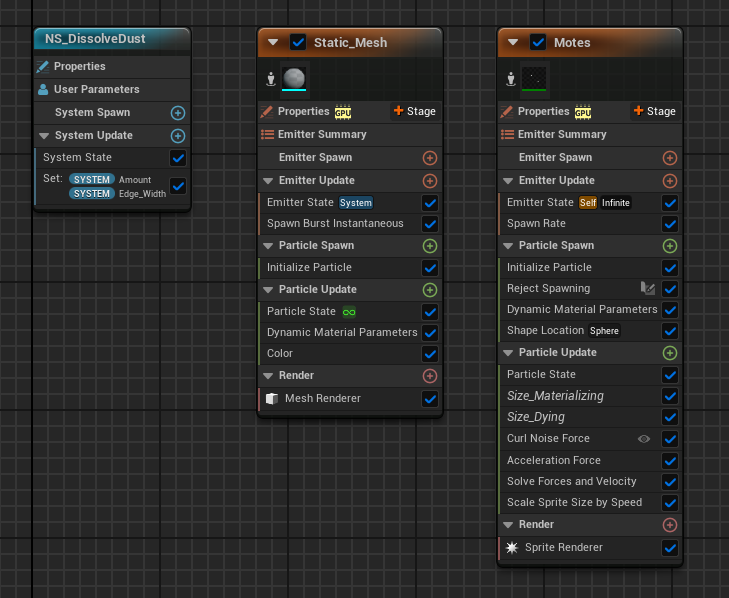
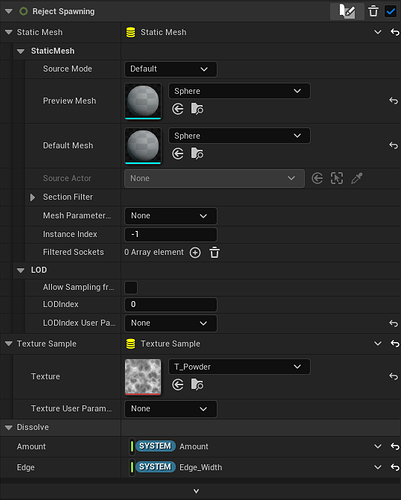
In system setup, create 2 variables Amount and Edge_Width (they’re equivalent to the variables set in material) which is going to be hooked up in dynamic parameters later.
- Amount: Control the dissolve amount of the static mesh in the range of 0 → 1
- Edge_Width: This will decide the fade range of the static mesh. Motes will only spawn in this range so if this value is 0, there’s no motes to spawn so keep that in mind.
- Static_Mesh emitter
Simply burst 1 mesh particle with above material.
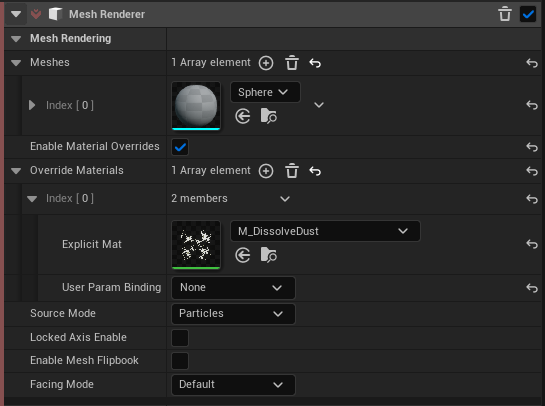
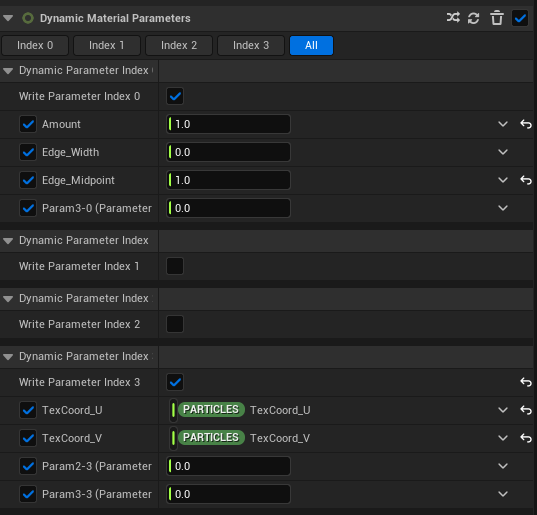
In the dynamic parameters, hook the variables above with the ones inside material editor.
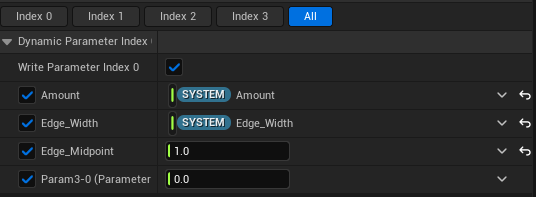
NOTE: If the edge isn’t displaying a dithered effect, it could be because the Edge_Midpoint is set to either 1 or 0. Try adjusting it to both values to see the effect.
- Motes emitter
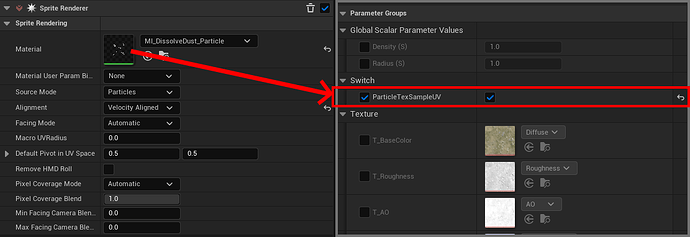
In sprite renderer, use the material instance created by the master material with ParticleTexSampleUV ticked.
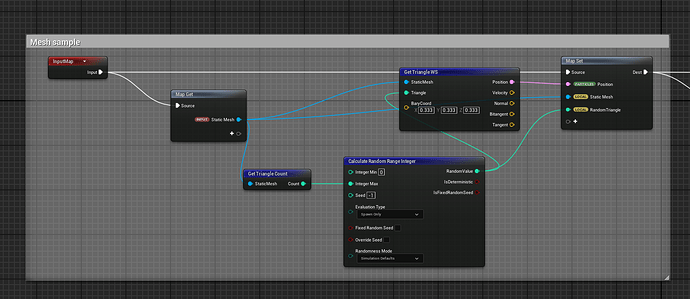
- Create a scratchpad named Reject Spawning.
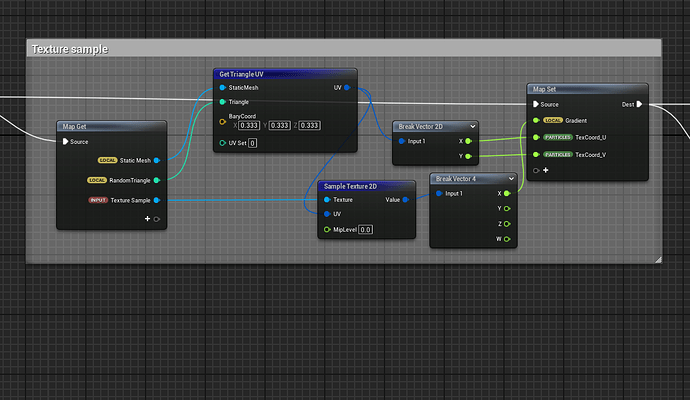
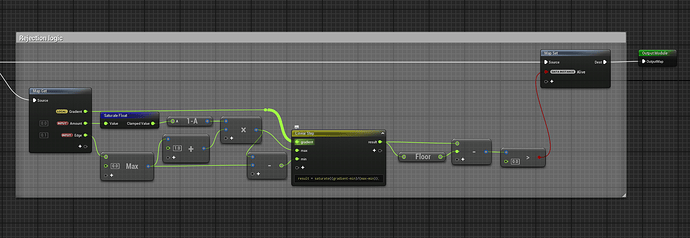
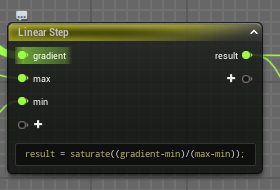
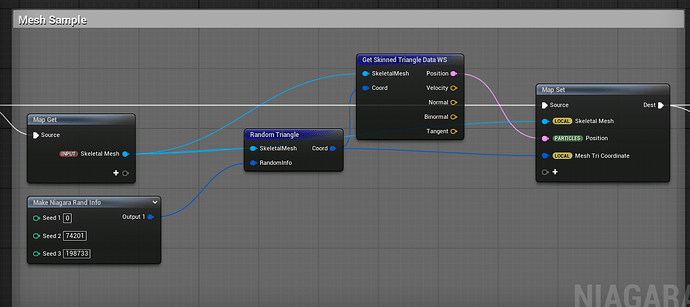
This scratchpad is designed to spawn particles on a static mesh, sample the UV coordinates from each triangle, and use them to feed into the gradient mask texture, which is the same texture used in the material setup. Next, implement the same dissolve logic function and isolate the edge to spawn particles exclusively from the edge.
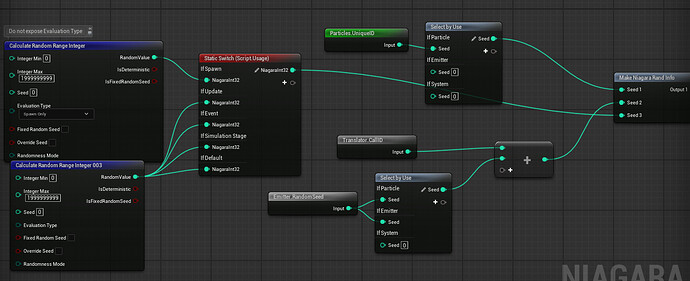
- Reject Spawning setup
- Dynamic parameters setup
Hook TexCoord_U and TexCoord_V created by the scratchpad to sample correct base color of the object.
Keep in mind to set the Amount to 1 so the particle is fully visible.
That’s all the basic setup for the effect to work, you can tweak it furthermore by adding forces/ scale color/size.
Enjoy the results! I hope this tutorial is helpful to everyone. If you have any questions, feel free to leave a comment below!
