Blood/Leaking effect

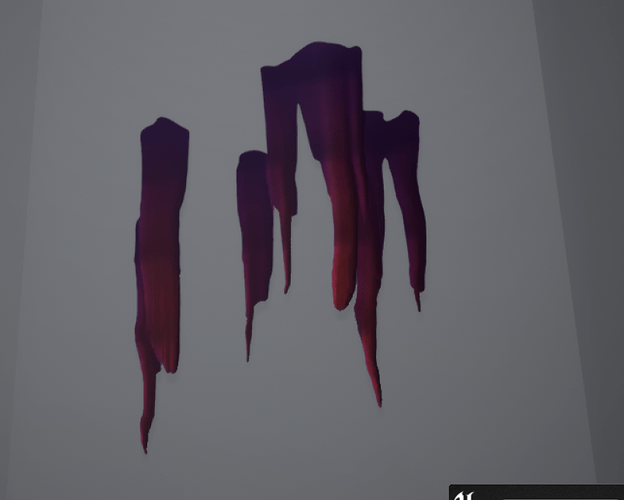
Current version:
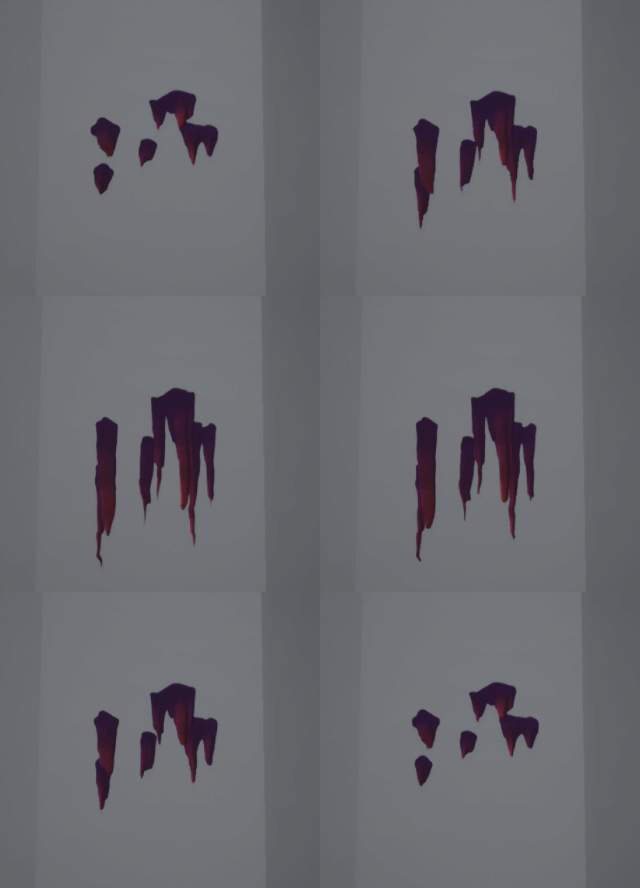
Blood2
Old version:
Blood2

Hi I’m creating this bleeding/leaking effect. It’s not finished yet but I thought some of you might like to follow my progress :slight_smile:

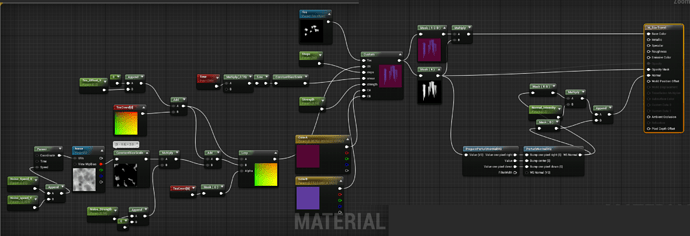
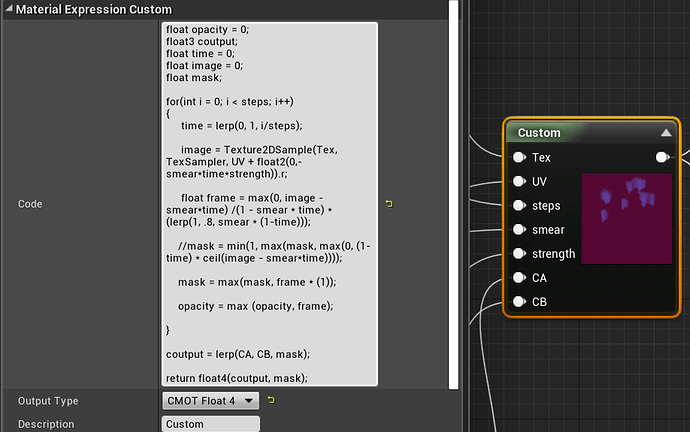
I’m incrementally offsetting and shrinking a texture with dots using HLSL and breaking the path with a soft UV distortion. After that I create additional masks to colorize it. And at the end create a normal texture to get some thickness.

This is my shader:


7 Likes

This is fantastic. How did you go about understanding how to implement hlsl code into your material network and making if functional?

Thank you for sharing :slight_smile:

1 Like

I was trying to get into raymarching and via tutorials I learned a bit hlsl. Though the raymarching was a bit to early I will still get back to it. Eventually the code is very easy and pretty similar to other coding languages :slight_smile:

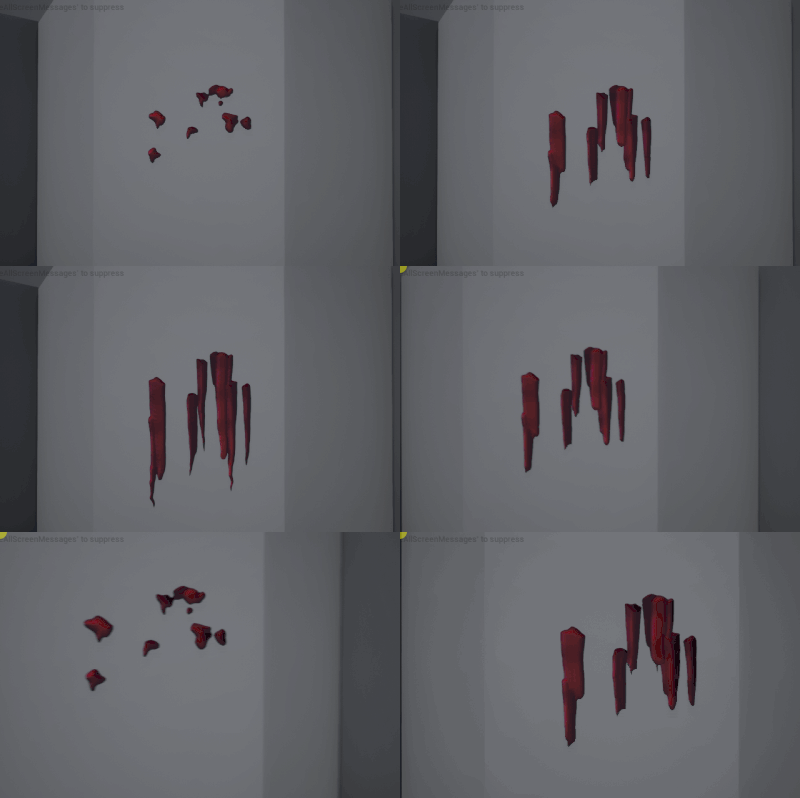
I have done some tweaking and optimizing.
Now I have a normal transition next is a fade so it better blends in with the surface.


Blood2

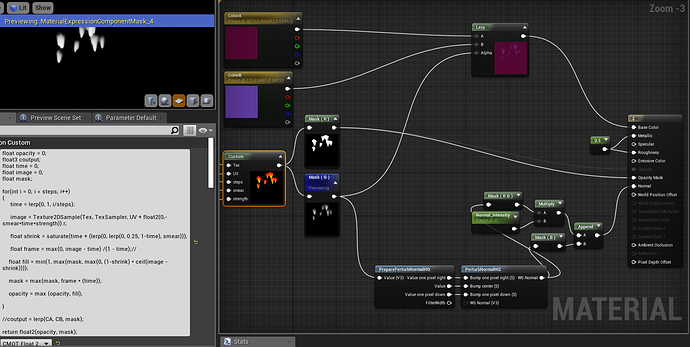
Updated code:

2 Likes

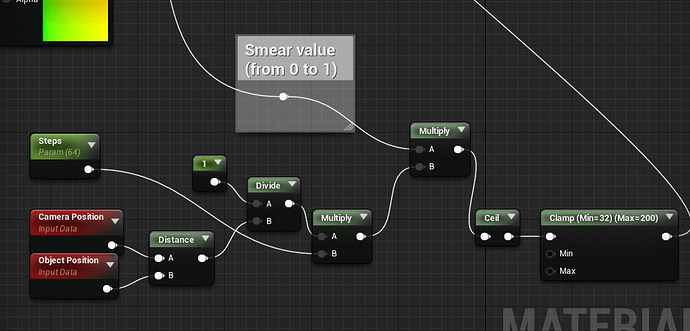
You might have noticed it is not very cheap to do many texture samples so I thought maybe we can optimize this by lowering the steps depending on the distance from the object and the current smear or lets just say (lifetime) because the less smear the denser we sample the textures.

Here you can see an example with a low step count.
Blood3

It is not perfectly how I want it to function but it’s getting close.


*the ceil node is actually not needed

1 Like

I would suggest you try doing it without textures. Think of each point where the blood start as a circle. Then you can make a function for it.

See IQuilez’s blog (or bible…): Inigo Quilez :: computer graphics, mathematics, shaders, fractals, demoscene and more

In this case, a circle is a 2D spere so:

float sdSphere( float2 p, float s )
{
return length( p ) - s;
}

From there you can feed a position p and a size s to the function above each loop of your marching instead of sampling a texture… You can then color the sphere based on how far from it’s center that pixel is, calculate normals if you need using the following (replace function with sdSphere from above)

float2 calcNormal( in vec2 x, in float eps )
{
vec2 e = vec2( eps, 0.0 );
return normalize( vec2( function(x+e.xyy) - function(x-e.xyy),
function(x+e.yxy) - function(x-e.yxy) ) );
}

Now all you need to do is run this 2-3 times for the origin points, add a pseudo random jitter to the size of the sphere each loop, maybe some offsets. etc…

Not having a texture to run in your loop could speed it up a lot since that sphere function is super simple.

Also, note that when you get into marching the cost is directly scaling with the number of pixel used, so even if you reduce steps as it gets further away, you are likely not going to have great return compared to the reduction in quality as the number of pixels to process is already going down. So in reality, this optim is giving you quality problems, while not addressing your primary area of problem, when this thing is close to camera and taking a lot of screen space.
2 Likes

Thanks for the feedback :slightly_smiling_face: I will definitely get into it and post some updates.