This has been asked in the past, and I don’t think it’s possible but I’m bringing it up again just in case. Wanting to spawn a particle on a mesh surface based on a material parameter. For example if I have quad mesh with mask texture on the material, then I spawn particles from the surface of the quad where it is white and not where it is black. Wanting this to be dynamic, so as I change the mask in the material then the spawn points follow appropriately.
The “Skel Vert/Surf Location” module with the “Inherit UV” parameter and using “Dynamic Parameter” node in the material seem promising but I don’t know how to use them.
I know this can be done in PopcornFX, as I’ve done it before (not sure about the dynamic material part though), but my workplace is anti PopcornFX plugin (one of those, “It didn’t work this one time for what we wanted so it’s now considered broken forever” situations).
This will be made better in the future someday, but for now you could in theory do this with a little hacking.
Set up your skelmesh you are emitting from with a mask that maps to your UVs the way you want.
Make a system that reads from it using skel vert/surf locations.
Enable “inherit UV”.
In your particle, drop in a dynamic input. Set the 0 and 1 entries to “spawn time only” and “auto set”. Name them X and Y.
in your particle material, put in your dynamic parameter and append the 0 and 1 (X and Y) together to make a UV.
Use that UV to sample the same mask texture your mesh is.
If you had, say, a black and white mask, this would give you white particles where the white parts are, and black particles for the black parts.
Then, do some logic in the vertex shader to collapse any particles that are fully black to 0,0,0 or something and let the GPU cull the degenerates. It’s a hack, but could work OK depending on counts and need.
Going forward we’ll make this kind of thing worlds better in Niagara, but for now with Cascade this would be the only way to accomplish it.
I’m mostly catching what you’re saying. When you say use the UV to sample the same mask texture as the mesh, do you mean, in the particle material, just plug in the appended XY dynamic parameter values in the UV’s of a Texture Sample with the same texture as the mesh mask?
Also, I’m not able to rename Param names of the Dynamic module in the particle system. It’s grayed out and the tool tip says “Read Only” at the end of the description.
I have the particles spawning from the mesh, but everything else about it is still broken.
PS With the Skel Vert/Surf Location module (along with this hack) are particles only able to spawn at vertex positions on the mesh? (As opposed to anywhere on a face)
How might one accomplish this in UE/Niagara nowadays?
Can a separate/hidden mask channel be used somehow so as to not interfere with a meshes ‘hero’ materials & UVs?
I haven’t found much reference, and have been poking around in a scratch module to see what I can come up with, but the analog I have in my head is Houdini’s scatter by attribute, which bursts particles only in a color-masked area, and not over the entire mesh.
Skeletal mesh location modules write uv’s to a transient parameter, so you can use it to to sample a textures (module also already exists) and then use a kill particles module with something like color.x > .1 to remove particles.
Except for that it is the same as what has been described before.
Sweet, thanks for the reply. Just found this tut which explains precisely.
I only need to do this on a StaticMesh, and the [Sample Static Mesh] Module provides the MeshUV Module Parameter akin to SampledUV in the [Skeletal Mesh Location] module. In fact, if you jump into the corresponding Niagara Module Scripts you will see they both use [Get Tri UV]. The [Sample Static Mesh] module outputs it as MeshUV while the [Skeletal Mesh Location] outputs it as SampledUV because it has to track the movement of of each Tri as the mesh animates/deforms (good ole bary centric coordinate maths)
Heh, so the catch here is you need to sample an image map, and since you manually assign a texture to a mesh it presumes you will do the same in Niagara. So I wondered if this kind of sourcing could be achieved with a procedural texture (ie material). The idea would be the same in so far as you have to sample the UVs on the mesh, and then feed those UVs to the shader… which can be done by plugging those sampled UVs into a DynamicMaterialParameter.
However, I believe this is designed to drive the material assigned to the SpriteRenderer so you can’t kill particles based on color as this isn’t the particles color. So I’m wondering if there might be a way to get that color onto the particle so you can?
I suppose alternatively, one could periodically write out the material to a render target and sample that.
Well, the gpu particles are technically a shader, so you can just recreate your material in niagara. Probably cheaper if the amount of particles doesn’t exceed the texel count of the rt.
Will this setup only work for GPU particles? If so, is there any kind of workaround for mesh particles? Like rocks or crystals spawning off a character’s mesh in the direction of the mesh’s normals, while using a texture for their spawn location?
Niagara mesh particles can use gpu compute sims if I’m not mistaken.
If you want a work around, skelMeshSample can sample the vertex color, so you can paint it in.
Thank you! I’m guessing there’s also a way to feed in a skel mesh’s normals into a Niagara system too? So that you could point non-square sprites or geo in the same direction as the mesh face or vert normal?
Would you mind explain this a little more? how would I go about creating a material inside Niagara? as a scratch module? I’m trying to spawn custom particles from the edges of a dissolving mesh and I’m having a hard time masking out everything but the edge. Any tips?
Yes, in scratchpad. You can basically just re-create the exact same logic that you are doing in the shader to dissolve the mesh, but in Niagara. Niagara can also sample textures etc. If you need specific help about it, post your dissolve shader logic here and we can rebuild it in Niagara together
Another method you could try, is using the GBuffer. This will make it view dependent however.
I have done this here:
Thanks for the reply and the offer to help!
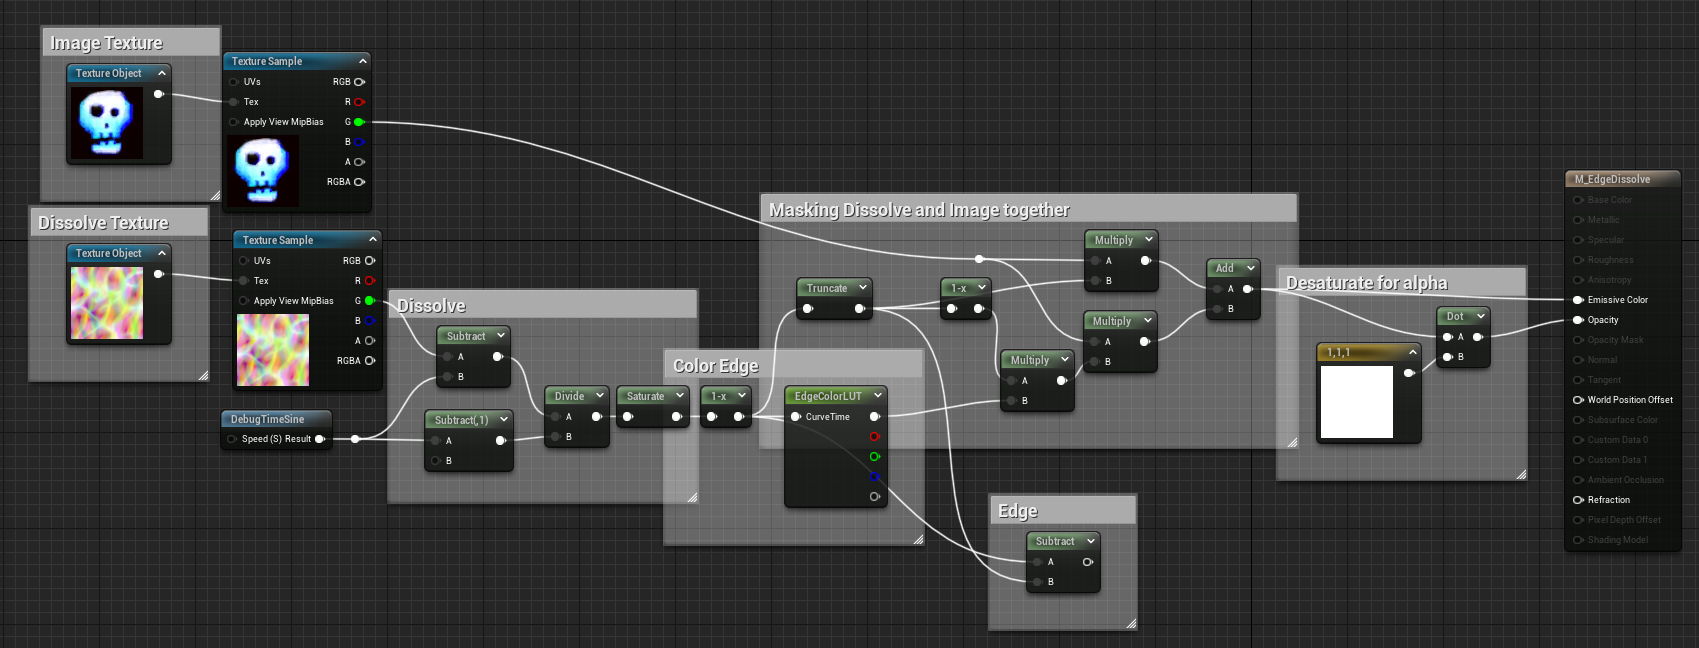
I put this together real quick since the dissolve I was using was in a big shader.
This is my dissolve map:
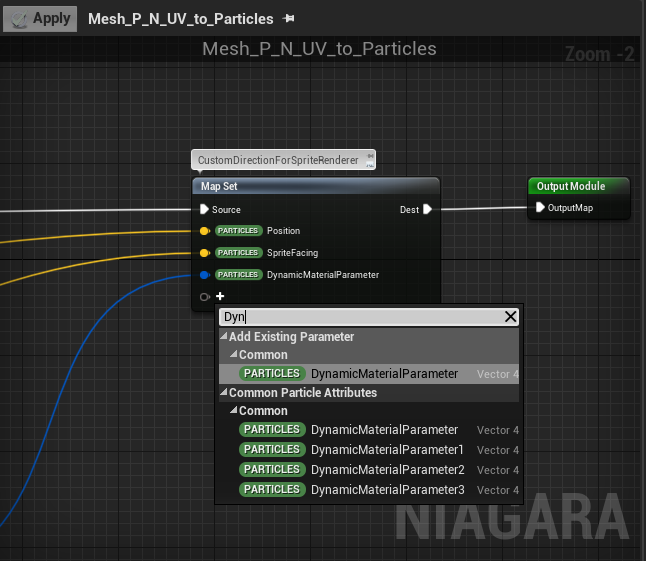
So far this just change the color base on the Dynamic parameter.
I tried looking in initialized particle module, but I didn’t see any useful clue to show the texture.
I know this isn’t my goal, but is it possible to show a texture on a sprite with the scratch module?
In the tutorial you linked, he sampled a mesh and then map the texture to it to spawn the particle from, is this a must?
If I understand it correctly, to achieve what I wanted in the first place I should combine the sample mesh+texture and then add in the dissolve function and the kill particles thing, right?
Btw, is GBuffer something that is built-in for Unreal/Unity? It’s like a place where I can read shading related info in screen space?
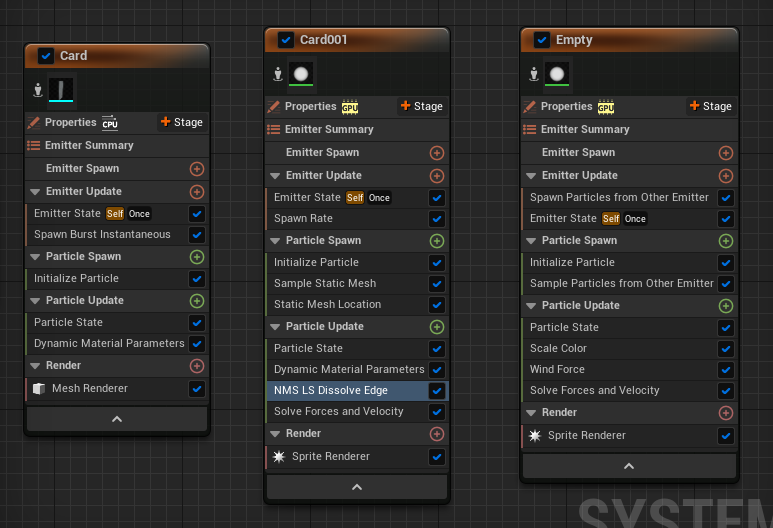
1 for the main texture that dissolves, 1 to spawn particles on the edge of the dissolve, and 1 to spawn particles from those particles because in order to dissolve the the first two at the same rate, they need to have the same loop duration or all the particles dies at the end of the loop.
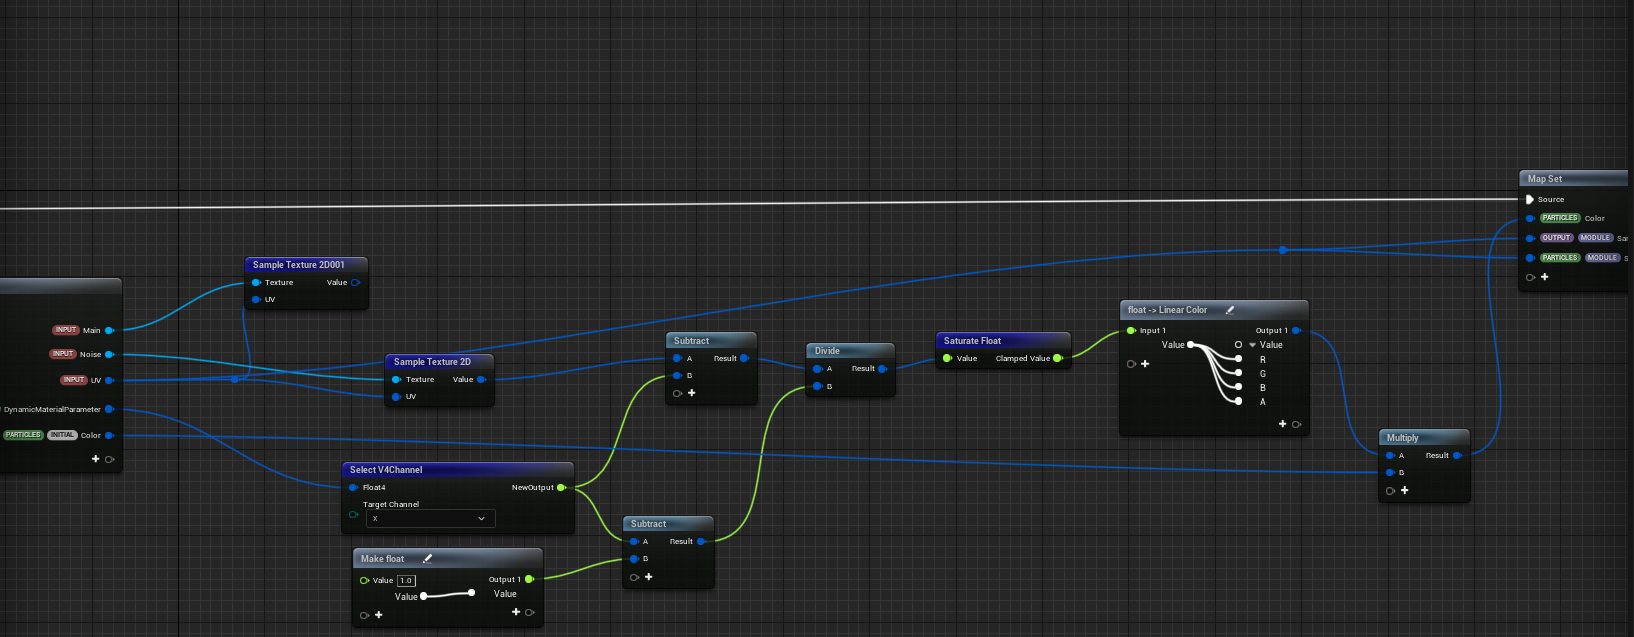
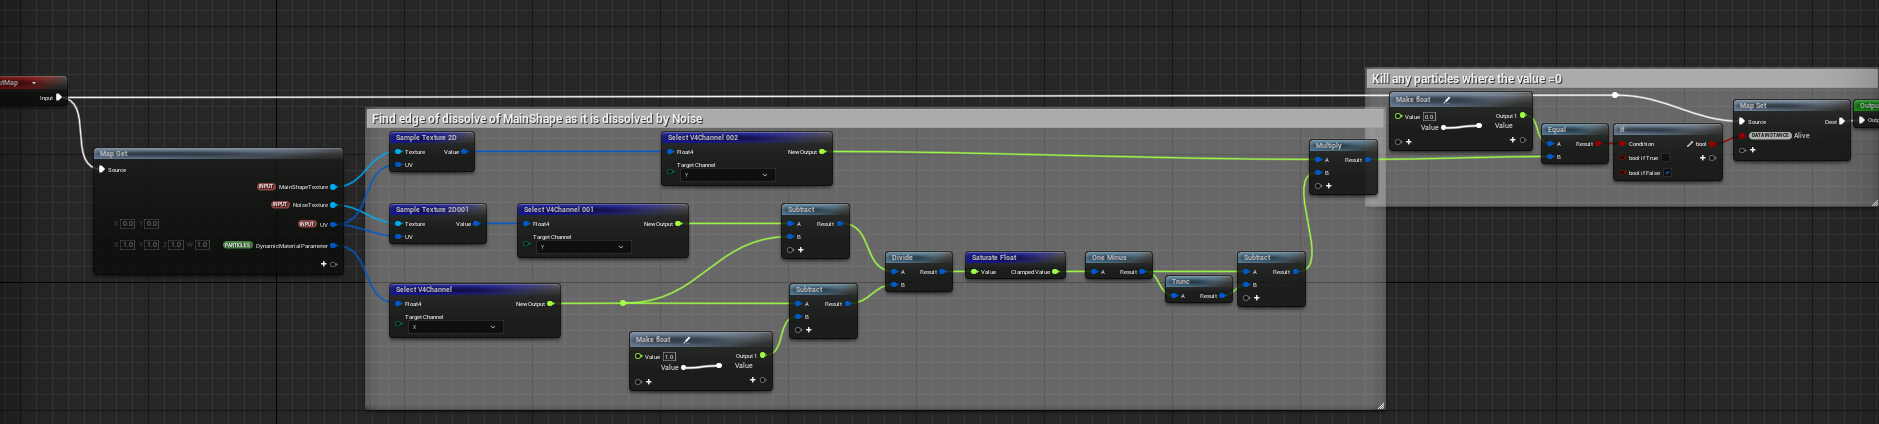
So I did end up having to sample a mesh to use it as a spawn location, and then I just use a custom scratch module that is essentially the combination of kill particles and sample texture (use UV of mesh to do so) with the dissolve effect I wanted.