Hey everyone! I’m Aka and this is my very first post here. I was playing around with this simple fire shader and was very happy with the result, so I figured I should share my process to get some feedback and hopefully help someone who’s starting out.
I had three main things I wanted to achieve with this shader:
- Lightweight: it shouldn’t use heavy inputs or complex simulations
- Flexible: it should be configurable so it could be used in many different cases
- Believable: it should be instantly recognized as fire, even though is a simple plane
I made it using Unity and Amplify shader, but I’m sure it can be recreated using any other tool and engine.
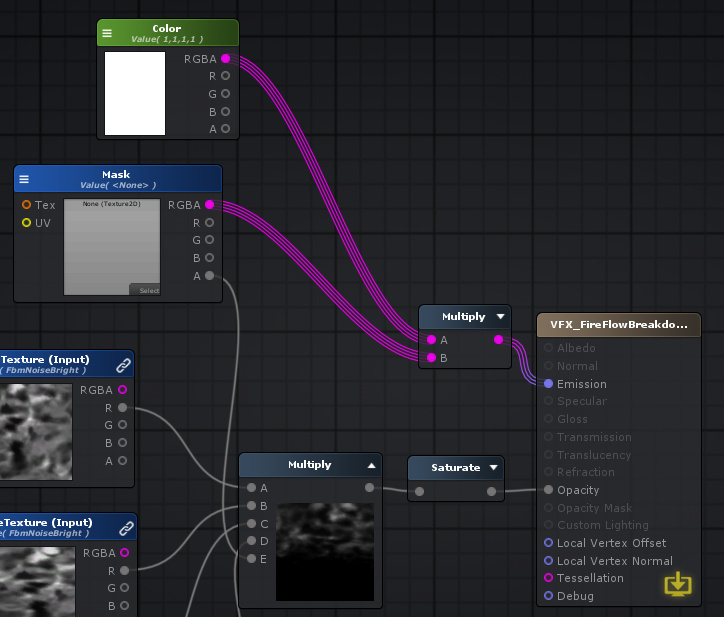
Base
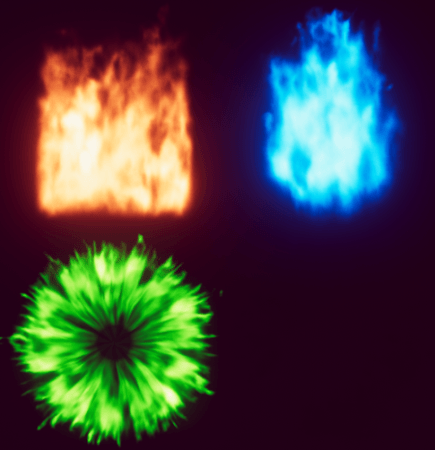
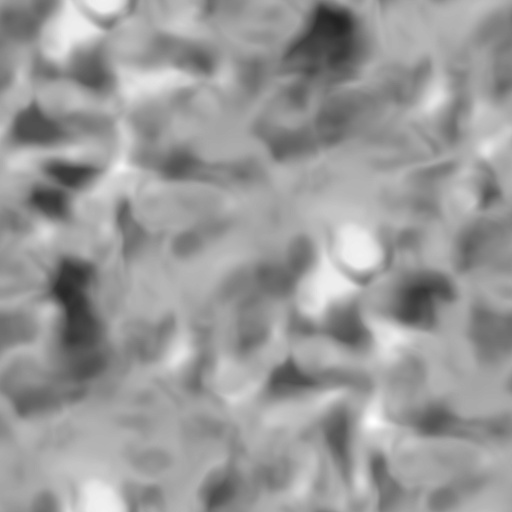
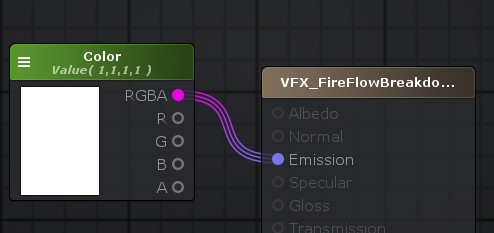
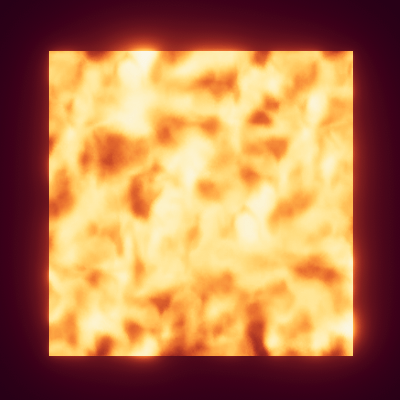
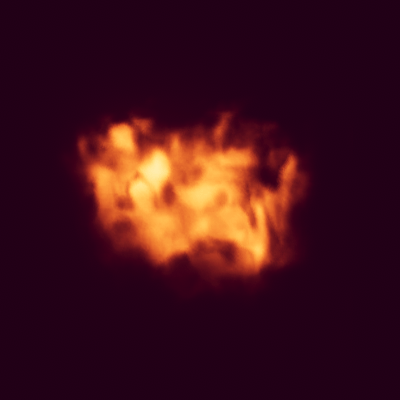
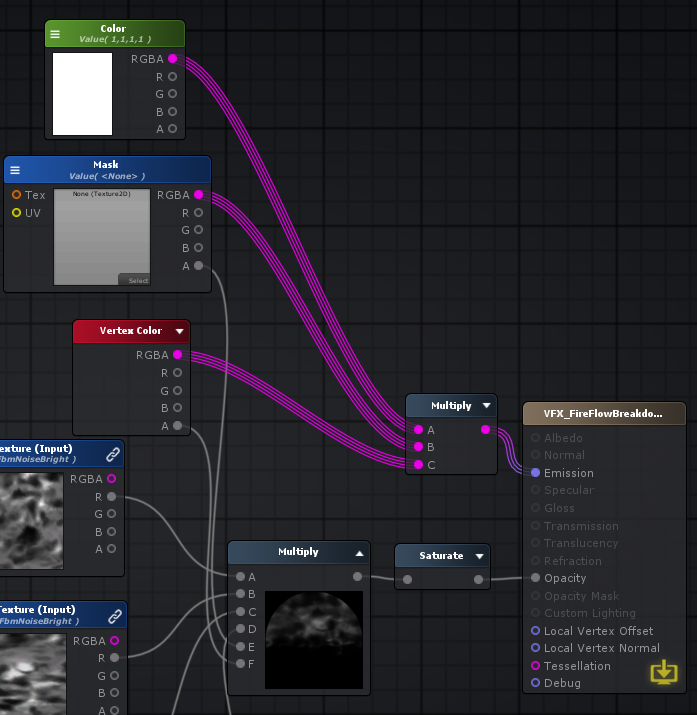
To make all the effects in the video above, I only used one noise texture! (and a mask for each) It’s this one:
To achieve this effect, I sampled the same texture twice with different tiling and scroll speed values, so it would look like it doesn’t have a fixed pattern and looks more like a natural fire. As I’m using black and white textures, I only need the red channel in my calculations. I also added a global intensity control, multiplied everything and plugged it into the shader’s opacity. It’s always good to add a Saturate node before the opacity output so it clamps the values between 0 and 1 and you don’t get any weird values.
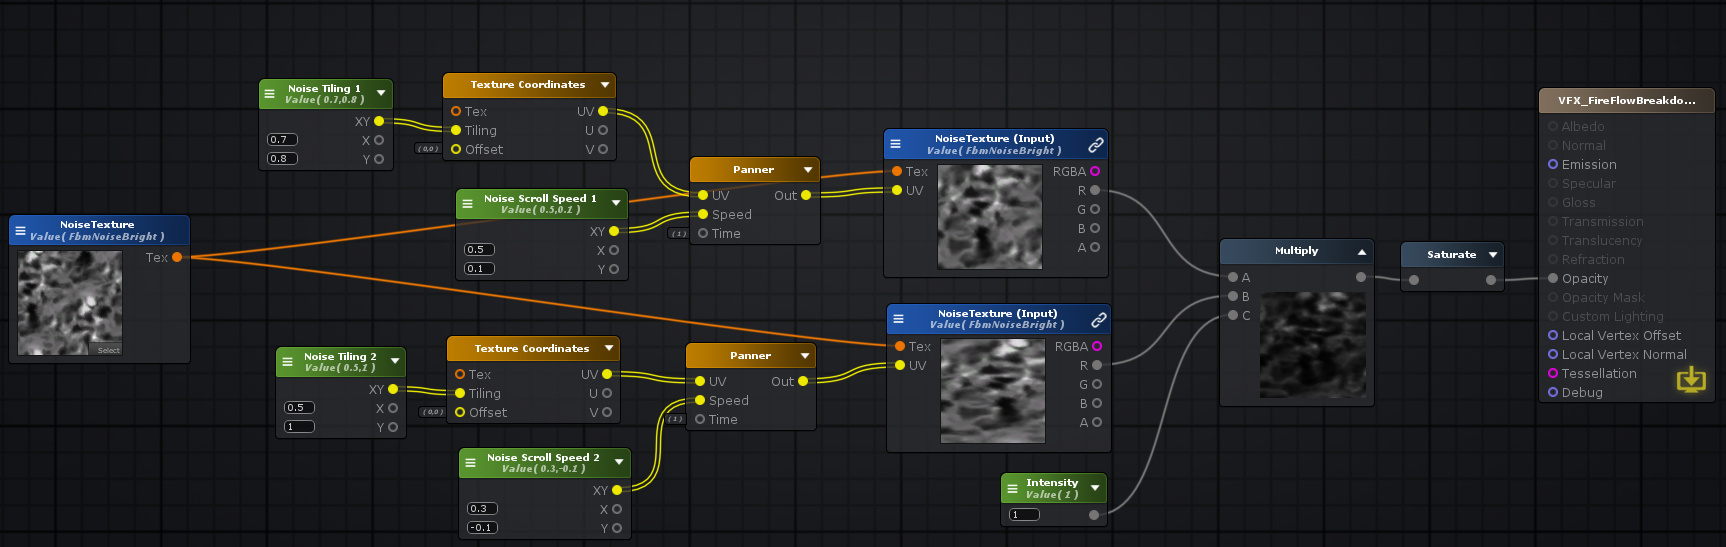
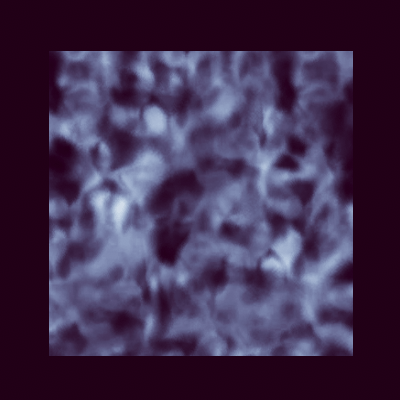
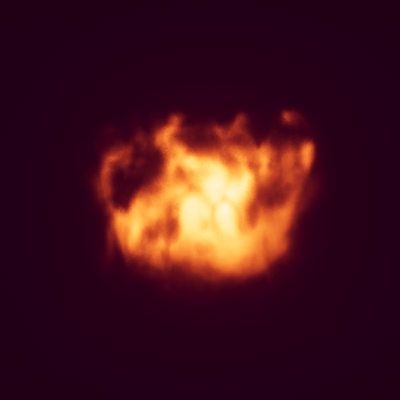
For now it doesn’t look like much, let’s add some colors! As I’m using a workflow with HDR and bloom, I can just add a HDR Color parameter and plug it into the emission output. The opacity will take care of the color variation and create some interesting colors. But there are other ways to do it, like gradient mapping or multiplying the base into the emission with some colors instead.
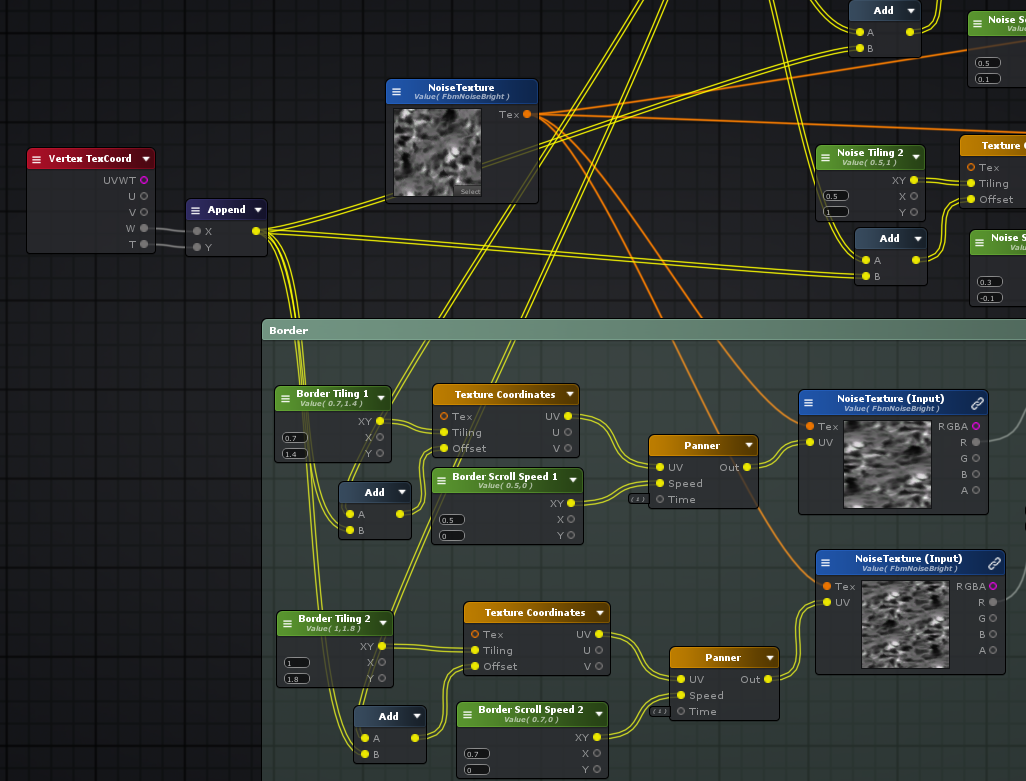
Border
At first I tried a static mask to make the border but it didn’t look natural. Instead, I used the same idea from the base and added some more math to turn it into an animated border! Again, I used different values for tiling and scroll speeds, you can reuse the same ones from the base but it looks less natural than using new ones. Then I intensified the values based on the UV and added some parameters to make it configurable:
- BorderHorizontal: a toggle value to define which direction of the UV to use
- BorderIntensity: to create a more intense value difference and make the border sharper
- BorderThreshold: to define the limit of the border and limit the values above and below it
- BorderSmoothness: to subtract and offset to the minimum value when passing through smoothstep
The key here was using Smoothstep to limit everything above the border and multiply it with the opacity values.

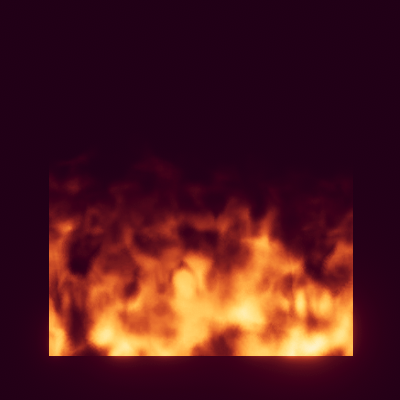
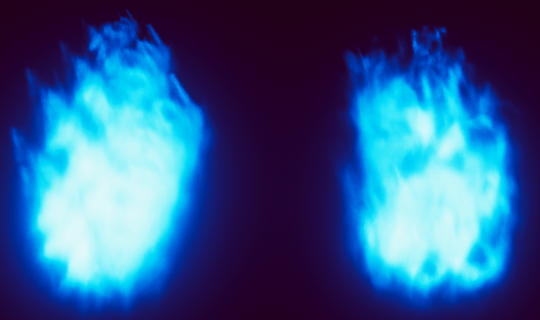
Low intensity and threshold, high smoothness: creates a soft and floaty border
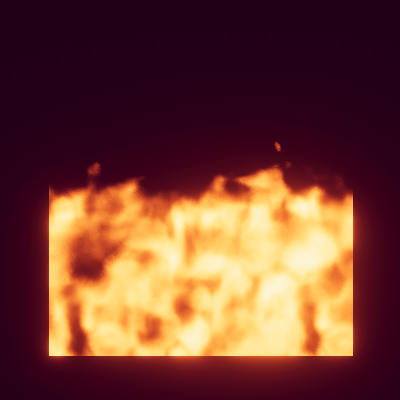
High intensity and threshold, low smoothness: creates a sharper and clearer border
We can also add a mask texture to define an overall shape along with the border.
It still looks a bit static, but we can add movement with particles or with some waves like I’ll show next.
Waves (Optional)
With simple math and UV offsets, we can make a wave effect to add more movement. In this case, I’m adding an offset to the X axis based on the Y axis of the UV, using Time and Sin to achieve the wave effect to both sides. I can also use a map texture to define how much the wave will affect each part of the object (darker values means less effect). A gradient works best, but using the UV can also work if you don’t need a custom map. I also use some parameters to control the waves:
- WaveSize: how many waves will be produced, higher values make more waves
- WaveSpeed: time multiplier for the waves, higher values make it wave faster
- WaveAmount: how far the waves will travel, higher values make them more intense
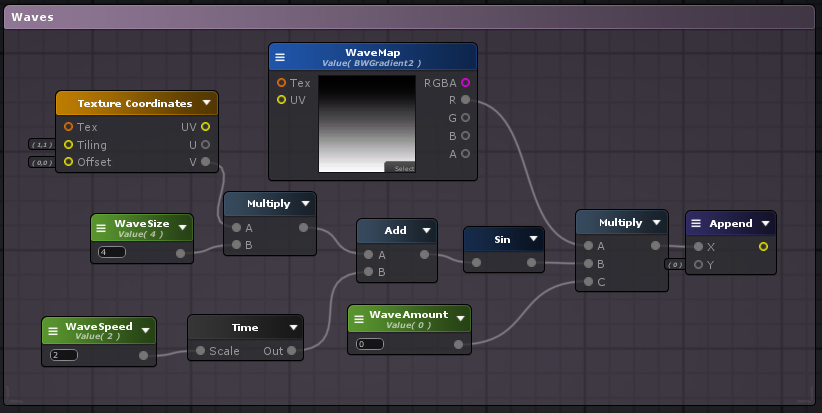
Then I just plug it into every texture sampler offset (including the mask), so it can create consistent waves across the entire effect.

No waves; Soft waves; Intense waves
Particle Effects Tips
When using this shader for particle effects, it’s important to keep some things in mind.
You can use Vertex Color for things like Start Color or Color Over Lifetime, as the particle system uses this input for these values. Apply it to both emission and opacity.
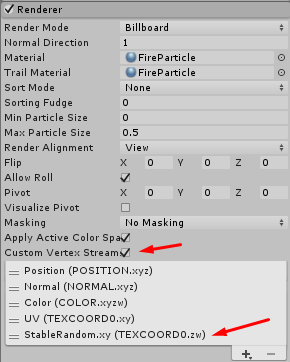
When spawning multiple particles, the panning values for each particle will be synchronized, causing patterns that look unnatural. You can use the particle system’s Custom Vertex Streams to add a random value to each particle’s offsets, creating a way better looking effect. This value is sent to the shader via the Vertex TexCoord property.
Left: no vertex streams; Right: random vertex streams
(By the way, the effect above uses only 7 particles! Pretty good result with a very low performance impact)
Sometimes you might want to use the default synched style to create a specific effect, so this is totally optional.

Left: no vertex streams; Right: random vertex streams
Closing Thoughts
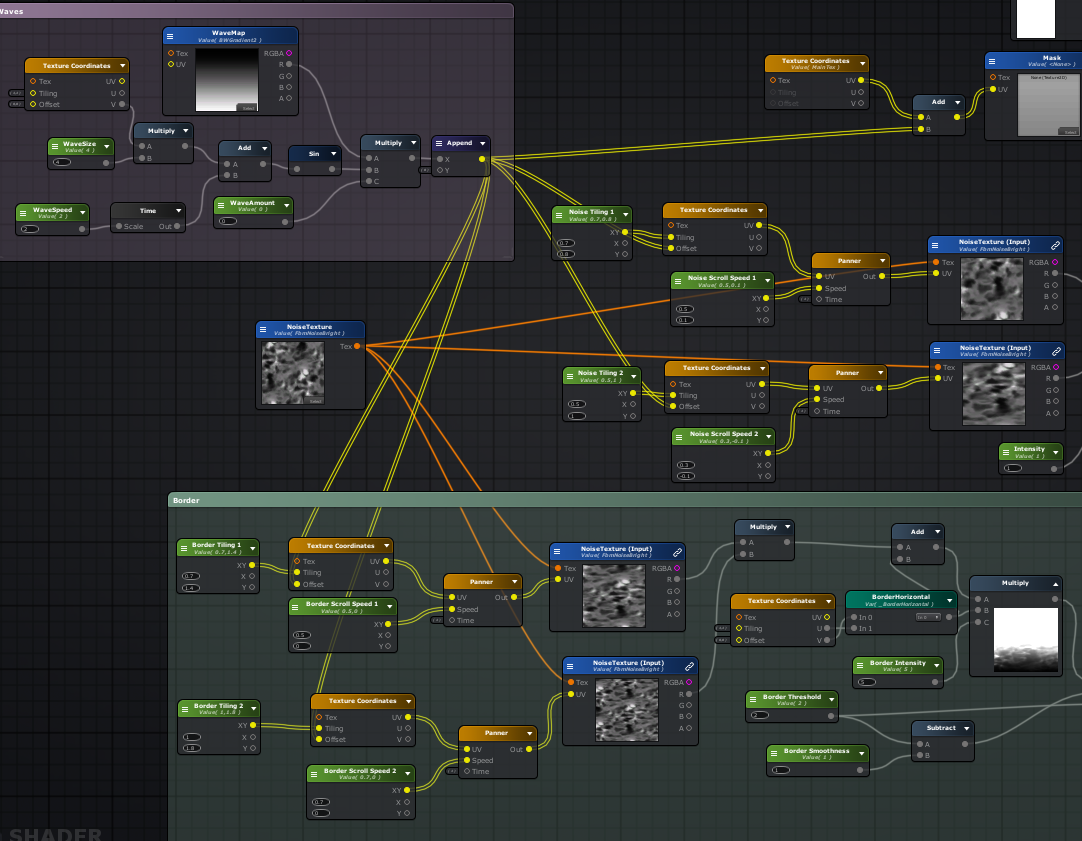
With all of this put together, the final shader looks like this:

(It’s a bit messier than I’d like, but it works!)
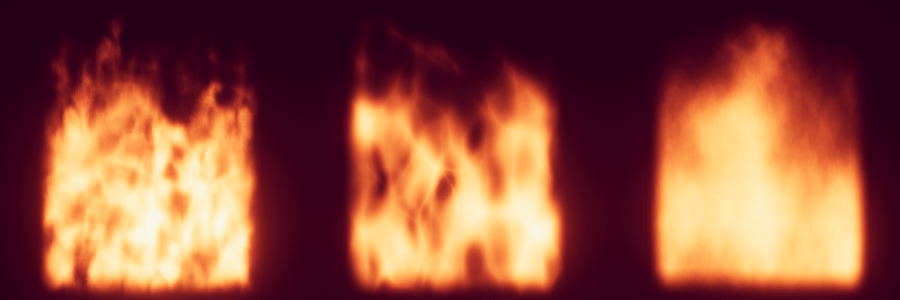
Here’s some more examples using different textures:


That’s it! Even though is a very simple shader, I hope you enjoyed and that it can help someone make their own cool VFX! I’d also love some feedback and suggestions on how this might be improved upon, and I’ll try to answer any questions you guys might have.
Thanks for reading!