I`m glad to share a work what I do for fun recently.
It is a flow trail shader in Unity 2018.2.4.
Amplify shader editor 1.5.8 for shader.
Substance designer 2018 for the texture.
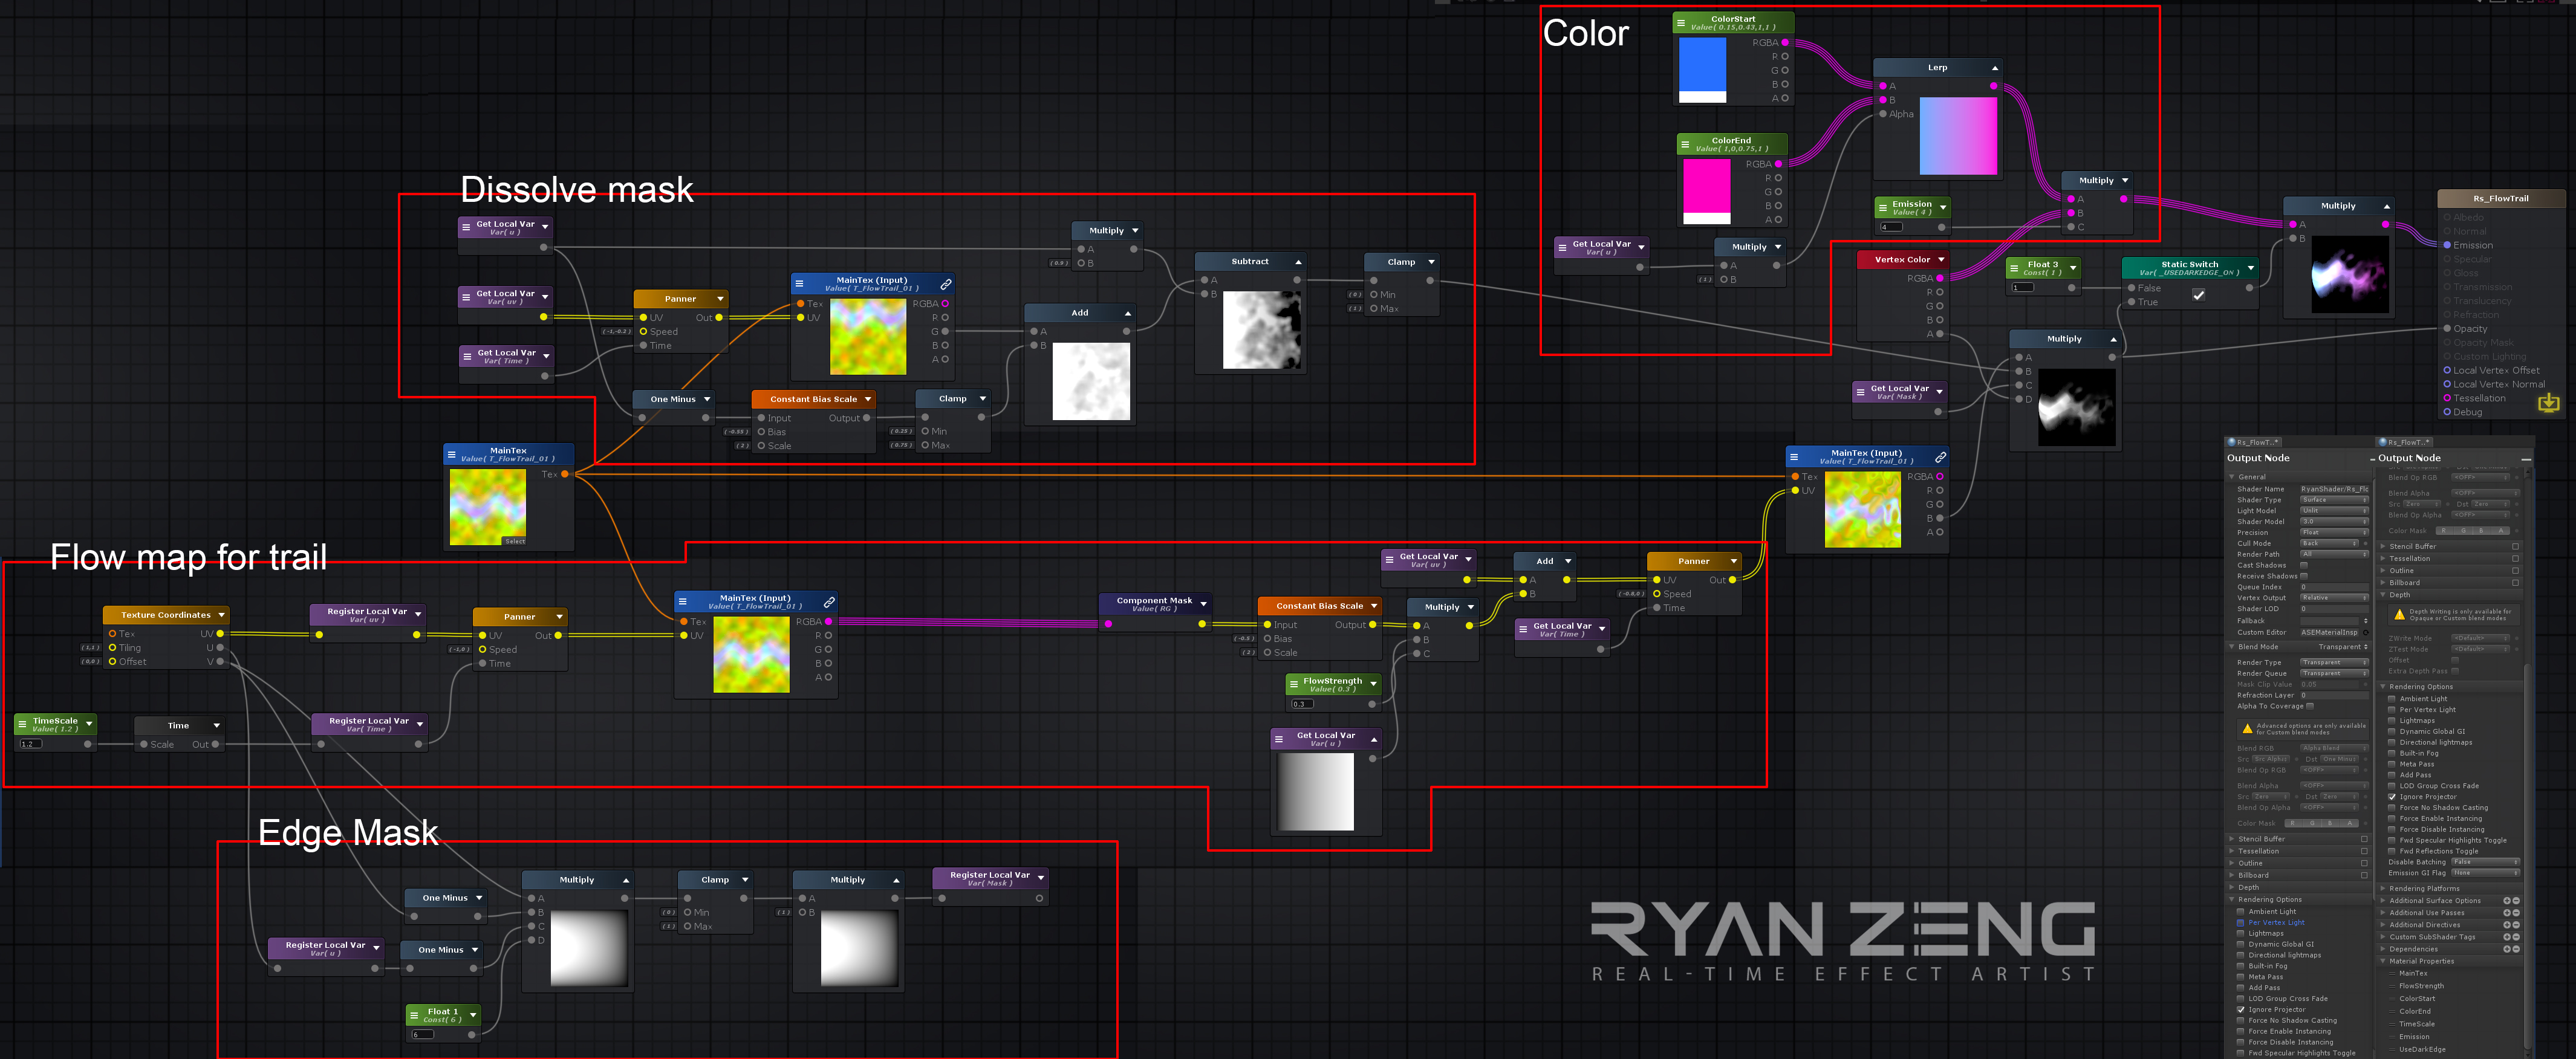
First: Define the main shape what I want for the trail.
Second: The way how to dissolve the shape. So I need a good motion for the mask.
Third : Fill the color.
Final : Optimize the visual. Mask some defect.
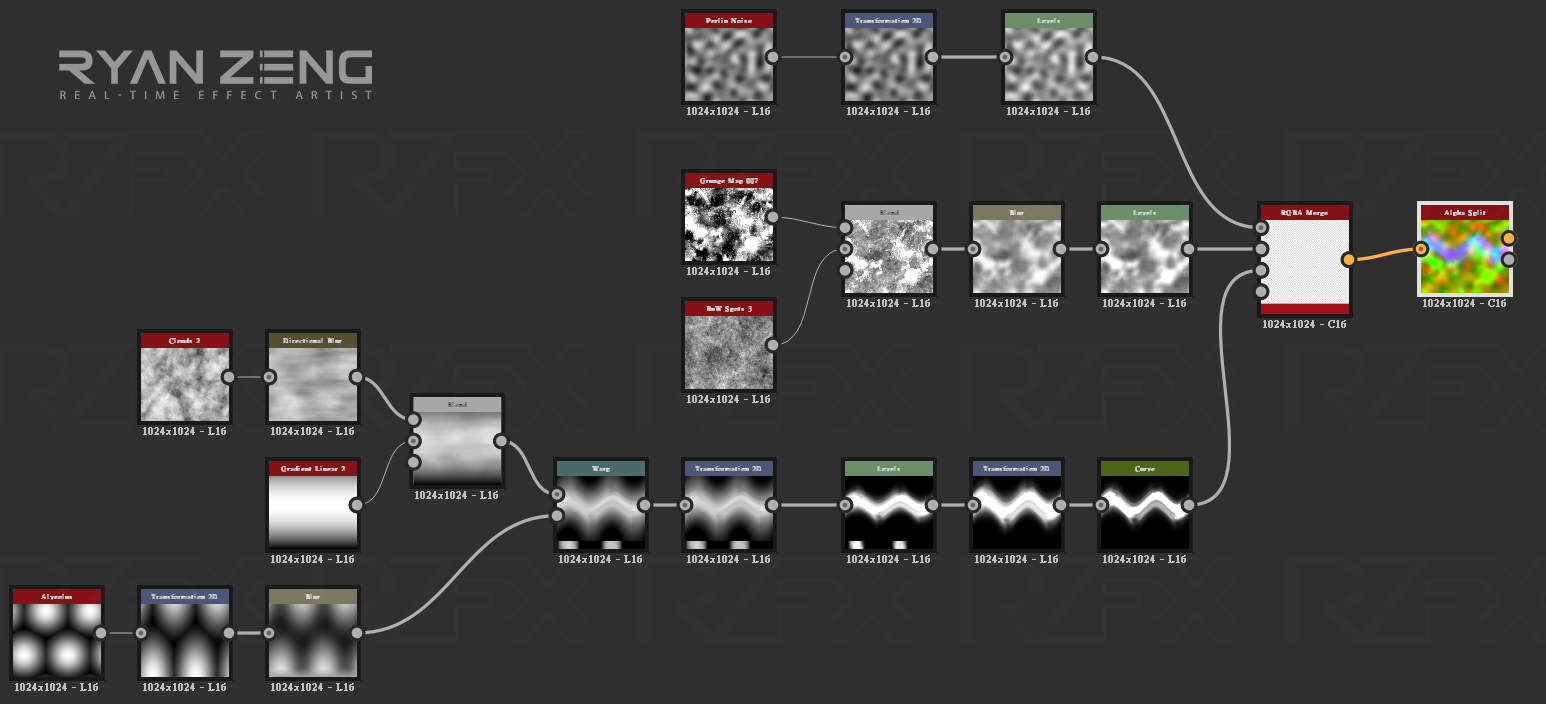
Here is the texture made within Substance designer for the shader.
RG: Work for distort the uv and the end of the trail dissolved.
B: The main shape of trail.
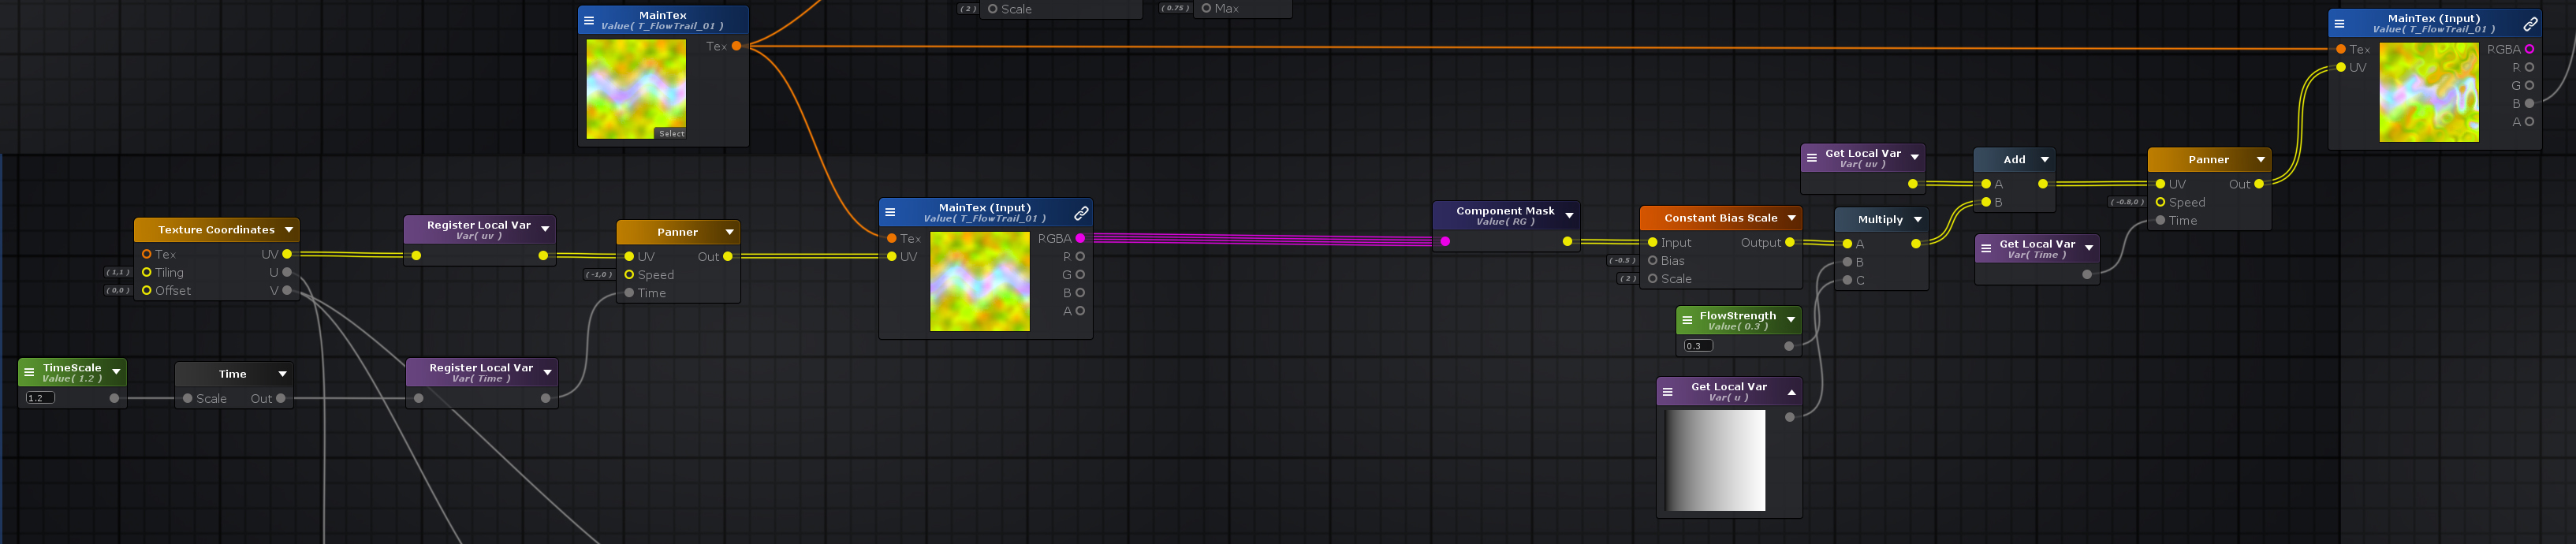
The first step.
Do the main motion of trail. And add a little distort noise at uv coordinate for B channel.
There is a tip that is the node “Constant Bias Scale”.
It remap the value of noise from 0~1 to -1~1. As a result, it will keep the distorted trail at the center.
And I multiply the gradient of U coordinate to keep the shape in the start position and more distortion in the end position. As the result, the shape of trail will be more variety.
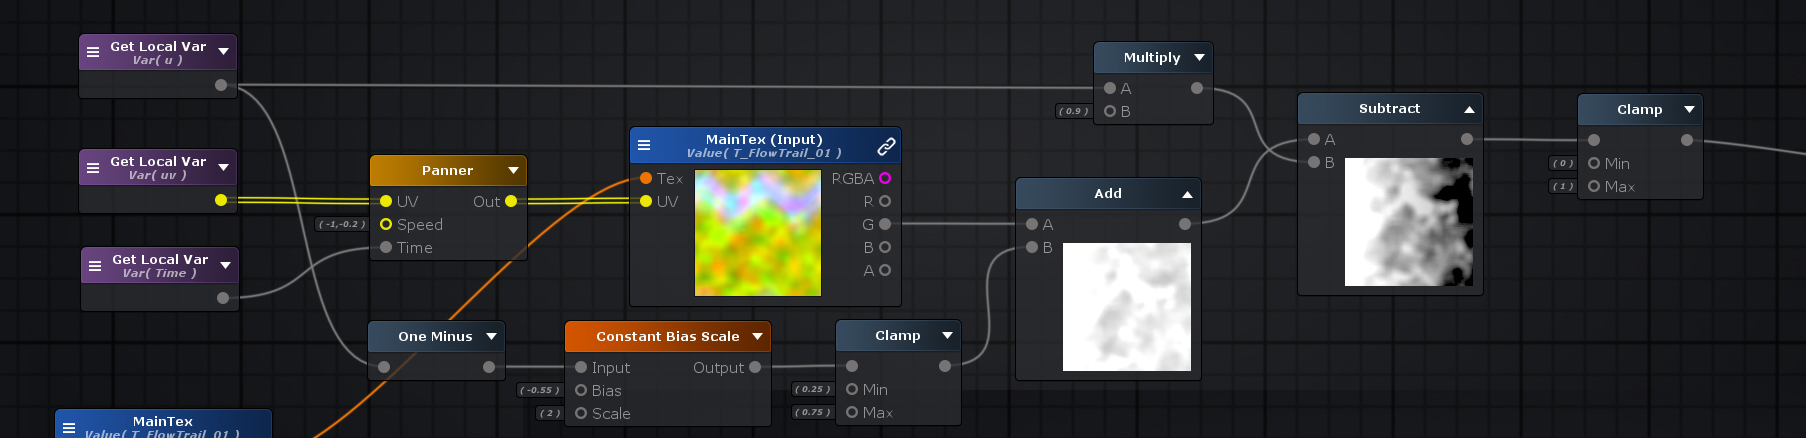
Dissolve mask.
As the trail moving to the end will be dissolved by the noise from G channel.
In order to keep the initial opacity, it add the gradient of U coordinate.
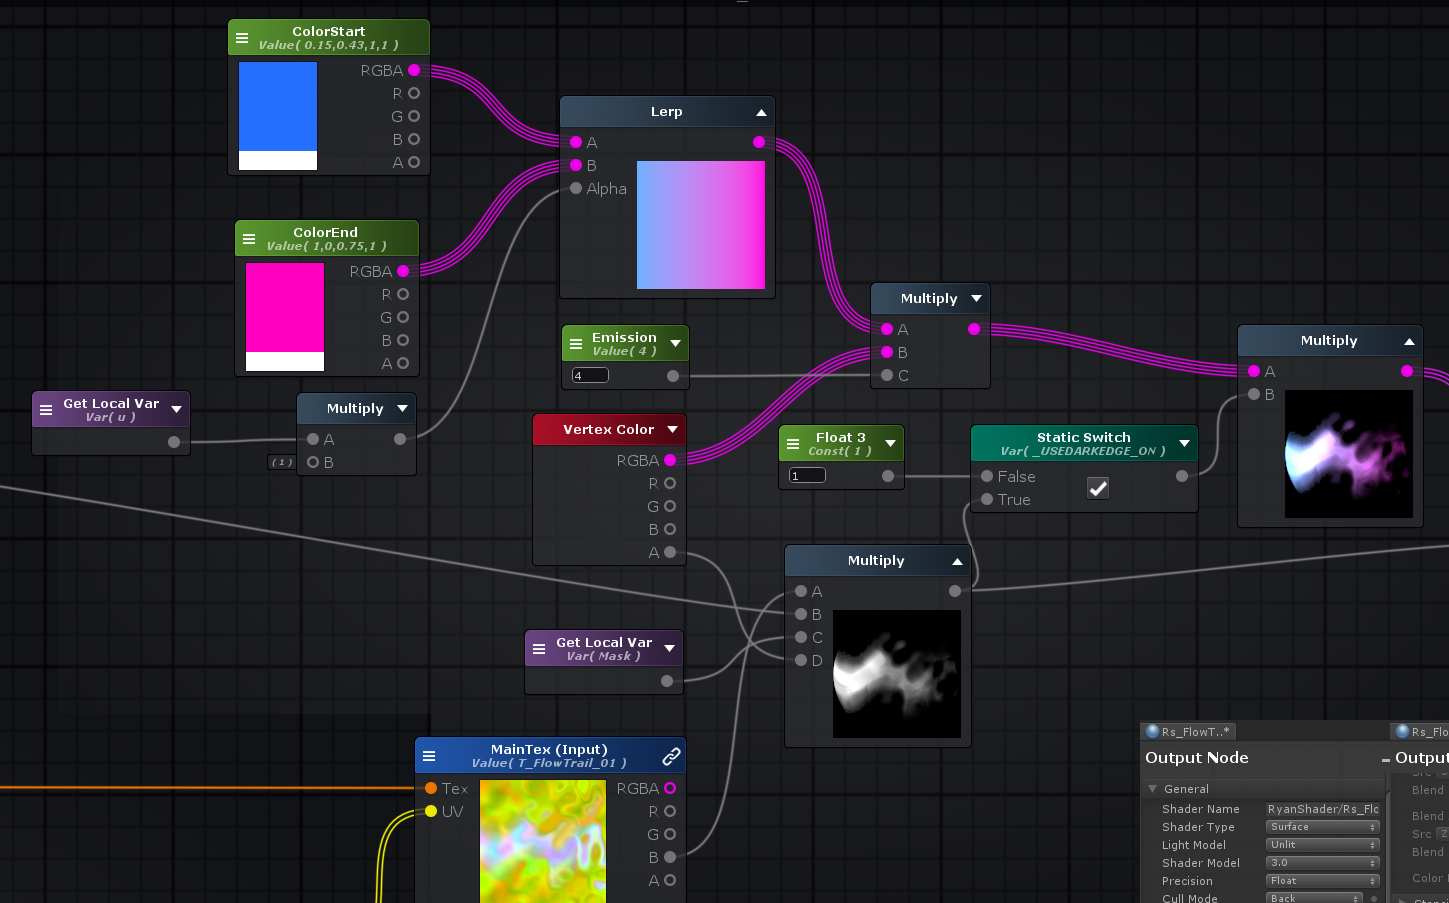
Color.
To fill the two color from start to end. It is filled full size.
If it multiplied the value of opacity, the pixel which less than 1 goes to black.
So, I created a switch to do the dark edge or not.
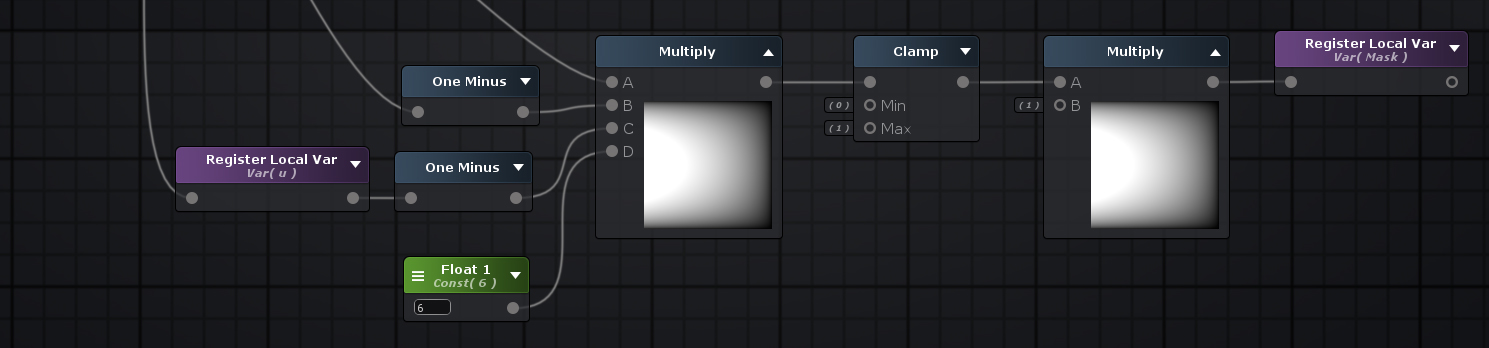
Edge mask.
As the value of “Flow Strength” went over, the trail will move over the area.
So, I need a mask making it to be smooth fade out when it over the edge.
I haven’t used unity particle systems ever (been in proprietary for years), but here is something that might be worth investigating if you are interested.
When building an “Edge Mask”, there are many methods of approach (using texture, using u/v coordinates, using world / local position, distance to a vertex, etc.). Just depends on what your target goal is
If you wanted a consistent trail falloff no matter the length, then you could do something like this:
Get vertex array[]

Locate the target vertex in the array (the vertex that represents the tip of the tail)
	Example:
		array.count = (get the number of segments)*2 >> find last vertex
        // or depending on how the vertices are appended to the array, it may be array[0] (the first vertex)

Get its position
	Example:
		vertPosition = GetVertPosition(array[0]); // there should be a method for this

In the fragment shader get distance from Vertex to all pixel positions in world space
    Example:
		gradient = distance((pixel position world space),vertexPosition);

Divide by a value to control final gradient and clamp
    Example:
		float falloff = 0.5;
		finalGradient = clamp((gradient / falloff), 0.0, 1.0);
I did a quick search in the docs and found a few things that suggests there might be a way to do this in Unity (can’t see why not).
Not sure if this is the right place to drop this, but I didn’t really wanna start a new topic just for this one issue.
I was trying to follow along with what you’ve done here (using unity shader graph so I’ve tried to recreate it as much as I can using similar nodes) but I’ve ran into this issue where the final output material doesn’t move or animate.
But as you can see in the nodes before it those seem to be working just fine.
I’ve tried using 3 different versions of unity (that include shader graph) as well as tried it over 2 different computers but the final result just won’t work. I’m at a loss at this point, so any help would be greatly appreciated
I`m not working with shader graph. I can not sure what is going wrong here.
Do you add the panner value to the B channel? Just like what you done below.
Could you send me the shader graph or more detail snapshot to my mail ( mzranca@gmail.com )?
Thanks for you send me the detail.
I post the result what I remake it within Shader Graph here, and for someone working with Shader graph for reference.
Wish it is helpful.
Cheers.
Awesome breakdown! Not only the exact effect I was trying to make at the moment, but I also learned a few new tricks! For instance I had no idea that you could use UV coordinates as smooth gradient masks… My life is forever changed! Thanks!