Recreating Dig Trail Effect From Ori

Hey everyone, so I’m trying to recreate an effect as close as possible to the following trail from Ori and the Will of the Wisps and I find it quite difficult:
ori_digging

I’m using Unity, my best attempt uses a Trail Renderer with a custom sprite I made in Photopshop:
my_best_attempt.gif
Here is the sprite I used:

This looks like I’m almost there but I can’t figure out how to keep the trail sprite from following the trail head as it moves away. According to this other post it sounds like something similar can be achieved by offsetting the UV’s based on distance travelled but I don’t quite understand how to do that.

I’m new to VFX so any pointer in the right direction would be extremly useful, do you guys think this effect uses a Particle System? A Trail Renderer? A Line Renderer? Any combinaison of the above with a custom Shader?

Thanks!

Edit: directly embeded all images instead of linking to external.

4 Likes

There are 2 main aspects of this effect.

The first, as you noticed, is the keep the trail’s texture from “moving”. As that thread you linked to discusses, this is harder than it sounds and Unity’s trail renderer actively works against you in achieving it. The only real solution is to not use Unity’s trail renderer at all. There aren’t even any assets on the store that I’m aware of that are able to do this properly. I’ve ended up hand writing my own every time I need this, even excellent assets like Ara Trails doesn’t have this option. This is obviously a big issue, but it is what it is.

The second part is the trail mesh is a constant width, and the texture being used is a gradient height map that doesn’t tapper. Instead the trail is fading out the alpha and that alpha is driving a cutoff edge on the height map. It’s a carefully controlled dissolve shader. Something like this:

4 Likes

Thanks for taking the time to answer,

  1. Your first point makes sense, I’ll try to dive into this and write my own Trail Renderer as soon as I get the time, would you advise me to start from the Line Renderer or from scratch?

  2. I don’t quite understand what you mean with the second point? As I understand it, this second point is related to the end of the trail and how it is disapearing, right? Seems to me like reducing the width of the trail + fading out the alpha color is sufficient, isn’t it?

  3. An other question came to me, do you think the sprite I linked is enough to reproduce this effect or do I need a sprite that tiles perfectly when repeated back to back? If I manage to implement 1) I don’t quite see how this can work if the texture doesn’t perfectly repeat, is that correct?

As a side note, I wanted to thank you @bgolus because I keep stumbling upon your answers on the unity forums about Shaders and VFX and it’s been an incredible help. By answering to all those posts you’ve helped countless Unity developers and you absolutely deserve to be thanked for!

1 Like

The problem is you need absolute control over the UVs, and you need them to be stable once a point in the trail has been emitted. Both Unity’s trail and line renderer suffer from the same problem that the UVs are recalculated every time the points change, and not always in ways you can easily guess. This means you can’t use the line renderer either, since the UVs may shift / warp when you add and remove points in ways you can’t counter. So yes, you have to do it fully from scratch, keeping your own list of points and generating your own mesh.

You could reduce the width of the trail and fade it out, but that won’t produce the same effect as what Ori is doing.

Here are some quick photoshop mockup examples.
Trail size & alpha would look like this:
image
That’s using a trail texture that looks like this:
image
I’m warping the texture down to a point, similar to what shrinking a trail would do, and them multiplying by a gradient.

A constant size trail and using a “dissolve” style shader would look like this:
image
That’s using a trail texture that looks like this:
image
It’s produced by taking the texture above, and using a linear precise inner glow in Photoshop, and then subtracting a gradient from it and increasing the contrast.

As you can see, the two are very different, with the dissolve style shader looking more like a tunnel that’s filling in vs one that’s shrinking and fading out.

Nope, needs to be a repeating texture like what I posted above.

7 Likes

Thank you very much for this extremely detailed answer. I’ll work on it using your hints and hopefully I’ll come back here later to post a complete solution.

Edit: This proved harder than I expected and I decided to stop working on this for now. If anyone comes up with a solution, let us know.

This appear on my feed and I am quite interested honestly!

So the key points here are:

  • The ‘squiggly texture’ must not move along with the trail
  • The trail shrink based on the squiggly texture
  • The trail has rough edges

Now, I must preface that I am not a technical art expert, but I love figuring out ways to work around things in the easiest way possible. In this case, I think that we could use World Position for texture’s UV.
Unless you add something to it, World Position will cause the texture to be projected onto the ‘world’ and not the object. With it, the trail’s UV no longer affect the texture as the trail moves or stretch.

Here is my attempt:

Dig

Pros:

  • Completely Shader Graph based. Once all the nodes are in place then it is pretty much done. You just have to adjust the parameters.
  • Relies only on Shader Graph material and texture. No coding required.

Cons:

  • The ‘pattern’ could feel repeated .
  • Needs a lot of adjustments in the material.
  • Not very precise.

Now, how do I make this?

Preparation

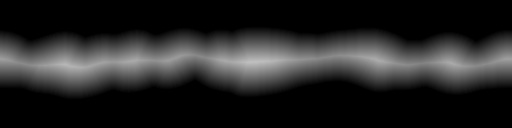
You will need a seamless horizontal straight line.

T_hologramLine

It must be straight because the trail UV being constantly generated and regenerated will distort or ‘move’ any shape that is not a simple horizontal line.

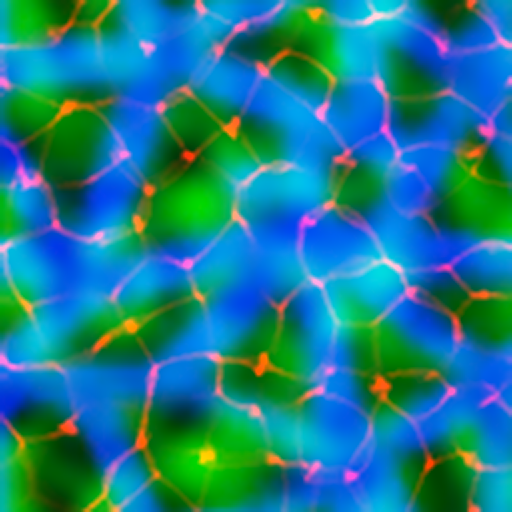
You also need some noise texture. Here are some I use:

T_NoisesPack01

Now onto the Shader Graph part! :hugs:

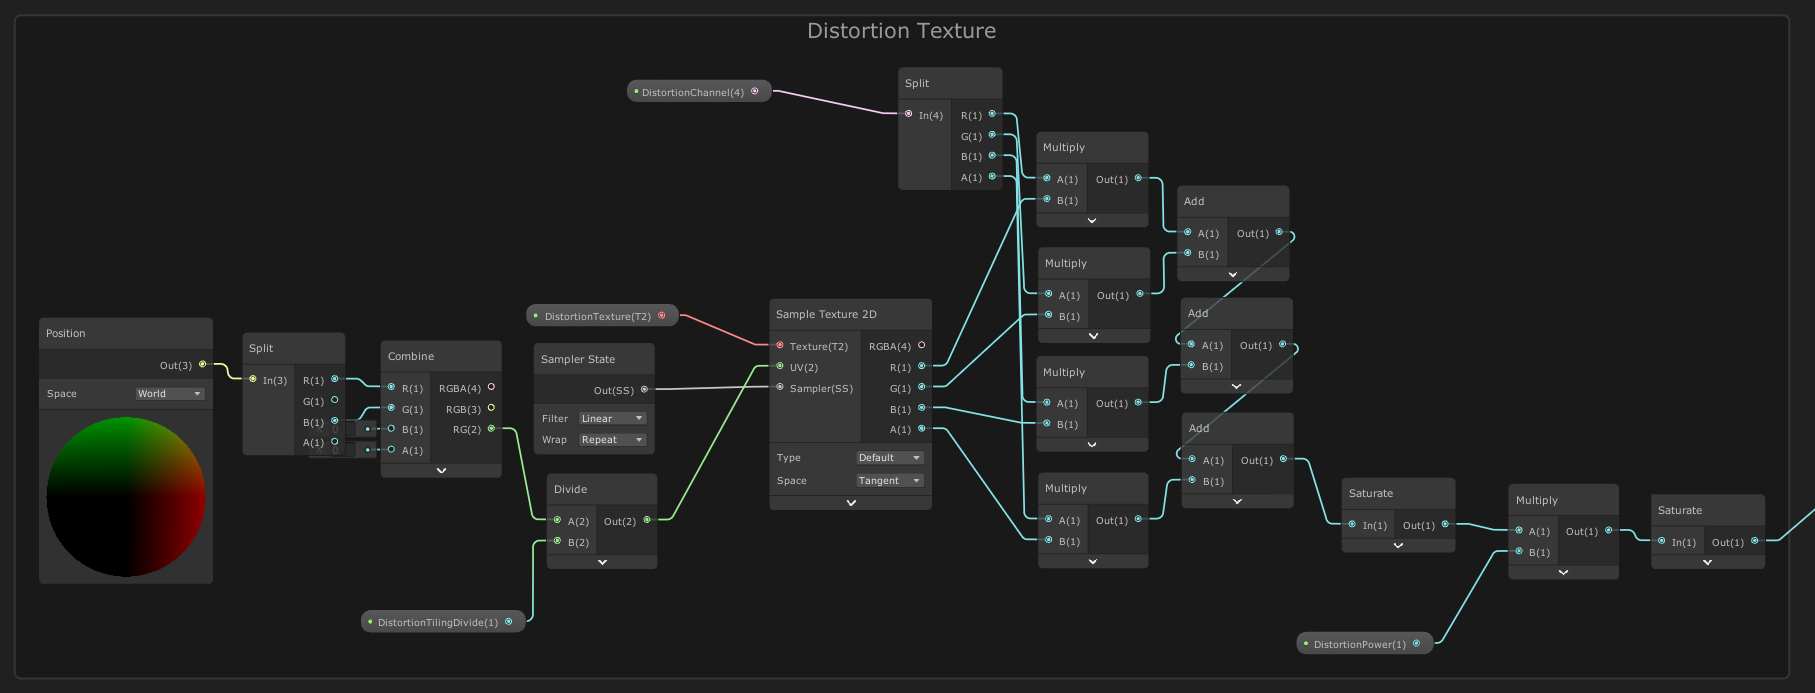
Note: Because I use texture with RGB channels storing different texture, I created a simple graph to extract each channel for uses. You don’t have to do it if you are not planning to use this type of RGB texture.
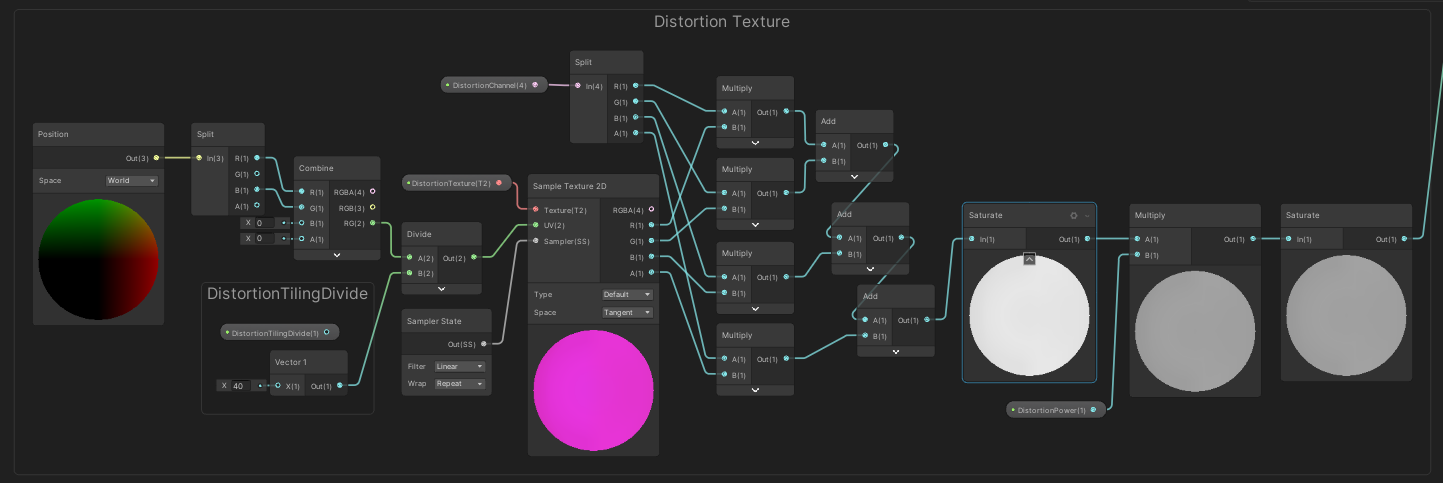
Distortion Texture

If you ‘add’ a texture to UV, it will distort the UV and thus distort the texture using that UV. Here we prepare the texture that we will use to distort the UV of the line.

It is important to use World Position as an input for Sample Texture’s UV. We will divide it before plugging it into Sample Texture 2D, otherwise the texture would be a veryyyyyyyyy small tiles. The more you divide it, the larger it gets.

Also important; you should multiply the texture you got with a fraction (like 0.5) before plugging it in the next step, because the ‘brighter’ the Distortion texture, the more distorted the trail will be to the point it looks more like a broken trail with holes and stuff. I suggest making the multiplier a parameter, so that you can control how distorted you would like.
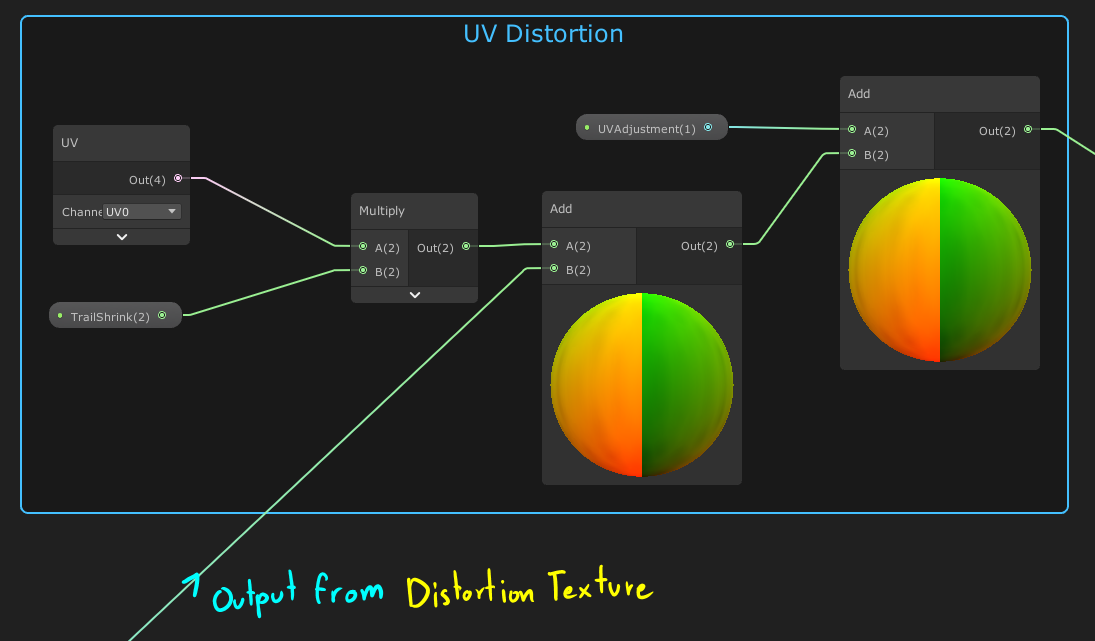
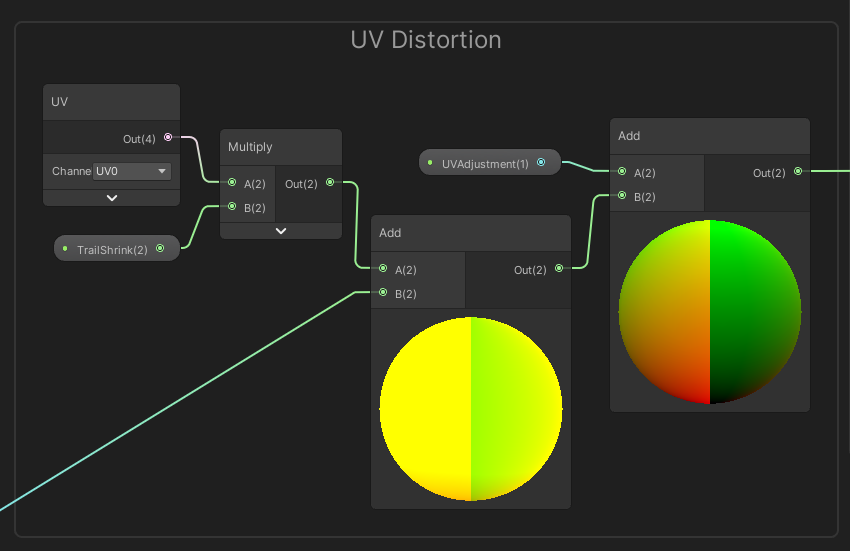
UV Distortion

Once we get an output from Distortion Texture, you can add it to UV. Now, once you did it, the trail will move off center because adding value to UV moves the texture, so we have to have another add or subtract node for ‘post-distortion’ adjustment.

(The TrailShrink part is not really necessary. I use Clamp as trail texture’s Sampler State to not make it tile once it distorted and other tile ‘spill over’. The byproduct is that if you multiply the UV of Clamped texture, it will shrink. The TrailShrink is then created to see if I can shrink the trail texture down for more room for distortion. It does not make much difference in the end but still mildly useful.)
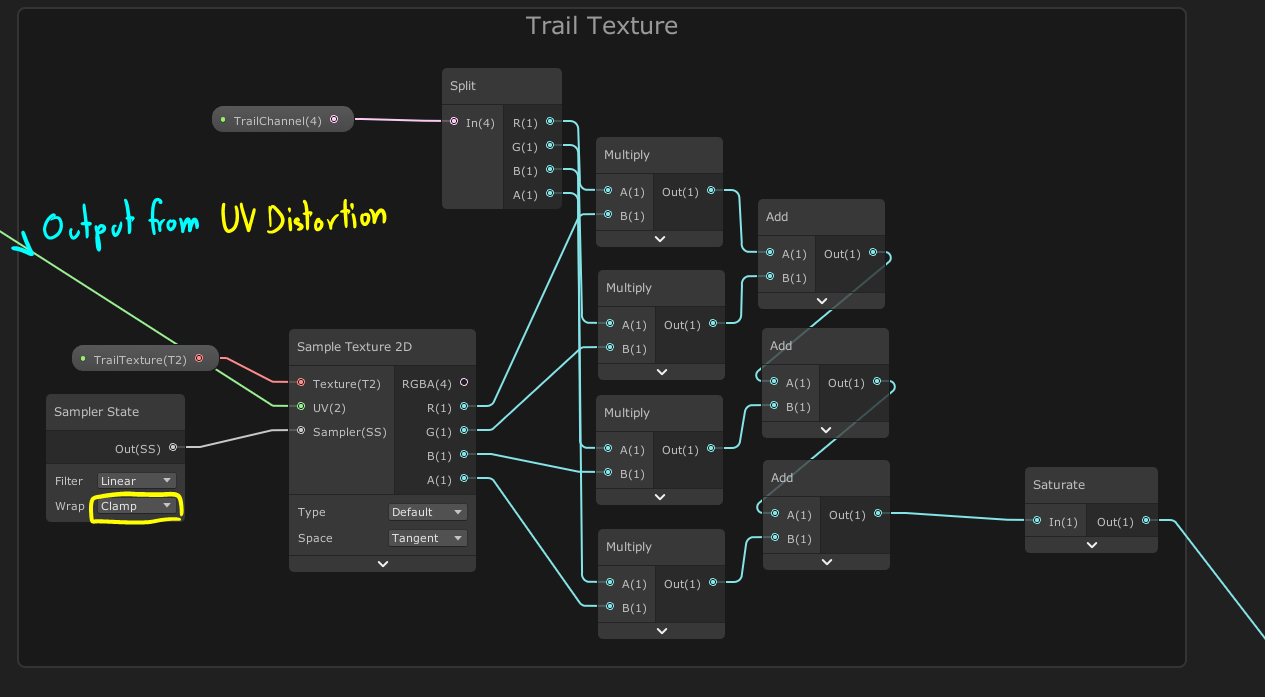
Trail Texture

Now we have the distorted UV! Plug it into trail texture’s UV socket and that’s it.

Oh and as I mentioned, don’t forget to use Clamp for Sampler State to prevent the distorted ‘tile’ from spilling from top and bottom.

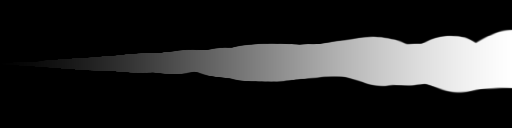
Now we got the squiggly trail!

Texture Reduction Based on Vertex Color’s Alpha (TRBoVCA)

A minor problem here is that if you just make the size of trail (from emitter) reduce over time, the trail texture will get ‘squeezed’ and lose its squiggly quality, So instead we will shrink the trail using its vertex’s alpha, in tandem with ‘corroding’ the trail texture!

So the basis of this setup is that, the more transparent the tip of the trail is (the closer Alpha is to 0), the more ‘eaten away’ the trail texture is (via the texture slowly getting subtracted), causing it to shrink as the Alpha approaches 0.

Now, we plug it into another Lerp (in pink). This is to be used for the corrosion below. The value here can be adjusted to your liking. The higher the B, the bolder the trail. The higher the A, more eaten away the trail, etc. I should make these two parameters but oh well.
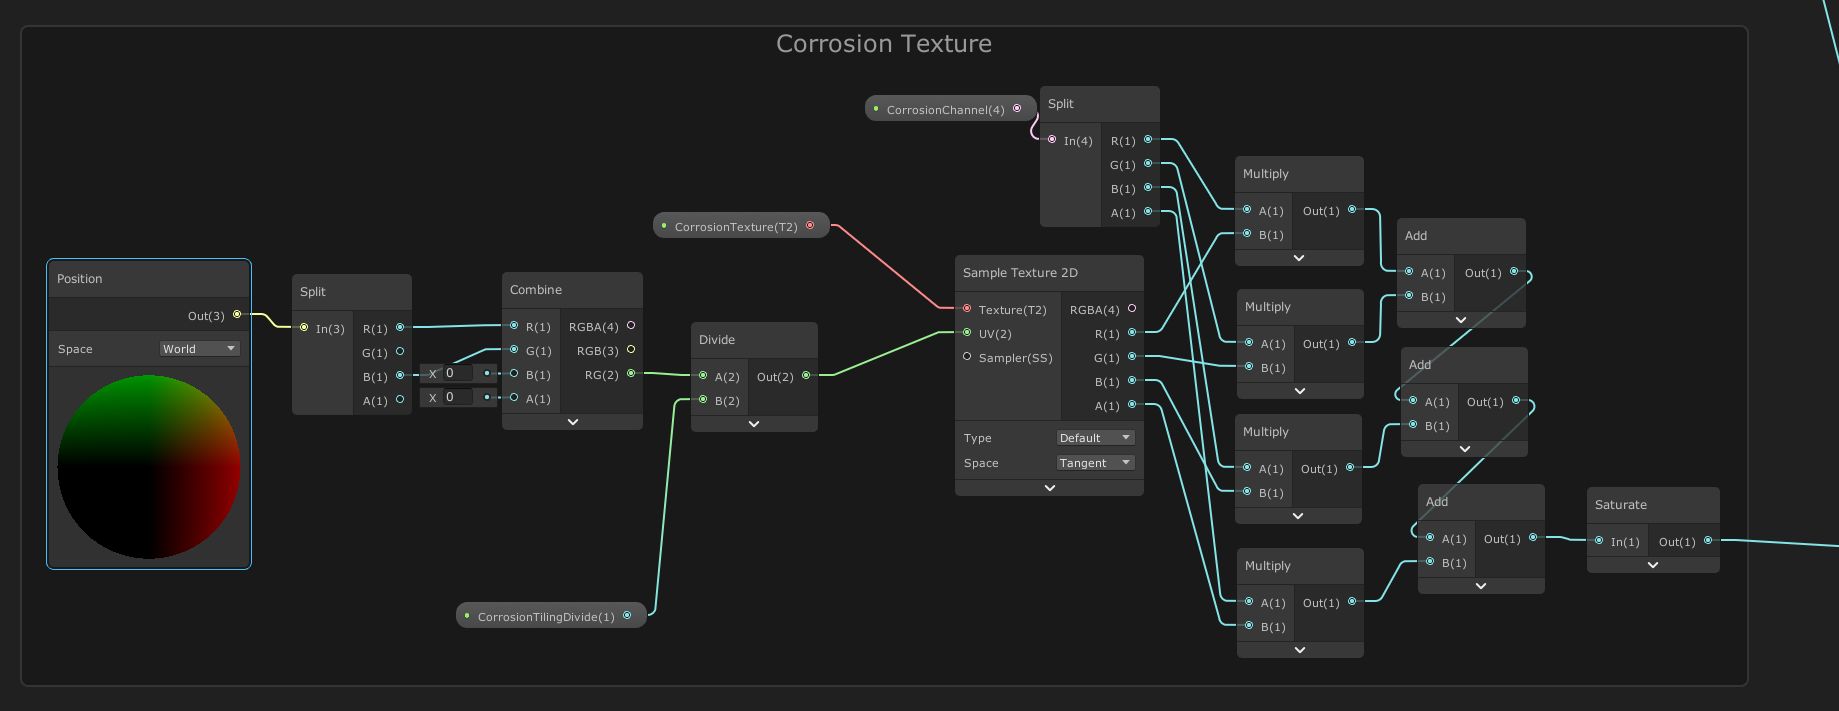
Corrosion Texture

The basic World Position texture setup like the Distortion Texture above. Uses different parameter though.
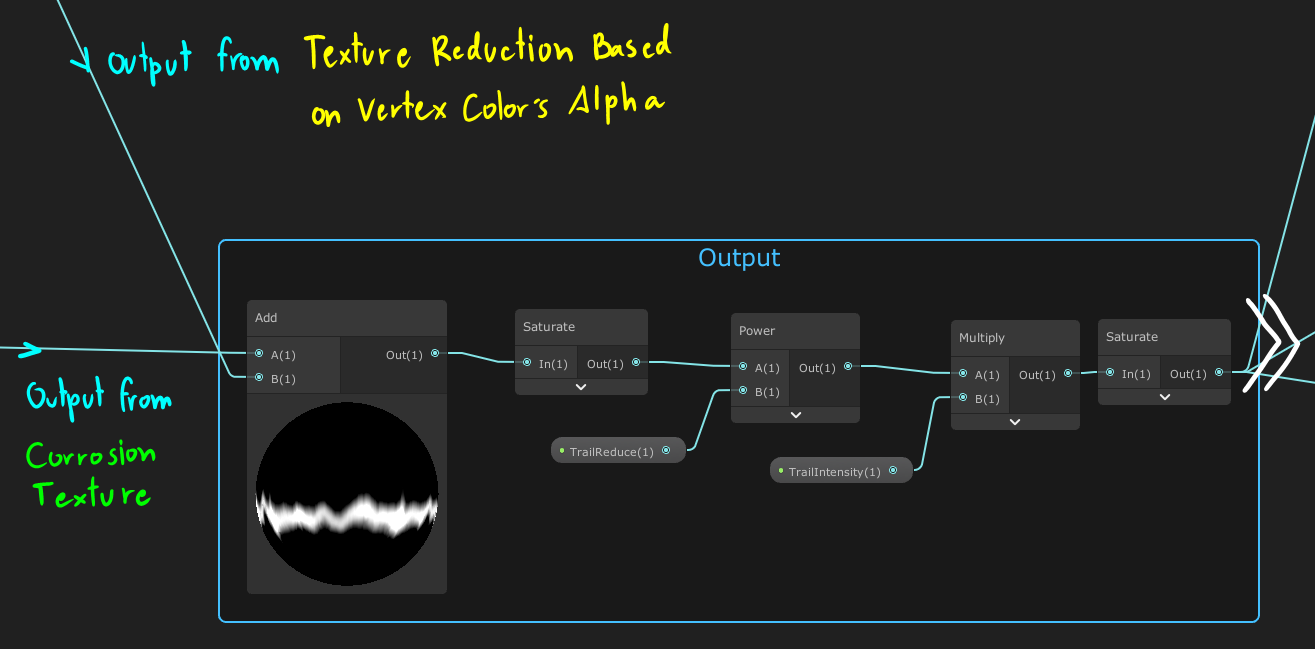
Output

The final part! (Well not really, under circumstances). We apply the corrosion like in the TRBoVCA (The closer to 0/black the part of the texture, the more it is subtracted, corroded) step above but this time, we also apply texture to it. This basically tell the shader that hey, the closer to 0/black the trail texture is, the more the trail got eaten by this corrosion texture. This creates a rough edges on the trail as its texture got eaten away before eventually fades away

Oh, the Power node is there to make the dark part darker, this making the corrosion stronger. The multiply is there to make the trail bolder and not soft. You can switched the multiple for a Round node, but I would like my trail to still have a certain softness to it.

Now we got the ‘output’! You can simply plug it into Shader’s alpha and uses Vertex Color’s RGB to color it, or use it to make gradient map. whatever you want

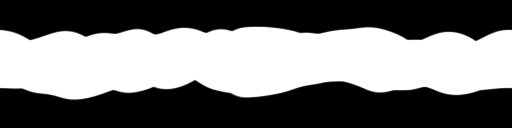
However, as I said, the distortion is fairly hard to control and predict. If you want just a rough edges like this:

Dig_Simple

Then you can just not do the Distortion Texture and UV Distortion part. Leave the UV for Sample Texture of Trail Texture blank, but keep the Clamp Sampler State!

Now, this method is not perfect and could use improvements, but I think it could be used fairly competently as a ‘ground dug up trail’ combined with some particle effect.

Also note that noise textures play a very important part, so experiment with different noises and find the one you like most!

Hope this help!

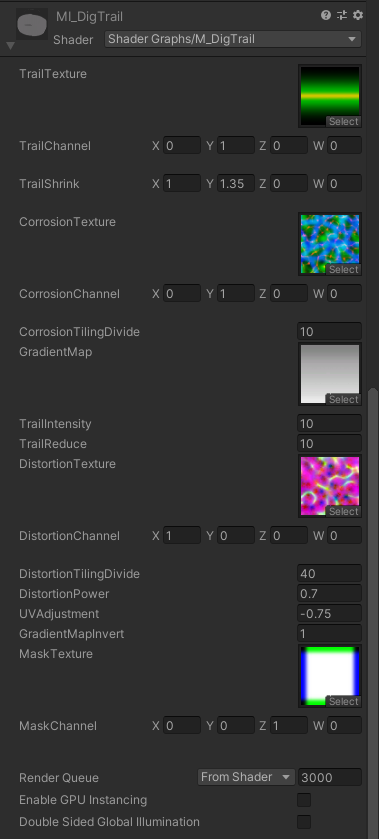
PS: My Trail and Material setup
  • Trail material has some additional nodes in the shader, but really just for cosmetic reasons.
  • I did shrink my trail tip, but it is just my preference really. You can play around with how the trail fade in trail color and don’t have to shrink the trail tip at all

18 Likes

Really cool solution @Kassyndra, thanks for sharing it!

However, I tried to implement your shader graph using the textures you linked, but I can’t quite get the same look as you. I must have missed something. Here’s what mine looks like (using all the same parameters you put in your last couple screenshots): nn

First things first, could it be the import setting on the textures? I left them all as default:

As for the graph, I noticed there is some discrepancy between mine and yours on the UV Distortion group (both Add nodes visuals looks different from yours):


This leads me to believe that the issue comes from the previous group (Distortion Texture), however it’s a bit difficult for me to pin-point exactly what’s wrong since I can’t see the visual output of those nodes on your graph, here’s mine if it helps:

Note that it’s a bit better when I decrease the DistortionTilingDivide parameter from 40 to 10:
nn_2

Any ideas?

Thanks again for your detailed solution above!

1 Like

Sorry for the late reply! (Been busy w/ life), but basically the smaller DistortionTilingDivide is, the more ‘tiled’ the texture is (it’s reversed with Multiply).

Your graph looks okay and the texture has no problem, so I think the thing left is tinkering with numbers. A lot of thing can affect them, majorly the scale of the world.

1 Like

Sounds good, I’ll get back to it and tinker with numbers when I get a chance. Thanks for your reply.

Hi,
Sorry just an off topic question.Do you think something like this is viable for a mobile game?Hows the performance do you think?
(Sorry idk who to ask, was looking for something like this for my mobile game)