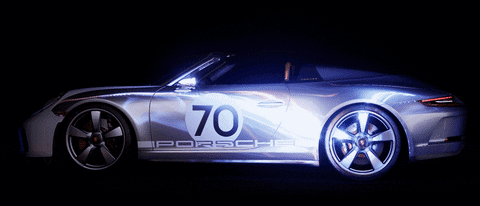
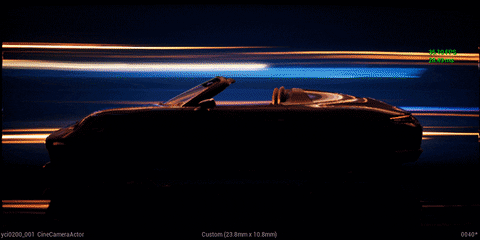
In 2018 I helped on “The Speed of Light” project, a collaboration between Nvidia, Porsche, and Epic. The realtime piece was used to highlight the upcoming RTX hardware from Nvidia, as well as the 50th anniversary 911 Speedster Concept. The piece was showcased on stage at Siggraph 2018 iirc.
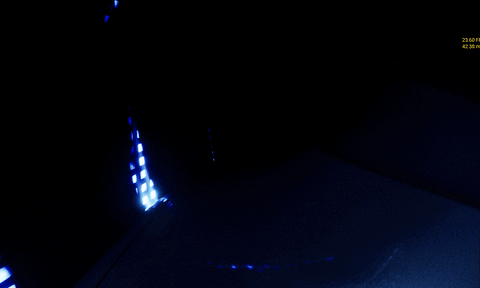
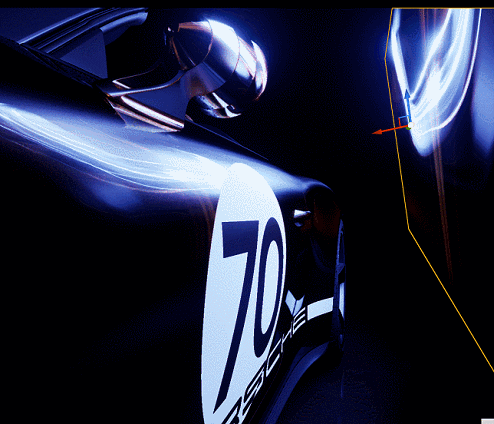
I was responsible for all of the abstract lighting used on the car, as well as the intro “birth of light” section. Below a set of random gifs I have during the r&d process of giving the car highlights from bounce cards that emitted light.
And of course, the final piece. Credit to the entire team here at Epic that I worked on this with.
Way, way back in the day of starting at Epic. I had been pulled in at the last minute to help with a few shots for the now shuttered Paragon (release cinematic). Back then I was really big into the vertex animation tool, which allows us to animate static meshes through the vertex shader (credit to Jon Lindquist). I used this for the muzzle flash for Twin Blast (what a sill name).
To see the motion and my setup a little more clearly, here’s a gif showing the simple rig I made in Maya.
If you want to learn more about the vertex animation tool and how I used it in the early days of Fortnite, watch my GDC talk below
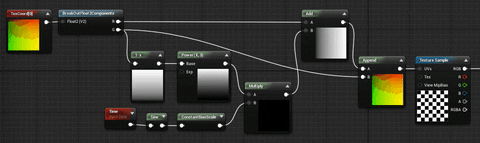
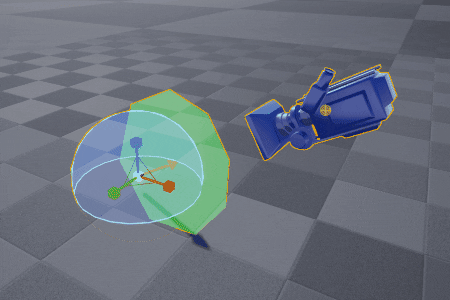
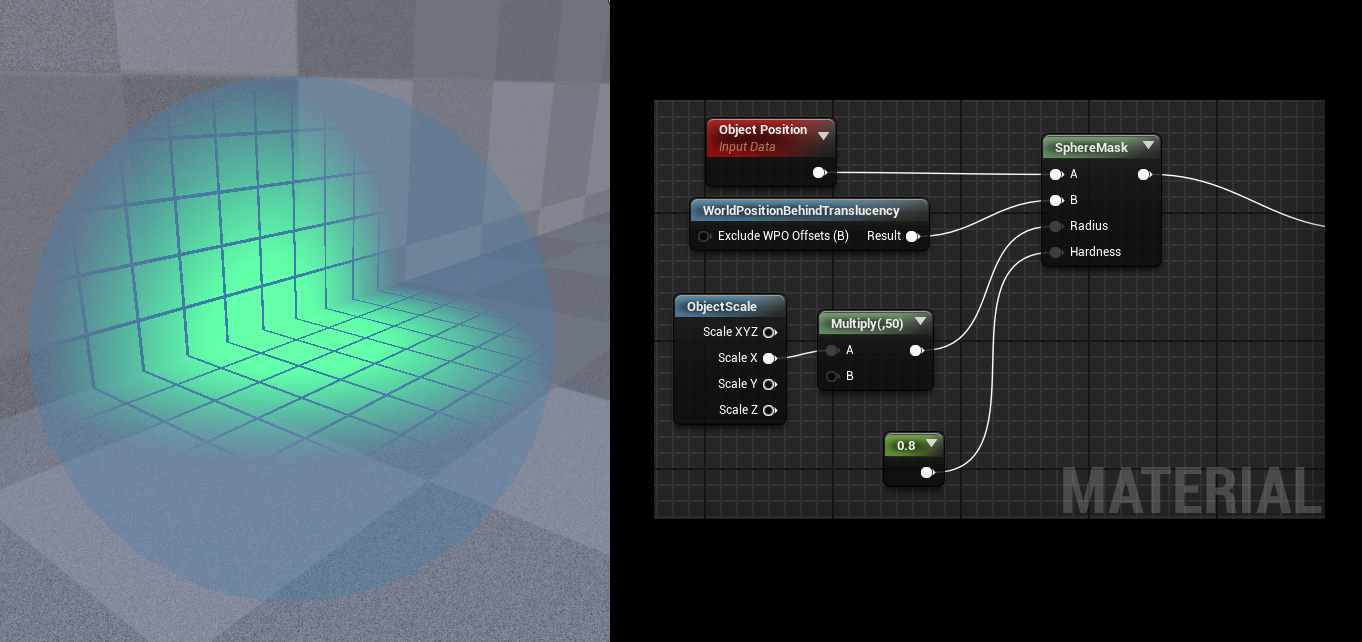
Another tip of utilizing translucent objects to enhance things like screens. This octagon rotates its verts inside the material to always be camera facing. It has a built in sphere mask for a simple glow that can fake a simple ambient haze. However you can also create a spherical radius to create a fake lighting model in the same mesh. You can create a vector from the octagon to the camera, and multiply that against your radius to push the verts toward you. You can then measure distance from world position behind translucency to the center point of the mesh to create a lighting falloff.
To create a simple lighting model, create a vector from the surface point to the center point of the mesh, normalize it, and then use that result to do a dot product against the surface normal. You can see as the plane moves, it illuminates the surface with it.
Edit: Also at the end you can see that as the camera orbits around and the screen is completely occluded, the glow fades. To achieve this, you can use something like the forward vector of the mesh and dot that against the camera directional vector. You just need to make sure the mesh is oriented properly to the screen.
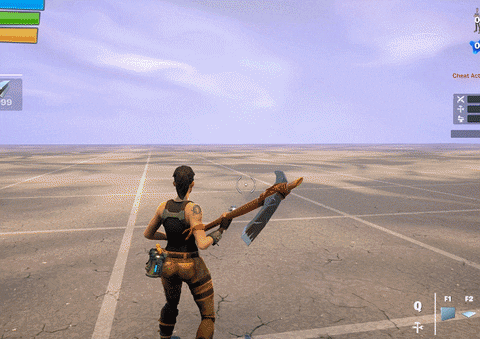
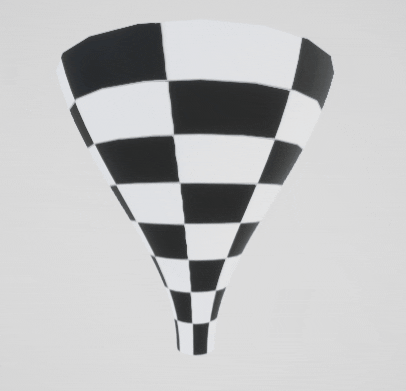
Sometime in 2018 (I think), I was pulled to help on one of the BR events. I was mainly responsible for the swirling vortex around the floating island. One of the neater things about the vortex is that all of the twisting, rotation, and stretching is completely driven by the material. This means you can quickly change any of these parameters on the fly.
Remember that a standard UV set is just two independent gradients on X & Y. One of the tricks I’ve done is adding back in one of the gradients into the other. If your mesh has neatly laid out UVs that repeat seamlessly, you can create you own twisting.
To help break any confusion on what the nodes are doing: The 1-x is just flipping the twist direction, so that the top gets twisted. The power expression is changing the falloff of the gradient so you get more gradual twisting. Adjust this to taste. And the sine wave is just a 0-1 scalar to help show the twist turn on and off.
In the in-game example, I imagine the vortex appears to continuously swirl around clockwise forever. When you replace the sine wave in the material with something to control the twist manually, how do you get it to feel like it’s continuously looping without twisting it into something really skewed? If that makes sense.
Yup @Niels is correct. The amount of twist in the UVs is constant in this example. We not only pan the textures though, but in the material we also rotate the entire mesh through world position offset. Since the mesh used in the game isn’t a smooth cone like my checkerboard example, it helps make the edges feel alive and undulating.
This is very interesting, but I struggle to understand it correctly!
I get the camera-facing octagon and the spheremask for haze, but I don’t understand how you get that fake lighting on the robot mesh? Is this entirely done in the octagon material? Why do you need to “push the verts toward you”? Do you mean the octagon verts?
Hey Bill!
Welcome to the forums. Not only are you a talented artist, but you are also a wonderful teacher. I’ve always enjoyed listening to your lectures because they are so well thought out and inclusive. Looking forward to spending more time collaborating together.
Yes the fake lighting model is done entirely in the material. I made a little gif that will hopefully help you understand the setup with some simple outlines.
The blue spherical volume represents the light’s radius in world space. The arrow in the middle in the vector from the center of the light to the camera.
Since the simple lighting model is rendering behind the translucent octagon sprite, we need to make sure its always on the outside of the spherical radius. As the radius changes in size, the octagon pushes away as well as scales larger to accommodate. At a certain point this becomes less and less of a savings the larger it gets, but this is great for small details like screens, beacons, etc etc.
Love your work Bill! Used to watch the imbueFX videos as well when I was starting out in FX.
I wanted to ask about that transition effect on the ground that you made for the Fortnite custom mode. I saw you talking about it a bit in the Math for Artist video, but I don’t understand exactly how the entire thing functions? I assume a Blueprint drives the values, but what kind of values exactly?
This is really awesome! Is there any more information you can offer for someone that doesn’t understand derivatives and doesn’t have a Daniel Wright at hand?
Is it using DDX / DDY? If so, what does it calculate the derivatives from with those nodes? And how do they combine to yield the exponent used for the fresnel?
Thanks Bill, I get it! This is very clever!
So from what I understand, the WorldPositionBehindTransluency can really help you fake a lot of things on a material, your approach seem close to this example: