I have recently been following this awesome talk by Eben Cook on this threshold animation for the blood effects he did in The Last of Us. I have followed it up to the point he talks about generating the normals but after that i am a little unsure of exactly whats going on. He generated a base normal from the threshold map with crazy bump. He is also generated some sort of gradient map based on the threshold and combining the gradient map with the normals in some way to get the final result.
Can anyone elaborate more on what exactly the shader is doing? The functions and math steps that are going on to combine the base normal with the gradients in order to get the final result.
Also, what is the purpose to having multiple colors in the gradient map? Is the gradient texture being generated on the fly by the shader or is it something that is authored by the artist?
Lastly, is the “final” normal being generated by the shader, or is all this an offline process that is authored by the artist? He did mention that they do the blending in the shader, but im unsure as to exactly what he means. (type of blending?)
Any insight would be greatly appreciated!
Thanks,
Caleb
P.S. Here is the gdc talk im referring to. Thanks to Eben Cook for sharing this awesome technique!
Hi @cEssex Without re-watching the video and from what I remember of how they set up the threshold, I’d say you could have two three light rigs set up for your simulation. One for the overall lighting, and the other two for the red and green channels of your normal map (left and top I believe? there’s a few posts on light rig setup for normals on here somewhere). With all of that you could render out your three passes, then pack your directional lit renders in the respective Red and Green channels of your texture, stacking them in the same fashion that they stacked the diffuse for the threshold. I can’t remember if they used an alpha channel off the top of my head, but that would give you a RGBA texture, which you could combine your two light channels to make a normal map inside of the material and have it step through the thresholding the same way you would your mask and diffuse.
I’ll look over the video after work and see if I can’t return with a better answer than this later. If you have any question about my explanation, let me know
I believe he’s asking about the normal map contraction math. A response curve was set up to build the normal map on the fly from a height map. You could do the same thing with a distance field, but you need to know what “inside” and “outside” are. This is the part where cEssex and I are confused. Well, I’m probably slightly more confused in that I haven’t gotten past making a valid “contraction fluid.”
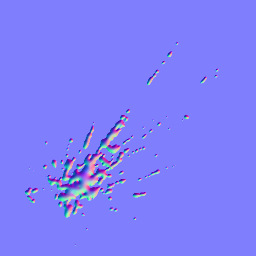
Im not sure about bifrost but i managed to do it with only realflow and skip the houdini step that eben used. I took a paint splat texture (textures.com) which looked like a good initial frame, cleaned it up in photoshop a bit and then brought that into realflow as a bitmap emitter. I set the particle speed to 0 and gave it a bit of volume. For my fluid settings i set the internal pressure to 0. This will stop the particles from colliding with themselves and the surface tension and external pressure will just push the particles together, causing them to form strands, and then globs.
Im not sure if bifrost has a similar setting to the int/ext pressure. If so, you might be able to use the same method.
I don’t know how Eben does it, but the way I generate normals for threshold maps is by sampling the “heightfield” around the pixel and combine. So you grab a pixel p pixels away to the left, the one on the right. Subtract one from the other and you have your R value. Do the same for Y/G and add a constant as B. Done. Works a charm
You can see it working quite well on the drops on the ground in this video:
(Don’t mind the tentacles, it was a weird experiment )
Yeah I’m also interested, I couldn’t make sense of it either. I made myself a lil tool in substance to generate the threshold map and normals too, but then I don’t know how to animate this normal map like Eben does.
Quick and dirty GIF showing the result of the technique I described above. This is using only one channel of a texture. No prebaked normals or anything. You could fit 4 of these in an RGBA. It’s not perfect, but for something as quick as blood, it’s often enough
That normal map doesn’t appear to support the wide open areas contracting the way that his does.
Also, he creates his normal map by blending between the actual normals and uses the slope of the brightness to define the regions.
The technique in that talk reminds me of the technique Guerilla used in Killzone 3 for the stealth effect, though the idea of using a normalized 2d vector is great. Means you just need a single RGB texture to do everything (plus the lookup texture for the edges, and the screen texture for the fresnel stuff).
I used that technique for MNC’s fodder taking damage over time to add scratches and pock marks to their surface. Super useful. Doing it with texture derivatives or multiple offset samples makes a bit more sense today as you’ve got a ton of ALU to spare, where the PS3 was a bit more restricted so a texture made more sense for Last of Us
True, now that I’m reading it again it’s starting to make sense. Thanks for pointing it out, really helped me figure it out I’ll try some stuff out and see if I can tweak this lil tool of mine!
@Partikel your method seems to work fine too, slightly different aspect. Eben’s normals have this film aspect to it, like a pizza dough with thick borders. But like Eben mentioned, they’re on screen for such a short amount of time that I believe that timing and shape are so crucial that shading could be just okay and it’d be great.
Hmm, I need to try that and see if the result is better.
Any idea of cost? Instinctively it feels more expensive to get the derivative than a subtract. Though, it might be safer as you don’t risk an extra texture call if you go to far from the originial pixel…
Time, I need more of it.
They are always pre calculated even if you don’t use them since that’s what the hardware uses to decide which mip map to choose. Can get a bit aliasy though
Yeah, people are always scared of derivatives, but they are nearly free. Certainly cheaper than resampling the texture 2 or 3 more times. Like @mattorialist mentioned it’s using data that’s already been calculated, a ddx or ddy is effectively just the cost of a single subtraction, but shared between 4 pixels. Even fwidth is just two subtraction and an add, again shared between 4 pixels.
For to reduce aliasing from using derivatives you can try using ddx_fine instead. Since ddx is calculated for each 2x2 pixel group, the value that ddx returns for all 4 of those pixels is the same. Using ddx_fine it is calculated for each 2x1 pixel group. There’s still a chance for aliasing, but it can help a lot in certain situations.
A bit off topic @Bruno, but do you have any tutes you could point me to for learning Substance as it pertains to vfx stuff? I don’t supposed you’d ever do a quick write up or video yourself on a quickstart guide to substance for fx work or texture generation for vfx?
I picked up Substance when it was on sale over the holidays, but I’m finding it a bit daunting and I can’t seem to find any learning material that isn’t broad across the board teaching for texturing. I’ve heard people rave about its procedural texture generation as much as they do about Houdini for sims, but I don’t know what nodes to use or which ones are sort of “every day use” like I do with Photoshop’s filters.
I even had an outline for a tutorial written down somewhere but you know, busy life gets in the way. Good to know that there’s interest
Nodes that I use a LOT are shapes, gradients (even made my own custom: https://share.allegorithmic.com/libraries/2401), blend, histogram scan, safe transform (I even have mouse shortcuts for those), all the sorts of blur. The Pixel Processor is pretty much a pixel shader, sometimes I quickly prototype ideas in substance before carrying it over to my projects.
The FX-Map node is good for creating custom noises and patterns but it’s internals are very confusing at first, so maybe leave that for later. Sometimes you can get away by using a splatter or tile generator with random position. There’s a good enough library of noises and patterns.
I could take a moment during the weekend, grab a few files of mine, clean up and send to you so you can pick it apart if that sounds good!