Plexus/Network style effects in Niagara Mini Tutorial
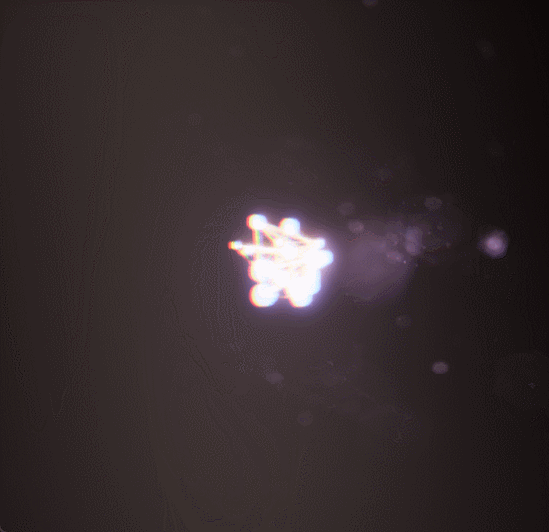
end result
So, I want to try and provide a sort of minimal setup for doing plexus/network tech-y kinda effects in Niagara. Just like the other mini tutorials, this is not intended to be a comprehensive one stop shop, but instead the smallest possible implementation, a surface level introduction that you can start building up from.
Only real prerequisite is to have basic Niagara knowledge. None of this will make sense if you don’t. There’s tones of good intro-into-niagara video’s out there, come back once you’ve had a look through those.
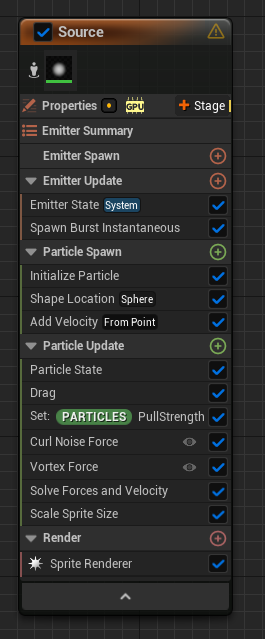
Source
The source will be the set of particles to span the plexus between, with our setup, this could be fairly arbitrary, in this case I went for a simple particle burst with high drag, and vortex/curl force pulling on the particles near the end of their live to add some motion.
Getting the nodes
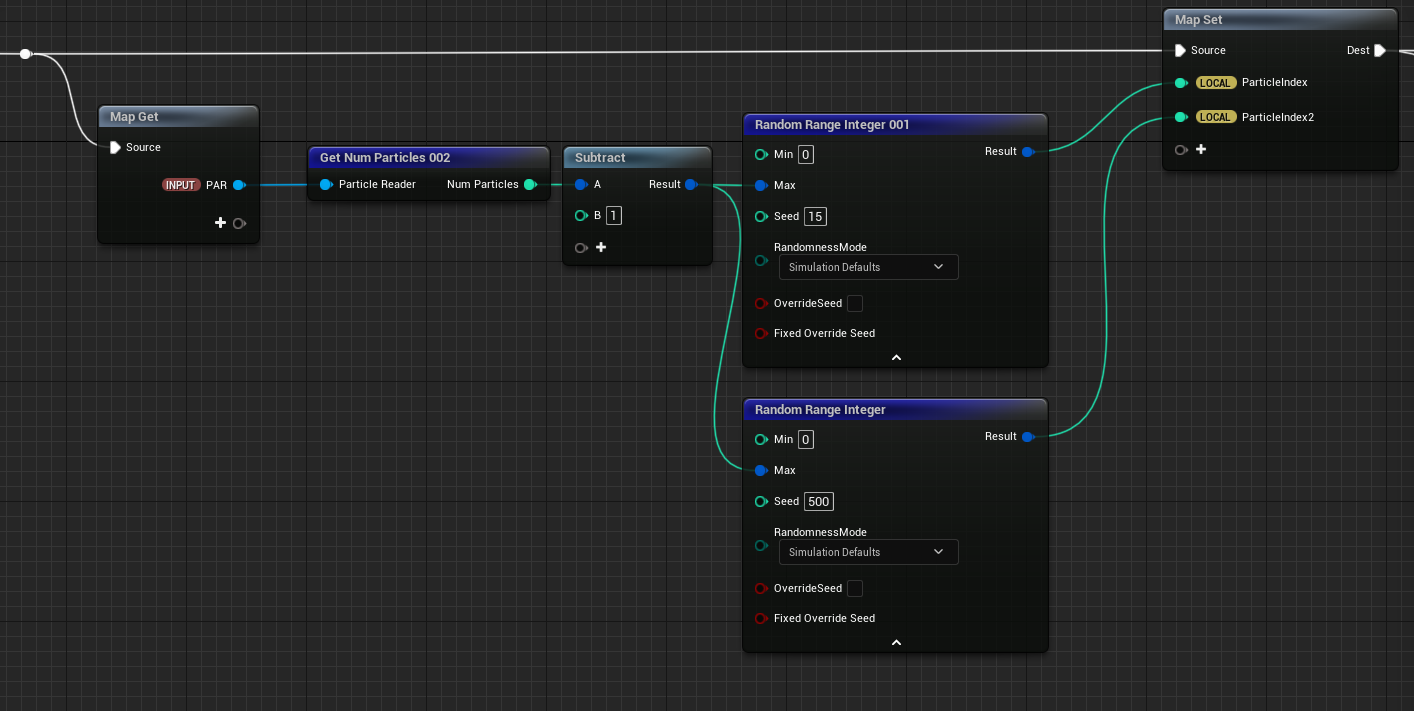
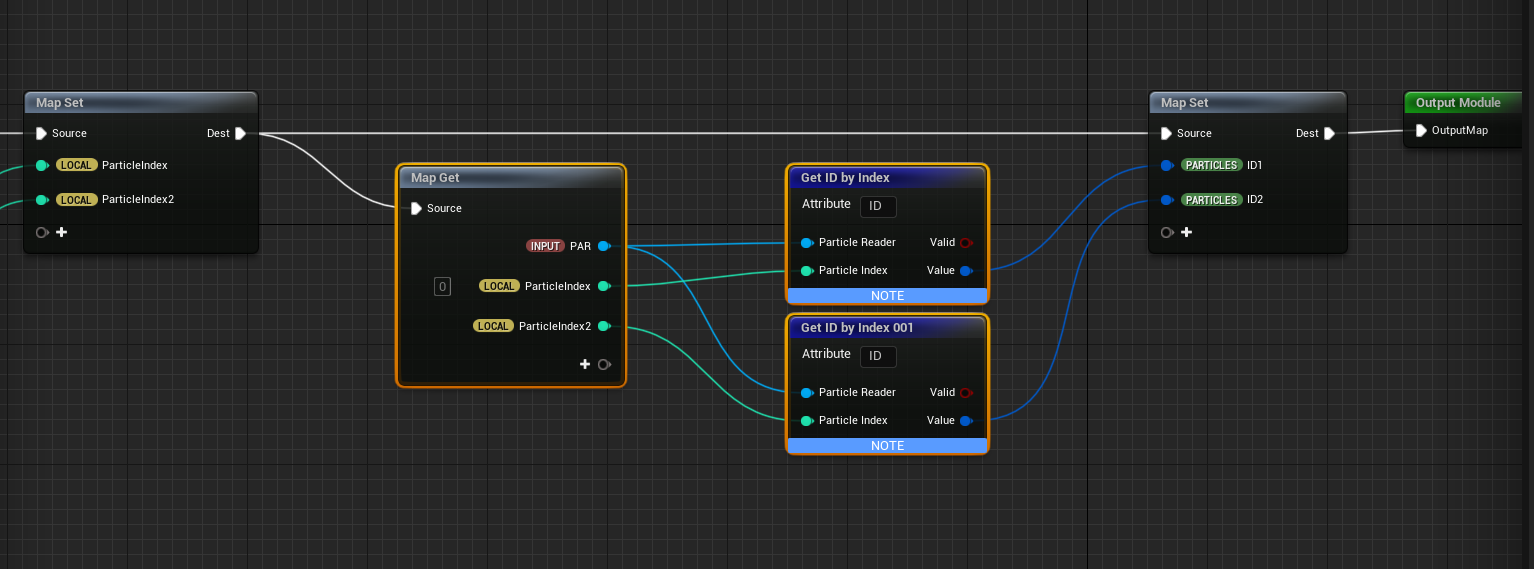
Once we have a bunch of source particles, we’ll want to define connections, in this version we’re going for a 1 particle per connection system, so we’ll need 2 nodes to go between.
To that end, on particle spawn we will look for 2 parent particles, and save their id’s to be used for lookup.
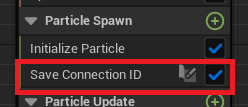
We save the idea instead of the index, because the buffer will be shuffled and we need a consistent way to lookup the same 2 particles.
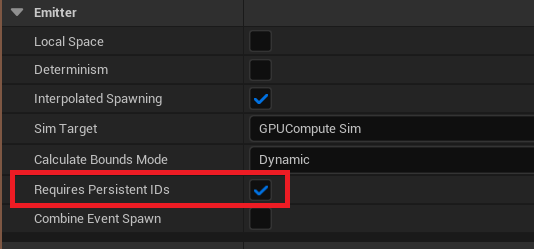
Note : Remember to enable persistent id generation on the Source Emitter!
We cannot get 2 random id’s though since they are somewhat unpredictable in their construction. So instead we get 2 random indices, and lookup and save their id’s instead.
You can try to solve identical parents here as well, but I prefer to just kill the connection in that case.
Updating the connections
Now that we have 2 points to connect between, we only need to find them and put a line between them.
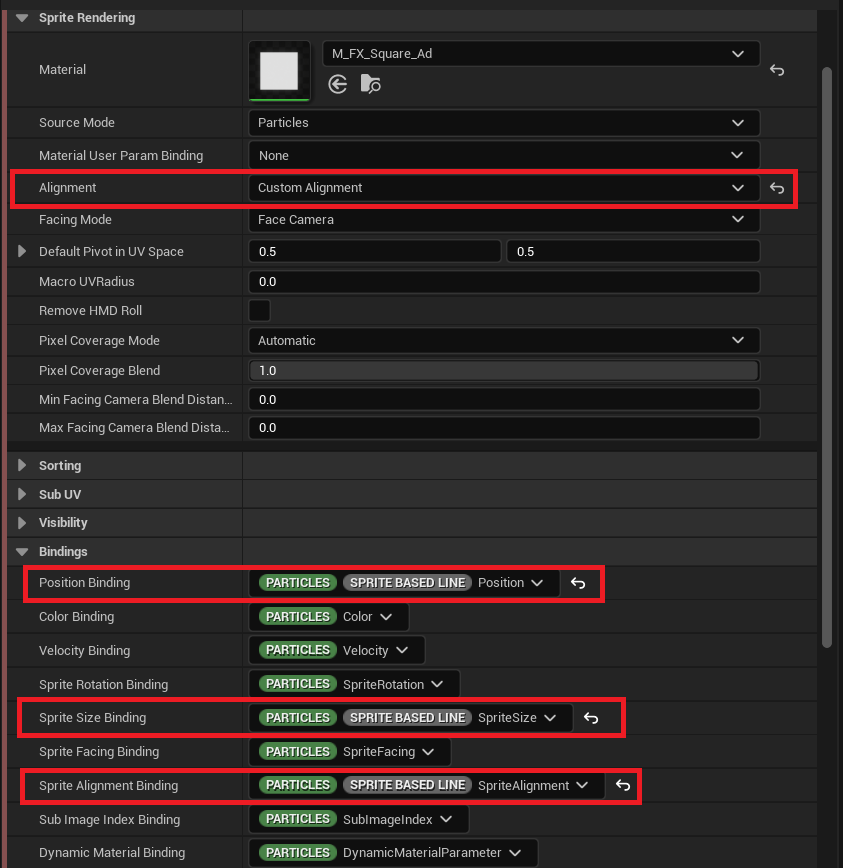
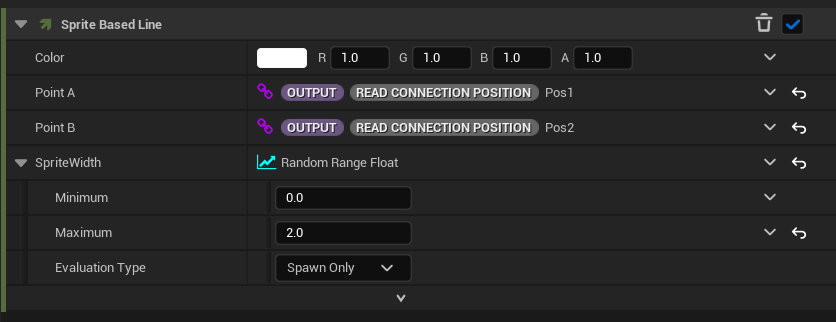
Actually, putting a line between 2 points is already supported by the module SpriteBaseLine out of the box, so let’s just use that.
Note : SpriteBasedLine requires changing the Position, SpriteSize and Alignment Bindings.
Note : You also need to set the sprite Alignment mode to custom
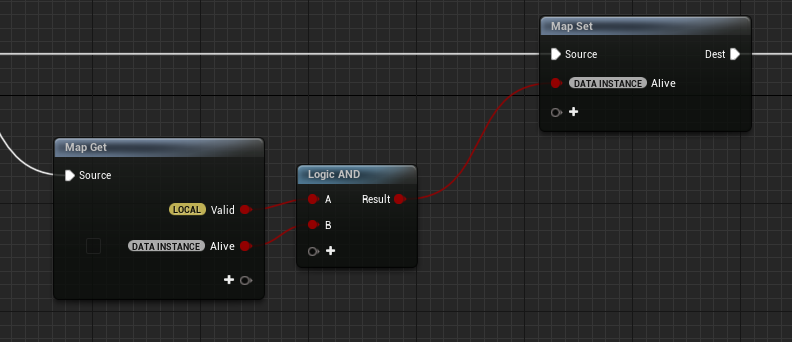
To get the points themselves we can use the particle attribute reader again.
Similar to how our particle location module works, we’ll read the locations, check their validity and set some positions and the DataInstance.Alive parameter.
We save the positions into 2 output parameters Pos1 and Pos2 in this case so we can easily find them back in the SpriteBasedLine module.
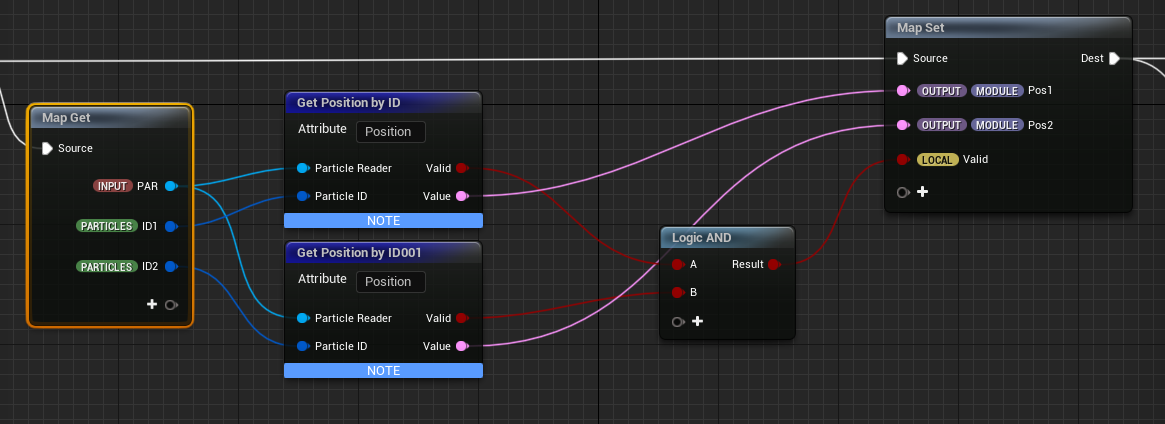
We also calculate a strength parameter based on the distance between the 2 parents. This is to facility smooth fading as the particle move further apart. (I guess this isn’t strictly minimal, but it’s pretty common functionality in these types of effects)
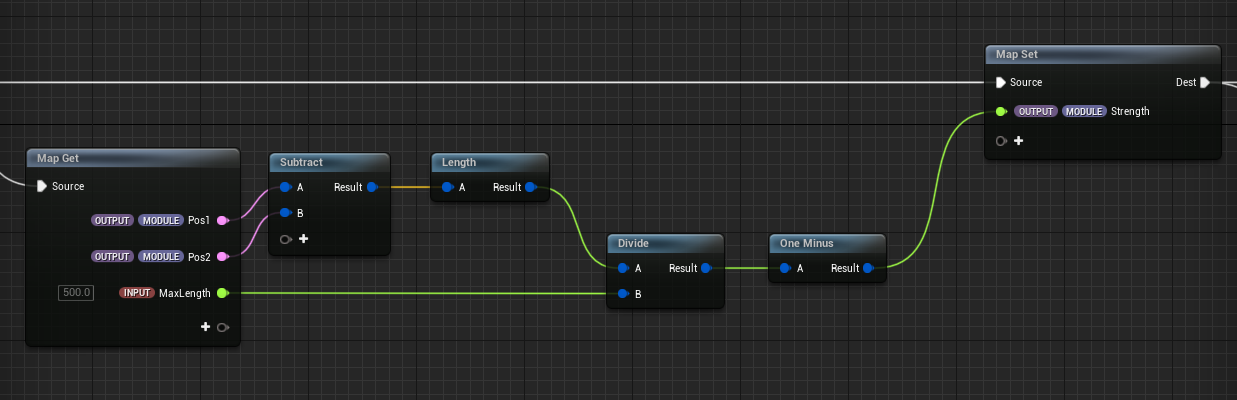
An invalid parent will cause the connection to break. If we don’t do this, the connection will snap back to the center of the world.
And that’s it, shouldn’t be super difficult, but can be really powerful in the right context.
Hopefully that is helpful
More
I wanted to add a few more suggestions to get the gears turning.
- These are sprites, so you can add some interesting shapes like lightning etc…
- Check Length before spawning to take out connections that are too long or too short.
- Partition using neighbor grid and find the closest n neighboring particles to create a cleaner non-overlapping network.