Hmm, is it possible that you have analytical planar collisions turned on?
1 Like
Hi, so it was a hidden mesh that I have on my level, it is working fine now with raytraced collision mode. Thank you ![]()
1 Like
This is wonderful thank you so much! One question I have though please, is there a way to exclude geo from receiving this fake decal? With actual decals you can disable Receives Decals, but with this? I haven’t been able to figure it out, thought I’d ask, thank you!
Since this is happening in the translucent pass rather than during the base pass (as is the case with deferred decals), we don’t have access to the stecil used in Receives Decals.
So I usually use the custom stencil for this.
If you are somewhat tech savy, you could also try extracting the original depth buffer, and save it to a separate buffer for use during the translucency pass.
Hey there! This is super interesting, thanks for the write up! I’m currently researching whether this could be used for a laser beam burning trail (imagine shining a laser beam on a wall and moving it, the beam should leave a hot burning trail for a few seconds until the wall gets cold again).
I could use regular decals but if all of them are just displaying circular textures, it’ll need a lot to make the trail look smooth - so I was wondering whether I could use this technique in combination with instanced mesh particles in Niagara, so they all add up to just a single draw call.
Do you think that’s possible? I’d just need to feed all the hit positions of my beam into Niagara I guess.
Would this also handle different angles? E.g. shining on a sphere would mean that the decals would be projected on different surfaces with different normals.
Thanks!
I would suspect the best way of doing that would to build the mesh dynamically using a spline mesh.
IF you do it like that, you would only need 1 mesh, reducing overdrawn and drawcall cost, but somewhat increasing complexity. Even with this technique you should be able to turn the spline up-axis to the normal of the wall allowing for the angle based fadeout etc…
You’ll need to pass in the spline section and total spline length to adjust the uvs, and to be able to adjust fading.
You’ll also need to set rendering to be allowed on a spline mesh instead of niagara mesh particle.
If you do decided to do it in Niagara, you don’t actually need to pass in all the position of the beam.
Instead move the Niagara Component, and use spawn per unit to detect the change and spawn on the current location.
Furthermore you’ll also want to rotate that component to the normal of the surface and take that over on spawn in the particles.
After that, fadeout etc can be handle per particle in the update.
The biggest issue here is that you’ll be overdrawing a lot so you’ll want to manually set spacing so there aren’t too many meshes overlapping
Thanks for the reply. I also thought about using a spline mesh, and generating control points for each hit of the beam on the wall. The shader would then only need to “stretch” the texture, so at the ends it has round edges but between start and end it’d stretch them to a line I guess?
And yea, with Niagara overdrawing would be a serious issue, but increasing spacing would also make it less smooth I suppose ![]()
1 Like
This method is great since I can handle it all in the particle system, and deal with the fade out there so thank you. Having a (presumably) lighting issue I thought you might be able to weigh in on.
One Skylight, one directional light. Mat is set up with Surface>Translucent Unlit though I’ve tried other combos.
This looks more like a culling issue to me. Try to increase the bounds of the particle system / particles.
Or do you not mean the decal suddenly disappearing?
Yeah, looks like a culling issue.
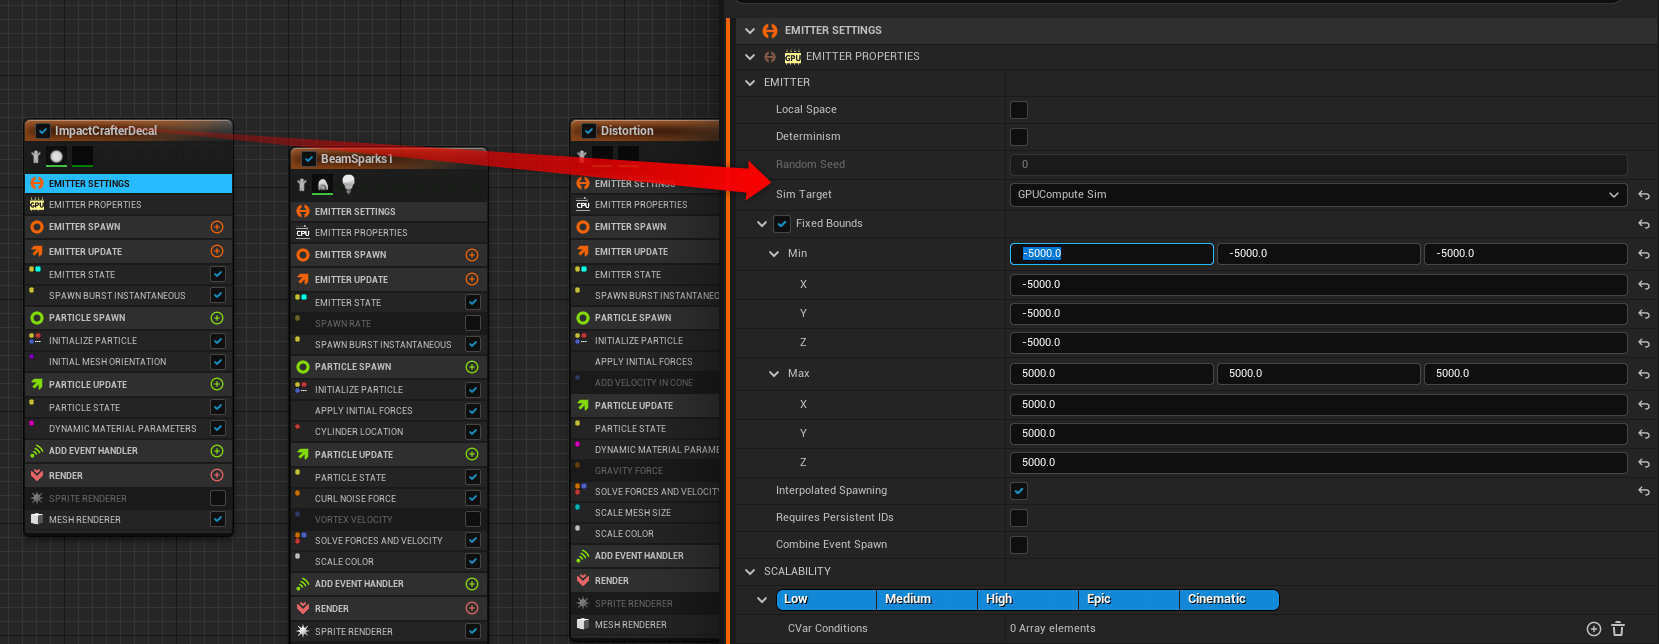
Gpu particles do not get bounds calculated automatically, so if it’s only gpu, the bounds might be reallly small.
Try setting the bounds manually, either through the bound overrides, or by placing cpu particles at the bound edges.
If it’s unlit, there will be no lighting. the skylight/directional light will not influence the material.
The particle decals cannot write into the gbuffer (too late) so you cannot change material properties as you can in deferred decals.
1 Like
Hey! Thanks to both of you for getting back to me. It was set to CPU particles, which makes this more confusing. Its definitley when the camera overlaps with the decal. Manually setting bounds doesn’t seem to be helping CPU or GPU, I’ve set ranges from 0 to -5k/5k.
My scale is 12xx12x12x so I’m able to mitigate the issue if I reduce the scale to say 5x but decals is too small. Can also mitigate by just reducing the z axis scale, but its that big to cover hills and angles better.
1 Like
The “two sided” and “disable depth test” checkboxes need to be checked.
FYI, they have added component renderers in Niagara as an experimental feature. So you could use that with normal decals if you want.
1 Like
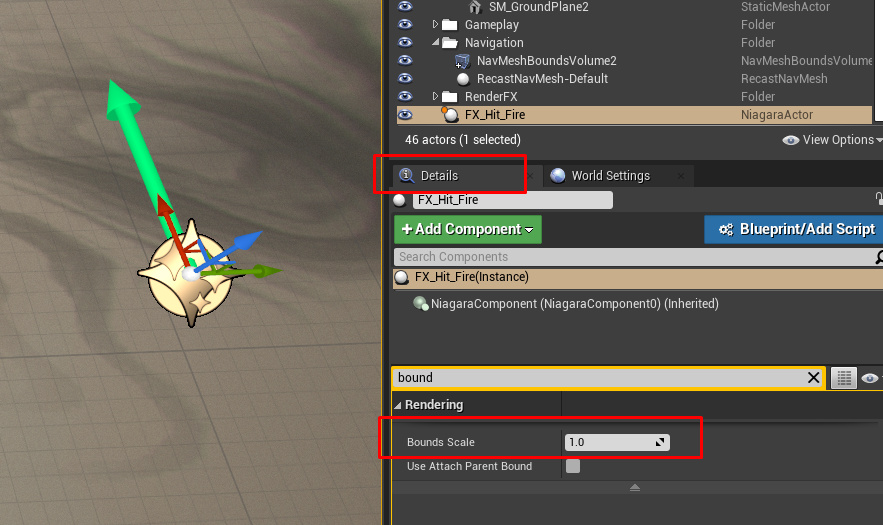
I also meant the bounds scale btw. Of the actual actor, once spawned.
You can scale that one up. In the details panel (or blueprints / c++).
1 Like
I make it in casecade.but it like this.
1 Like
Check the transform node, it might be wrong way around.
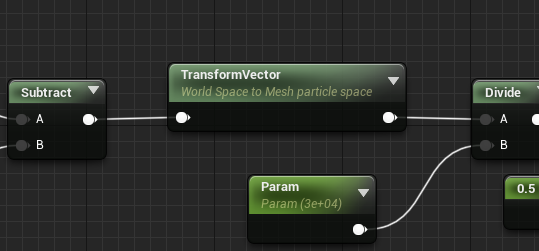
1 Like
niagara ok! casecade can’t. ![]()
I’ll see if I can test it in cascade if I find some time.
thanks! ![]() I think that’s a bug.
I think that’s a bug.
Thanks, this is very clear and detail material!
I have 2 questions
- How can I use normal map in?
- How to add BumpOffset on it?
If anyone know, thanks
1 Like