The intention of these mini tutorials is to have easily searchable reference for implementations of some of the newer (or altered) features in Niagara.
While waiting for Epic to (pretty please) implement decal renderers, I thought I’d share a little trick to creating pretty convincing decals inside of Niagara. (kinda)
The goal is to use WorldPositionBehindTranslucency, which @imbueFX shared a few months ago, to recreate the behaviour of decals for translucent and additive materials.
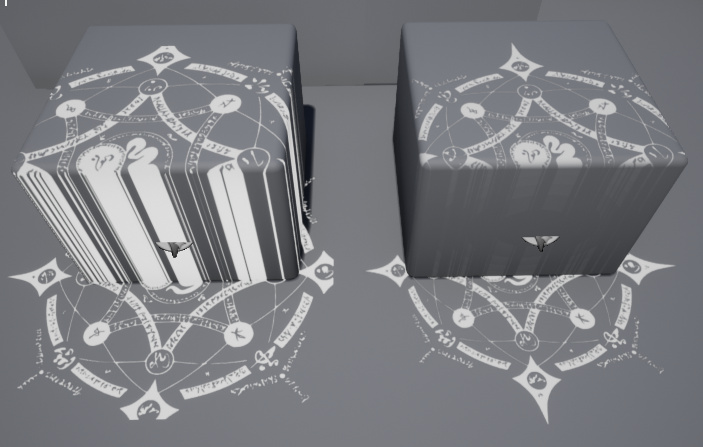
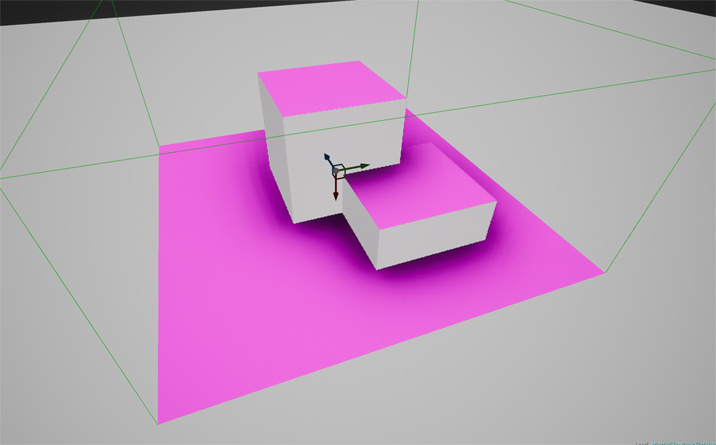
The result will look something like this:
Step 1.
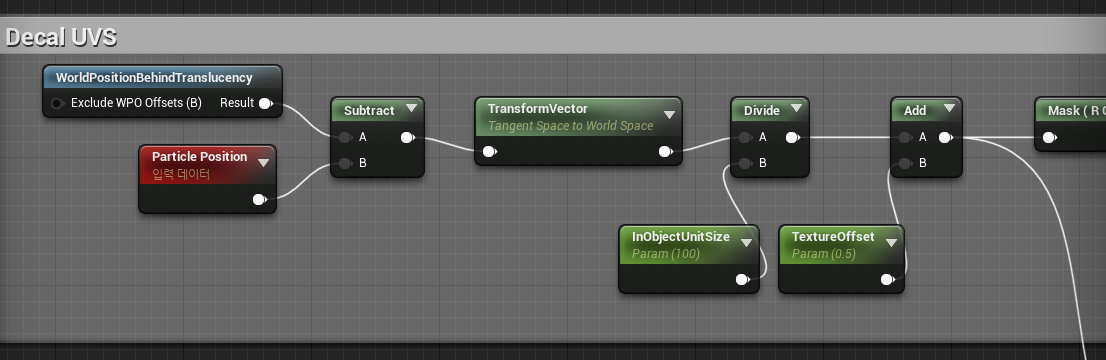
Here’s the material we are going to be using
Essentially, We calculate the mesh particle localspace position, but unstead of using the position of the fragment we are drawing, we using WorldPositionBehindTranslucency to find the surface position behind it.
After that we scale and offset and saturate the uv’s to create one distinct tile of the texture. (you could also set tiling in the texture settings, instead of saturating)
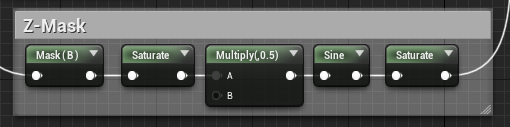
We also calculate a zMask, allowing us to fade the decal in and out when it moves outside of the z-range of our decal.
Step 2.
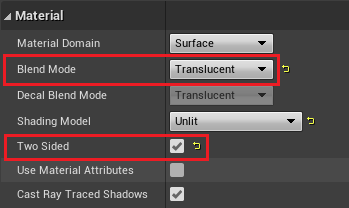
In the material settings, set Blend Mode to Translucent or Additive, and make sure the material doesn’t cull back faces.
In the advanced Translucency settings, make sure to disable depth testing as well, otherwise we won’t be able to see our decal up close.
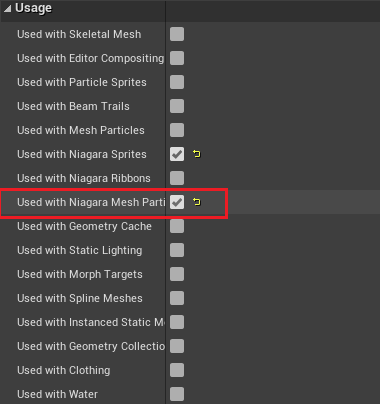
Under Usage, Enable Used with Niagara Mesh Particles
Step 3.
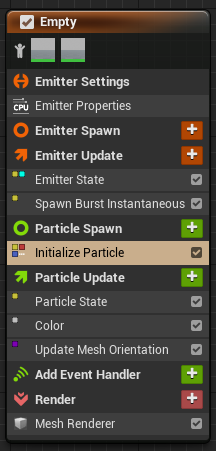
Create a new empty emitter and a mesh renderer.
I also added an Update Mesh Orientation module to make my decal rotate over time
Step 4.
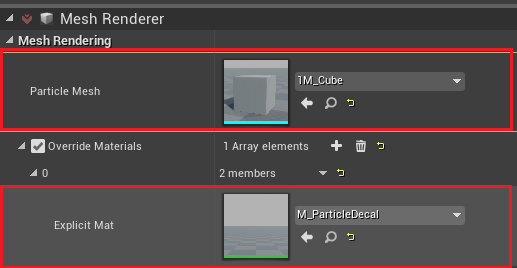
In the Mesh Renderer Module, for Particle Mesh, use a cube with it’s pivot in the center.
Also override the material of that cube to be our newly created material.
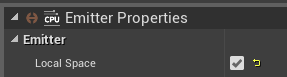
Make sure Local Space is on in the Emitter Properties Module.
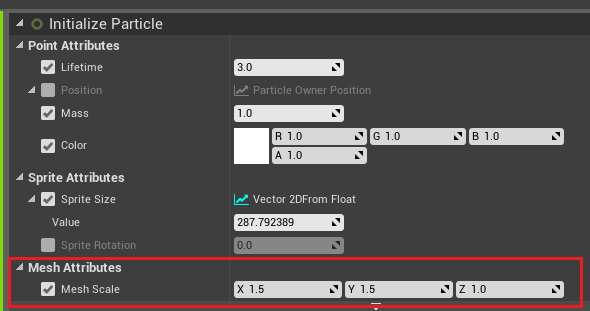
In the Initalize Particle Module, we can use Mesh scale to scale our decal.
Please let me know if you don’t understand something, or if I made a mistake somewhere.
I have been posting these tutorials in different threads, because I believe they don’t concern similar enough topics. Furthermore asking and answering of questions is a lot less confusing if you can just ask on the correct thread instead of having to reply to a specifc post in that thread.
However if people rather I wrap all of these neatly into one thread I can do so as well.
Please let me know which one you prefer.
Seperate threads per topic.
One mega thread with all the tutorials as seperate posts
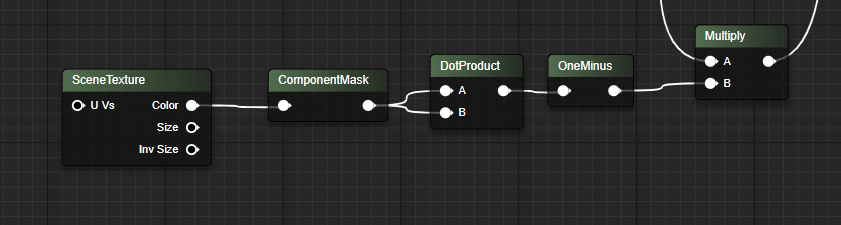
We need a saturate node here before the sine to avoid repetition in the z-mask
I changed the original post, but if you followed the tutorial before I recomend fixing this.Otherwise you will notice weird problems near steep edges etc.
The material in its current form cannot exclude actors. You could probably extend it to allow for exclusion using depth stencils, but in cases where a specific actor should not be projected on, standard decals should probably be used.
Add this to the bottom portion of the material and multiply it by everything previously going into opacity. So your new material should look like this:
This will probably not work for people using the forward renderer (mobile, vr, etc), you can use the z mask of the shape to adjust fadeout and limit decal stretching in that case.
This method also doesn’t work if you rotate the decal over another axis than the z-axis. You can transform the world normals to local space to solve that!
Oh good to know, thanks for the info. I’m finding it really hard to tell what will and won’t work for VR/mobile actually. Is there a guild/rule of thumb/ anything that’s helpful in discerning what will and wont work? Also, is there another implementation that WOULD work for mobile that doesn’t have the smearing?
It IS really hard to know what works and won’t
Both VR systems and Mobile don’t have that much runtime memory to work with, so deffered rendering would be a huge hit on that (if it works at all). That rule might not hold very long though with the speed at which they change…
If you don’t have the g-buffer available your best bet I think, is to limit the thickness of your decal.
You could also try tri-plannar projection based on the differentials, but that will probably give you hard edges.
You’d have to use the partial derivatives of the WorldPositionBehindTranslucency (if that is even possible)
right now you are recalculating and using the normals of the source mesh, so a simple vertex normal node would give you the same result.
Hi, i’m new in unreal engine i try step by step follow your instruction and found out my WorldPositionBehindTranslucency node is different… any idea how to fix this?
Thanks for the fast reply, it seems like my version is bit different (currently, 4.22.3) the niagara looks a lot different also no emitter state, maybe my version isn’t great for niagara
Ah, yes, Niagara hasn’t been super stable until 4.24.
If it is possible however, I would suggest updating all the way to 4.26 as niagara is a lot more stable and easier to use, as well as having most of the features that where available in cascade implemented.