Hi everyone,
I want to share with you a free-to-use asset. It’s a shader that I’ve been adding features to whenever I needed them until it reached this point. This shader is intended solely for educational purposes; it is NOT OPTIMIZED and may cause some issues if you use it in projects, but it has been very helpful to me for working on and creating my own effects.
Here’s a video where I demonstrate the features—there’s no audio or anything; it’s just a guide in case you don’t understand what I’m explaining in this blog post.

We’ll start from the top and work our way down.
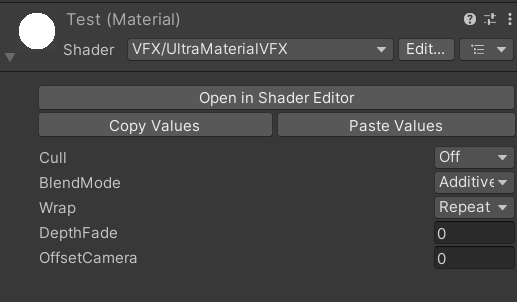
<This is the basic setup for your material>
Cull ----> Render one face or both
BlendMode ------> Controls the blend factor of each component going into the blend
Wrap ------> If u want the texture tiled or not
Depth Fade -----> Jarring edges where translucent objects intersect with opaque surfaces
Offset Camera -----> Move The mesh in front of the camera
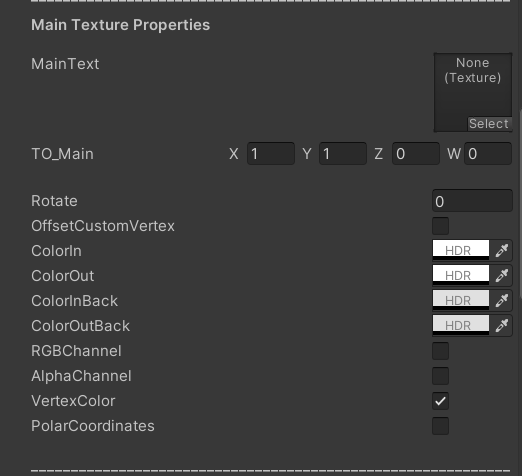
Main Text -----> Texture
TO_Main -----> Tilling and offset of the texture
Rotate -----> Rotator of the Texture ( 1.57 = 90º / 3.14 = 180º )
OffsetCustomVertex -----> Activate this to control the offset manually in the custom data
ColorIn ----->1st color blended
ColorOut ----->2nd color blended
ColorInBack -----> 1st color blended in the back face
ColorOutBack -----> 2nd color blended in the back face
RGB Channel -----> to use the RGB
Alpha Channel -----> to use the Alpha
Vertex Color -----> The particle system can put the color on your texture
Polar Coordinates -----> Activate the polar Coordinates of the texture
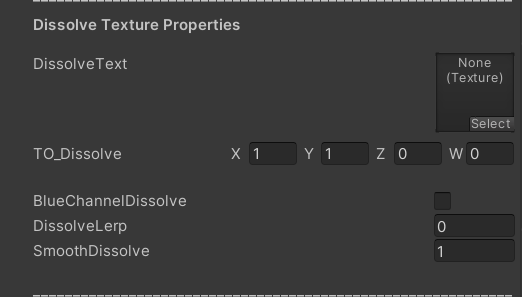
DissolveText -----> Texture used to dissolve the main
TO_Dissolve -----> Tilling and Offset of the Dissolve texture
BlueChannelDissolve -----> If u have a dissolve texture in the blue channel of the texture you can activate it
DissolveLerp -----> Lerp between the main texture or the dissolve texture to dissolve it
SmoothDissolve -----> smooth edges in the dissolve
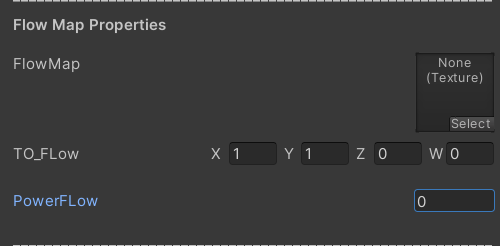
Flow Map -----> Texture to distort the main
TO_FLow -----> Tilling and Offset of the Flow Map
PowerFlow -----> Power of the distorsion
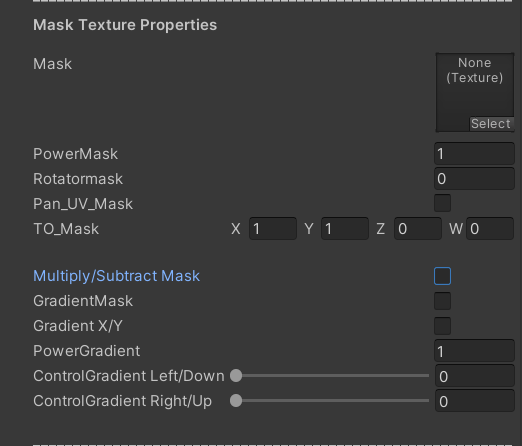
Mask -----> Mask texture
PowerMask -----> Power of the texture
RotatorMask -----> Rotate the UVs of the mask
Pan_UV_Mask -----> Panner the texture
TO_Mask -----> Tilling and Offset of the mask
Multiply/SubtractMask -----> Change the operation of the mask, the subtract give you a different result
GradientMask -----> Activate the gradient mask, used only if you dont have a gradient texture or you need to used together with the mask texture
Gradient X/Y -----> Change the gradient in the different coordinates
Control Gradient Left/Down -----> Control the gradient
Control Gradient Right/Up -----> Control the gradient
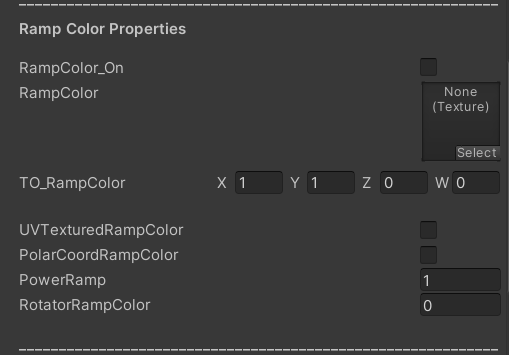
<This texture only i use it to do a different gradients and make the color less flatten>
RampColor_On -----> Activate the check if u want to use it
RampColor -----> The texture of the ramp color, you can use a color or a gradient to do different effects
TO_RampColor ----->Tilling and Offset of the Ramp
UVTexturedRampColor -----> This check allow the texture to put the colors playing with the gradient of the texture ( An example, if u have a gradient that has red and goes to green this gonna take the black and white of the main, so the black part will be red and the white green, if the main has a gradient it gonna do the lerp.)
PolarCoordRampColor -----> Activate the Polar Coordinates of the UV
PowerRamp -----> Intensity of the Ramp
RotatorRampColor -----> Rotate the UV
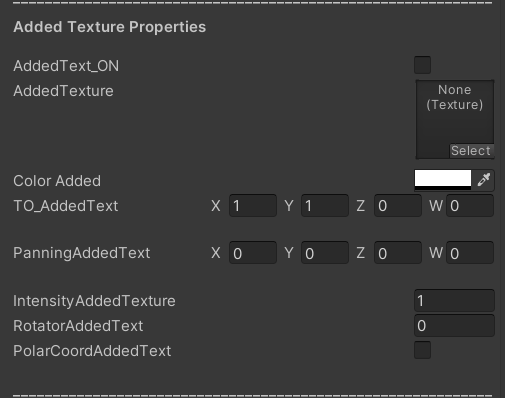
<As the name says is a texture i use to add to the main and give it more randomized>
AddedText_On -----> Activate the check if u want to use the added texture
AddedTexture -----> Texture
ColorAdded -----> Color of the texture
TO_AddedText -----> Tilling and Offset of the Added Texture
PanningAddedText -----> Panner of the texture only works X and Y
IntensityAddedTexture -----> The Intensity of the texture
RotatorAddedText -----> Rotate the UV
PolarCoordAddedText -----> Activate the polar Coordinates
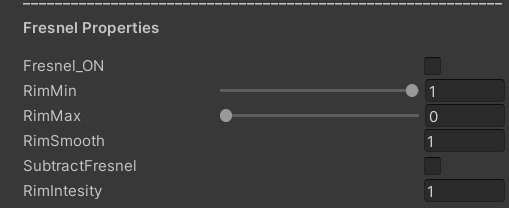
Fresnel_ON -----> Activate the check if u want use the fresnel effect
RimMin -----> Adjust the minimum of the Rim
RimMax ----->Adjust the maximum of the Rim
RimSmooth -----> Smooth the edges of the Rim
SubtractFresnel -----> Do the One minus to the Fresnel
RimIntensity -----> The intensity of the Rim
If you want to dissolve the texture from the particle system remember activate this option
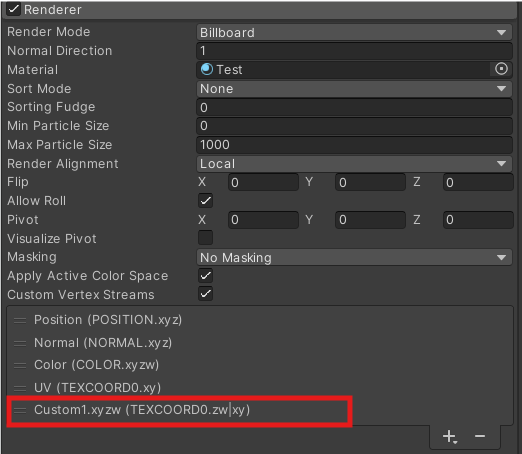
And check the Custom Data module
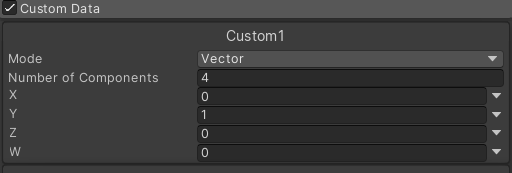
X -----> Dissolve
Y -----> GLow
Z -----> Offset Main X
W -----> Offset Main Y
Remember if u want to use Z and W activate the check box “OffsetCustomVertex” in the main Part
Note: " This shader might be a bit complicated for beginners but dont hestiate to ask any doubt"
Download Link: https://drive.google.com/file/d/1JoIH4lS7Y45Y2gNe9e7aj6-mHjuynSy2/view?usp=sharing