Is that how to put an image in a thumbnail? I hope so x)
So this is a remake of an old VFX I made 2 years ago. Many things have changed since then! I work as a VFXArtist now! Wohoo! I’m also a tutor!
I wanted to share this so that maybe it will help others level up their VFX skills with a few relatively small know-hows that I applied from one effect to the other. I constrained myself to use the same textures.
Here’s before after video:
Even with the same textures, the two effects looks significantly different. I’ll go through what I decided to change, and why.
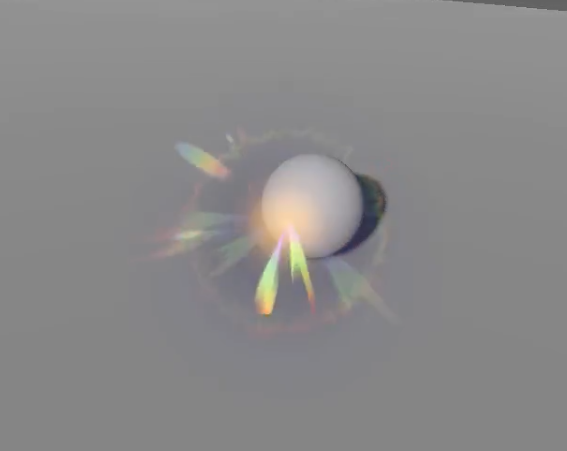
First of all, breakdown of the effect:

-
I’ll start by addressing the elephant in the room. The colors. In the old effect, the colors looked super washed out. This is due to my own lack of knowledge when first making my shader compound with wonky defaults in Godot: the textures were not converted to sRGB, hence the washed out colors.
-
Management of blend modes: the first effect is made with regular blend mode. The secondary one uses a mix of regular blend mode for some elements, and additive for others. Specifically, the blue large glow is there to tie all the colors together, since the rainbowy particles have blue towards the center (most of them! the sparks don’t! but it’s fine anyway)
-
Timing: when i made the first effect, I had a windup with a glow that wasn’t really working out. I had reasons to add a windup (the effect was for a talk) and i wanted to showcase the textures sliding on a mesh. But that just didn’t work. I could have found other ways to show it, but instead i stubborn’d it.
So this was easy to tweak. -
Non uniform scaling. Godot 4 now supports non-uniform scaling for particles, which allows me to make more interesting motion inside the same effect. I have used non-uniform scaling for the spikes in the middle and the rainbow “sparks” that fly out.
-
Removal of a number of emitters: I didn’t like the cyan ring that flies outwards. I removed the curves for the windup. I changed the small sparks that felt more like fire-sparks into something-ish? that lingers.
-
Opacity! This time i tried to really play around with the full range of opacity and decide which emitters should be the core of the effect, and what other emitters should support it.
-
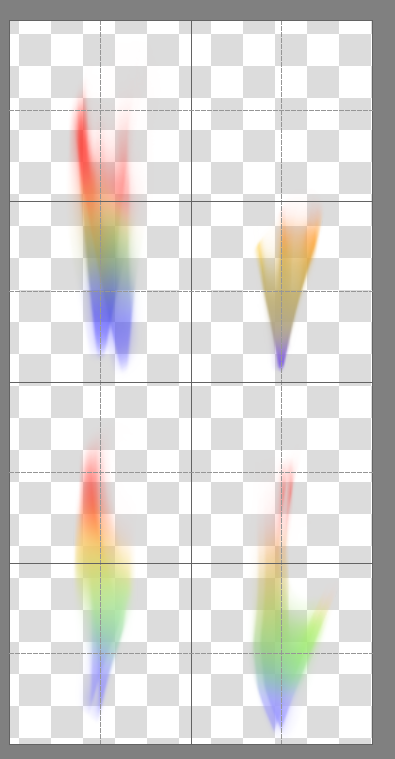
Okay, I lied. I did change one of the textures:
I didn’t manage to make these work on quads: the textures were not correctly pointing towards the center and as a result the effect looked super wonky. I really wanted that radial feel so just offset and rotated slightly each of those to match with their central axis. -
The distortion at the back was removed because I didn’t have the energy to write the shader for it. Same for the fadeout towards the ground. I was satisfied enough with what i had to decide to not re-implement those. That’s it. I don’t have any other justification for it x)
Here’s a video on different value background:
To nobody’s suprise, the additive particles get really lost on a brighter background. They could be instead using a different blend mode, perhaps i’ll play around with it and change my mind in the future. But for now I’m happy where this is, and I’m happy it took me just 2 hours to make.
If you read all the way down here, thank you! I hope this is useful in some way. Have a great day!