Hello ! I’m writing back because I found a solution for my issue, and I believe it’s the “correct” way to do it. So if anyone, at some point, has a similar question, here is the beginning of an answer.
The solution is to extend the C++ class UNiagaraDataInterface, by creating your own DataInterface inheriting from this class. Indeed, the Niagara Data Interfaces are a powerful and modular tool that Epic uses to extend Niagara features.
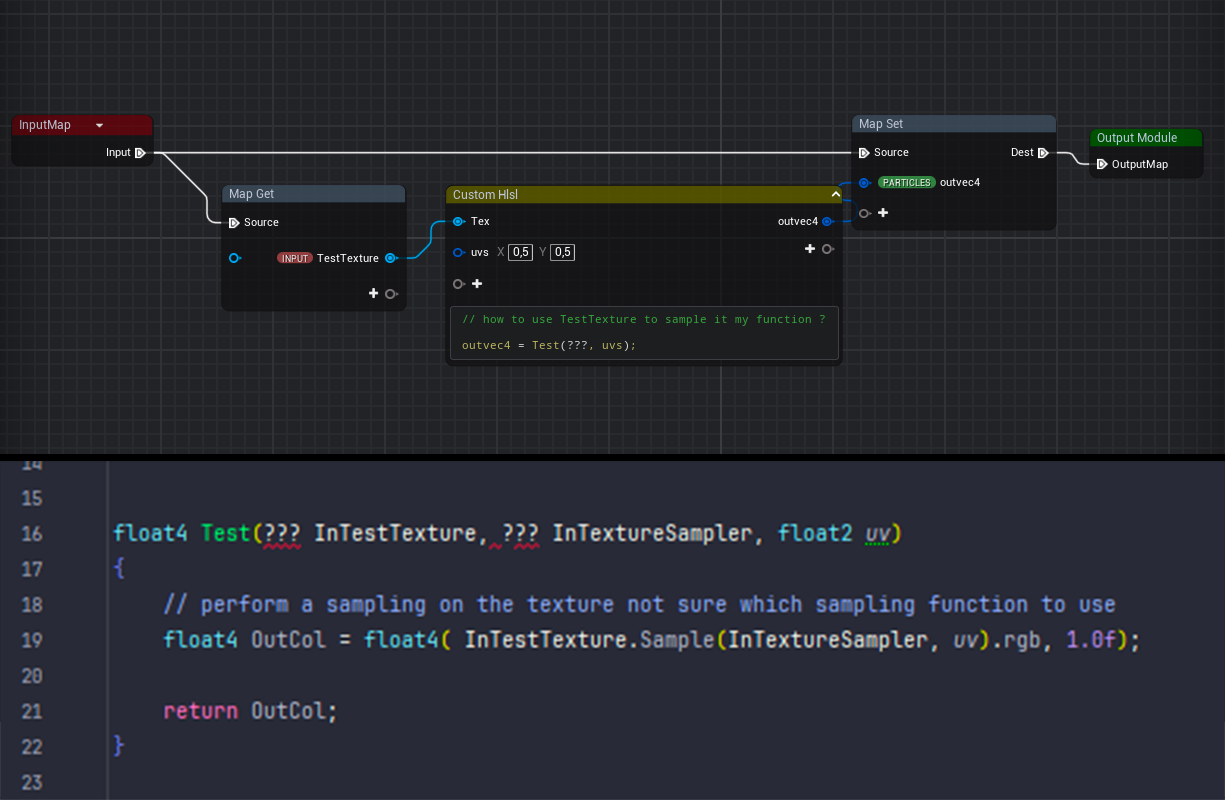
For example, by “default” (ie Niagara without any Data Interfaces), Niagara doesn’t seem to be able to sample a texture (in the HLSL way), because it requires a Texture2D and a SamplerState. Indeed, it seems there is no way inside Niagara to extract the texture RHI from a UTexture2D (so a UObject, a CPU-side representation) to pass it to a shader.
That is why Epic built, for that case, a UNiagaraDataInterfaceTexture class, that you use through “TextureSample” inside Niagara. This Data Interface allows you to specify a UTexture2D (CPU representation) and will dispatch a compute shader with the corresponding Texture2D and SamplerState (HLSL types). The shader parameters looks like this :
	BEGIN_SHADER_PARAMETER_STRUCT(FShaderParameters, )
		SHADER_PARAMETER(FIntPoint,				TextureSize)
		SHADER_PARAMETER(int32,					MipLevels)
		SHADER_PARAMETER_RDG_TEXTURE(Texture2D,	Texture)
		SHADER_PARAMETER_SAMPLER(SamplerState,	TextureSampler)
	END_SHADER_PARAMETER_STRUCT()
(implementation can be found in Engine/Plugins/FX/Niagara/Source/Niagara/Classes)
The bounded compute shader is NiagaraDataInterfaceTexture.ush, and is a bit particular at first (at least for me). Here is how it looks like:
Texture2D		{ParameterName}_Texture;
SamplerState	{ParameterName}_TextureSampler;

//...

void SampleTexture2D_{ParameterName}(in float2 UV, in float MipLevel, out float4 OutValue)
{
	OutValue = {ParameterName}_Texture.SampleLevel({ParameterName}_TextureSampler, UV, MipLevel);
}
SampleTexture2D here is the node you can find inside the Niagara editor.
This " {ParameterName} " was a bit confusing to me, but what it means is that this .ush defines a template that would execute some code. And when you create a new Data Interface inside your Niagara system, you also create an instance of this template (you could imagine that {ParameterName} becomes the name of your instance DI, and -it’s a guess- it generates a new shader file with a more standard HLSL code by replacing this {ParameterName} ).
In the end, it means that you can declare any amount of UTexture (or something else) in your custom Data Interface, bind them to the corresponding shader parameters in your custom shader file (ush) and you could execute your custom code on these textures in a more traditional HLSL style, without relying on the CustomHlsl node from Niagara (which is not always the most convinient tool if you have a lot of code), and harvest the result directly inside your Niagara system. (A traditional compute shader would require to pass the output to the Niagara system through the CPU I believe, which is a lot less efficient)
Another example called MousePosition data interface, with some comments, is provided by Epic in the engine, as a plugin called “Niagara Example Custom DataInterface” or at this location : Engine/Plugins/FX/ExampleCustomDataInterface.
So yes, it was the way to go for me, and I hope this post could help if you try to implement your own custom DataInterface !