Fire propagation system (shader + BP + vfx)

Update 2018-11-11:
WoodBurning_2018-11-11_MaterialsAndLights_small

==============================

Hi everyone! I’m working on a project which combines particle-based VFX, shaders and Blueprint. It’s meant to be a complete package - controlled in one place - for fire propagation. Two modes of operation will be: static (for level designers/artists) and dynamic (for in-game interaction).

Currently, a user can add points of origin (up to 5) to a global blueprint. They areas are controllable with a gizmo, as shown on the video. Each area spawns it’s own emitters, trying to fill the surface.
There’s also a support for vertex painting.

Particles:

https://www.youtube.com/watch?v=S3wwcLFbbUg

And earlier version of the shader:

I’ll post progress updates here. When it’s finished, I’d like to make a Marketplace asset out of it. Of course I’d like to hear what you think. And what you’d expect from such a package it was to be used in your game.

28 Likes

woah! this is nuts! or…hot…heh. Nice work amigo

Cool! How will it propagate? Fuel and cells? Will it voxelize props or how will you handle the spread to freestanding objects? How is the damage volumes handled? Any ideas on how to mitigate overdraw if several cells next to each other ignite simultaneously?

A big, but awesome project :slight_smile:

@pmiller - Thx!

@Andreas - Thanks for great questions! The truth is… I’ve yet do design most of the interactive propagation.
So far I had been focused on the shader side, communication from BP with it, and starting / stopping the emitters. The first thing that I should get right is the voxel structure - and how to update emitters based on changes in it. This would be a backbone, otherwise it would all come down crashing :smile:
What I’m finishing so far are the two simple modes - vertex paint, with manual emitter placement, and radial areas with automatic emitter placement and update.

Your overdraw question hints at a bigger concern I have - how to limit the area which can burn at once. I’d guess that most games keep good performance by tweaking parameters like burn-out rate. So this is strictly intertwined with game design . Here, on the other hand, it should be quite universal. I think I need to include such limits anyway. I should probably add warnings or buttons, that will help users to balance the values for optimal performance? Maybe something like volume areas instead of 1 big one?

As for the props, I planned 1 emitter per prop. More complex solutions should be on the side of the user, as here a lot of various solutions are viable - from burning per bone to scattering some points over an asset. I’d like to focus on environments, but even in this case there are still challenges like building overhangs.

One more question about the communication with the shader part. My current idea is to read voxels and draw their intensity pixel by pixel to a 2D render target, which would be an ‘flattened’ 3D texture. What could be an alternative approach, if this ends up too expensive? Because as far as I know, UE4 doesn’t have volumetric textures. Also maybe my idea here is an overkill?

Hehe, I’m looking forward to following your progress on this as I’ve fought all of these issues in the past. I’ll refrain from telling my approach as that could prove limiting. I’d rather see you crush it!

1 Like

Good idea! I’ll surely post here about whatever I try.

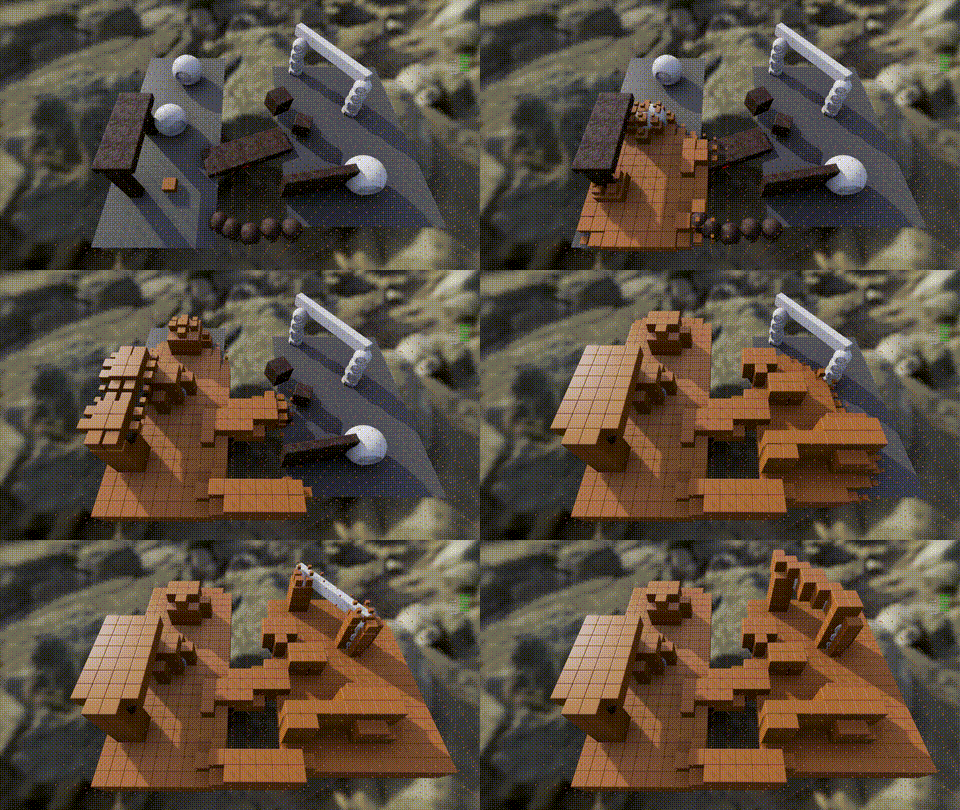
Beginnings of voxel-based fire propagation. Orange block size = temperature.

WoodBurning_2018-08-19_PropagationNativized

How it works:

  • in Construction Script: voxels are generated to fill the manually set bounding box. They’re stored as a 1D array.
  • Each cell casts 12 rays around. The resulting “hits to total number” ratio is saved in each cells as a “conductivity”. (It helps with stuff like empty cells and corners.)
  • in game: a copy of the voxel array is made. Every voxel reads its immediate neighbours (26 cells), sums their temperature and adds to its own.

The prototype is all in Blueprint. As for performance - cut down from 50 ms to 2 ms per frame just by nativizing BPs! (i.e. auto compiling them to C++). Finally the core math will have to be C++, because there’s too many little function calls, which profiler clearly showed (even just float add is a function in BP).

Nearest TODO: igniting/putting fire out, fuel (life) per cell, sending damage to actors, different flammability of objects.

10 Likes

I moved entirely to C++ with the simulation code :slight_smile: It was well worth it - in speed, readability and the simplicity of data access. And I finally found a motivation to learn the language. Compared to nativized BPs, the speedup also affects the editor part, which makes adjusting the grid so much more responsive.

The second thing I did is copying the simulation data onto a texture. It makes it accessible by materials.

Now I’d like to add resampling of the grid in runtime. This should allow me to spawn big emitters in low-frequency places and small emitters on the edges of fire.

WoodBurning_2018-10-05_Textured_Wood

Bigger video: https://www.youtube.com/watch?v=mPYYVYP_SlA

9 Likes

Love it, how did the move from BP to C++ go? Any major problems you ran into?

Wow, this looks so cool :slight_smile: Also love to voxel based fire propagation.

@Shr1mpsy Thanks!

@Niels C++ in UE was very difficult for me at the beginning. The major problems was how to set up the project and to learn Unreal’s flavor of the language. There’s a lot of macros and requirements - if you got some of it wrong, the thing won’t compile at all. On UE Answerhub you can find a lot of advice like that:

Change to DevelopmentEditor configuration, compile; Change to DevelopmentGame configuration, compile. This gets IntelliSense to recompile and rescan headers and everything works fine again.

I have years of work experience with Python and I didn’t expect such a hard learning curve. But one day I rolled up my sleeves and decided to burn through it, no matter what. After 4 days things started to work, which doesn’t seem long at all in retrospect :slight_smile: I must admit that generally I like how UE’s code is organized for performance. I learned a thing or two from just working with the TArray class or FVector.

There’s this popular Udemy course - but to my surprise, I found the formula was not suited for me (what’s a variable etc. etc.) So then I bought Tom Looman’s course for $15 (sales are frequent on Udemy) - and it was perfect. He shows a working example first, encourages you to dissect the code and play with it. Only then he proceeds into details. I’d definitely recommend this course instead of Wiki in the beginning.

However, I’m glad I started with a Blueprint prototype. Firstly, I knew that the algorithm works. It was easy to test and iterate. BP has also this great advantage of showing you the functions that work with a given object - and a search field :grin: I was able to learn the API this way.

Secondly, with a working Blueprint organized into functions, I was able to gradually replace pieces with C++ code. Just a UFUNCTION macro and it’s there, in Blueprint, as a node. I love it.

The last thing I did - writing to a texture - was actually much harder then everything else. There were two articles on the Wiki, which helped, and a couple of Answerhub comments. One of them got 31 upvotes, meaning that a lot of people ended up there. Finally I found a proper method in Isara Tech’s tutorial. There are places in Unreal where, it seems, without the good people from the Internet you’d be completely helpess.

To end this long post - one more thing about C++ itself. The language opens you up to an abundance of fundamental, time-tested techniques and sources of knowledge. For example I watched a talk from Mike Acton - it’s about the importance of the data, their layout, and organizing the code around them. My mind immediately started to think how I could use that. The next day I refactored the voxel grid from an array of structs (PropagationCell) to multiple linear arrays of floats (Temperature, Conductivity, etc.). Now whenever I need to read or write to temperature, I don’t need to carry the other properties along.
5 Likes

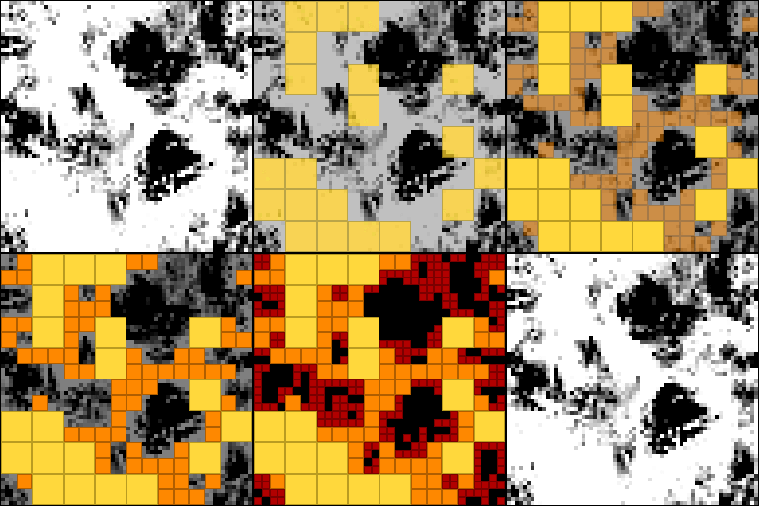
I’m thinking how to approach emitter spawning. I’d like to have big emitters in “flat” areas, for both optimization and less noticeable grid structure. Small emitters should be only spawned where detail is needed.

My current idea is to calculate “mipmaps” of the voxel structure. Then a difference could be measured between subsequent mips. Let’s call it an error map. If the value is identical for 2 mips (error almost 0), it means the fragment is uniform - or entirely empty. If the error is big, the place could use more detail. What do you think?

(Right GIF: Yellow = big emitter, Orange = medium, Red = small)

WoodBurning_2018-10-07_Diff WoodBurning_2018-10-07_Compression

3 Likes

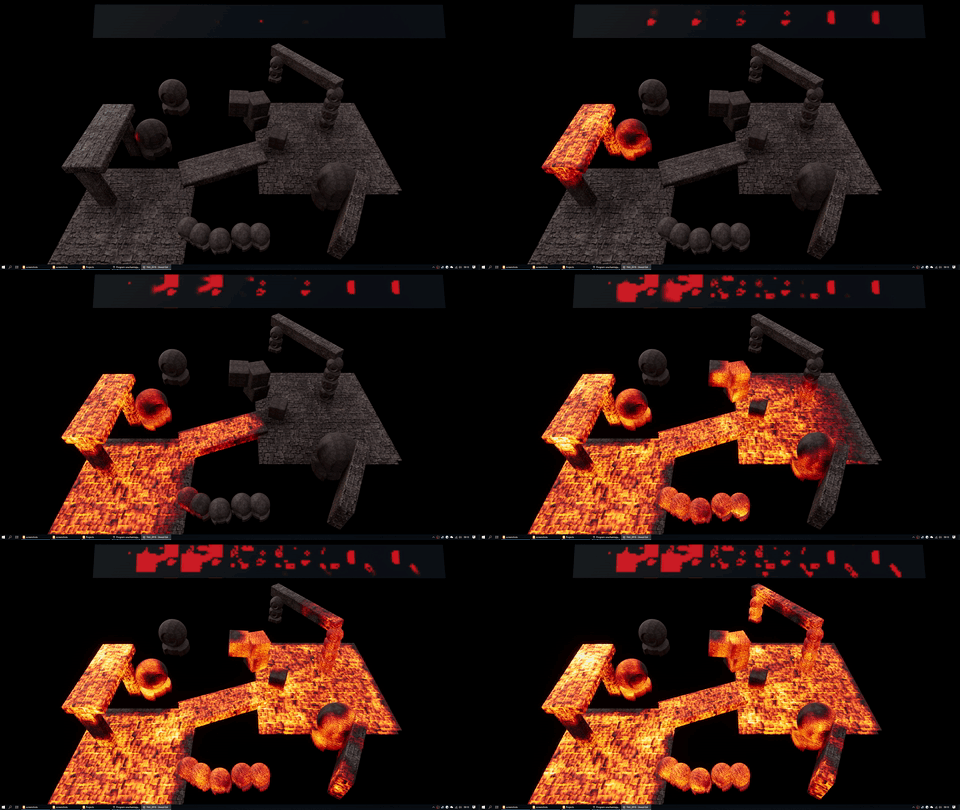
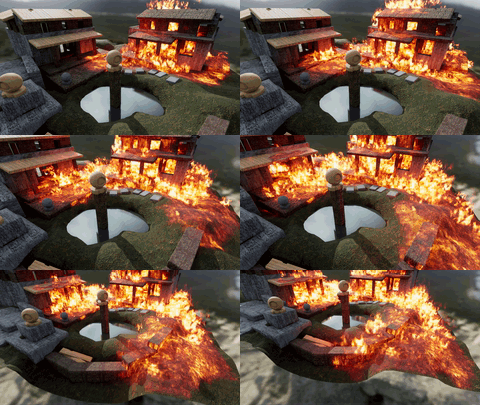
Now it spawns and controls particle emitters. Materials burn too - according to their properties (notice the water pond and stones blocking fire). Lighting is also controlled by the system (grid of lights, optimized away when not needed).

The proper simulation code was probably the hardest part. The heat is transferred to neighbors or air (thus lost in the original cell). There’s a fuel property and an ignition temperature to start the reaction.

I also needed to add downsampling to make the emitters work. The simpler grid (mip 1 or 2) is used to control vfx and lighting. In the future it will allow for querying the simulation fast (kind of like an octree, though without its complexity). A full “mip chain” is generated over several subsequent frames, making the calculations quite lightweight.

For setting material properties I wanted something user-friendly. I decided to go the Physical Material route. Subclassing it and adding new fields works like a charm - they show up in Unreal’s UI and are easily read with raycasts.

14 Likes

very very cool man !

Five months passed since the last update… :roll_eyes: But these were the months of hard work - both on this and CP 2077 at work :smile:

It turned out this system had a huge bottleneck, unfixable with its old design. I refactored it completely. The simulation was moved entirely to the GPU. This was easy… But then I needed a way to transfer the data back to the CPU, to spawn emitters! To maintain reliable performance, I wrote code that calculates voxel grid mip maps for the CPU. Blueprint was almost entirely eliminated in the backend - but I still expose functions to BP, as a nice interface for the user.
The whole work paid up. GPU sim is 50x faster than the previous CPU code. I’ve been also able to easily add features like FireListener component, for dealing damage to pawns and props.

After I finished all this math and systems, I went back to the VFX themselves. So here’s where I need your feedback. I really need to improve in flames VFX. :confused:

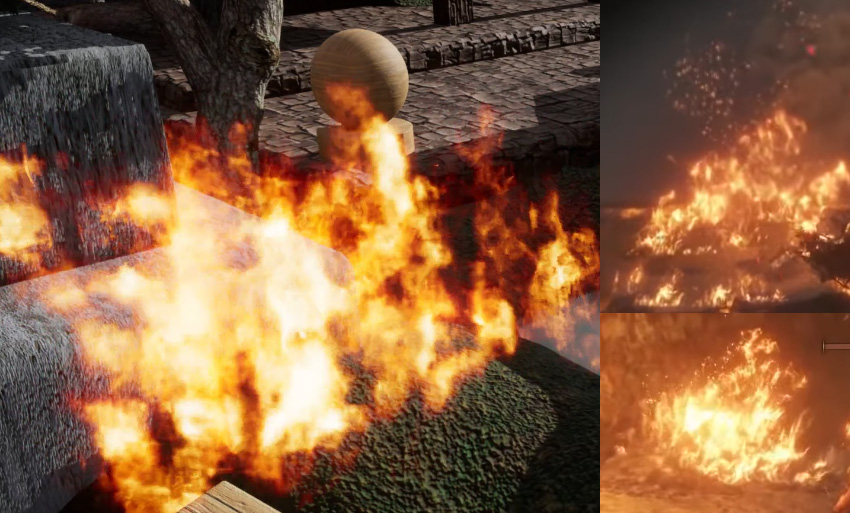
This is how it looks like on the Paragon example map. It doesn’t look right to me yet. I’d really appreciate all the feedback you can give! Of course the smoke is missing, but I think there’s still work to be done with the flames themselves.

The flames are classic sprites. The base is Pyro simulation in Houdini. The sim is baked into an atlas of 128 frames, 128 px each. On top of that, in the Unreal material, I added distortion (tiled flow map) and HeightLerp (additional fake detail). Video showing the settings:

https://www.youtube.com/watch?v=tkipvb3FeIU

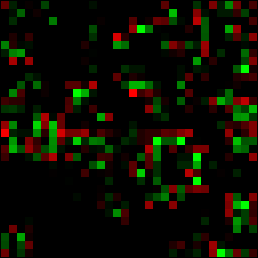
If you’re curious about the GPU simulation thing, and the whole technical background, I hope to write about it in detail at some point. Here’s a math I devised for packing the 3D voxel map into a 2D texture, for maximizing cache locality :slight_smile:

and here’s the map in the debug mode

4 Likes

That’s really impressive. As for the fire itself, one thing that stands out to me is that it’s always moving straight up at a fairly uniform speed and there are no embers or light (and smoke but you mentioned that).

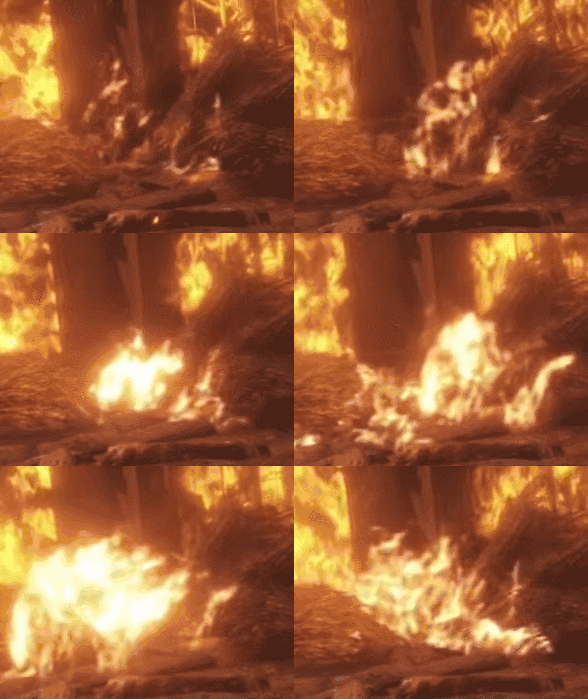
The kind of fire you’re making feels like it should have wind affecting it, at least a little bit, and the flames themselves would be a bit more turbulent. The flame shapes also feel a bit too big and they are quite soft so you get a yellow->red gradient going on. The shapes need to be sharper with a tighter gradient for lack of a better way to describe it. Sekiro has some lovely fire, here’s a comparison (apolgies for slight blurriness, it’s from a video):

flames

Video: https://youtu.be/C2w7Mqk3JDA?t=778

Also look at real life flames for reference.

1 Like

Thanks for the valuable advice! Great point with the gradient. I’ll try to make it sharper and more chaotic, more vibrant in motion :slight_smile:

1 Like

Ok, project was dropped :smile: but I made a tutorial about the heat on the surface

https://youtu.be/3pqqAWX7zlQ

11 Likes

Hey @OskarSwierad, may I ask you, how did you make this dynamic emitter? (The gizmo that you can change location and scale to adjust intensity of the heat)

I need to make something similar in the project that I’m currently working on and I have no clue on how to do that lol

Ps: Awesome post and work man, thanks for sharing it with us!