I came across a post from Beyond-FX about keeping your emissive material the same regardless of the exposure in the game level. The EyeAdaptation node is used in the post. I had encountered the EyeAdaptationInverse node in the tutorials, but didn’t understand how it worked. So I decided to figure out how it works and what’s the difference.
What is Eye Adaptation?
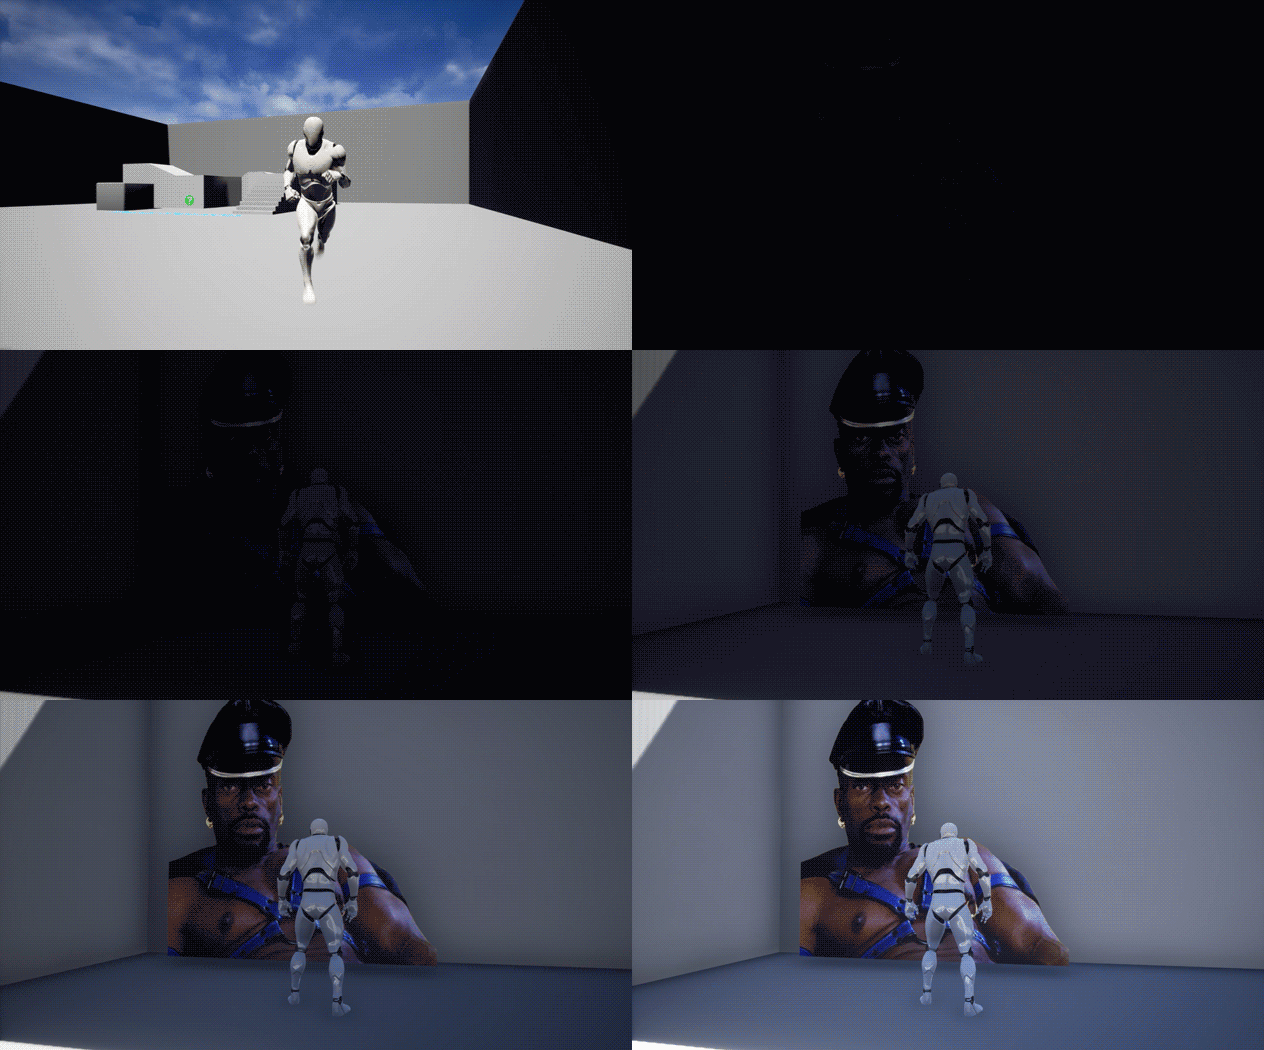
Eye Adaptation (also known as Auto Exposure) simulates how the human eye adjusts to different lighting conditions. When you move from a bright area to a dark one, the scene temporarily looks darker until your eyes adjust, simulating real-life vision. And vice versa. As in the example below👇
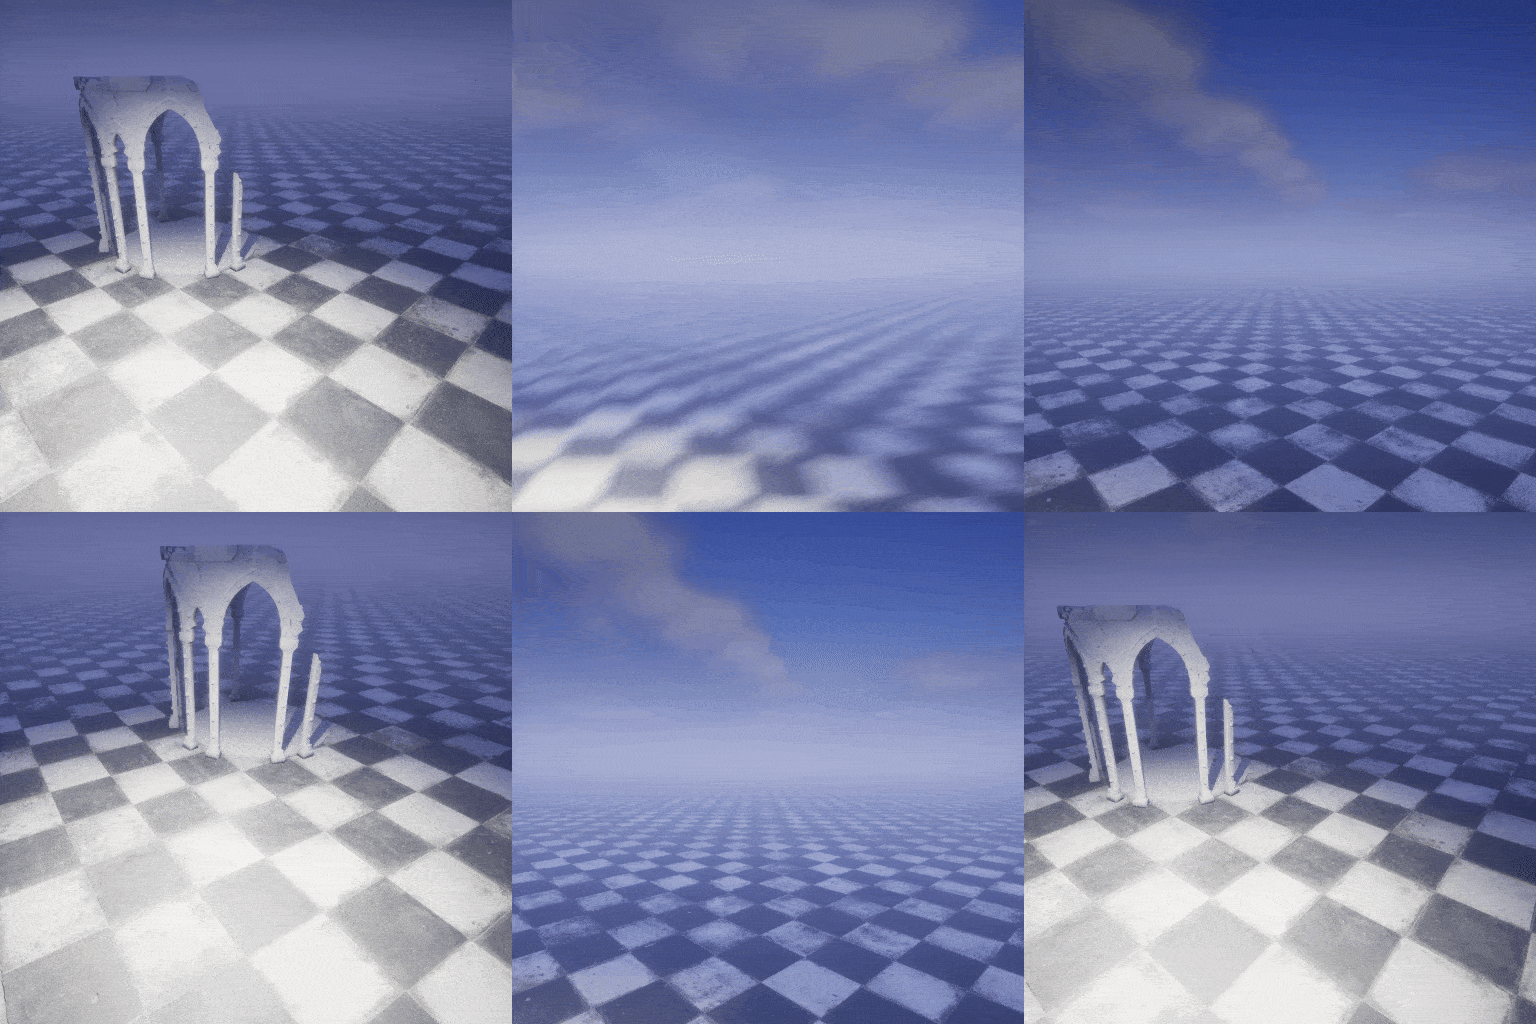
Where to Configure It
You can turn on/off and modify Eye Adaptation in Project Settings (Check the «Auto Exposure» to turn on)
or edit in the Post Process Volume (that you need to add to the scene; the «Auto Exposure» from the project settings must be enabled) — adjust speed, compensation, and brightness limits to control how your scene transitions between light and dark.
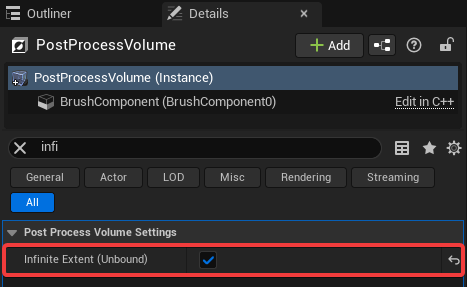
P.S. In Unreal Engine, in order for Post Process Volume to apply effects to the entire scene (regardless of its size), you need to enable the Infinite Extent (Unbound) option.
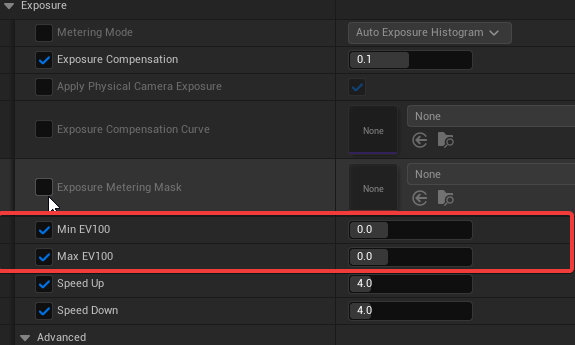
To keep the post-processing effects but TURN OFF the Eye Adaptation effect, in «Exposure» set «Min EV100» and «Max EV100» to 0.
EyeAdaptation, EyeAdaptationInverse shader nodes
I created a project, «Auto Exposure» is turned on, NO Post Process Volume.
-
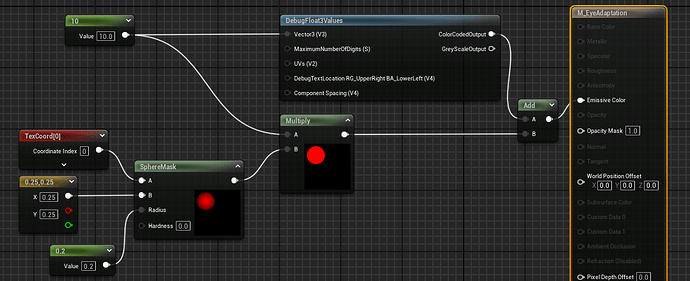
Created a simple debug material with Emissive 10, Translucent, Unlit.
As a result, our Emissive value is always 10. BUT! We see that in the shadow the white circle becomes lighter, and in the light it becomes darker. This is because Auto-Exposure (Eye-adaptation) is enabled.
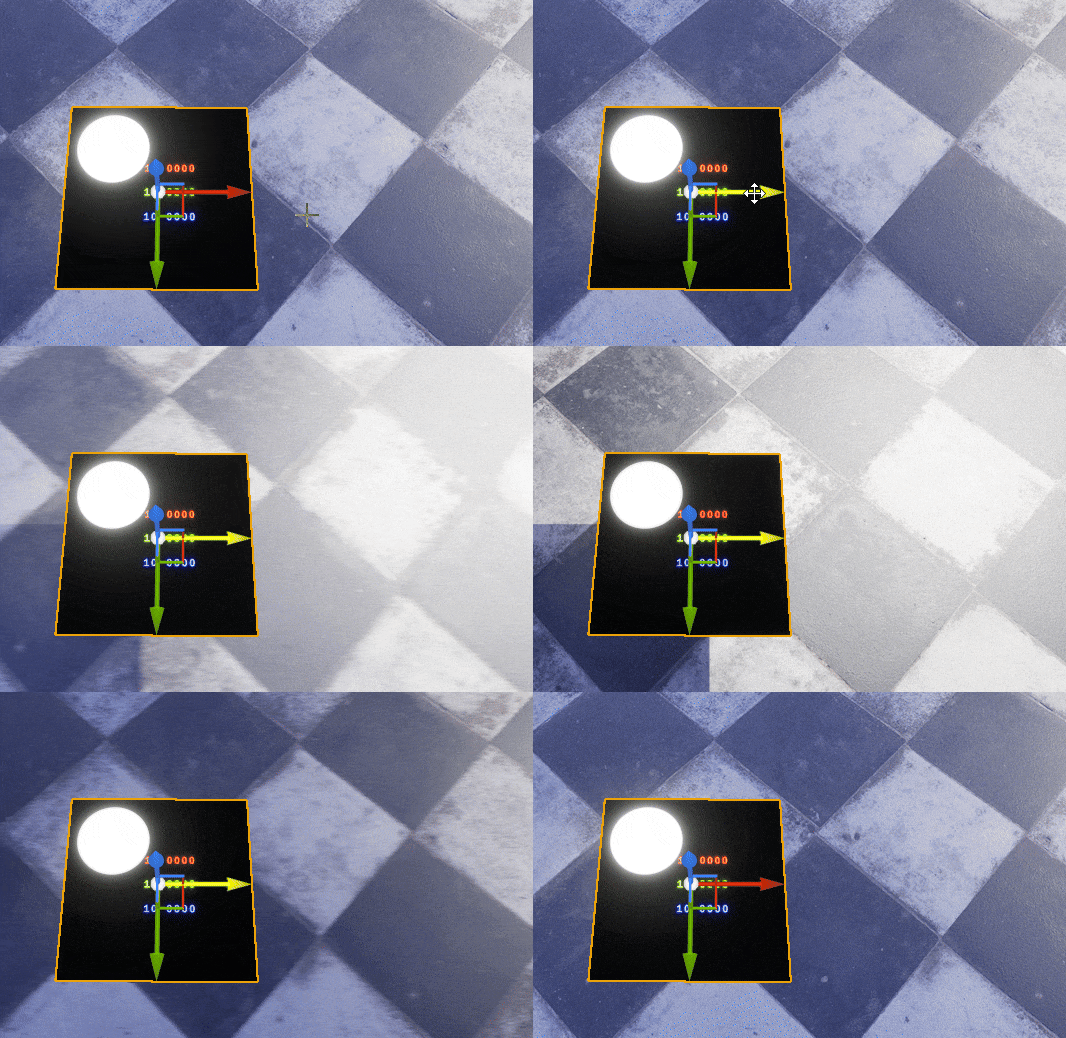
-
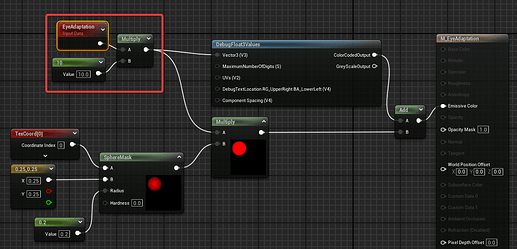
Let’s multiply our value of 10 with EyeAdaptation node
We see that the values have now been multiplied by ten, in the light emissive = 100, in the shade = 300
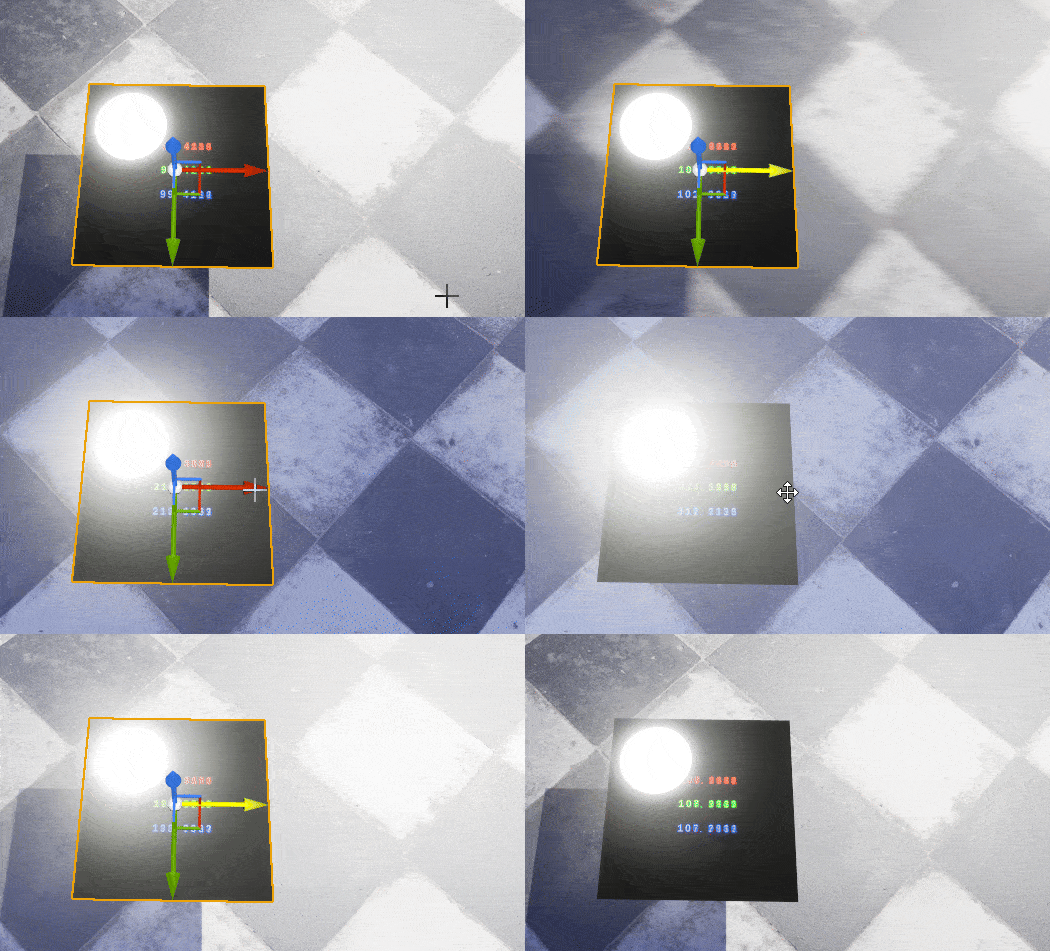
-
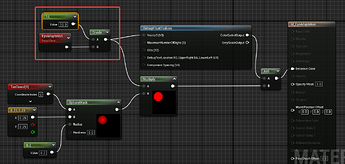
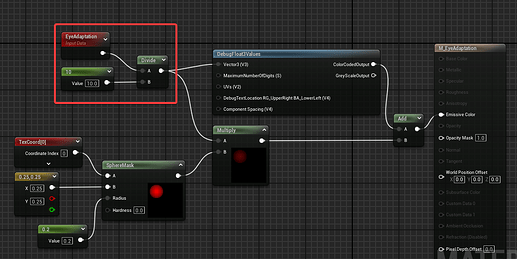
Now let’s divide Emissive (10) by EyeAdaptation, i.e. use the technique from the Beyond-fx post.
We see that our Emissive values get smaller in the shadows (around 0.3) and larger in the light (around 1.2). BUT! Our white circle has the same Emissive.
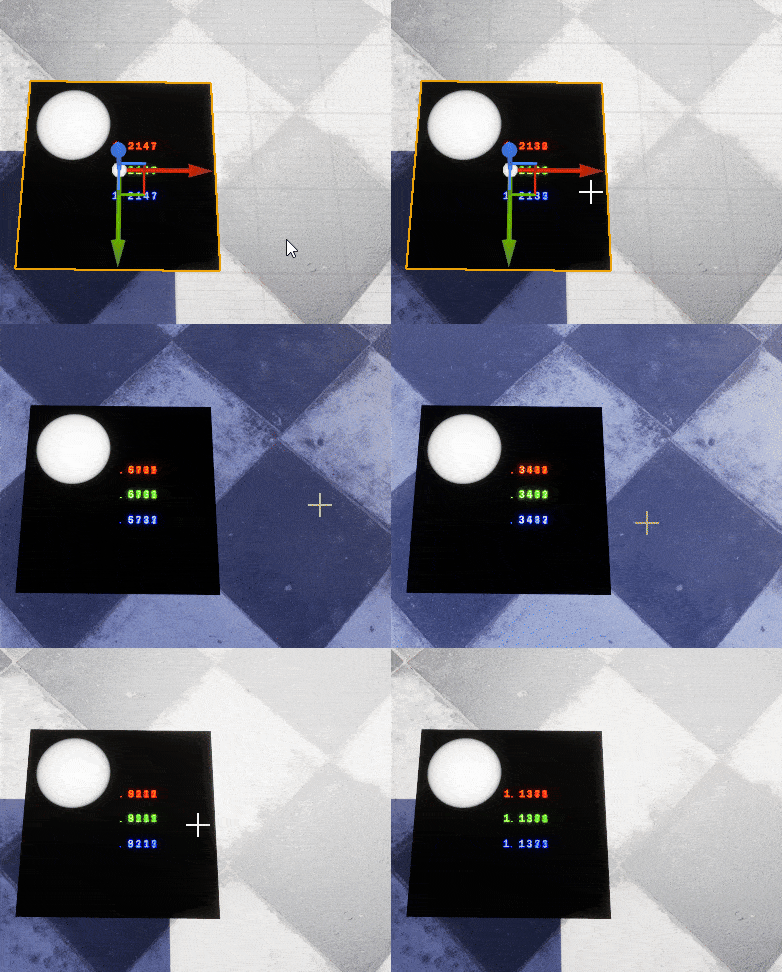
-
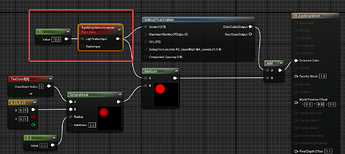
Let’s use the «EyeAdaptationInverse» node
As we can see the result is the same
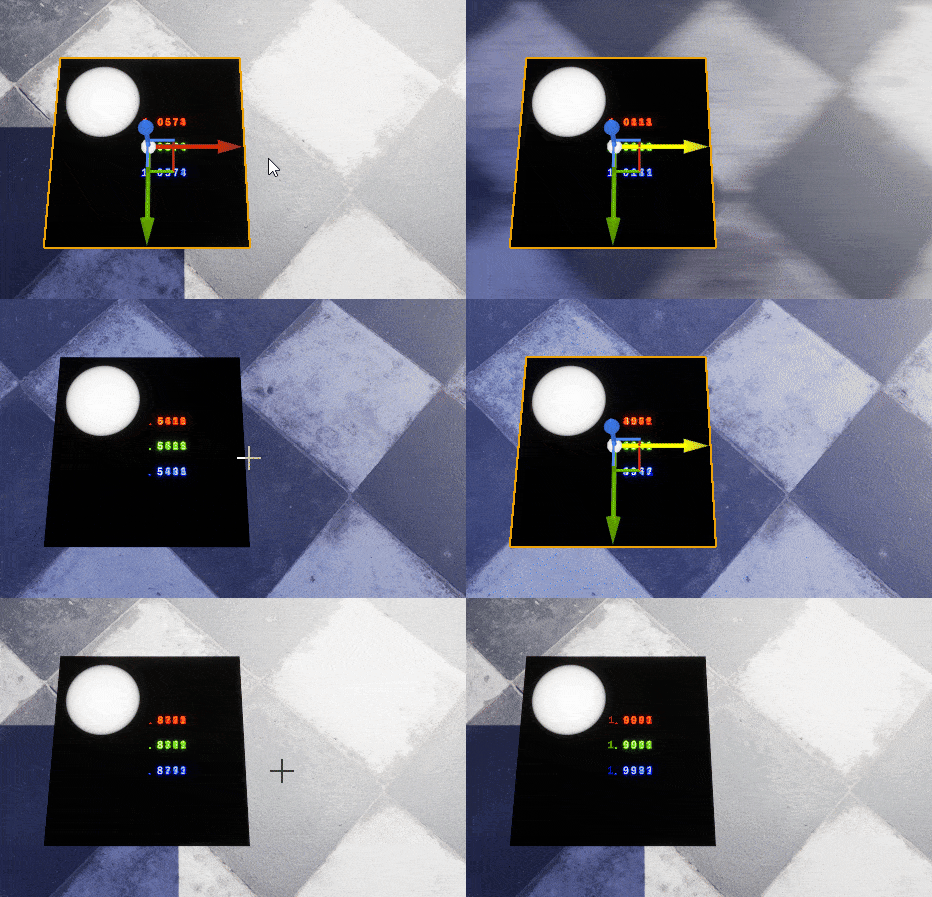
Conclusion: Dividing Emissive (10) by EyeAdaptation and putting Emissive (10) in EyeAdaptationInverse = the same result = a constant brightness everywhere (The fact that the emissive numbers change is not important; we only care about our white circle.) -
But what happens if you split EyeAdaptation into Emissive (10) the other way around?
We see that our white circle gets lighter in the shadows and darker in the light, but 10 times less than when we multiply EyeAdaptation by Emissive in Example 1.
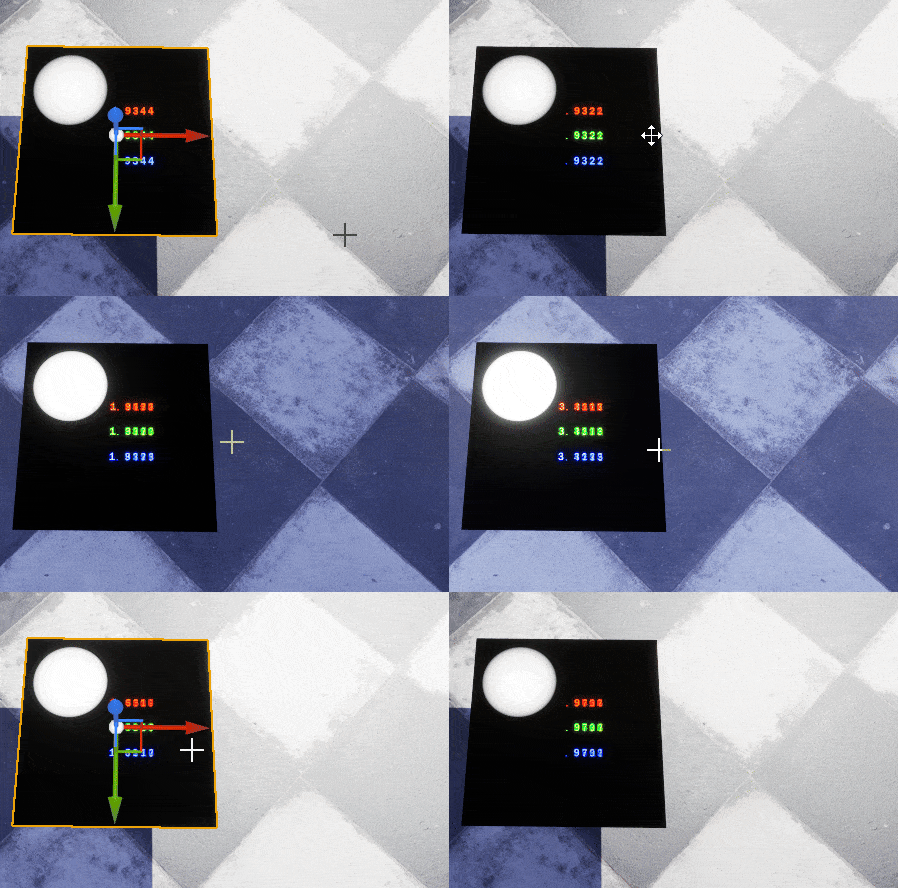
To summarize:
- Auto Exposure, Eye Adaptation simulates how the human eye adjusts to different lighting conditions
- EyeAdaptation; EyeAdaptationInverse nodes = it’s a NUMBER varying with a scene lighting, if auto-exposure works.
- EyeAdaptation = Lighter in the shadows, darker in the light.
- Use EyeAdaptationInverse or divide an Emissive value by EyeAdaptation, if you want a constant brightness on any level and any auto-exposure settings.
Homework: create nodes where your effect will lighten in the light and darken in the shade (honestly, I don’t understand how to do it myself😅)
I just want to take a moment to applaud your dedication and passion for growth. The fact that you’re here, exploring new ideas and diving deeper into your craft, speaks volumes about your commitment to excellence.
Your creativity shapes worlds, evokes emotions, and leaves lasting impressions on audiences everywhere. You’re not just artists—you’re storytellers, problem solvers, and innovators who push the boundaries of what’s possible.
Keep learning, experimenting, and believing in your talent. The world of VFX wouldn’t be the same without your brilliance. You’re doing incredible work, and the best is yet to come! ![]()
![]()
(The AI-generated smiley face and the compliment).

