Anton Lindgren: Sketch #25 Heal

Hi there!

First time posting on the forum.

I figured I will do a heal over time effect.

The plan is to make a powerful holy type healing cooldown that is up for a few seconds and ticks every second or so. I figured this would be something to counter heavy sustained damage for a short duration.

I have a rough idea to base the effect with an aura at the players feet and then build it upwards with some particles and soulercoasters.

I’ve seen a bunch of interesting ideas posted for effects on this month’s sketch already and it will be interesting to follow along and seeing what everyone comes up with :slight_smile:

Edit
Final effect:

HD version:
https://youtu.be/oRwvL8N92DQ

6 Likes

I started working on the aura part of the effect today. At first I was planning on making it more fiery like in Daniel’s post. But then I started playing around with some blockier textures and I kinda like where that’s going.

Any feedback is much appreciated :slight_smile:

1 Like

Hey there! Welcome! :sparkles:

Good job there, i like everything from the camera angle, to the background, and of course, the effect itself!

As for the feedback, I’d try enlarging the size of the healing cross symbols, reducing their spawn rate, and let them live for longer and go up slower. The faster the pace of them, the more your subconscious thinks “hey, that looks dangerous!”.

Keep it up!

1 Like

That’s some solid advice, thank you :slight_smile:

1 Like

I added some soulercoasters today.

I followed Glad’s tutorial to make a houdini tool that I could use to create the meshes inside UE4.

Also I tried the pointers you gave Lush and it helped alot. :wink: But now with the soulercoasters in place it became a bit cluttered so I turned the pluses off.
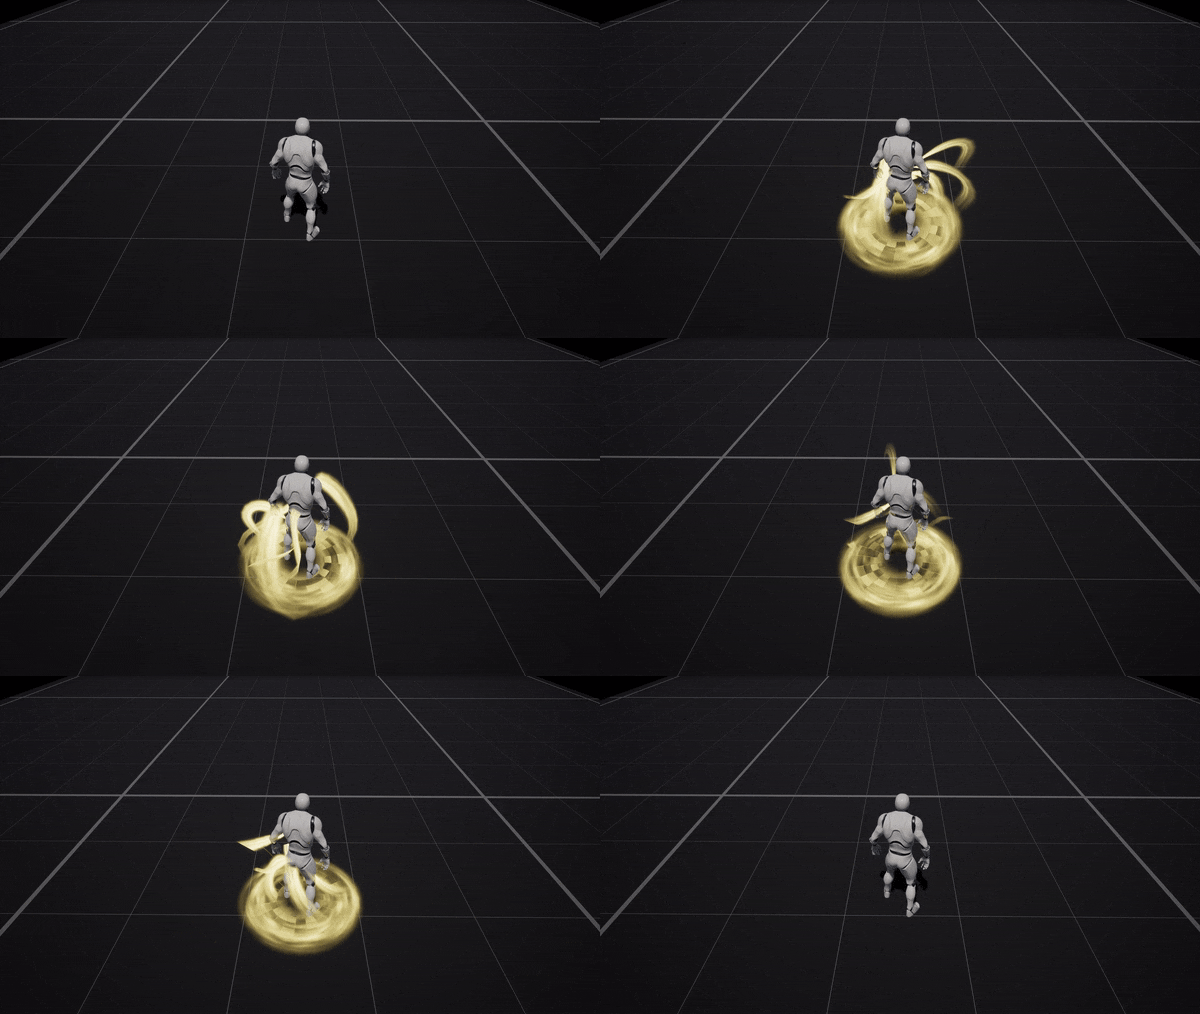
02_Heal

1 Like

I made a new digital asset in Houdini that I can use to create disc shapes directly in UE4.

As for now the properties I can set is the inner radius, outer radius, number of segments and number of caps. The UVs are layed out from the center and outwards.

I’ll probably expand it to gain some more control over the UVs.

Plan is to create a library of tools that I can use to generate basic VFX meshes.

03_Heal

2 Likes

Updated the ground discs somewhat, added a pulsating core, updated the beams and added some glimmering sparks! Also revised the color scheme and brought in a secondary color.

Feels like it’s getting closer to something :slight_smile:

As always, any feedback is much appreciated!

04_Heal

2 Likes

If you want more ideas of meshes for your library, check this thread.

2 Likes

How did you achieve the mosaic effect at the foot of your character ? The effect is really interesting :smiley:

2 Likes

Thanks for the link, that’s awesome!

1 Like

Thanks!

Here are the textures I’ve used for the tiles.

First I use a closed round disc mesh with the inner vertices mapping to the bottom of the UV and the outer verts mapping to the upper part of the UV in order to make the tiles go from the center and outward.

To make the individual tiles fade in and out I use the first texture as a “random” seed and feed it to a sine function and correct it so it goes between 0 and 1 instead of -1 and 1
sine(time + textureColor.r) * 0.5 + 0.5.

After that I multiply the mask with the second texture to separate the tiles from each other.

In order to make them curve smoothly I just add the V(y) coordinate of the UV map to the U(x) coordinate.
UV.x += (UV.y * 0.2);

Lastly I multiply with the third texture to make it fade in towards the edges.

The first two textures are also panned in the -y direction to move the tiles toward the center. And of course all three masks are packed into the rgb channels of one texture for performance :slight_smile:

The answer might be a bit scattered, feel free to shoot follow up questions for anything that is unclear! Also I might do a little gif breakdown for it when everything is done.

3 Likes

I made a material for the character that glows in unison with the blue core at his feet. I also took some inspiration from the Diablo 3 monk skill Epiphany and made the character jet black during the effect - not sure if this destroys the perception of it being a heal but I like the contrast.

05_Heal

The glow color is a gradient between my two existing colors for the effect. For normals pointing downwards it uses the blue color and the more upwards it’s pointing the more it goes towards the yellow.

I’ve exposed a LiveTime and a Fade parameter that I control via a timeline in my player blueprint.

2 Likes

No huge update here. Mostly tweaked stuff.

The biggest changes were that I turned down the darkening effect to 50% and that I updated my Curve Mesh tool to push out crossed meshes.

06_Heal

The gif below demonstrates one of the two curve meshes I use.

06_Heal_curvemesh

1 Like

Just made some minor tweaks today but I’m calling this one done now. :slight_smile:

Here is the HD version of the effect.

Cheers everyone, it’s been a blast following all the threads for this sketch!

07_Heal

https://youtu.be/gNHbUjlj1n0

3 Likes

Mmkay so I’ve been playing around with Houdini smoke sims these past couple of days and today I thought I would see how it fits in with this effect.

I felt like it gave it kind of an angelic look so I got inspired to make some diablo style wings as well during the heal.

So here we go with my… final final update… I guess.

2 Likes