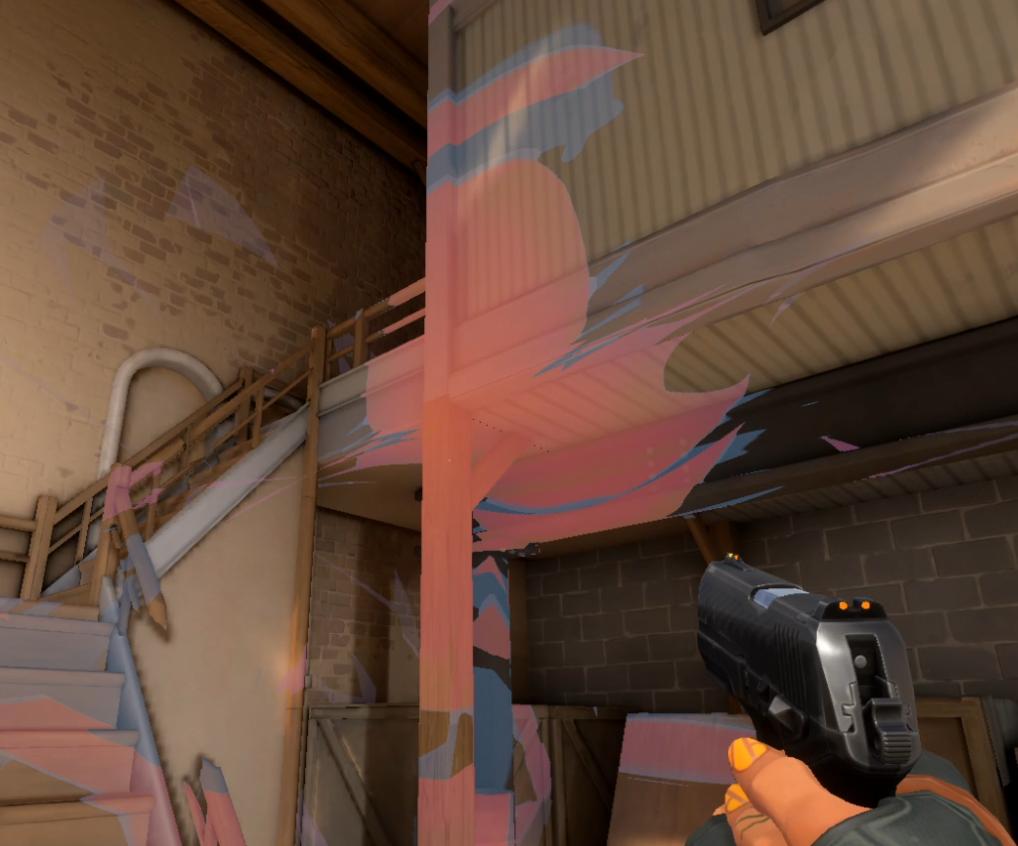
Hi guys! So yesterday Valorant has been launched worldwide, and i’ve got a chance to play this game. What took my interest was how they did decals for explosions and other stuff:
I’ve been trying to achieve this effect with screen projection decals and triplanar mapping,
but it seems like they have some another approach for it.
So if anyone know how they did this effect, please share that knowledge, i will appreciate it so much.
This video by the brilliant Ben Cloward could be helpful. In his situation he is solving an issue with the caustics decal only being projected on one axis, the same solution should be doable for you as well. Hope it helps.
@kmskazka
I can come up with a few ways to make this without screen projection nor triplanar mapping.
They aren’t using textures at all. It is a procedurally generated 3d volume generated at runtime in the pixel shader.
They calculate an ideal direction (based on camera view direction and surface normal) to project the decal in on projectile hit. As demonstrated in your video, you can sometimes kinda break the decal by turning around it afterwards.
Spherical mapping from the decal position, which itself is offset using the surface normal.
Hi. I did the vfx for Raze. Wyvery’s 3rd suggestion is pretty much what we did. There were earlier versions where I was using triplanar mapping but I’d get these extremely noisy seams between projection axes when the decal was projected over complex geometry like rafters, pipes, etc. Biplanar Spherical UVs are not a perfect solution because they still create undesirable pinches and bulges in some situations BUT they do give you seamless spherical UV projections for your decals. I can’t share our shader graphs but the setup’s similar to a polar coordinate function only with values derived from the absolute world and actor positions instead of the usual UV channels.
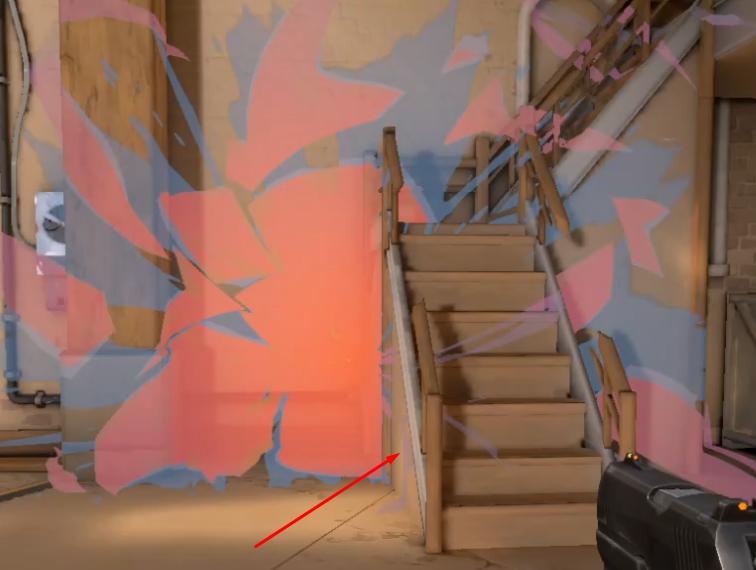
@Dave_Shovlin so I’ve tried spherical projection as you mentioned, but my results are not that great… Also the thing is i have to spawn decal in some range after collision with surface, inside object, so it will get some distance to project from center. Please take a look, and point me in right direction.
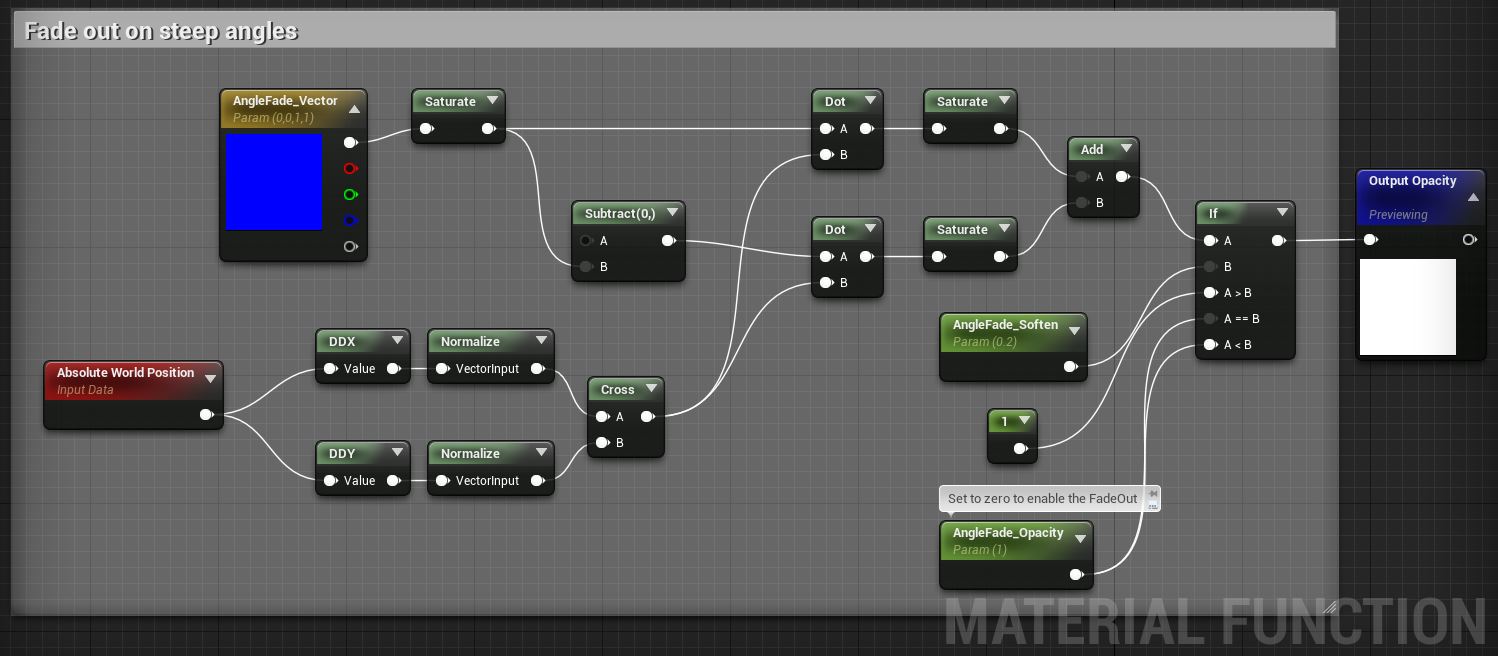
I have an example of Angle Based fadeout on my website. It’s not perfect at all, but at least you can kinda get rid of some of the stretching. Spherical projection is probably a better approach though.
is this using blueprints? or a decal object? it’s pretty cool, I tried copying your graph into a material, but I’m not sure how to get the objects’ rotation into the shader
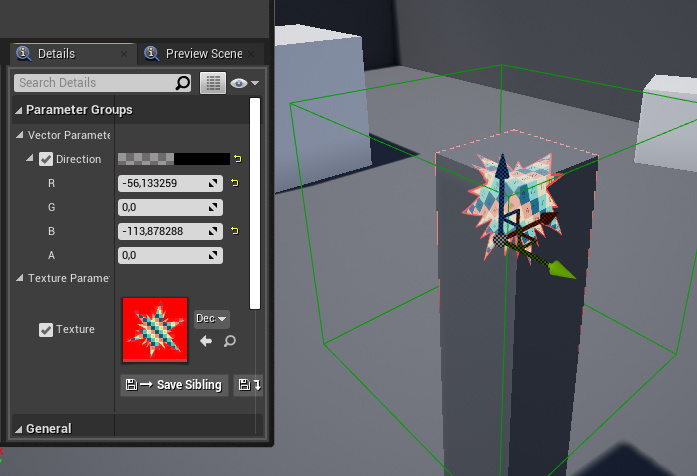
Ty man, there is vector parameter called Direction, and its basically a rotator(each channel represents angle around axis), so you can pass your rotation to it. To see the result you need to put your decal inside of the object with borders around it, because it projects from its center to the surface of object.