I have a character that has a second UV set that is used as a mask for particle spawning.
Does anyone know how I can use the second UV channel of a skeletal mesh to colour my particles using Niagara, I can use the mesh reproduction sprite node and yes my particles look like the default material spawned over the mesh (using the MRS in the material also of course), but when I try to set this to my mask texture and use the second UV channel in the settings in Niagara it just looks broken.
I am trying to use the ‘experimental’ UV mapping variable that exist using either the mesh reproduction sprite or the skeletal mesh sampling, but changing this value seems to make no difference to the look of my particles. I seem to only be able to get the UV channel 0 to colour my particles.
I’m interested in knowing if I am doing this wrong or there is more to this for it to work.
Hey Aaron, hope I understood what you’re trying to do, my apologies if not!
You can (almost) always double click the modules to find parameters/inputs and see what they are doing.
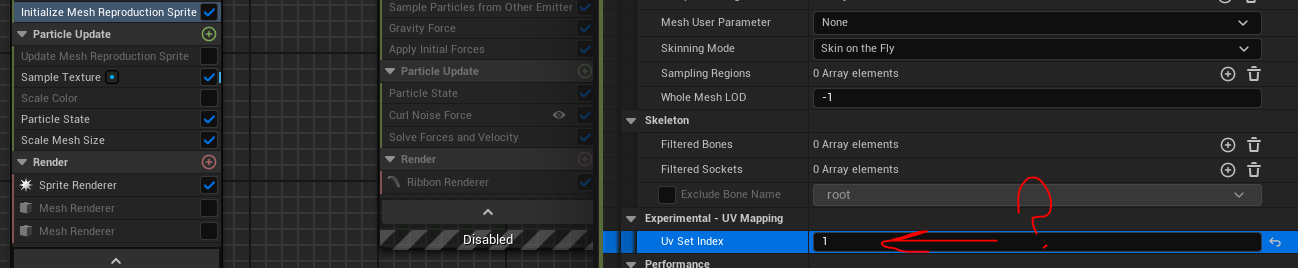
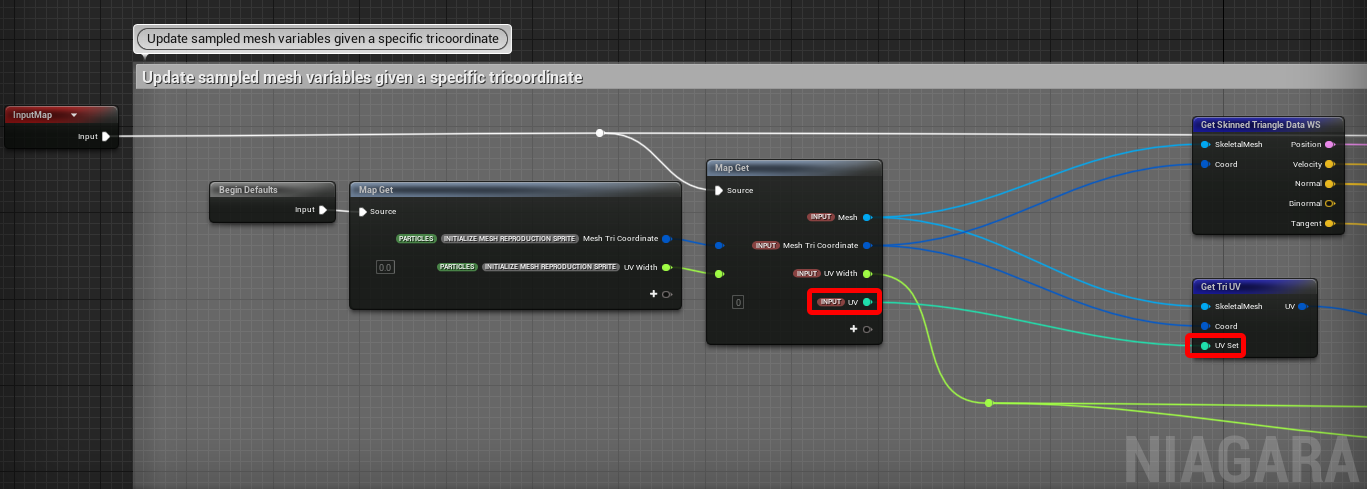
That said, if you open up the original UpdateMeshReproductionSprite module and hook up the UV Set to a parameter and use that instead of this magic UvSetIndex, it will work as you expect.
Here’s the result:
Lazy setup for MRS
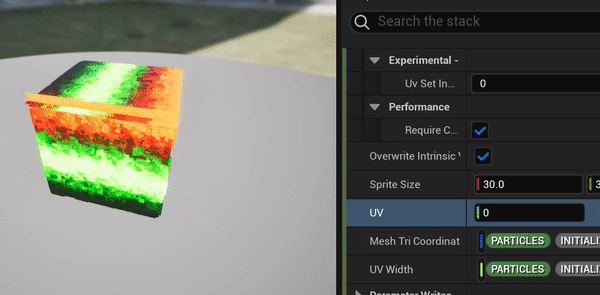
Here’s the UVs with the texture(dict_0000_0087) I’m using
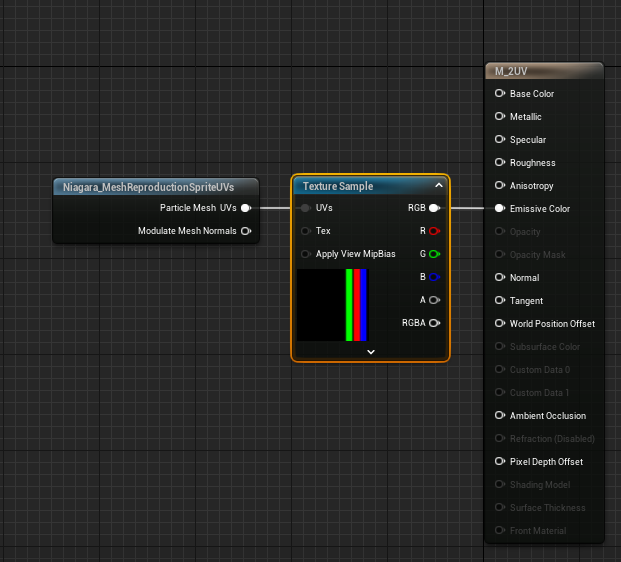
I think you can also achieve this by using the SkeletalMeshLocation module, then feeding the output UVs into a SampleTexture module, then setting the color of your particle to the output color of the SampleTexture module which is what I assume you’ve also tried? Bit more hassle if you ask me.
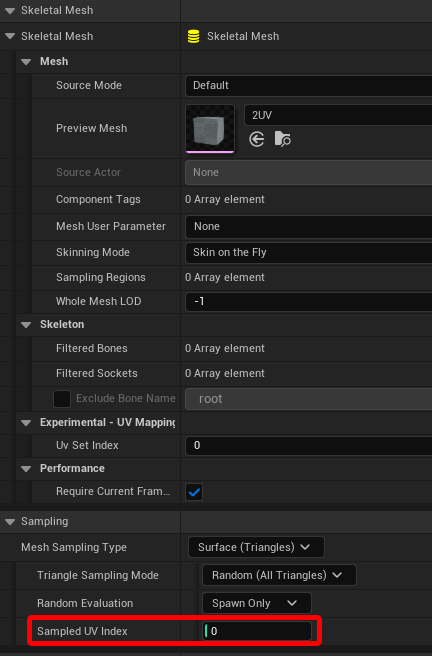
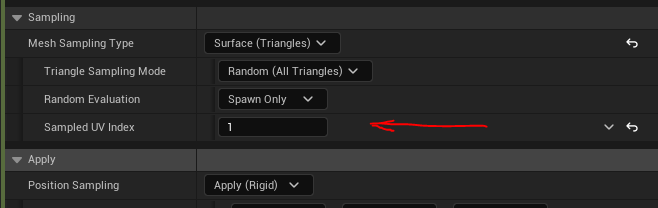
Do note however, with the SkeletalMeshLocation module, you still don’t use that UvSetIndex parameter, there is a ‘SampledUVIndex’ parameter under ‘Sampling’ when you set MeshSamplingType to Triangle/Vertices.
Hope that helps!
You might also consider duplicating/versioning default niagara modules in case you update your project and the module happens to change down the line.
Personally, when I had to do something similar I did not bother using different UV maps.
I added the option to sample a texture inside the SkeletalMeshLocation module, which then also allowed me to specify ‘valid’ texture values and animate/threshold them all inside niagara!
As for what the UvSetIndex is doing, I could not find it anywhere in either modules, so someone smarter will come along and tell us both, or we’ll figure it out in a later UE update!
Hi thank you! And very sorry for the late reply but I was off work until now.
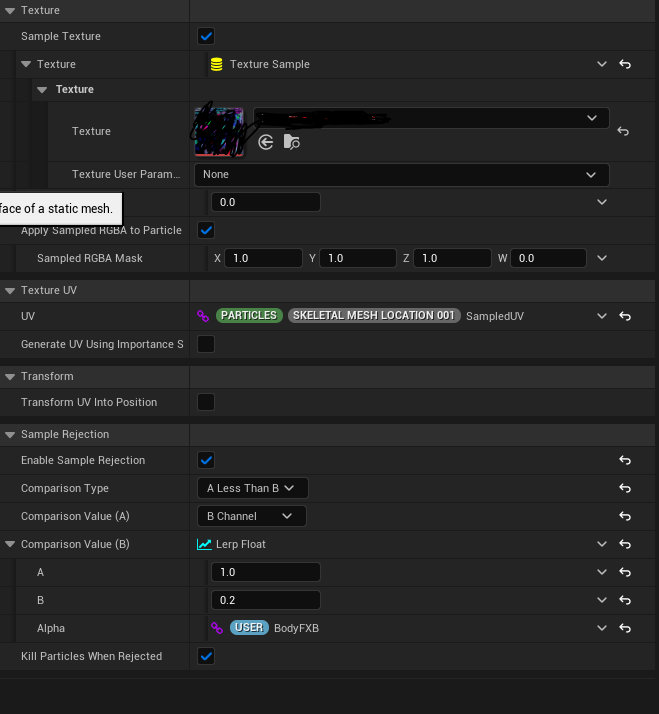
I have indeed duplicated the MRS node and changed the UV to 1, this worked with regards to getting the texture but trying to do anything with the sample Texture seemed to be broken also, I again duped the sample texture node and changed the UV index from 0 to 1, and I can get it to sample the texture, but trying to use the Sample Rejection seems to be broken now, and I am having all kinds of weirdness happening.
I’m wanting to create a sweep mask using the texture on UV 1 that is a bunch of gradients on each RGBA channel.
It’s very frustrating that just by having the texture on UV set 1 has caused so many issues in Unreal! Unfortunately due to our workflow in our studio this has to be done this way.
But in the end I have done this via Vertex colour instead, which I baked into the mesh vertices using Maya, again I couldn’t bake the texture to the vertices in Unreal because baking from a texture to vertices using UV set 1 is broken in the mesh paint! Go figure! it’s not ideal as ideally everything would be done of a single texture but, it seems Unreal just doesn’t like things being in UV set 1, so in the end I gave up on this approach as the time it was taking was becoming silly.
Just an update on this incase anyone else stumbles across this thread, I ditched both Vertex colour and textures in the end, baking textures into the vertices was a step too far in complexity and I wanted something more procedural and elegant.
In the end I went for using the Gbuffer to color the particles and used that colour in the kill bool comparison, it helped that the material had glowing sections to it, and always will so thought that was the best solution here and eliminated a huge amount of work in our setup! It limits us to only having glowy materials plugged into the character diffuse to spawn on the GBuffer, but it works very well.
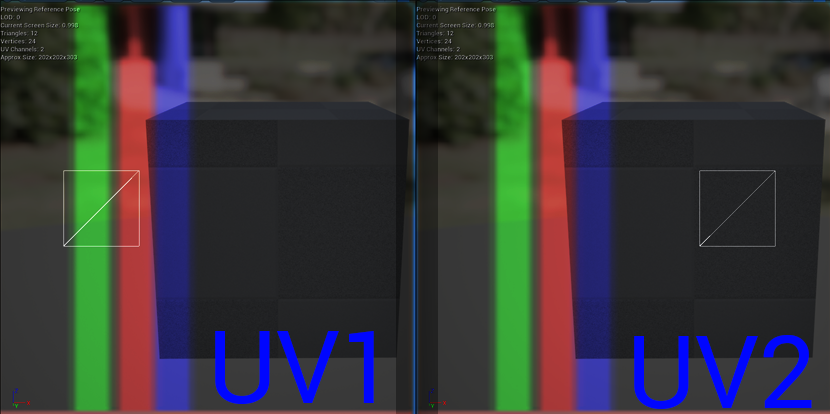
I have another update on this, we revisited this setup, and I got it working using UV1, and I don’t know why I didn’t see this before but, the answer was sitting right in front of me the whole time! In the sampling section (not the UV Mapping Section), you can choose a different UV set, it says that is for sampling vertices and tris, but does indeed swap your UV index for use with the sample texture node.
And here is how I am using a variable form a blueprint to sweep through the sampled texture channel to spawn particle form that area, works a treat, I have omitted the texture and texture name due to NDA.
I’m also using a lerp to remap the values being spat out of the blueprint to work with the texture being used.