Hello again!
I wanted to share an update on this topic since I’ve managed to come up with a much more efficient and scalable solution than the one I originally posted, also fully decoupled from Blueprints, for anyone interested.
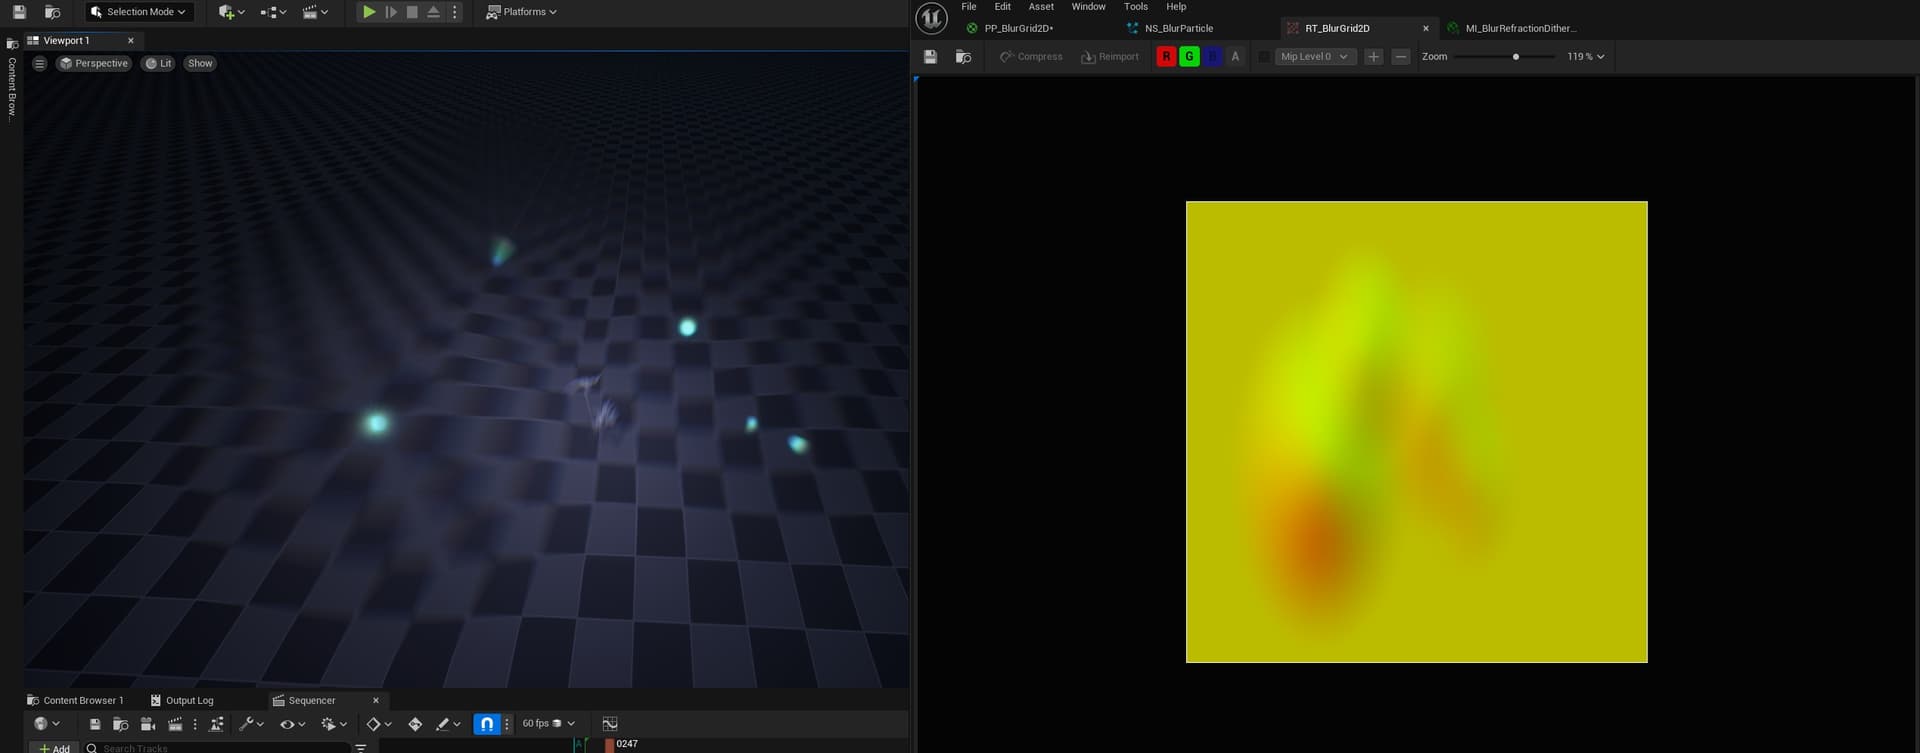
This new approach makes use of Niagara Grid2D and the new Niagara Data Channels (NDC). The idea is to recreate a Motion Vector Render Target using a Grid2D by reading particle data (position, radius, blur intensity, etc.) and writing it to an actual Render Target texture. This texture is then sampled in a Postprocess Material, where the blur is applied based on the stored vectors and instensities.
It’s essentially the same concept as my first proposal —a custom g-buffer of screen space motion vectors—, but implemented in a far more optimal way, avoiding the overhead of scene capture.
I’ll explain the basics of how my solution works:
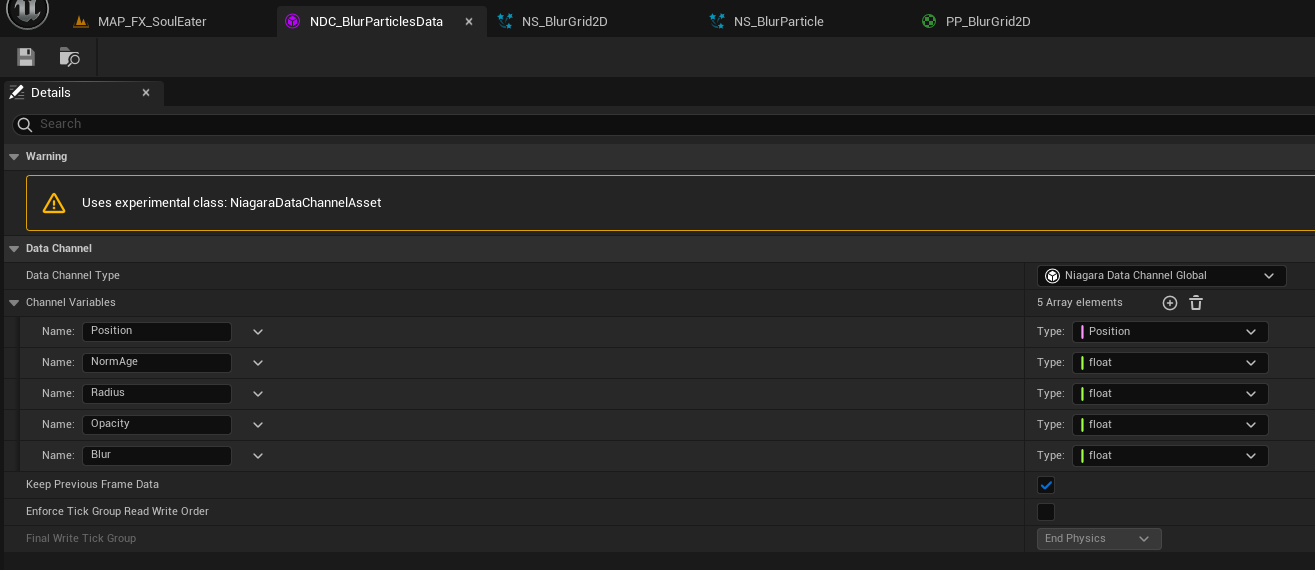
- Create the NDC Asset and define whatever variables you want to export from your ‘Blur Particles’.
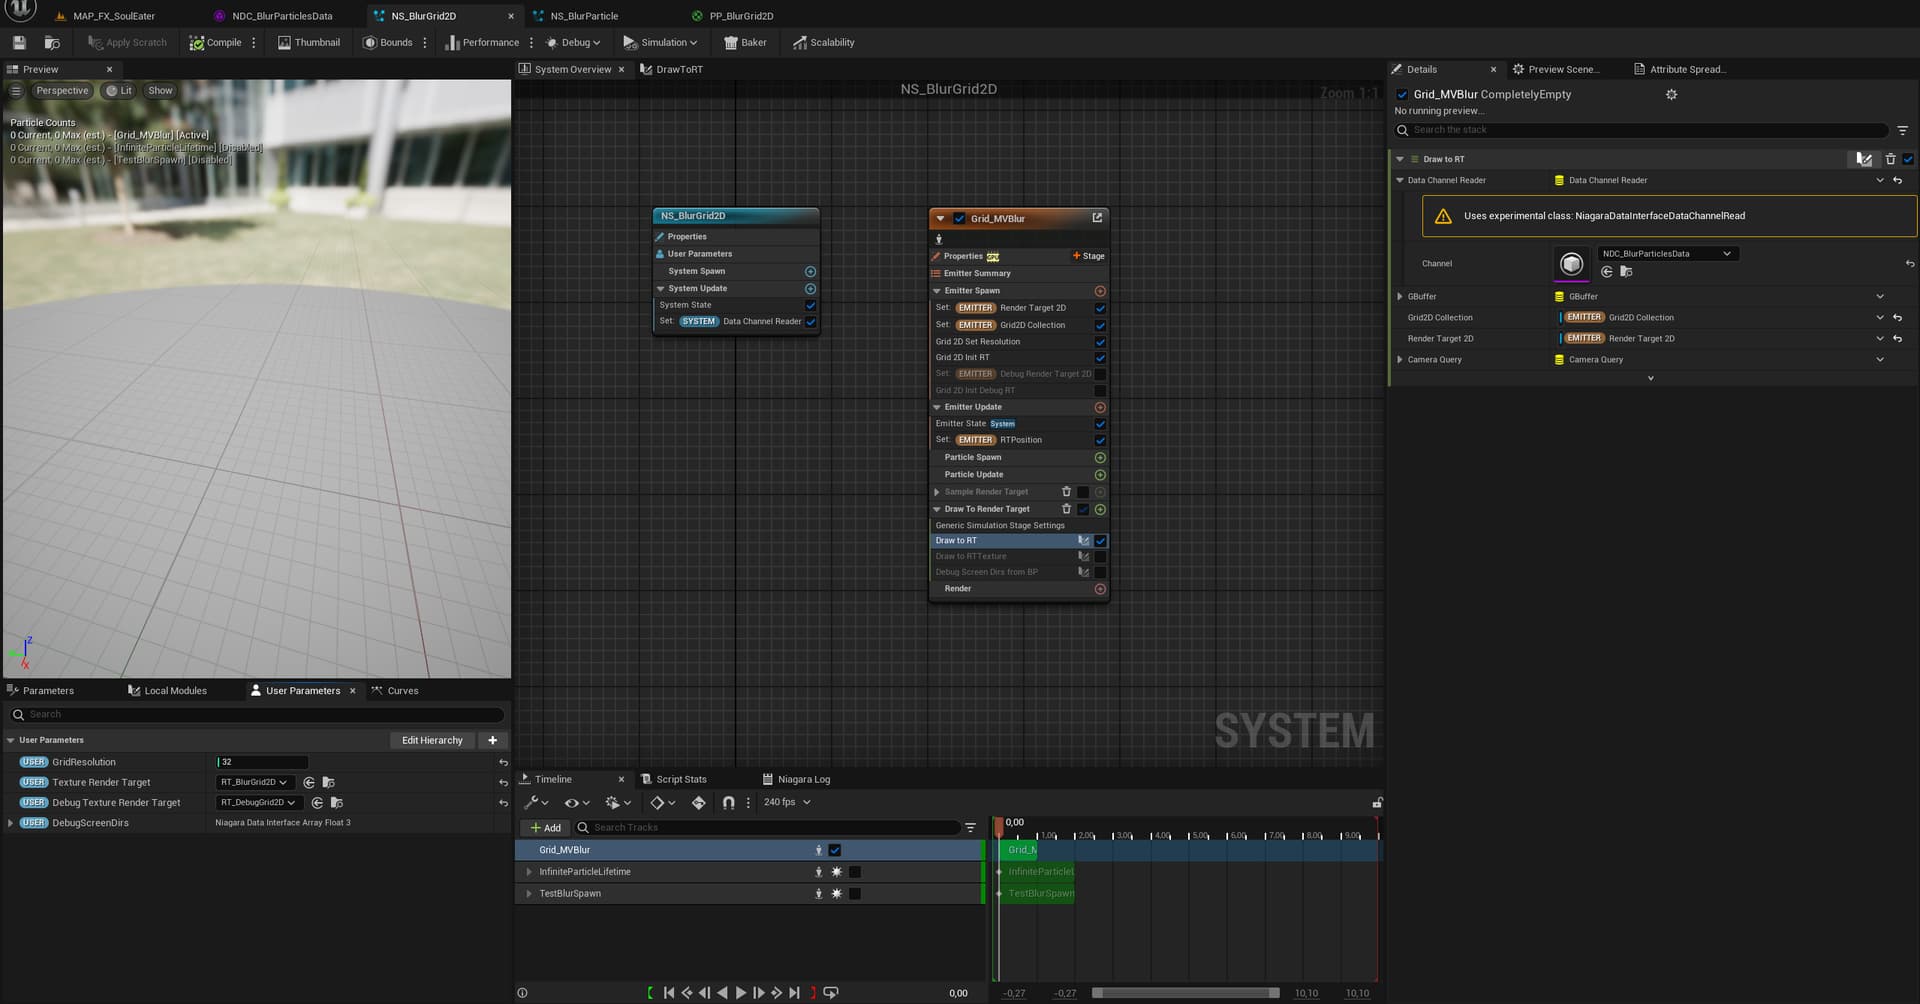
- Set up a Manager Niagara System that acts as your Blur Manager. This system contains the Grid2D, receives the NDC Data, and writes to the Render Target texture.
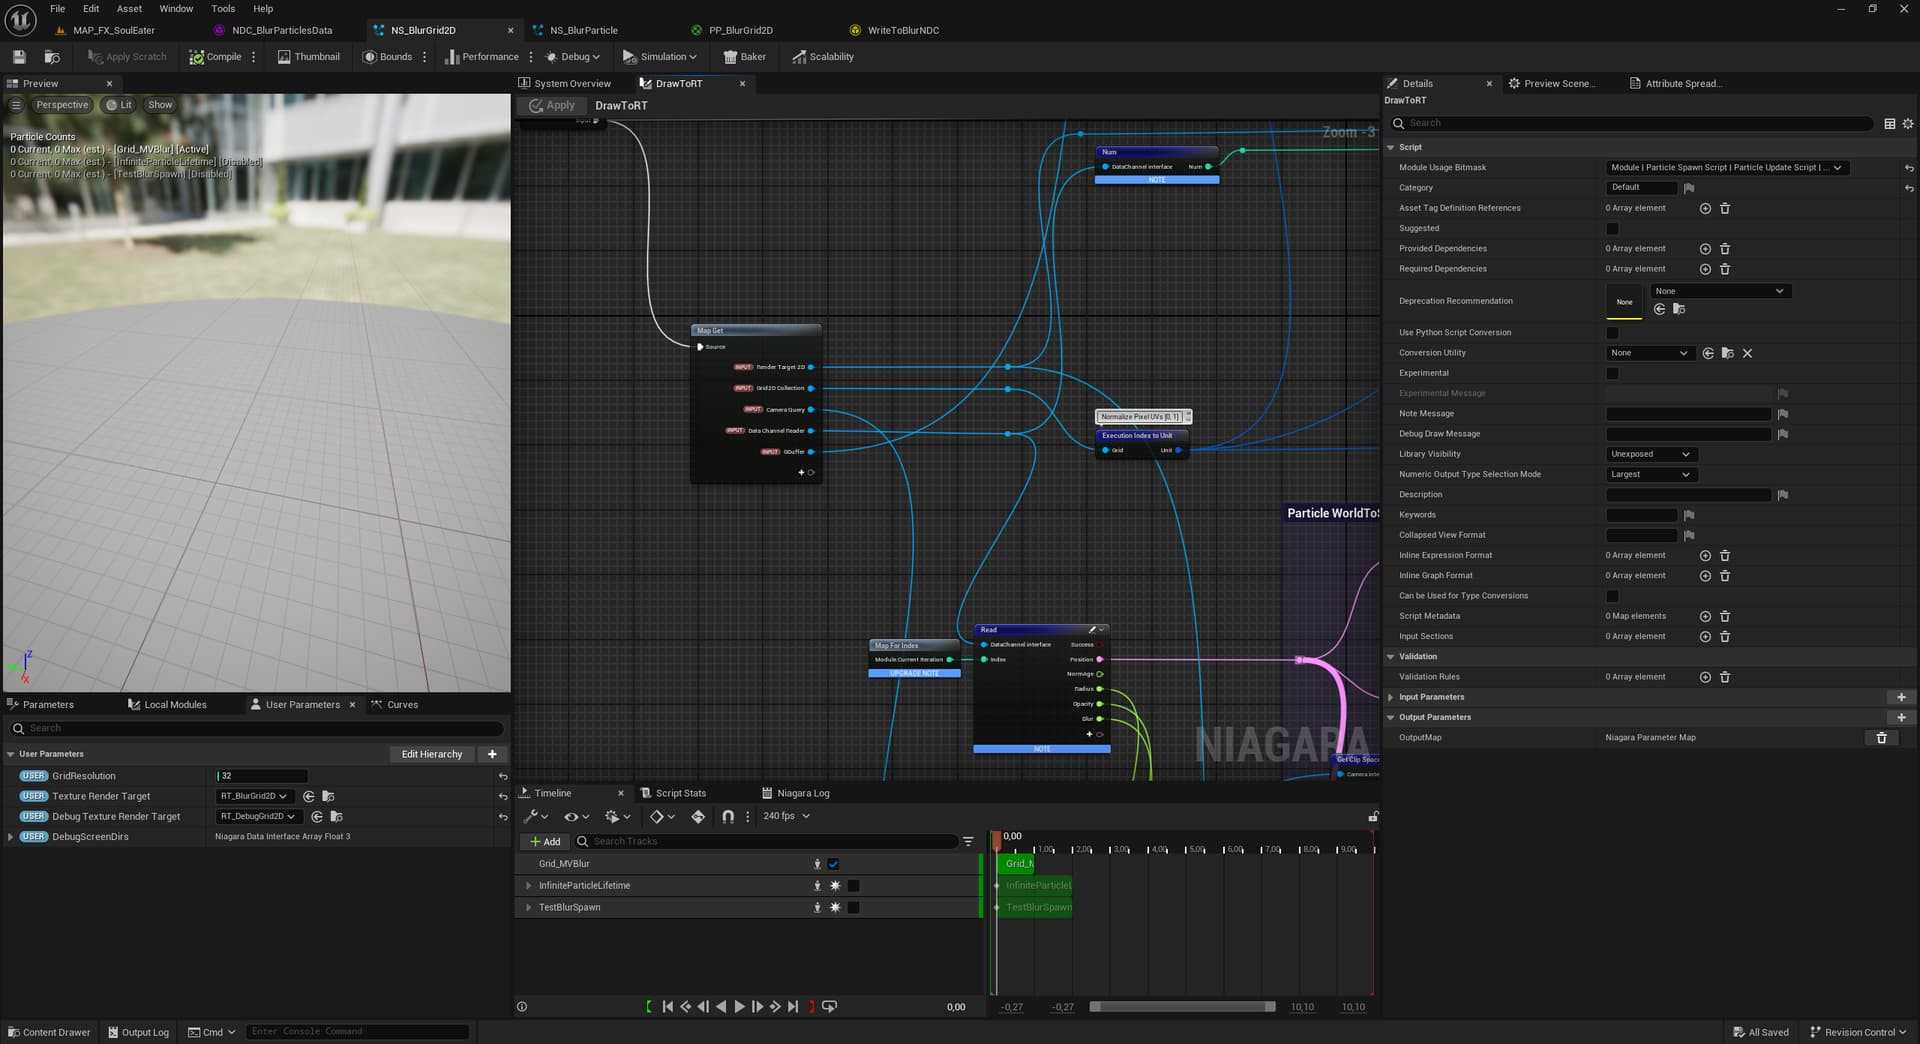
All the core logic is done here. Each Grid cell corresponds to a pixel in the Render Target, so you operate within the grid as if you were in screen space.
And what do you write? You can go simple —transform particle world position to Grid UVs, create a radial mask and output that—, or more polished —fit radius with aspect ratio, distance and FOV, project sprite location and orientation to recreate it in 2D space with perspective, etc.—
- Emit blur particles from any system (e.g. an impact effect) and have them write to the NDC.
One cool thing about these NDCs is you don’t need to manage the data pool manually. A new Data Channel is appended whenever a new particle is spawned and removed automatically when it dies.
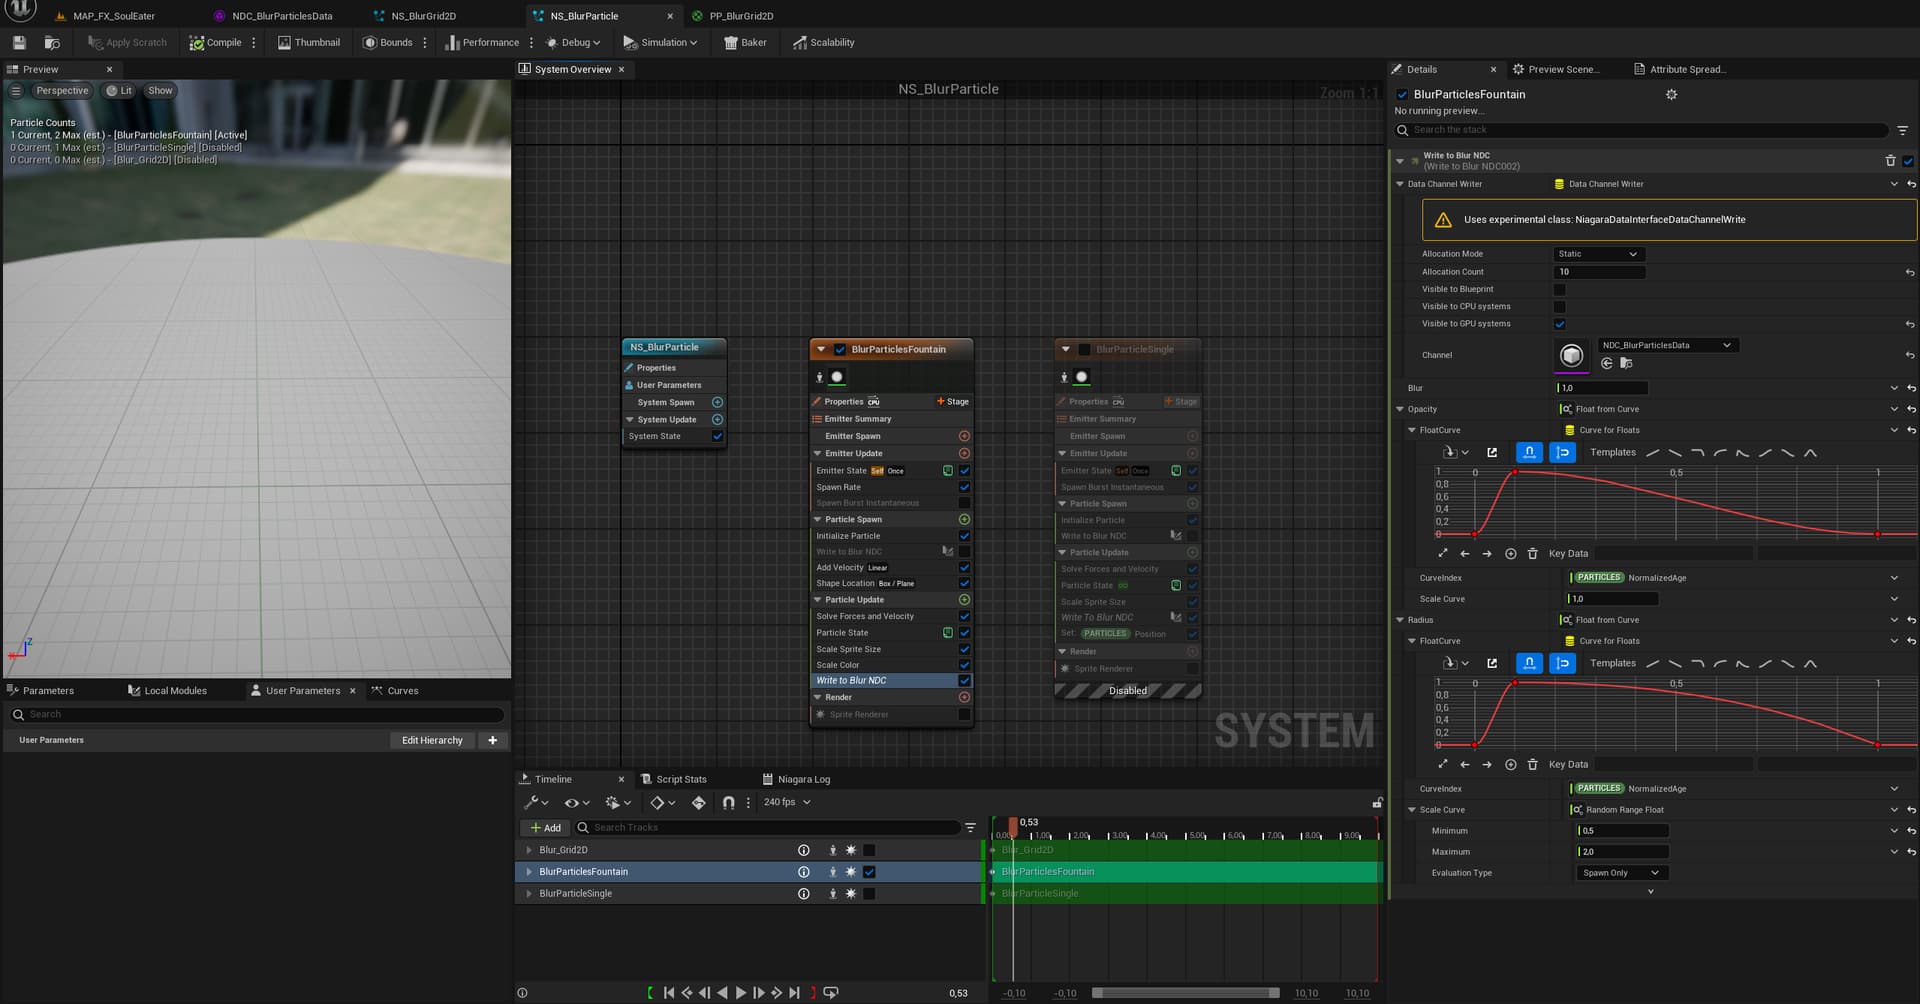
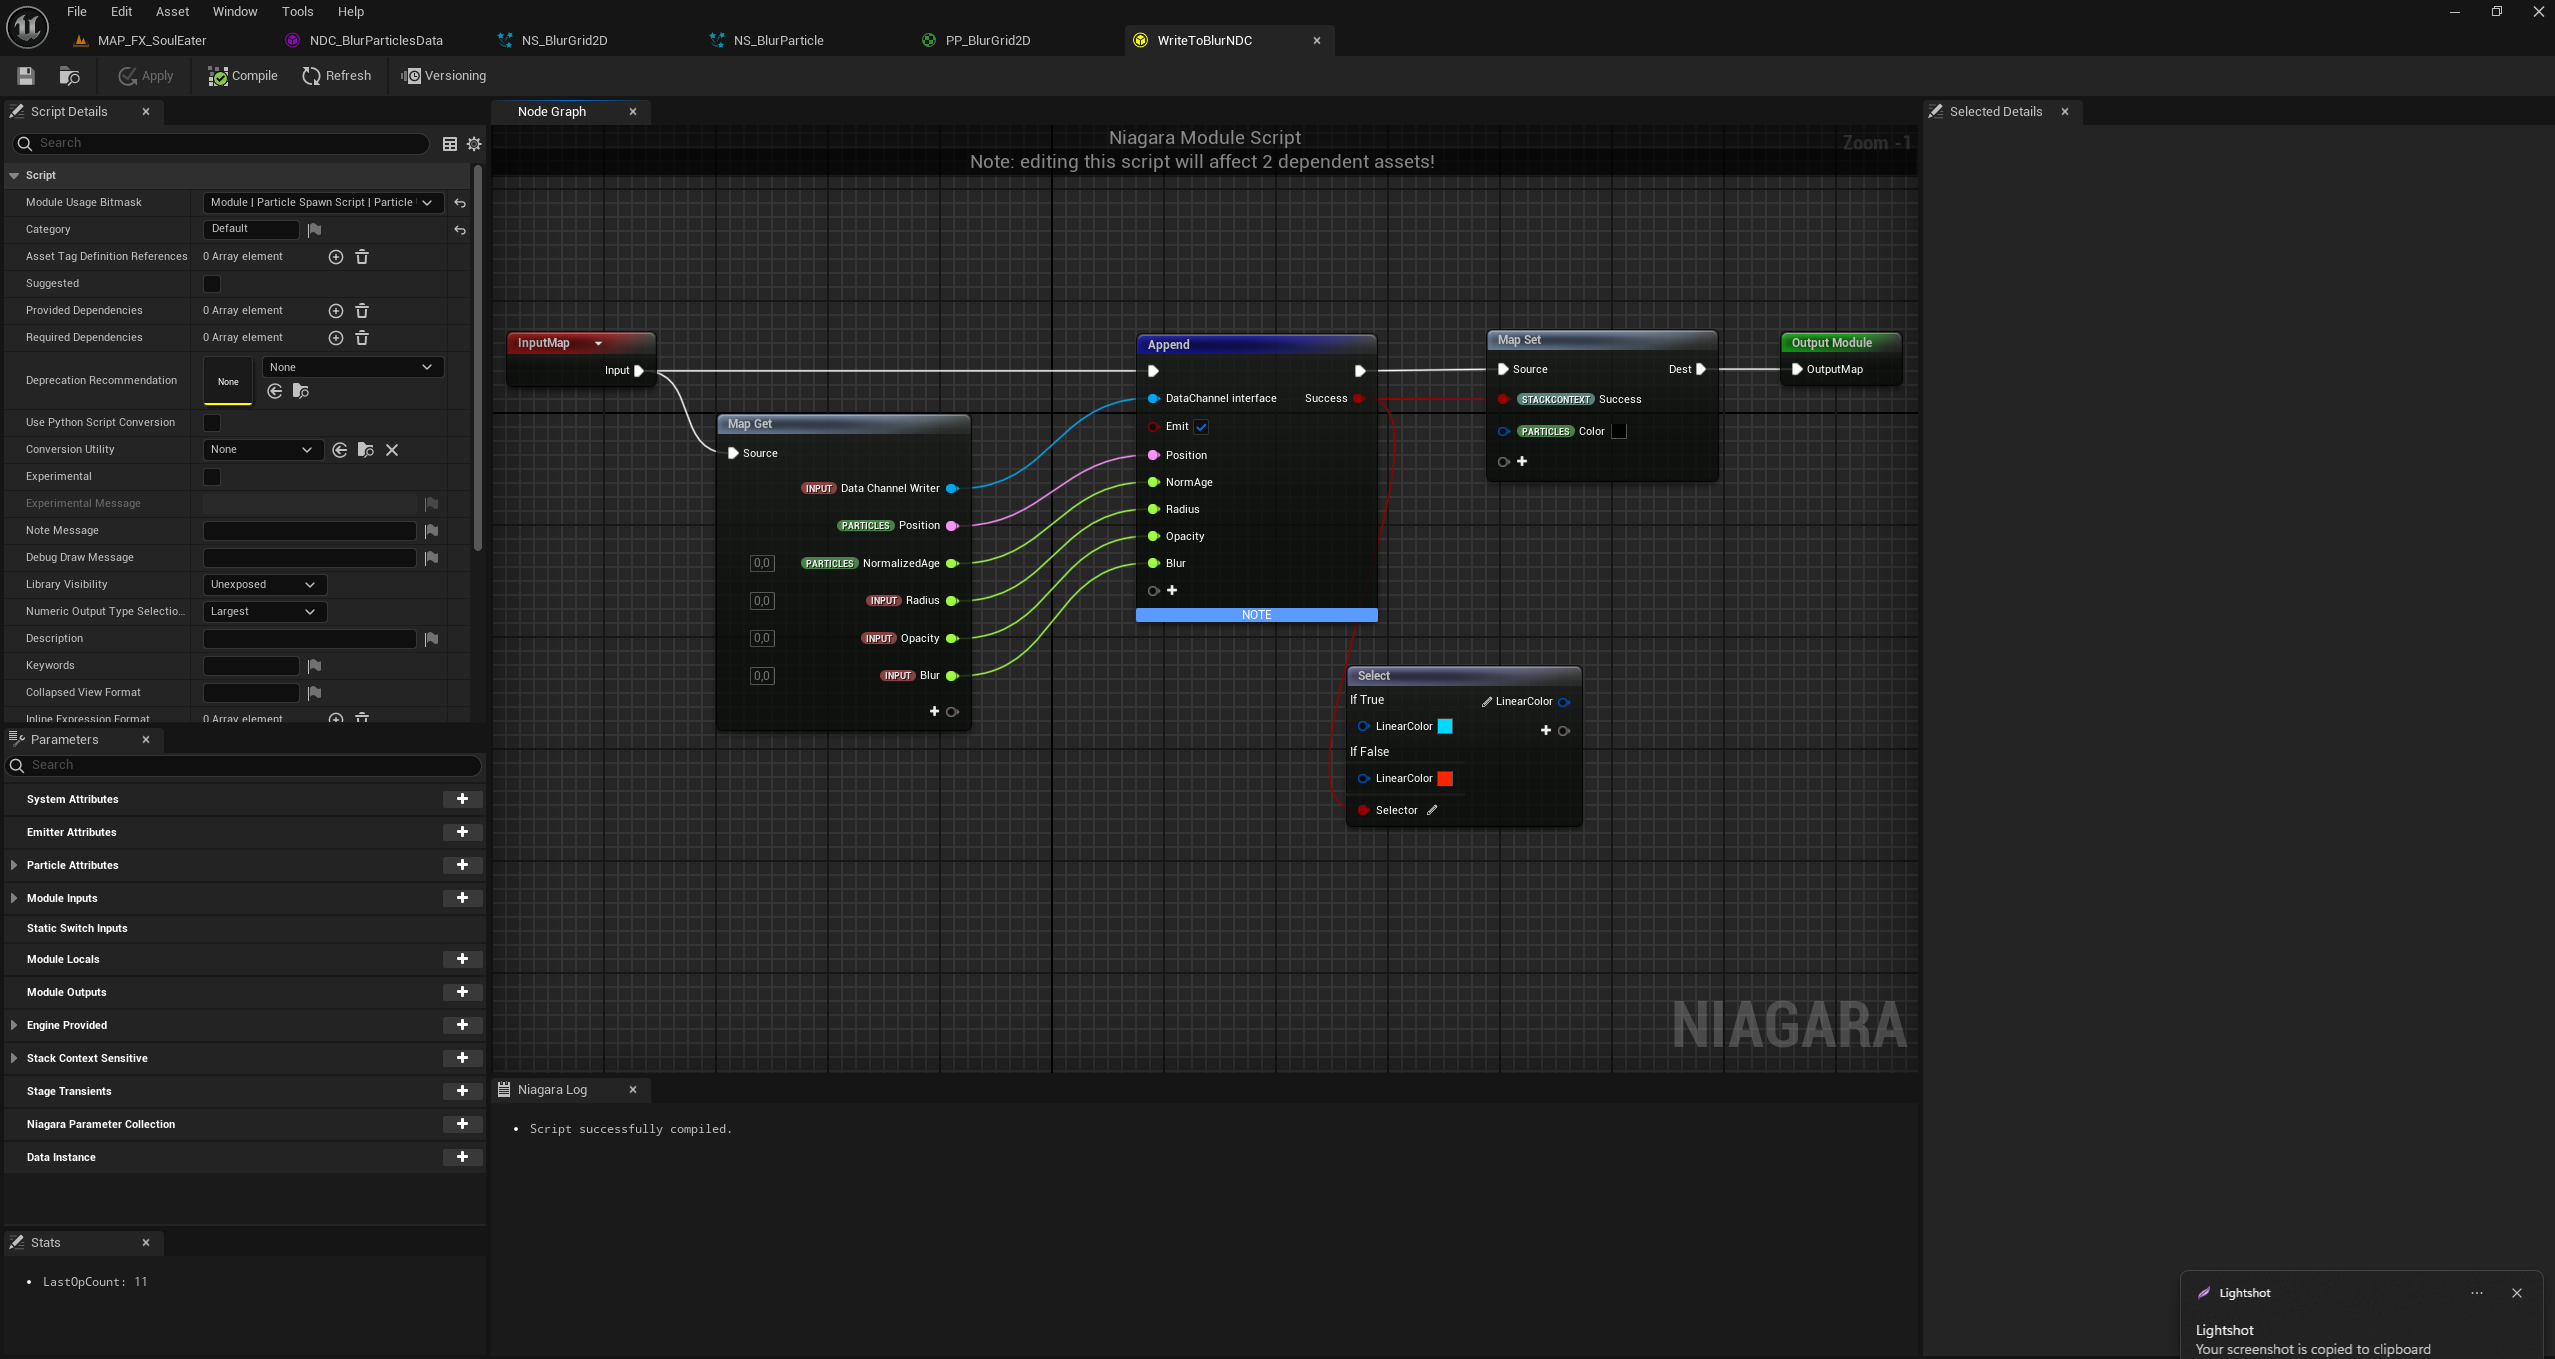
- Sample the Render Target texture in a Postprocess Material, using this MV data as the blur directions.
Some insights on this new method:
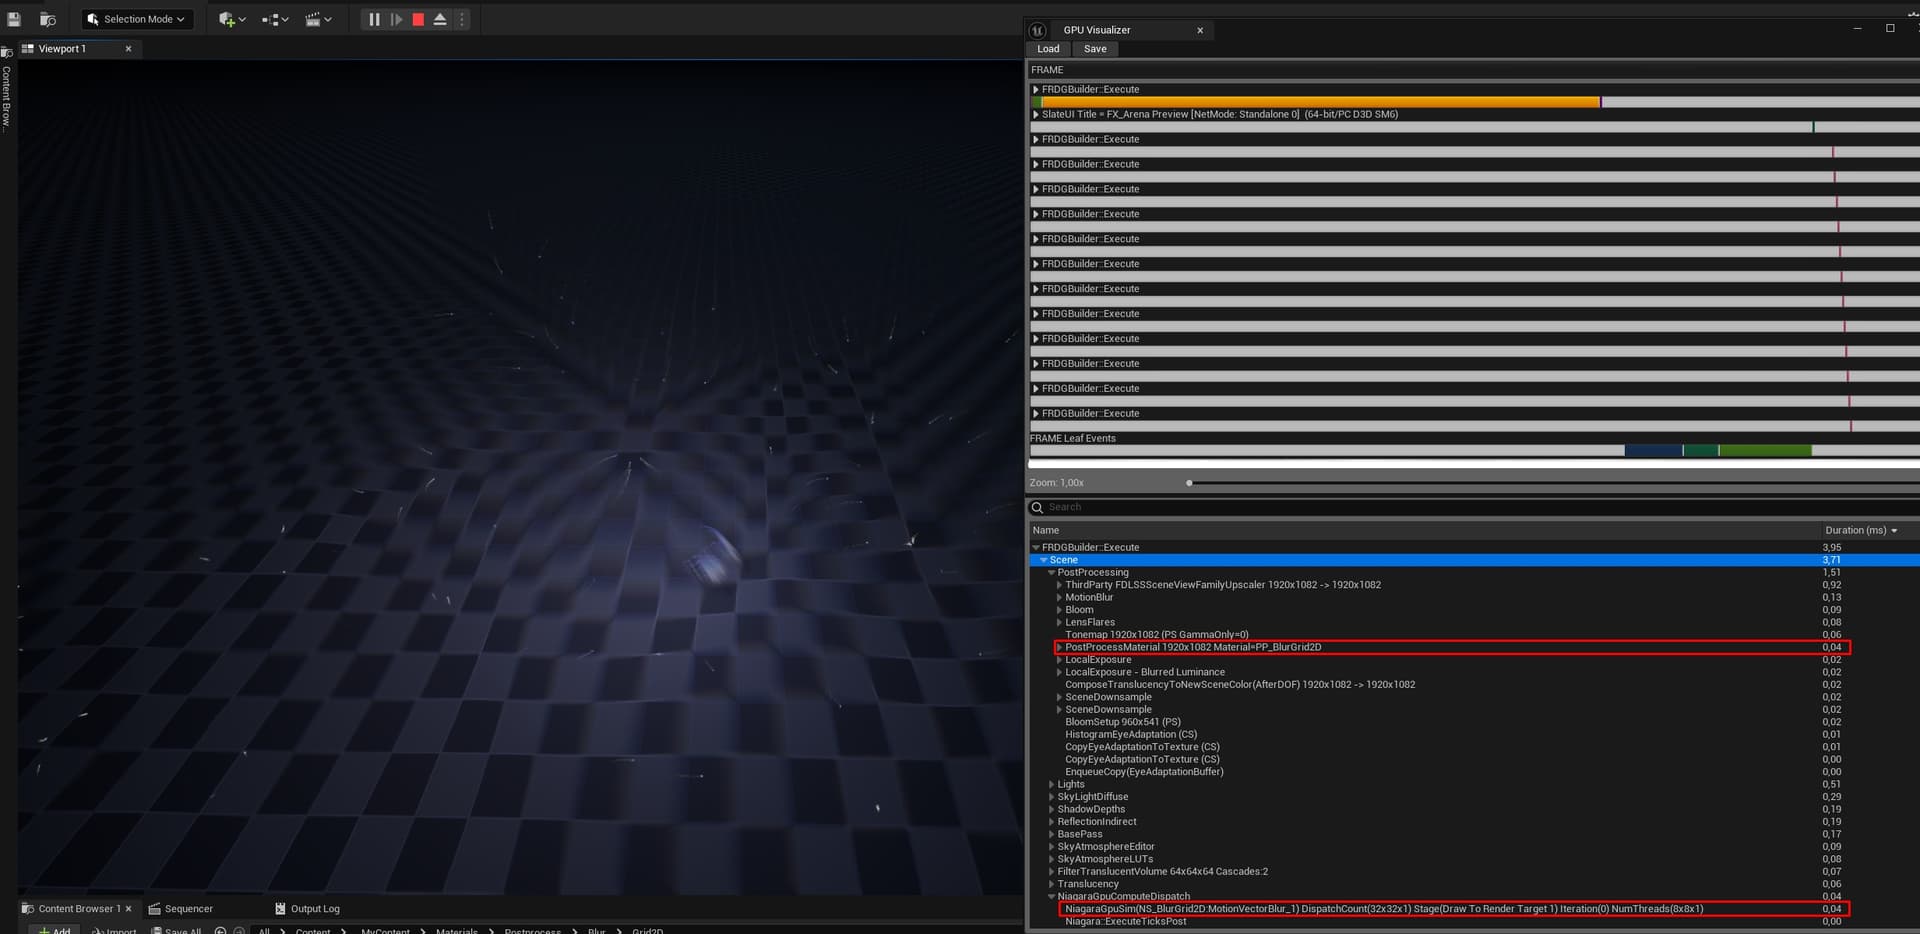
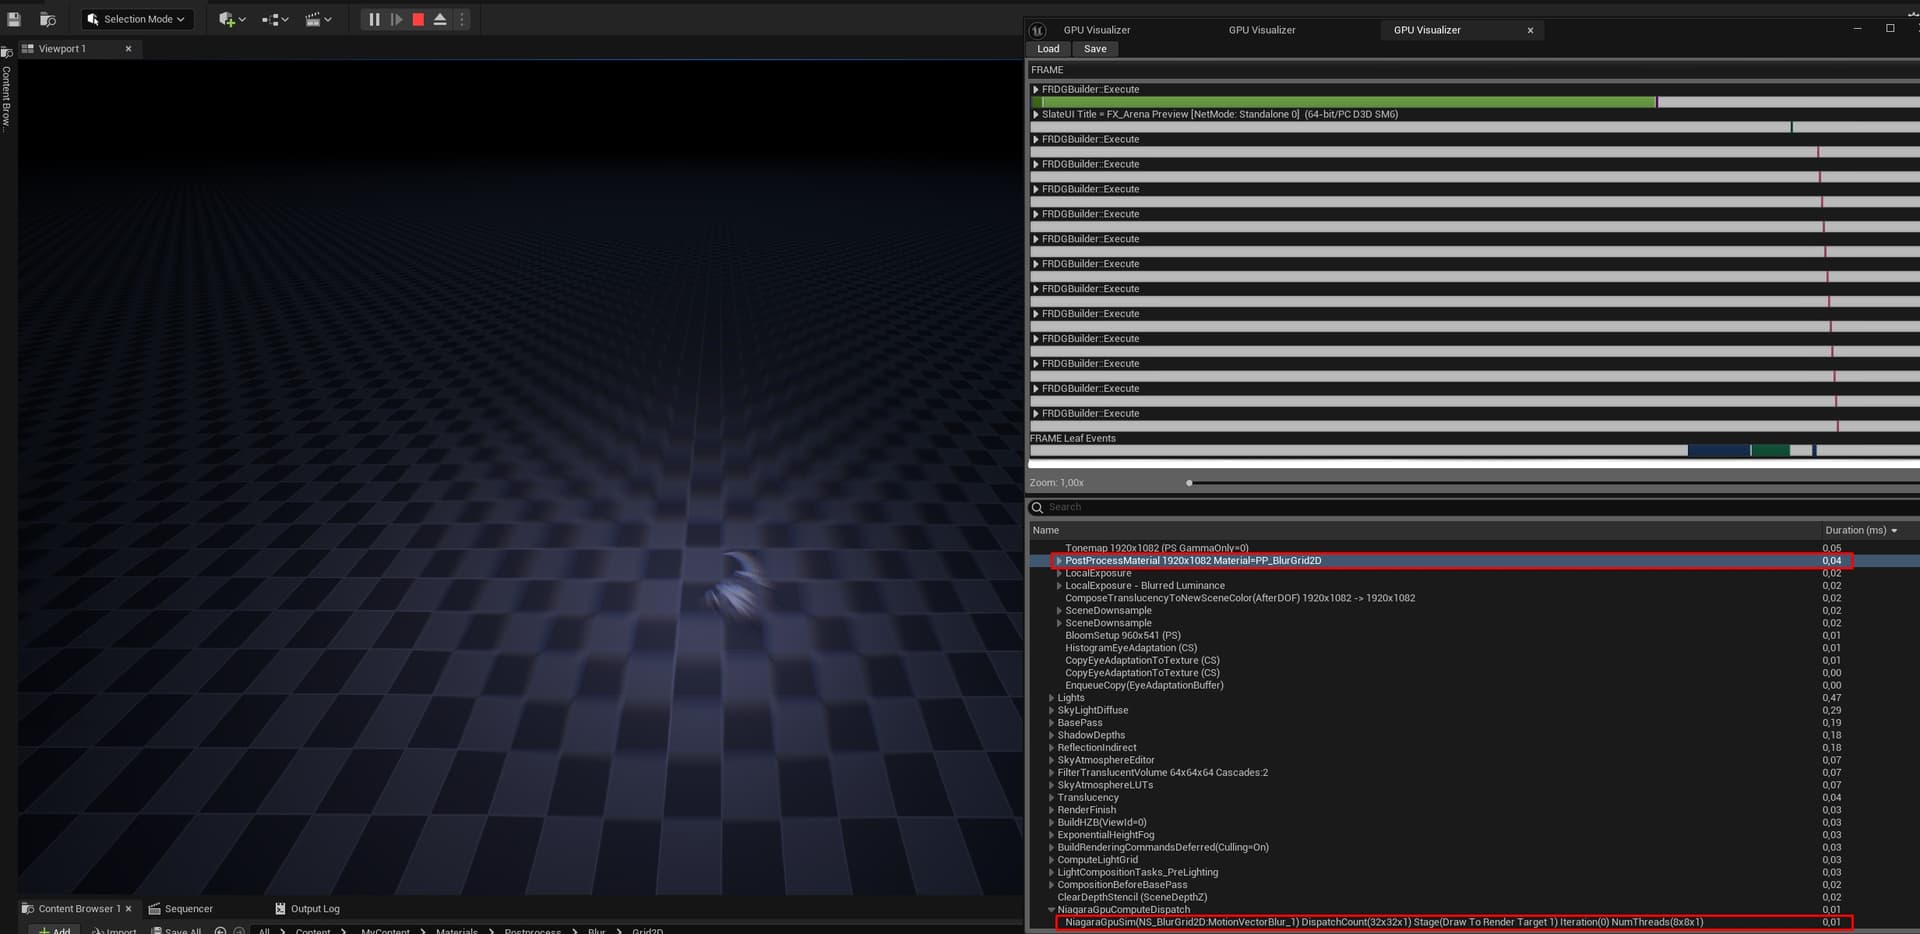
- Massively faster. Niagara Grid2D runs internally as a GPU compute shader, so is very convenient for tasks like this where you emulate a texture space. Also, since the blur runs in postprocess you avoid translucency and overdraw issues when spawning multiple instances —though it’s not sometihng you’d tipically spam. Still, you can add early-outs to skip processing pixels with no blur.
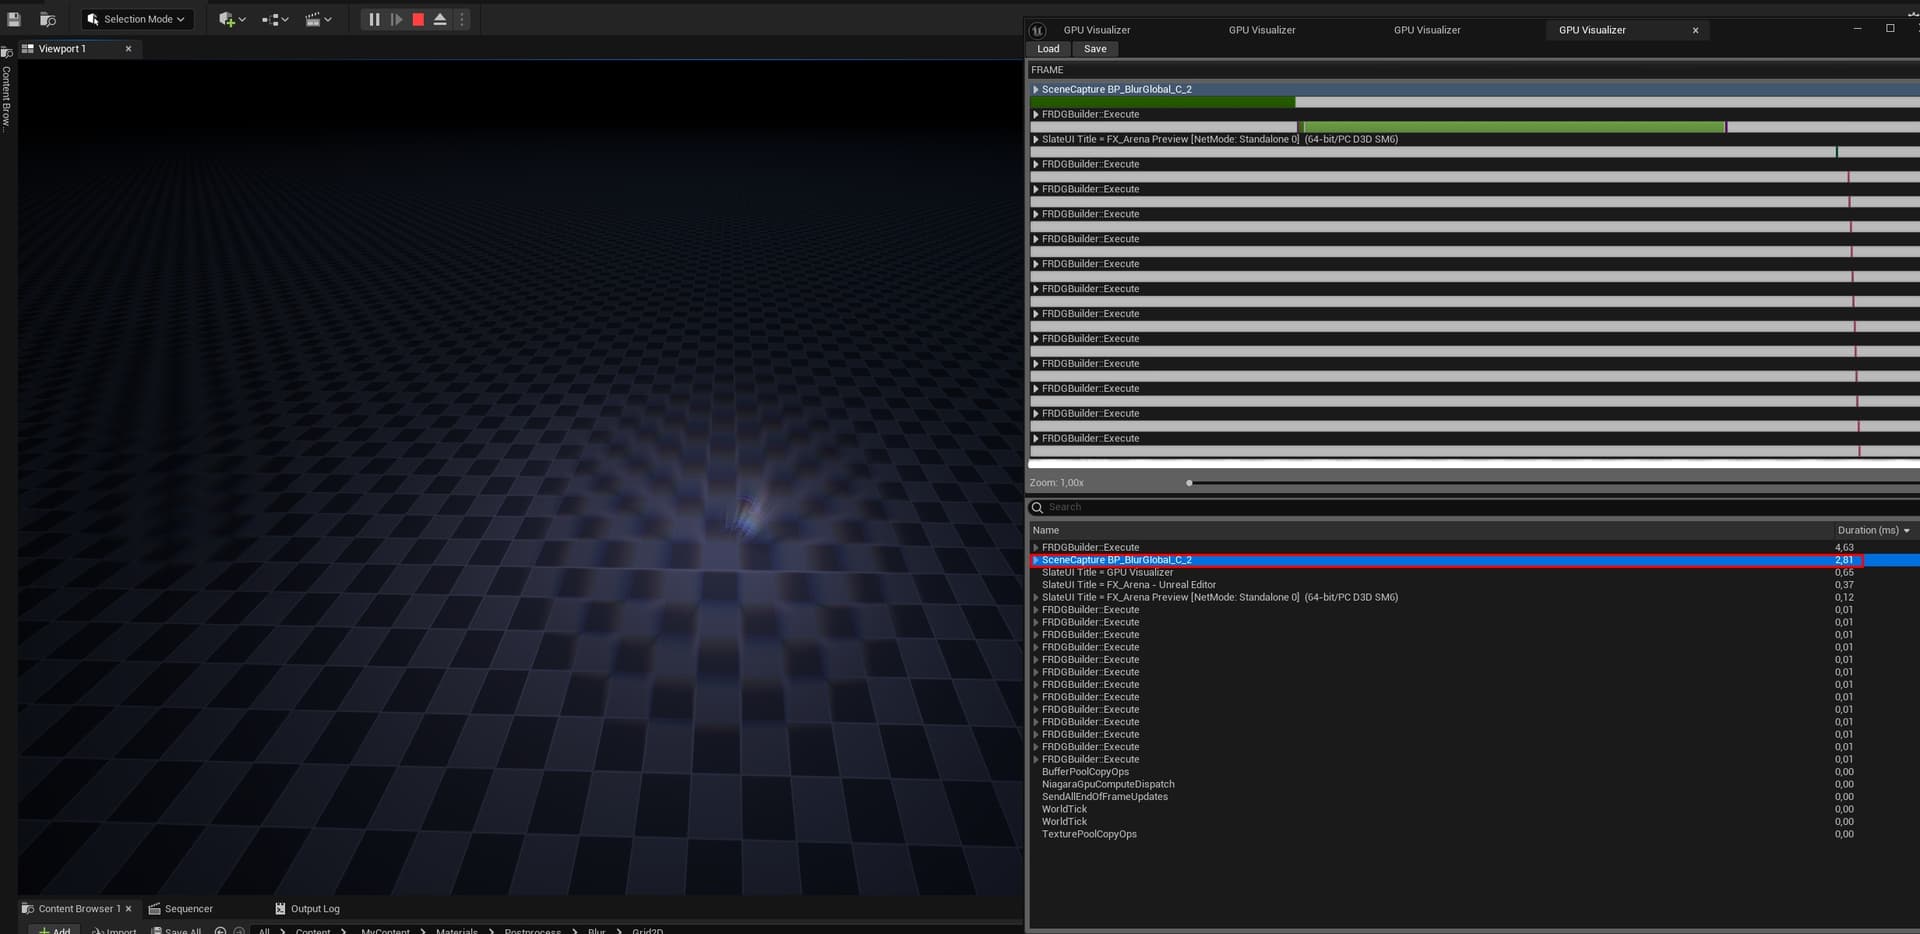
In my tests (1920x1080, 8 blur steps, 10 concurrent blurs covering the full screen) the overall cost was ~0.08ms. For reference, that’s 1% of a 120 FPS frame time budget.
In constrast, Scene Capture alone can cost 2-3ms (!!!), not adding up the additional texture sampling+translucency cost. - Lower memory usage. The required Render Target resolution is very low. I used 32x32 with no visible differences. Since you only encode motion data, there’s no need for higher res. Also, masked radial shapes are pretty much well covered with any resolution.
- Fully within Niagara. Once the system is in place, you can emit ‘blur particles’ from any other Niagara system. You could even write or read data from Blueprints if needed (I did for testing), NDCs look really powerful.
For anyone interested, here are some of the profiling stats I gathered to compare GPU times:
- 1920x1080 resolution (100% screen percentage), 6 blur steps, 32x32 render target, RTX 3080Ti
- Grid2D, 100 blur particles — Grid2D, 1 blur particle — Scene Capture, 1 blur particle
Now I’m much more comfortable with this solution, and hope the explanation serves as a good starting point for anyone who wants to give it a try.