Hi!
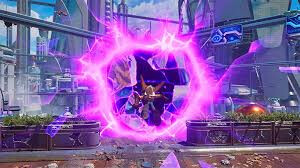
I’m a first-year game development student working on an Unreal Engine 5.6 project, and I’m trying to create a stylized portal shader inspired by Ratchet & Clank: Rift Apart .
My goal is to achieve:
- a glowing outer ring,
- animated radial lines/filaments,
- a deep inner portal/tunnel look,
- subtle movement so it doesn’t feel like a static texture,
- a result that still looks good from the side, not only from the front.
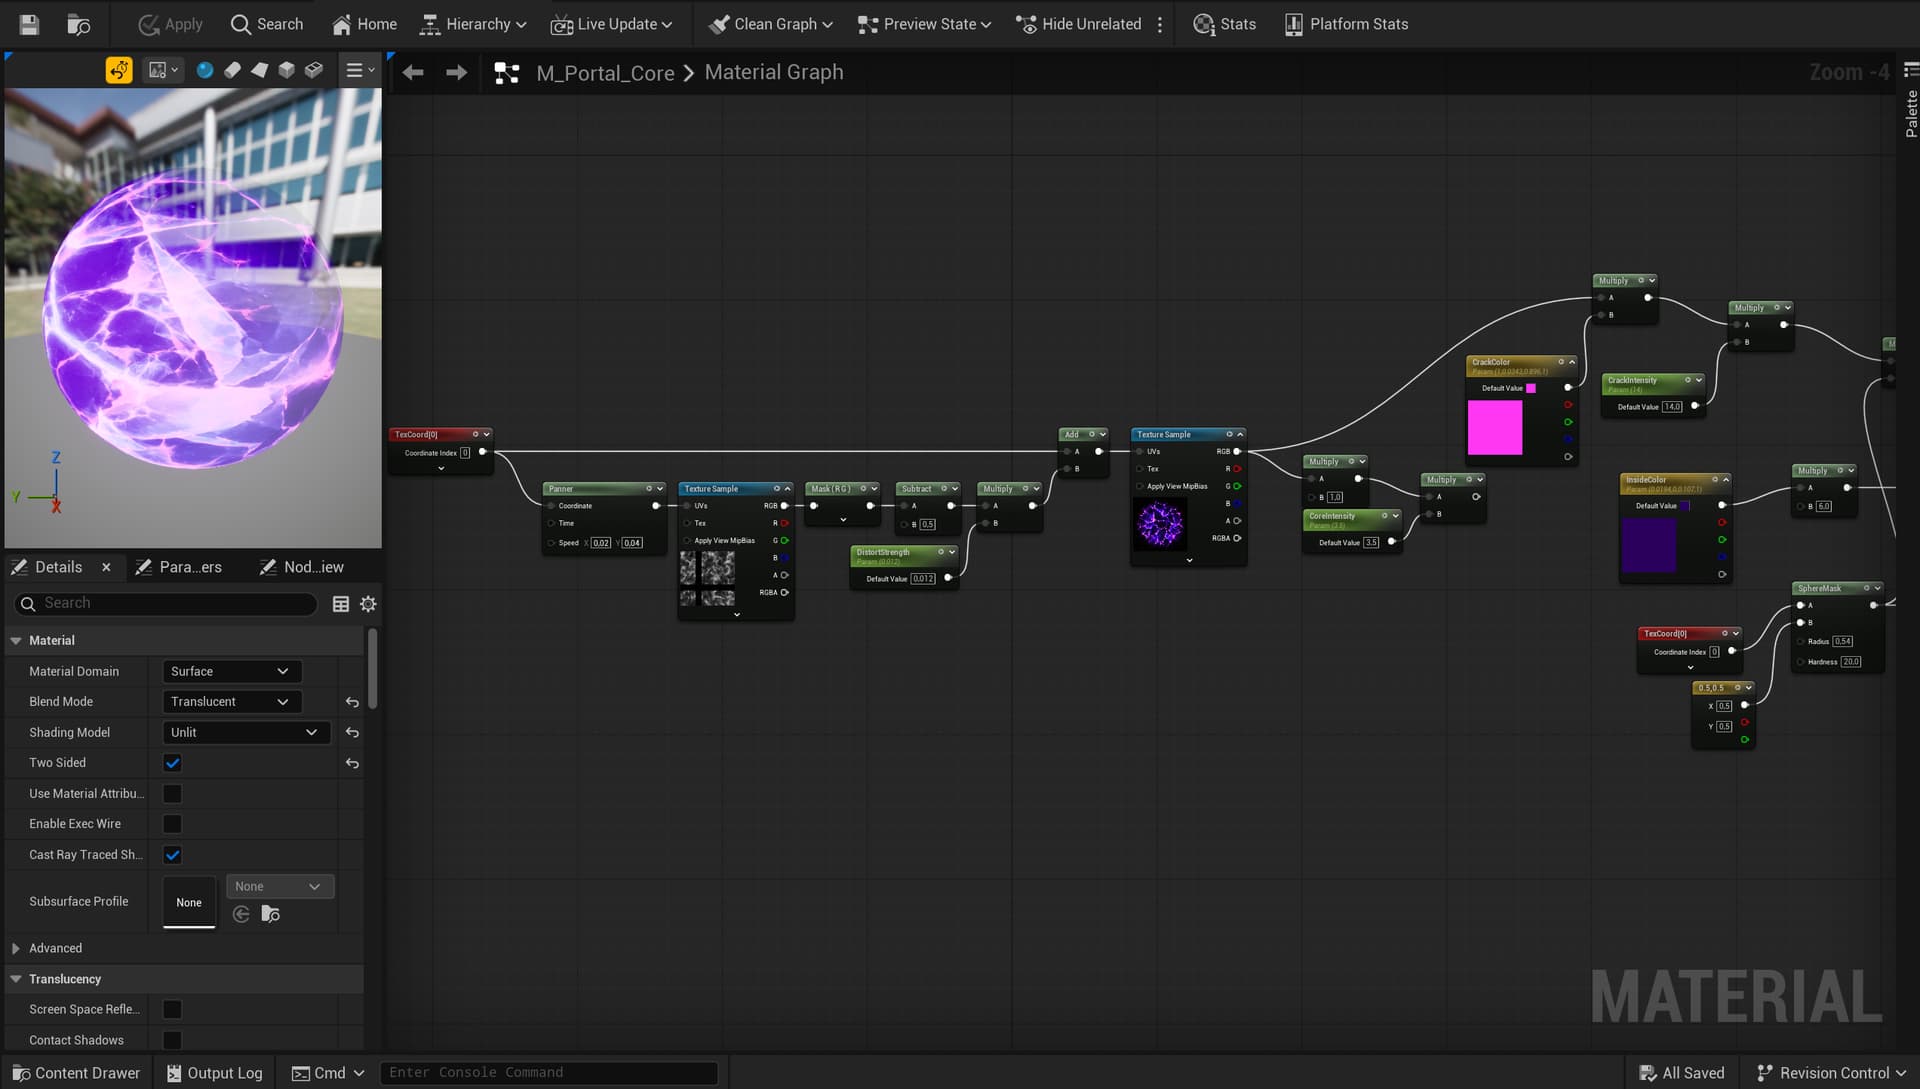
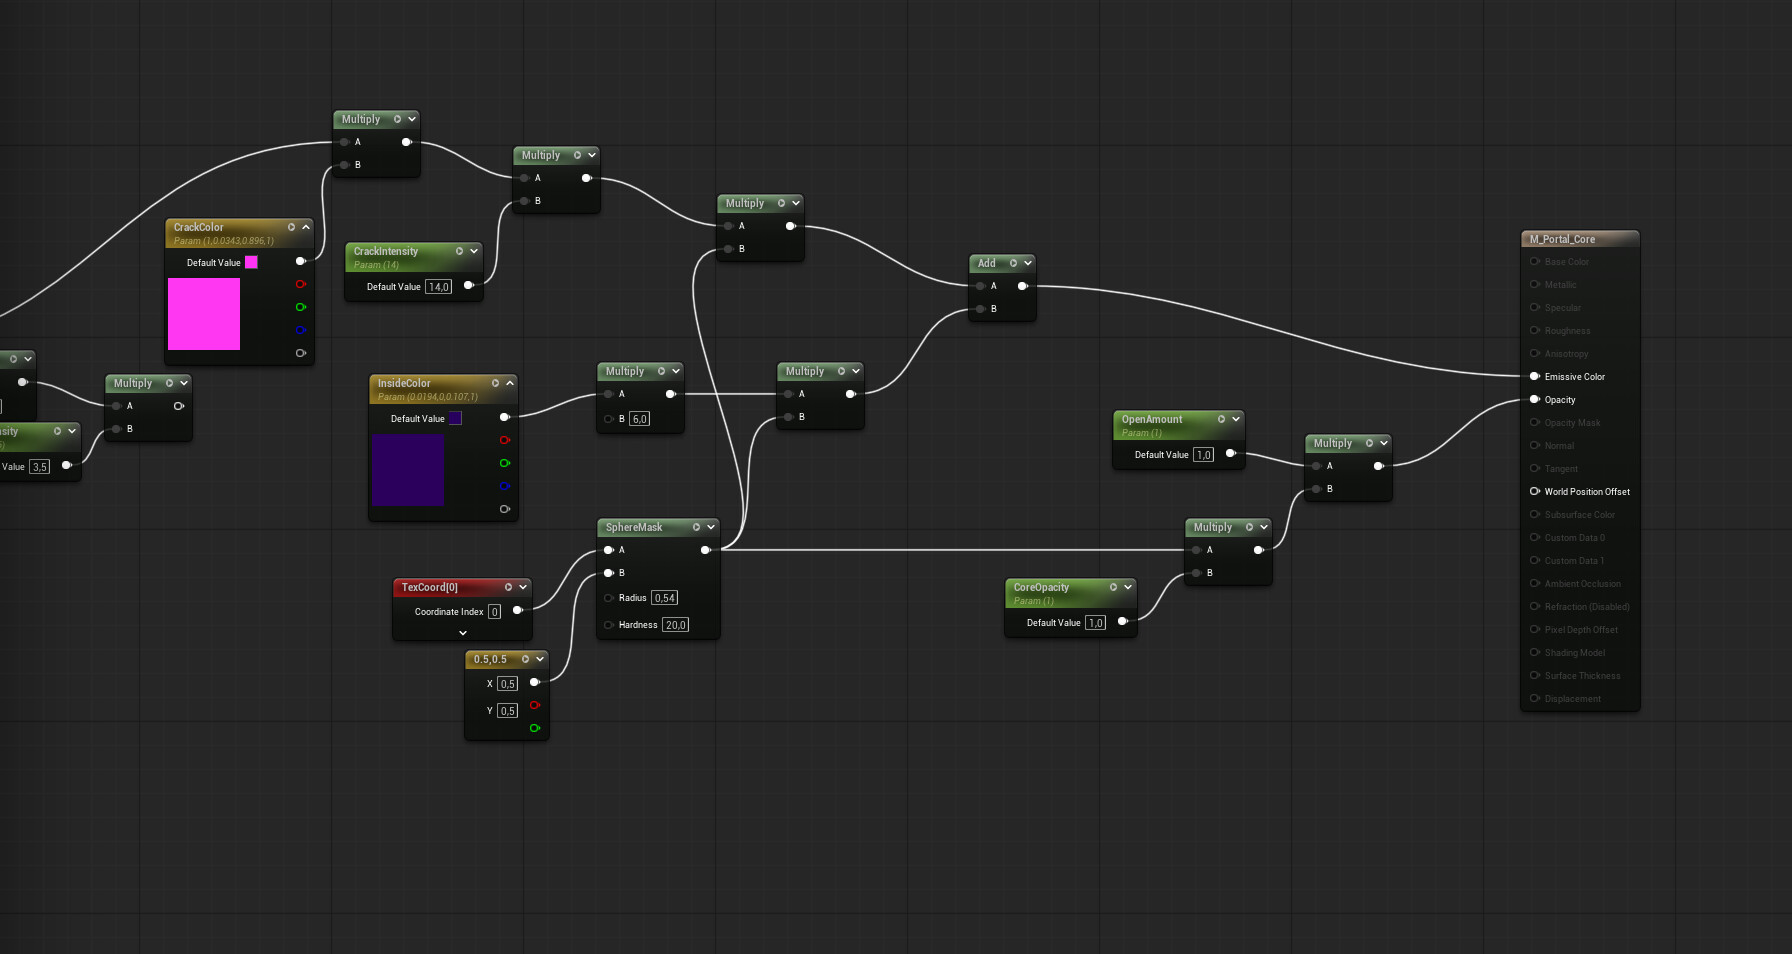
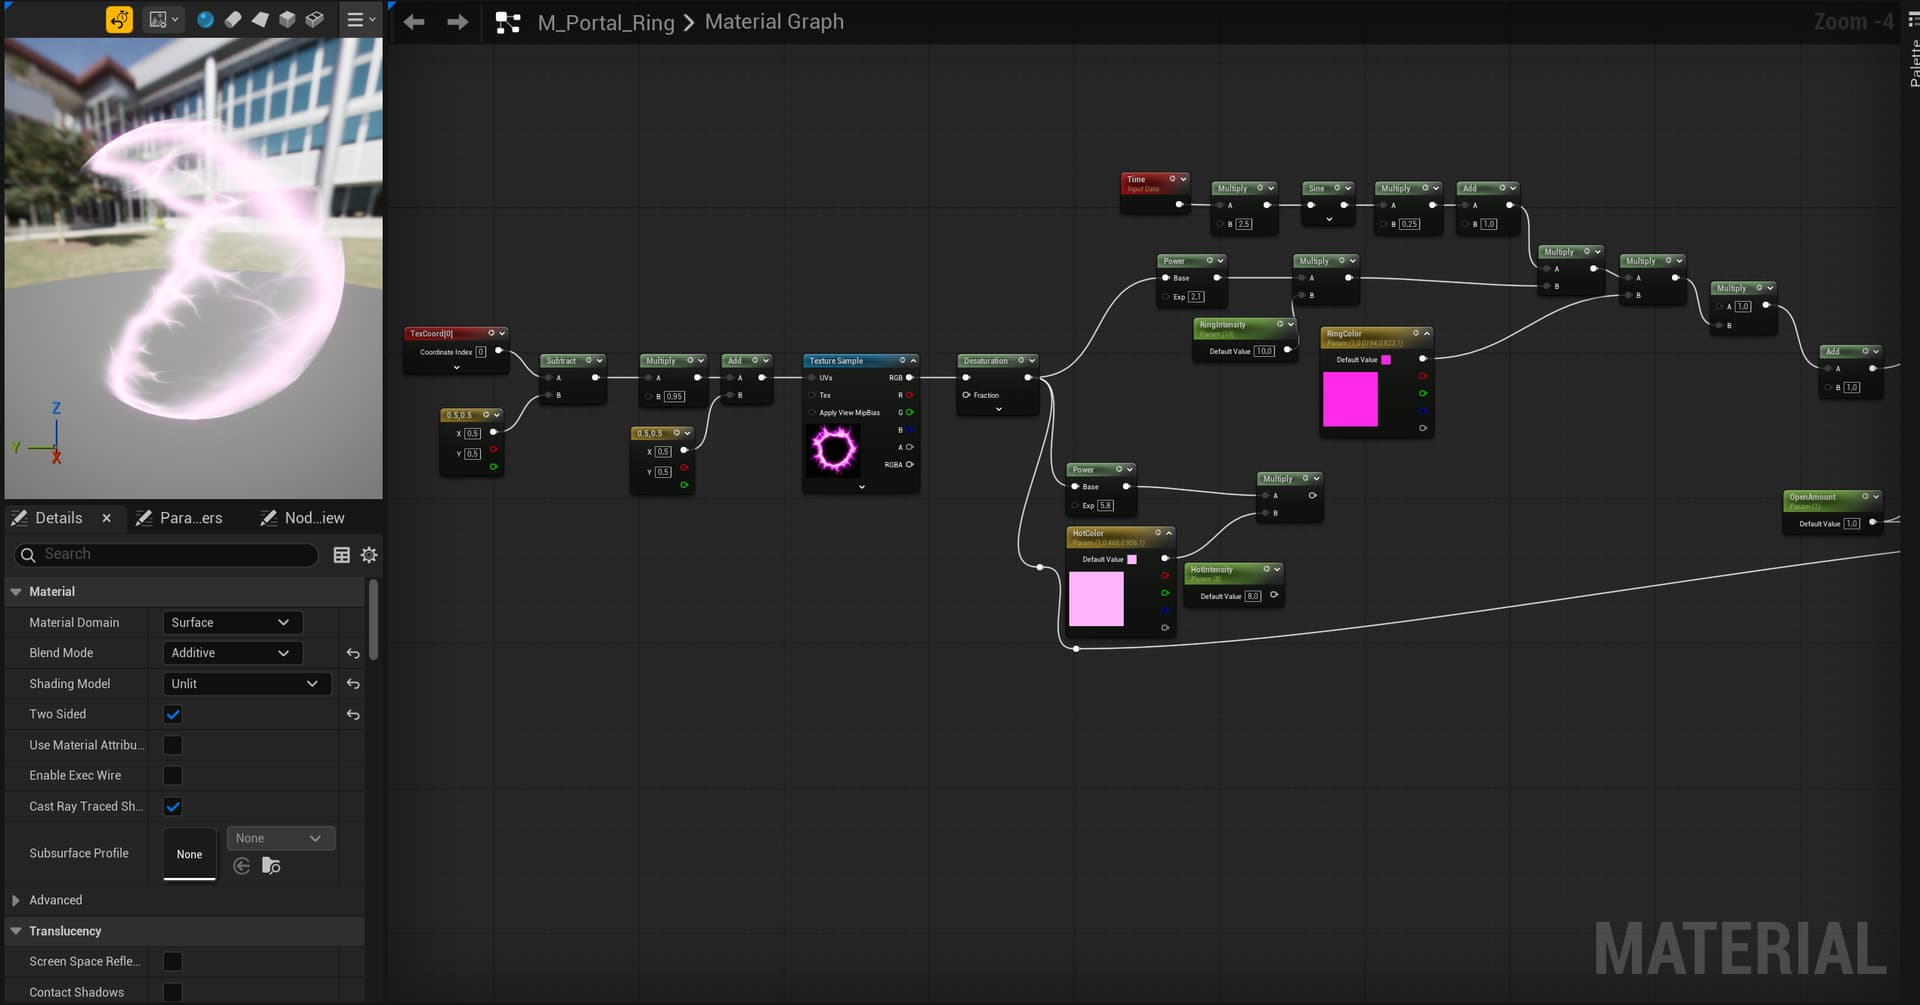
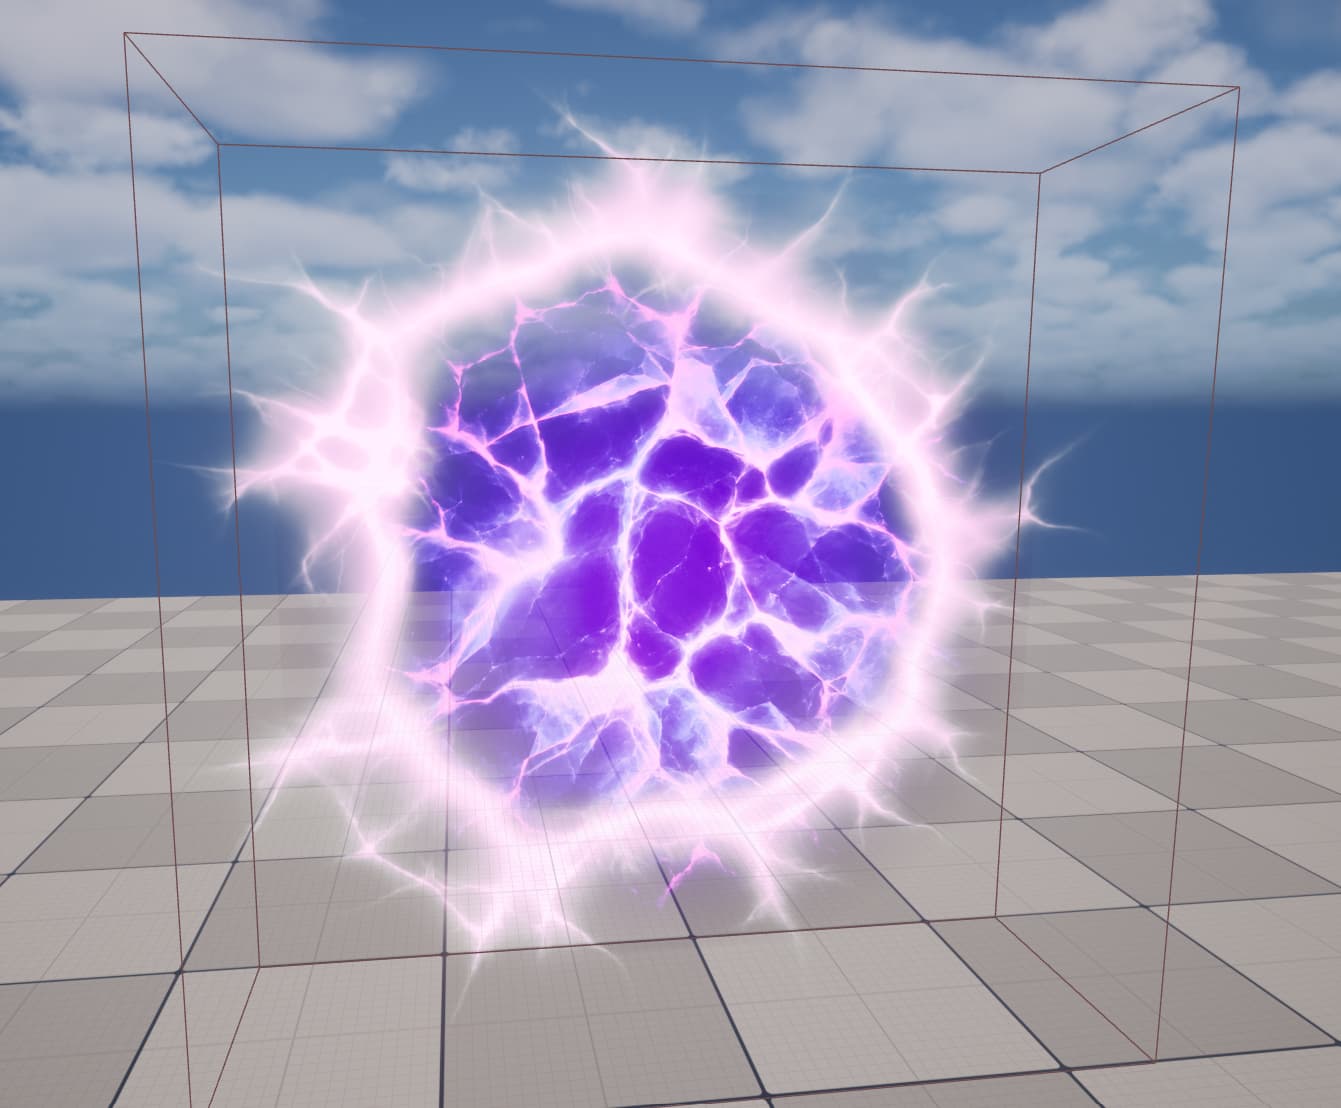
I already have a basic material and mesh setup. The portal is made with separate elements for the ring and the inner center/tunnel, but I’m struggling to make it feel deep, dynamic, and close to the reference .
Here are my current screenshots:
And here is the kind of reference/look I’m trying to approach:
I would really appreciate some guidance on the shader/material setup.
More specifically, I’m wondering:
- Should the depth effect be done mostly with the material, the mesh shape, or both?
- What kind of nodes/techniques should I focus on for the animated filaments?
- Would polar coordinates, noise, panning textures, Fresnel, depth fade, or emissive masks be useful here?
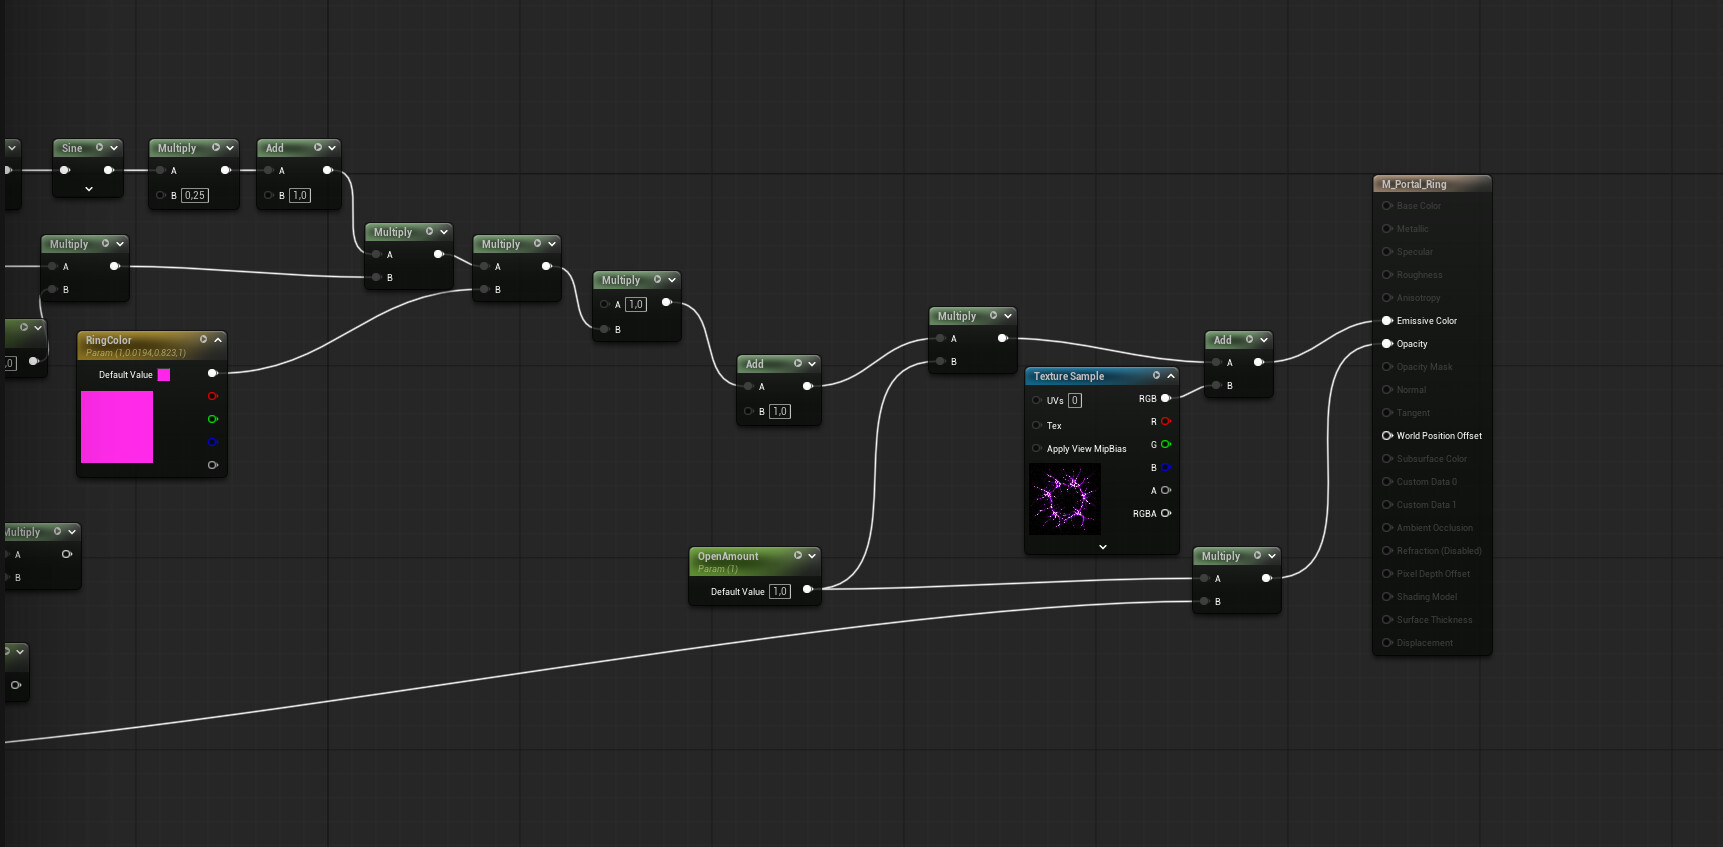
- How would you structure the material to separate the outer glow, the radial lines, and the inner tunnel effect?
I’m not asking someone to make the whole shader for me, but I’d really like to understand the right direction and techniques to use.
Thanks a lot!
1 Like
This is how i would tackle it, first of all I’m looking at this video for reference.
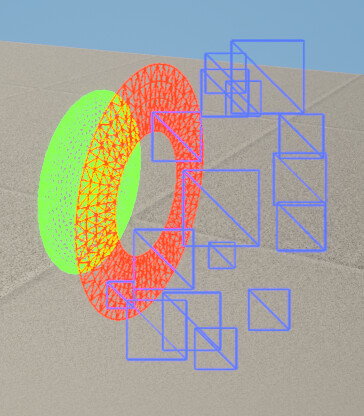
First of all, I would think of how the effect should be structured especially if we want it to work in 3D, in this case I think we make all the elements separated each with their own material. I would do something kind of like this where the red is the outer ring glow and filaments, the green is the depth effect and the blue will be either crystals or some smoke puff to try to hide the plane look from the side (in the image i’ve separated them a lot for better visualization but I would put them closer to each other).
-
For the depth effect, as always there are various ways to do it and they differ in their pros and cons, theres Parallax Occlusion Mapping or using a cubemap texture which i think can work when looked at from a normal distance and as long as no object goes through. You could also use the Stencil Buffer to render things only through the portal.
-
For the filaments, in the reference the dont really seem to me moving, just glowing irregularly so a panning noise multiplying the emissive should do it.
If you want them to move you could add a panning noise to the uvs of your filament texture to distort them
-
Then for the techniques you mentioned, polar coordinates are a useful way to make a texture behave in a circular way instead of the usual way. Though I usually use a circle mesh with square UVs to get the same result but there are some cases where polar coordinates are needed. Then noises as you’ve seen are a great way to add variety to effects, you can also even use them to create textures, panners are also really useful to add dinamism. In this case im not sure I would really benefit from fresnel since the effect I’ve imagined is made up of mostly planes. The depth fade node could be useful to add some glow if you intend to set up the effect through the ground sometimes.
As stated at the beginning this is how I would do it but there are always many ways to do vfx. Also I think your effect looks aready really good, if you want to match the color i would suggest to be careful with how much emissive you add since the more emissive the more it will look white-ish. Hope this brings you some insight! 
Thanks a lot, that actually helps a lot!
I think I understand the direction better now: instead of trying to make one material do everything, I should separate the portal into different elements: the outer ring/filaments, the inner depth part, and maybe some extra particles or small shapes to help it look better from the side.
For the filaments, I’ll try the panning noise approach first to make the emissive glow irregularly, then maybe use a subtle UV distortion if it still feels too static.
For the depth, I’ll probably keep it simple at first with separate mesh layers or a simple inner tunnel/depth plane before trying more advanced stuff like POM or cubemaps.
Thanks for the warning about emissive too, I noticed that when I push it too much it starts turning white instead of staying pink/purple.
This gives me a much clearer plan, thank you!
1 Like
Small update:
I’m still trying to improve this portal shader/material, and I’m mainly struggling with the inner core/depth part.
After looking at some tutorials, I understand that Niagara can help a lot for the outer energy and movement, but my biggest issue is still the shader/material structure itself. The portal currently feels too flat, especially from the side, and the center doesn’t really give the illusion of a deep tunnel or inner space.
I’m not trying to make a real functional portal with a render target or a live view into another level. I only want to fake the visual depth in a stylized way that is achievable for a student project.
Would a good direction be to use:
- a thicker torus/3D mesh for the outer ring,
- a separate masked plane or curved surface for the inner core,
- a fake cubemap or tunnel texture in the center,
- polar coordinates or radial UV distortion for movement,
- separate emissive masks for the bright filaments,
- Fresnel/Depth Fade to help blend the edges?
If anyone has experience with stylized portal shaders in UE5, I’d really appreciate advice on how to structure the material or what technique I should focus on first.
I’m not looking for someone to make the whole thing for me, but a rough breakdown or direction would help a lot.
You can also message me here or on Discord: daimos12