The Niagara module script feels some difficult

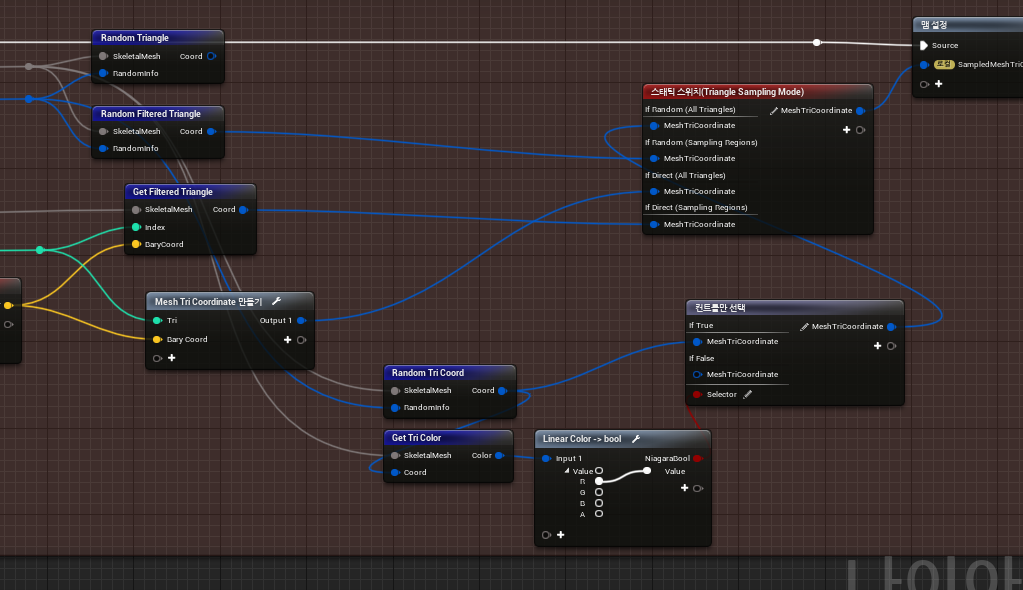
The Initialize_MeshReproductionSprite module appears to generate sprites by transferring the position of the mesh using the center of gravity coordinates of the triangular polygon of the mesh.

However, I can’t customize it further because I can’t understand the node behavior of the module script exactly… It’s a little different from normal BP. (e.g., the concept of a map that looks like a structure, SelectNod that seems to act similar to if, etc.) Are there any tutorials that you can refer to, such as the structure of the Module Script or the information of the primary node? Please let me know if you have any.

(What we are currently trying to implement is that we want sprites to be created only where vertex colors are applied compared to the vertex colors of the triangle before delivering the sprite generation position in MeshReproductionSprite.)

I fixed this problem by modifying the NiagaraModulScript of Sample Skeletal Mesh & Skeletal Mesh Locaion.

You don’t have to add dummy meshes for sampling now, and particles will also be created in the polygon that is being simulated for closing!

DumyMesh_Niagara
Dymy Mesh
An existing version.
(Dummy mesh and appearance)

after
After VertexColor
A new version.
(The dummy mesh is no longer needed, and it appears in the simulated clothes section.)

However, during the run-time when Niagara is placed on the engine and simulated, modifying the vertex color of the mesh will cause a DX crash, which will turn off the engine client…

This is because Niagara’s component process was implemented in a hurry in shallow knowledge without understanding it properly…

PS. Where should I study Niagara module script…;(

4 Likes