Tayko's Sketchbook

Hey Guys! It’s been a while since I’ve posted something, I finally have some free time to work on personnal projects again and decided to share that with you all.

If you have any questions don’t hesitate to ask them ! i’d be happy to answer them :smile:
And if you want to see more about my work you can always check my Artstation.

Thumbnail :

Sun Breakdown

Last effect :
Scroll down to see the full breakdown
https://youtu.be/-BFS1HCEXxo

Now back to the crystal effect !

As of right now i’m working on an ice spell, which is something i rarely do because i’m too busy exploding things and stuff, you know :grin:
My main reference for this effect comes from Requin Cobalt

However i want this effect to be way more Crystal-ish. For the moment i’ve started working on a couple shaders, textures and meshes.

Crystal Shader with Parallax
Crystal%20Shader
Crystal Spikes In Game


Main Reference

25 Likes

Looks so nice! Well done :heart_eyes:

1 Like

I like how the ice was drawn. This shapes… :heart_eyes::star_struck:
I will save it as a ref for my future toon ice effects.

damn that looks so nice I’d love to see a full breakdown!

1 Like

Got my ice crystal effect done today !
it was much quicker to finish than i expected at first. :smile:

https://youtu.be/_mmZHZQrSe8

I deviated from the reference and used a crystal shard instead of a character as i think it fits the theme a lot better, talking about that the projectile spawn is kind of special, it’s really easy too but i think it is worth talking about, to achieve that spawning style just multiply a Noise texture (or 2 for more variation) with the Vertex Normal as you normally would and be sure to use a mesh without a smooth shading, that’s it !


Also the crystal colors popping at the impact is just a mesh with every faces kinda set randomly with a scrolling texture, this is the techniques Shannon Berke shared a while ago (Shannon McSheehan - LoL FX + Knowledge Share)

And of course, the crystal shader (which is only missing the depth fade nodes and the cartoon outlines)

5 Likes

The best moment :heart_eyes:

4 Likes

Lately i’ve been trying to bring a bit more originality in my works and tested some unusual theme,
this time it’s a Retrowave Bomb! which was quite challenging as there is so few ressource to gather vfx-speaking :smile:

6 Likes

Currently working on re-creating Genos famous move “incinerate” from One Punch Man.

Genos%20Incinerate%20Reference

There is still a lot to be done but here is my first version of this !
Genos%20Incinerate%20First%20Pass

29 Likes

Nice! This effect is inspirational to the work I’m doing now. I specifically like the color variety and look of the core of the fire blast. I’m curious about how you are achieving that. It looks powerful.

1 Like

Thanks a lot Aaron!
Glad you like it, i will post some process / step by step evolution pictures once i’m finished with this effect, aswell as a detailed breakdown :smile:

1 Like

that looks awesome. I love the values you’ve got there, also the contrast between dark and bright adds a lot. On the floor is that a panning texture that mimics the bounce lighting? really cool so far, I’d love to see more…

1 Like

This is exactly that, i used 2 planes for the ground, one for the shadows and another one to fake the light, i multiply my mask with a noise texture to give a sense of movement

1 Like

That Genos effect is so cool, I love the few frames of flame shapes right before the explosion, it gives it some awesome anticipation

1 Like

Okay so i think i’m done with this one ! :grin:
This was a cool project to work on, i tried to improve my drawing skills and learned a lot of things while doing so.

Here is the final version and a quick breakdown :

Genos Incinerate
https://youtu.be/8GJsH68LP5g
Breakdown
https://youtu.be/w4uYu9FAKO4

About the colors of the core fire blast, this is simply achieved by using a color ramp and two different noise textures, which are UV Deformed by two other textures

7 Likes

Thanks for posting a breakdown and shader Tayko! I’ve learned a few things by looking at this.

Nice job on the effect, it looks great. Cleaver way to get noise in the light on the ground.

1 Like

Hey guys ! the lockdown kinda hit me hard and I’ve had a hard time being productive, but i’m slowly getting back to creating stuff again :smile:
Recently i have been working on one of my favorite theme… demons!
As always if you have any questions / suggestions feel free to ask / share.

Demonic Bomb :

8 Likes

Your timings always feel really nice! what is your secret? :star_struck:

1 Like

The secret ingredient is, a worrying amount of time spent on moving curves :sweat_smile:
No but seriously i love to use a mix of smooth movement with violently changing ones. Disney’s “12 Principles of Animation” helped me a lot to understand timing, it is such a good compilation of rules for animation, it never gets old!

Having that book sitting at home and at the office. Probably a “must have” for anyone handling stuff that is moving.
But great to know it is often just a “I change the values until it looks good” :smiley:

1 Like

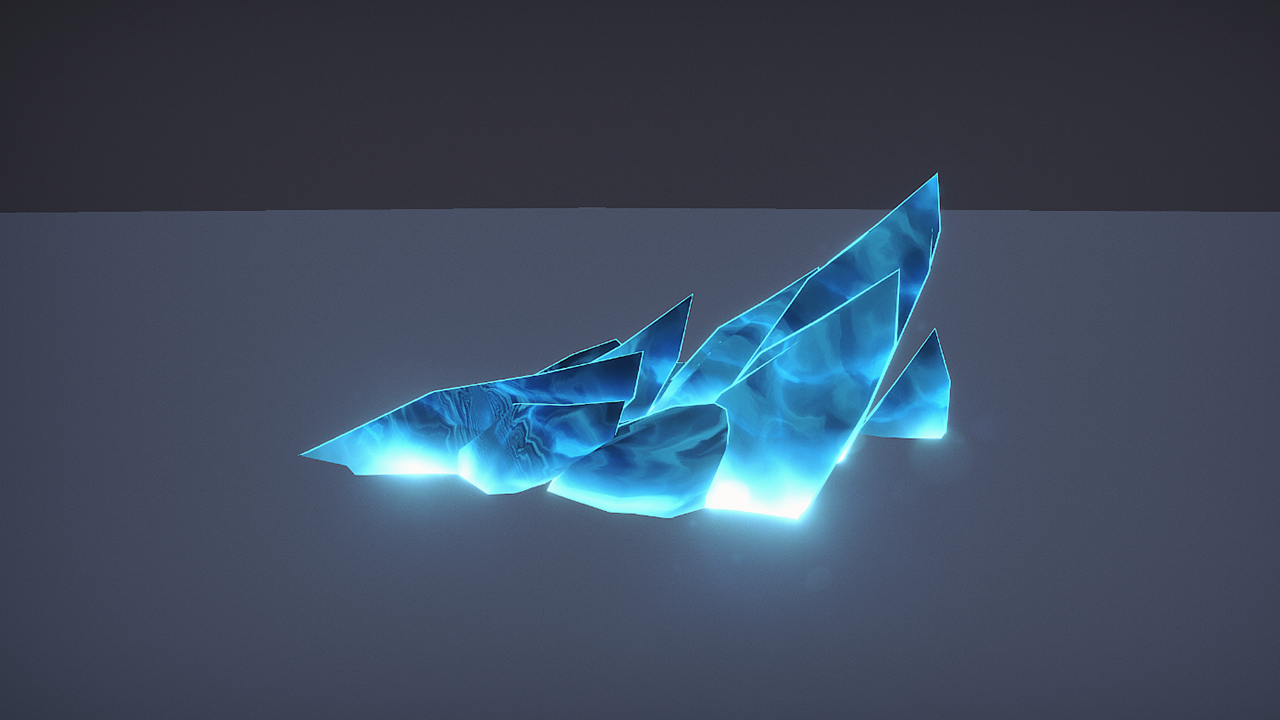
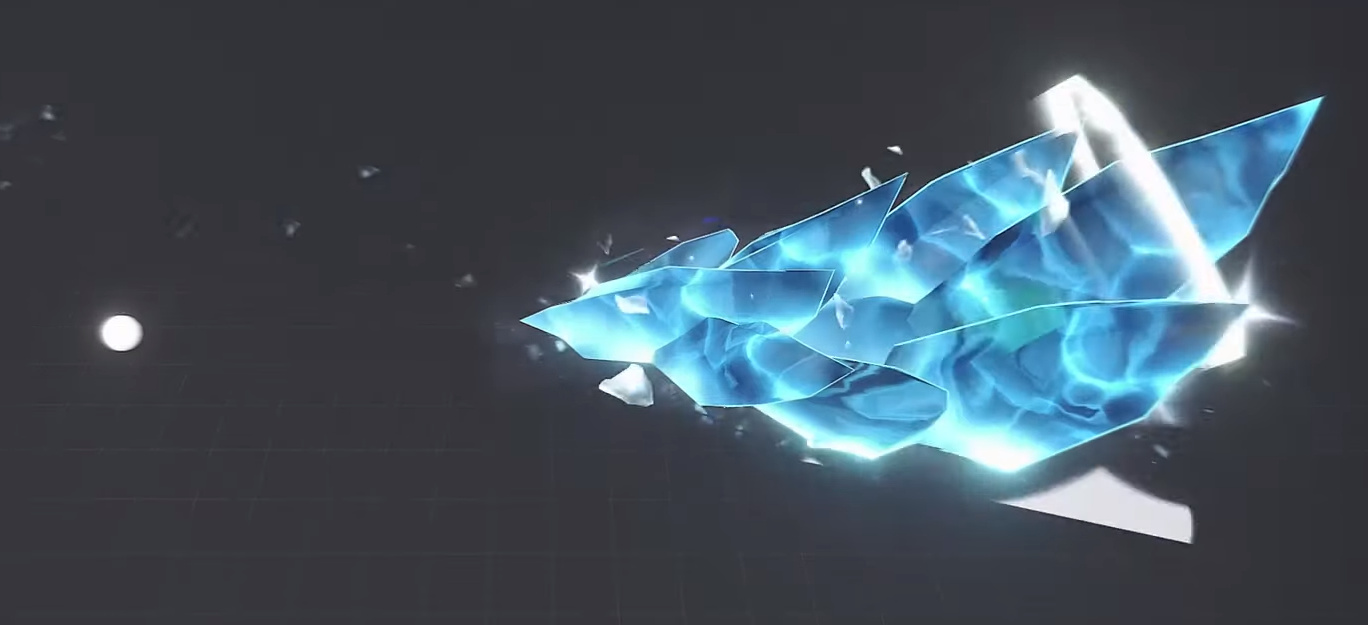
I was working on a sun shader for a vfx scene and it turned out great so i decided i would share that with you guys,

My main goal with this one was to create something stylised yet detailed, this is highly inspired by Valorant art style but i tried to make the flow and movement of the effect as realistic as possible.

I made a step by step video that you can watch just here! :sunny:
https://youtu.be/-BFS1HCEXxo

Now this is mainly targeted to intermediate artists like me, as it would be quite tricky to pack so much information in a short video, i thought it would be much simpler to just write the details here.

So let’s start with the textures !


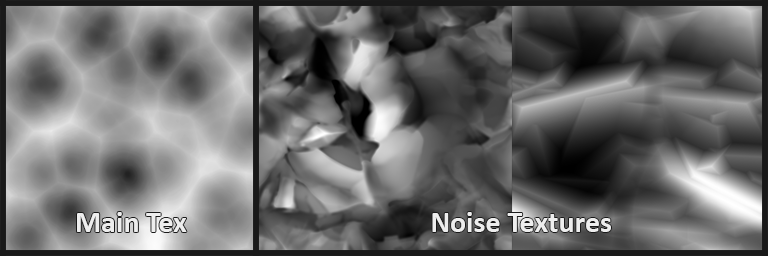
The sun consists of 3 textures :

  • The first one is your basic organic noise which is made inverting a lot of sphere in photoshop / substance designer.
  • The second one is made inside substance designer, using the cell node with a lot of slope blur and directional warp (and because i use directional warp, the effect won’t be seamless anymore so i also use the “make it tile” node at the end)
  • The third and last texture is made using the same technique as Pierre Fleau in his Substance Designer Rock Height Tip

Note that any noise texture would work just fine, but i think it look best when combining one rough and large texture with a more chaotic and liquid one.

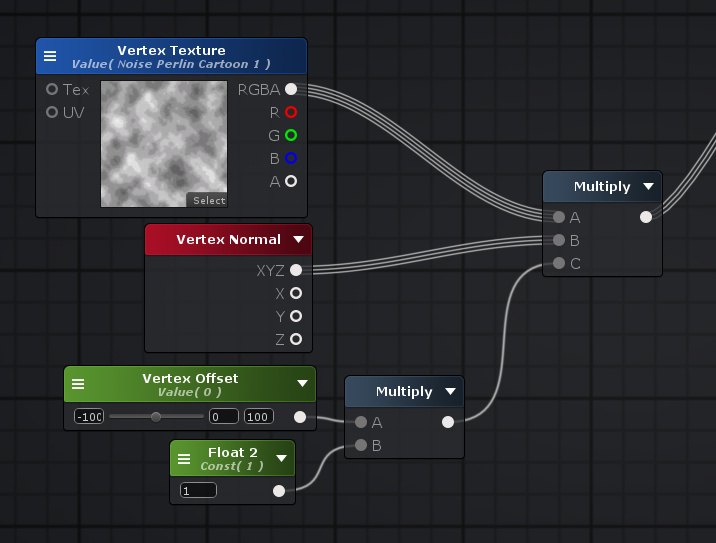
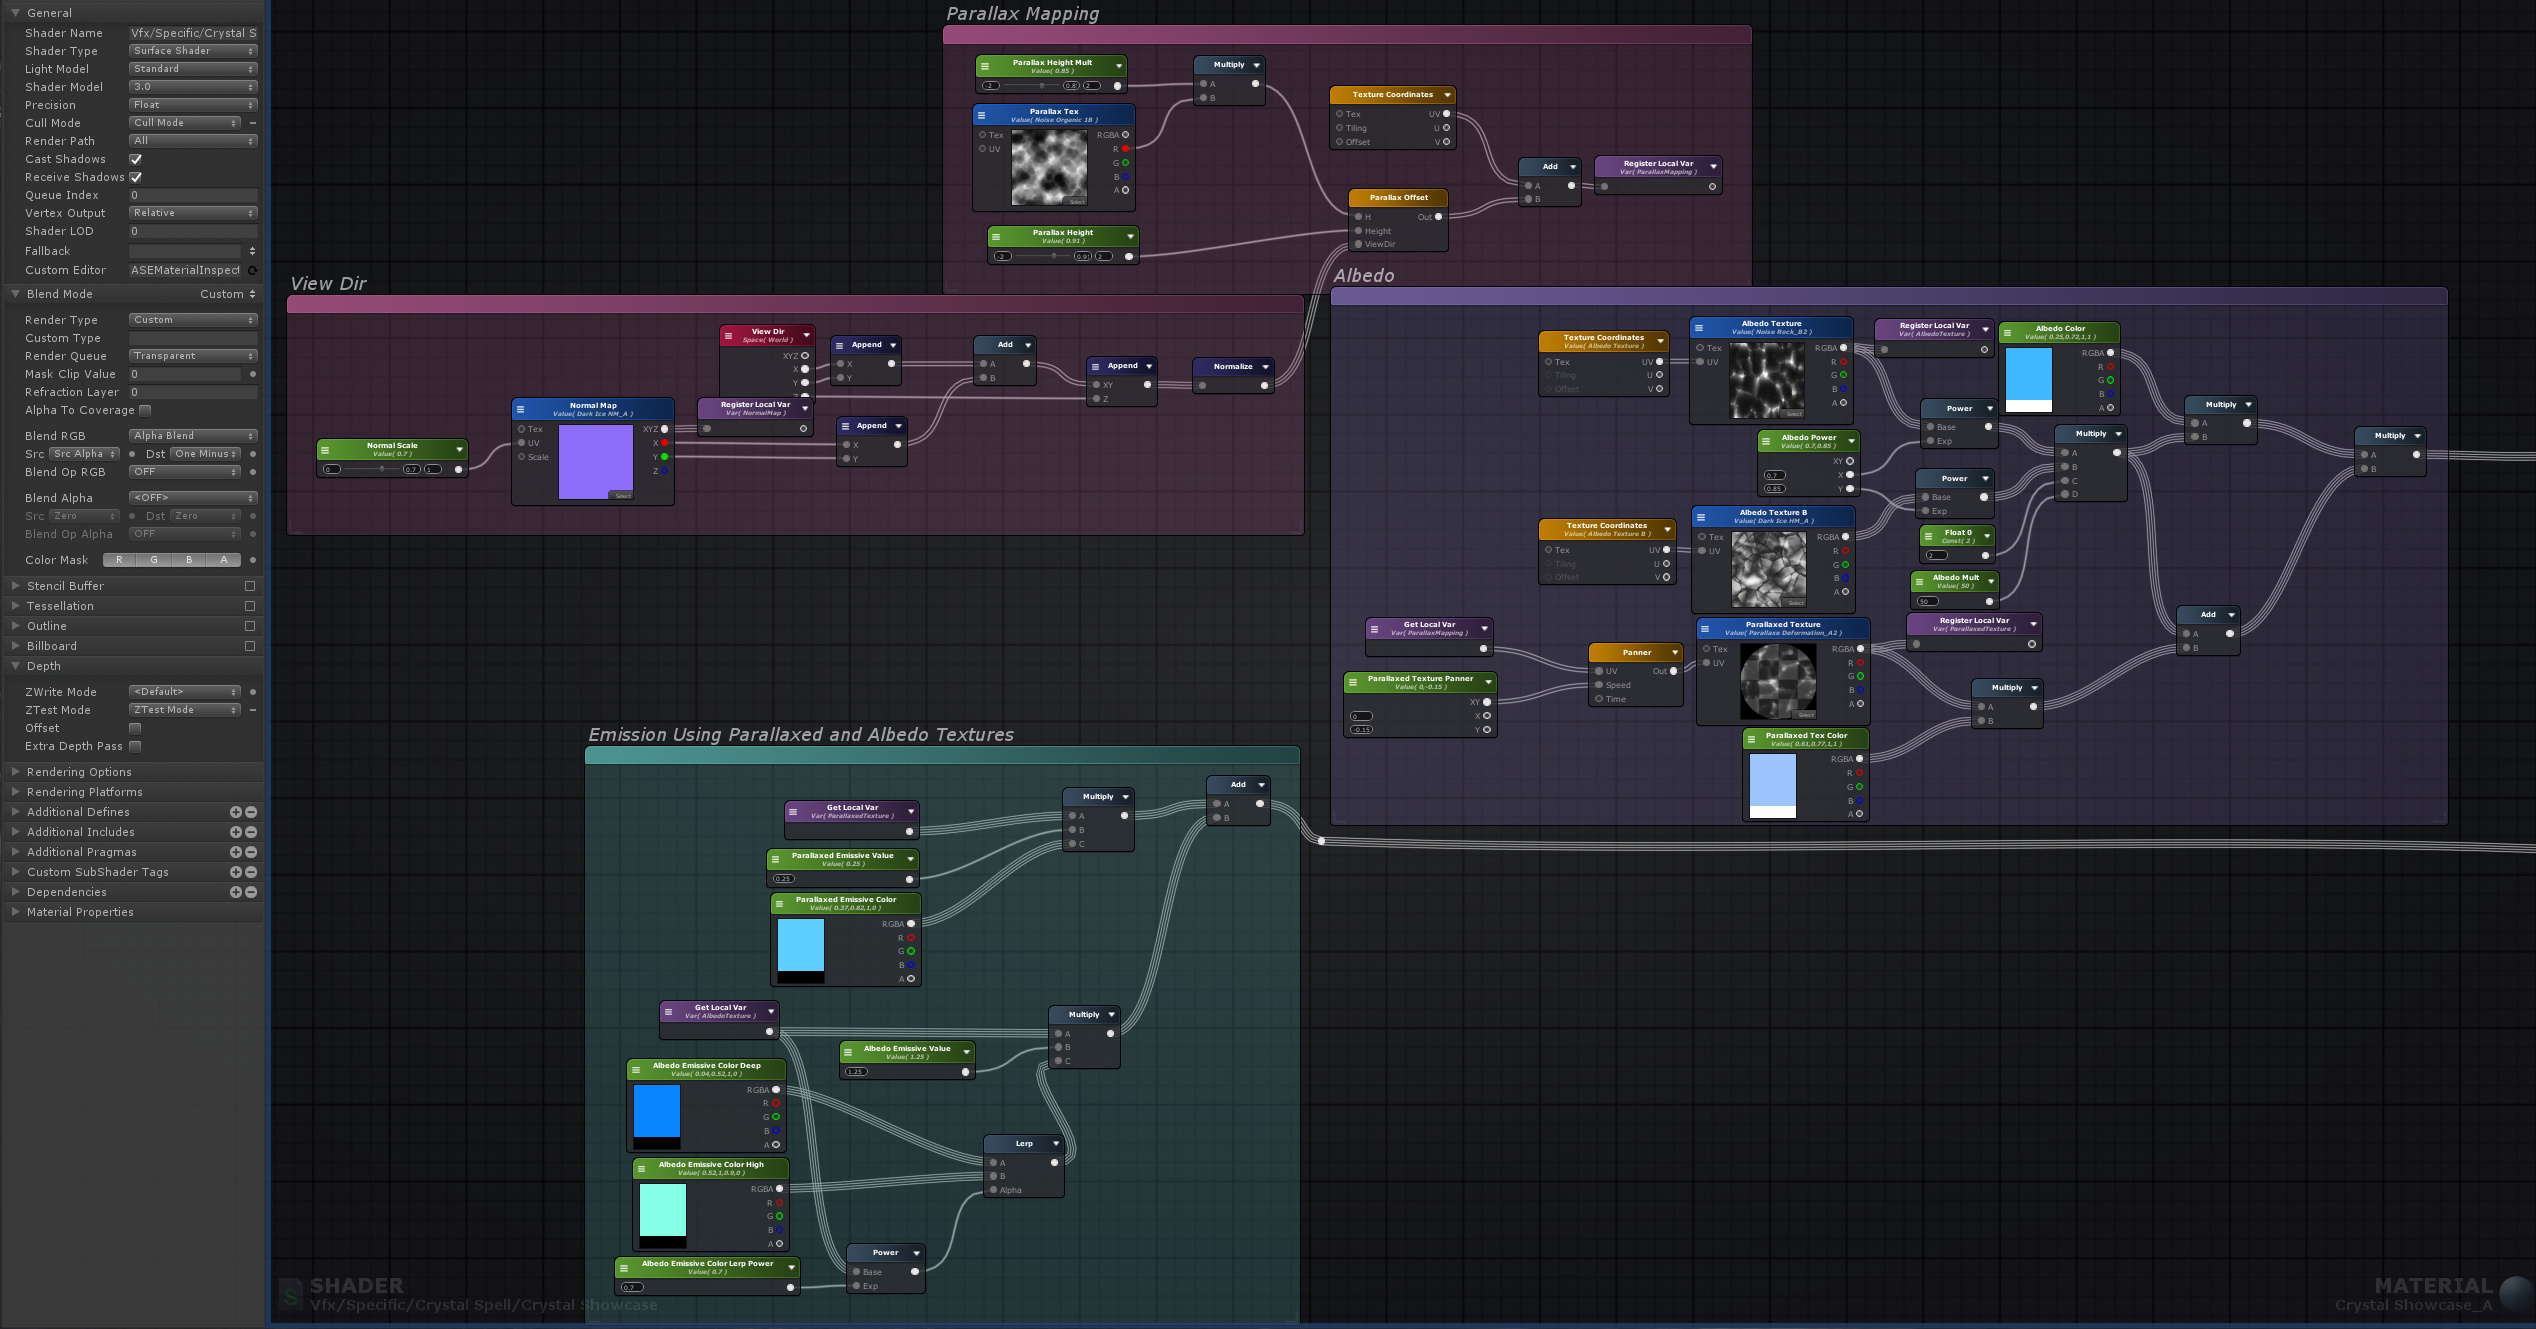
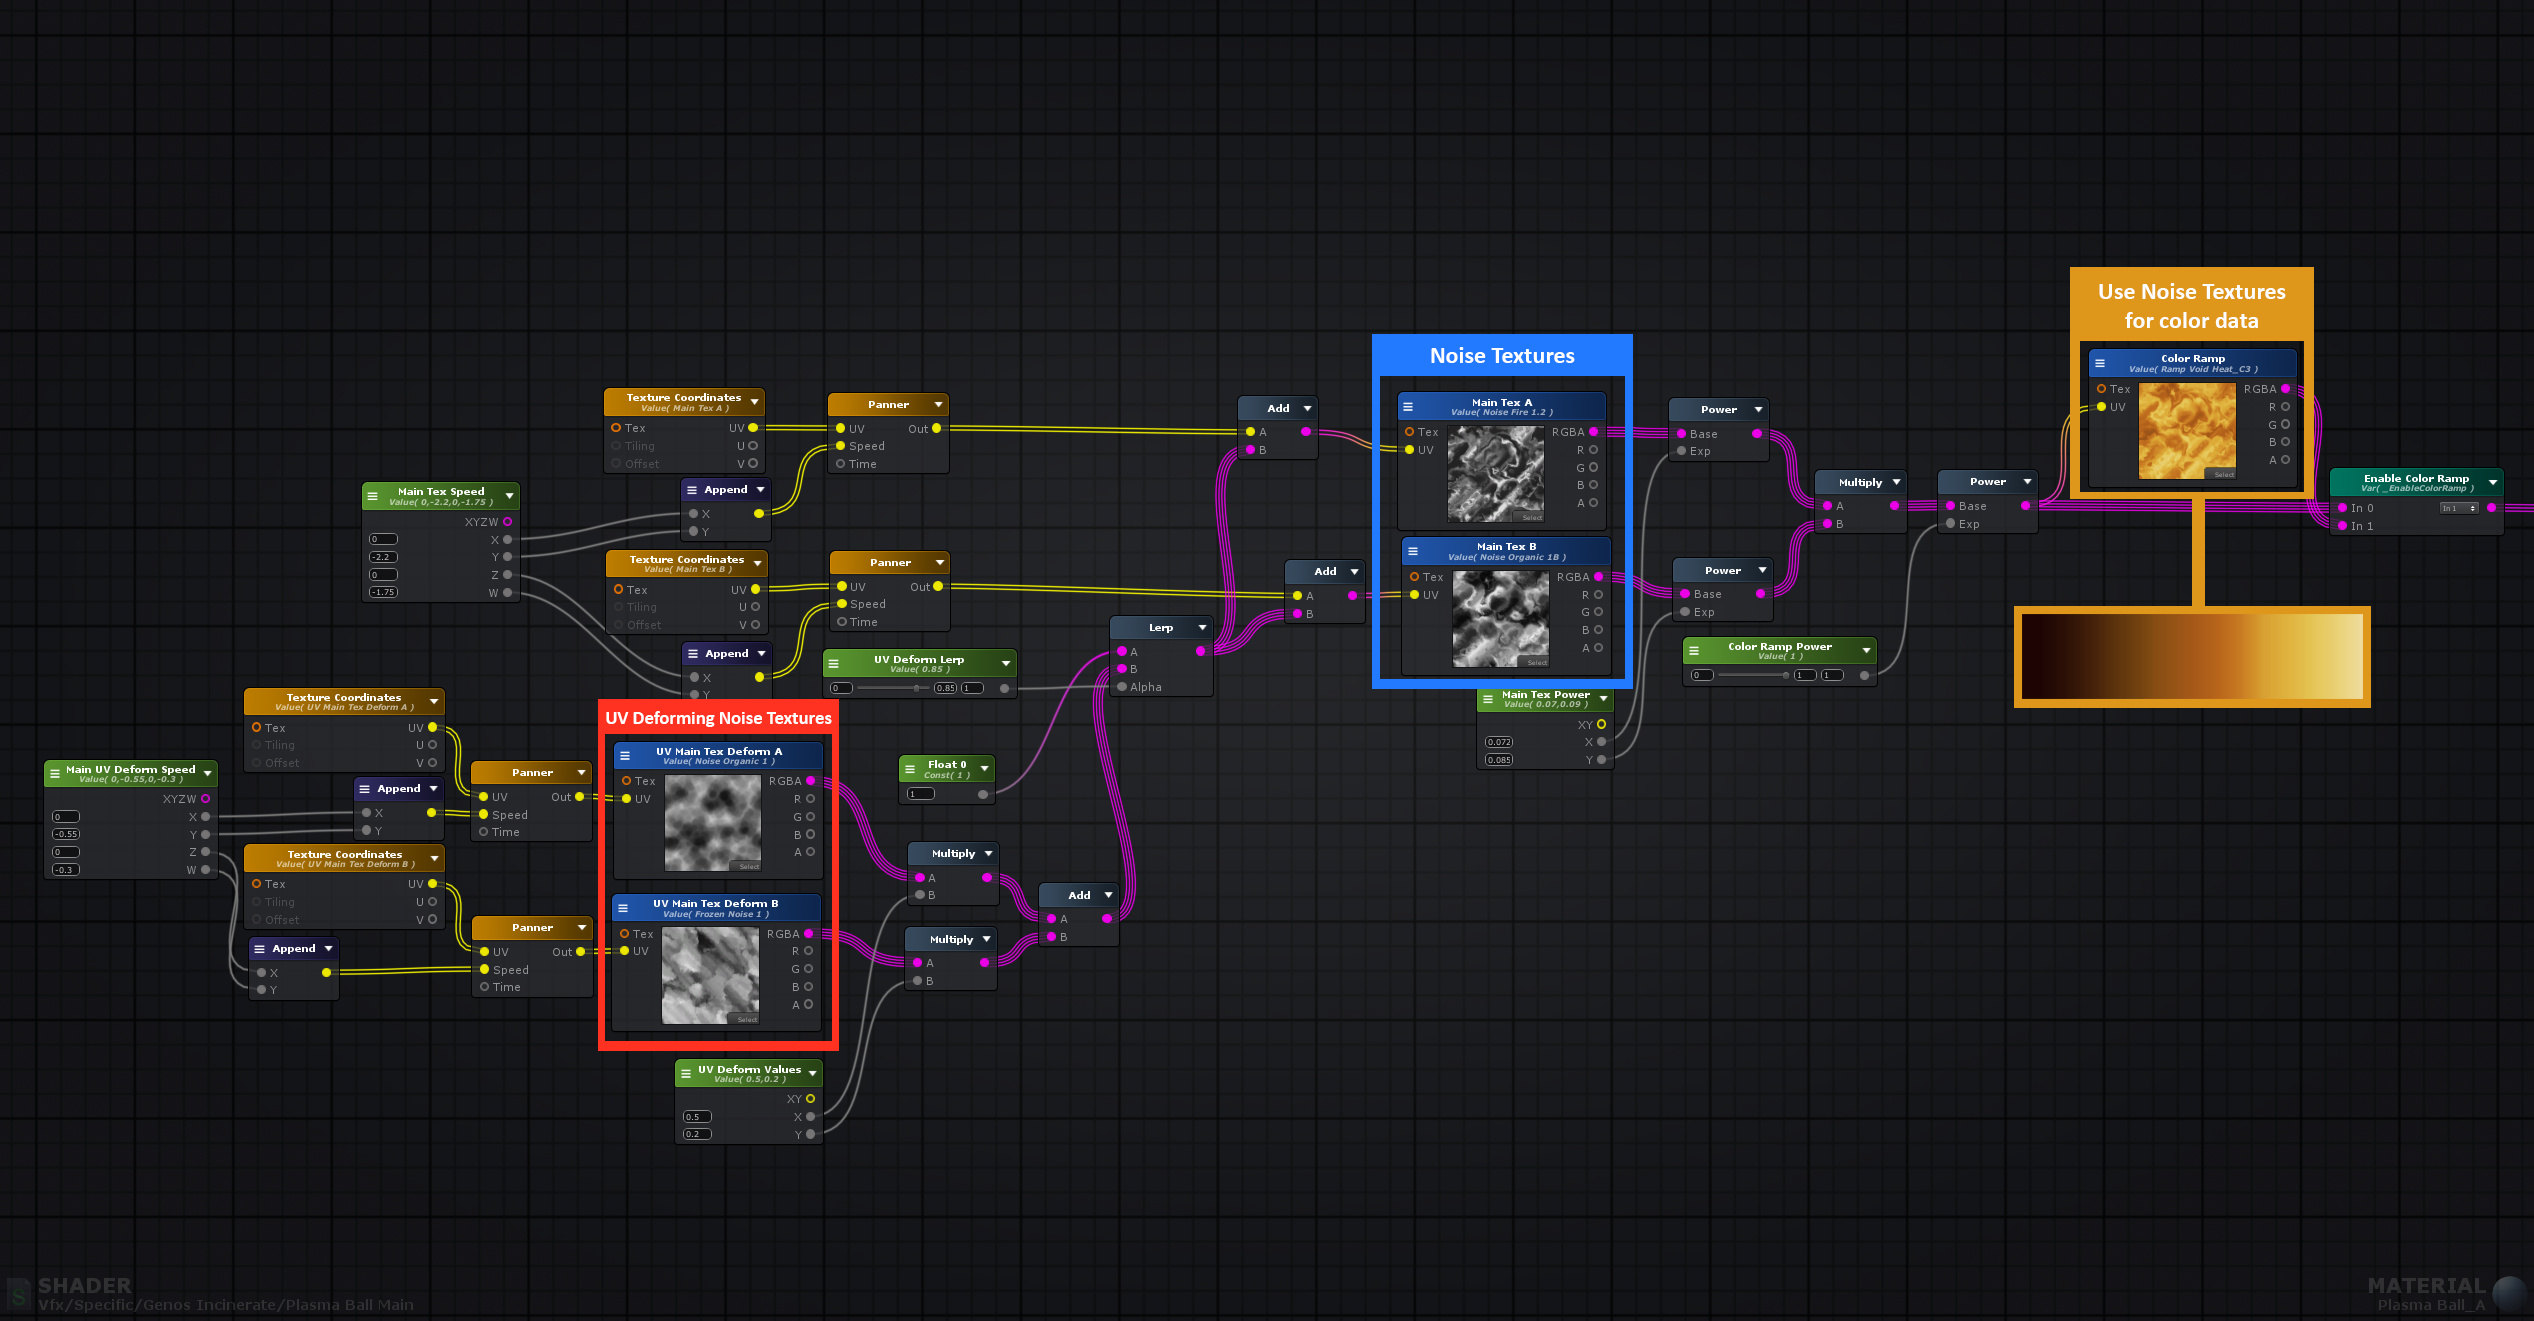
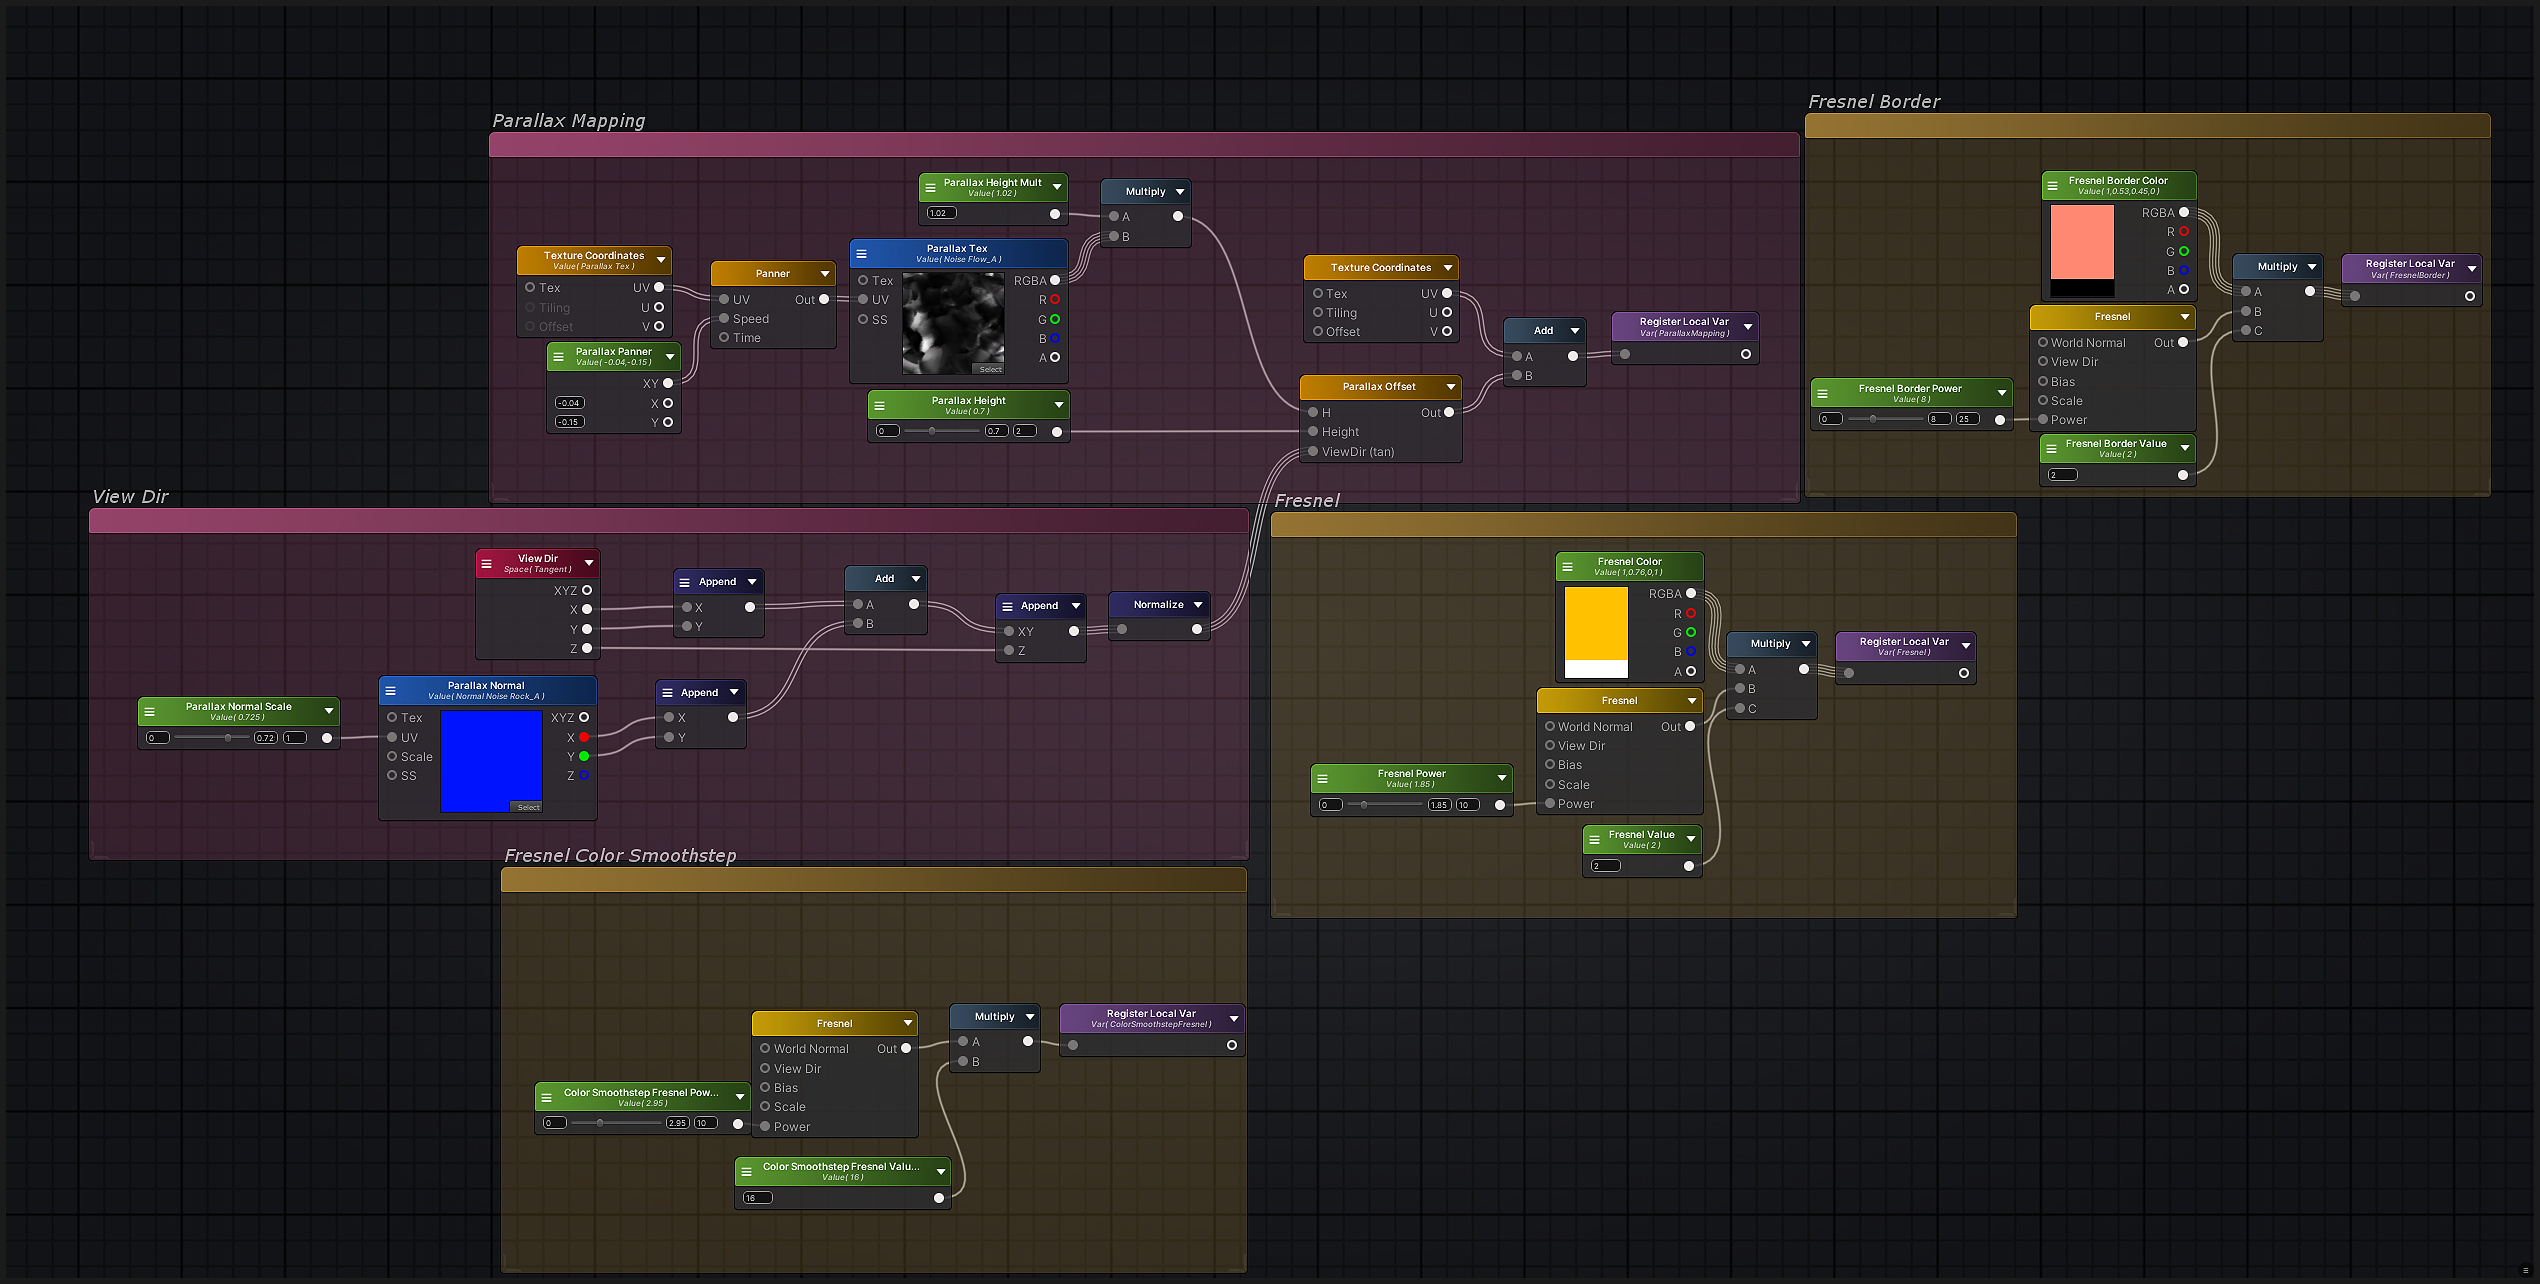
Now that we have our textures let’s go into detail about the shader, for this i used Amplfiy Shader.

To get the realistic movement and details i wanted i decided to use a parallax effect, that way it look more 3D and have more depth. (you can also see the fresnel used)

To have this wavy effect that come and go i decided to multiply different variant of the effect, one with a lower power, the other with a smoothstep node, this is similar to using simple UV distortion, but instead of just deforming, it sometimes reform and feels like the disortion is layered.

I then used a fresnel with smoothstep to even further increase this impression of layer of plasma moving under the surface, as plasma appear brighter the denser it is.

And voila! Thanks for reading, i hope i explained everything correctly, if not feel free to ask any questions :smile:

6 Likes