Hi, I try to make like this cool black-white screen FX .
but I am not sure this workflow is correct.
make post-processing material → animate in Level Sequence or BP?.
Someone know better approach?
Hi, I try to make like this cool black-white screen FX .
but I am not sure this workflow is correct.
make post-processing material → animate in Level Sequence or BP?.
Someone know better approach?
Hey^^
Yeah that workflow is the normal way of doing a black&white flashframe.
Create a pp-material and animate it either inside a script or a sequence ![]()
Not really a lot other options that make sense (but also depending on the engine you are using obviously)
Not sure where @Kashaar posted it, so tagging him for his setup.
You could also spawn a translucent particle right in front of the camera (covering the whole screen), read SceneColor & SceneDepth and then tweak it to what you need (Black & White). This will allow you to animate in out via Niagara a bit more easily, if needed.
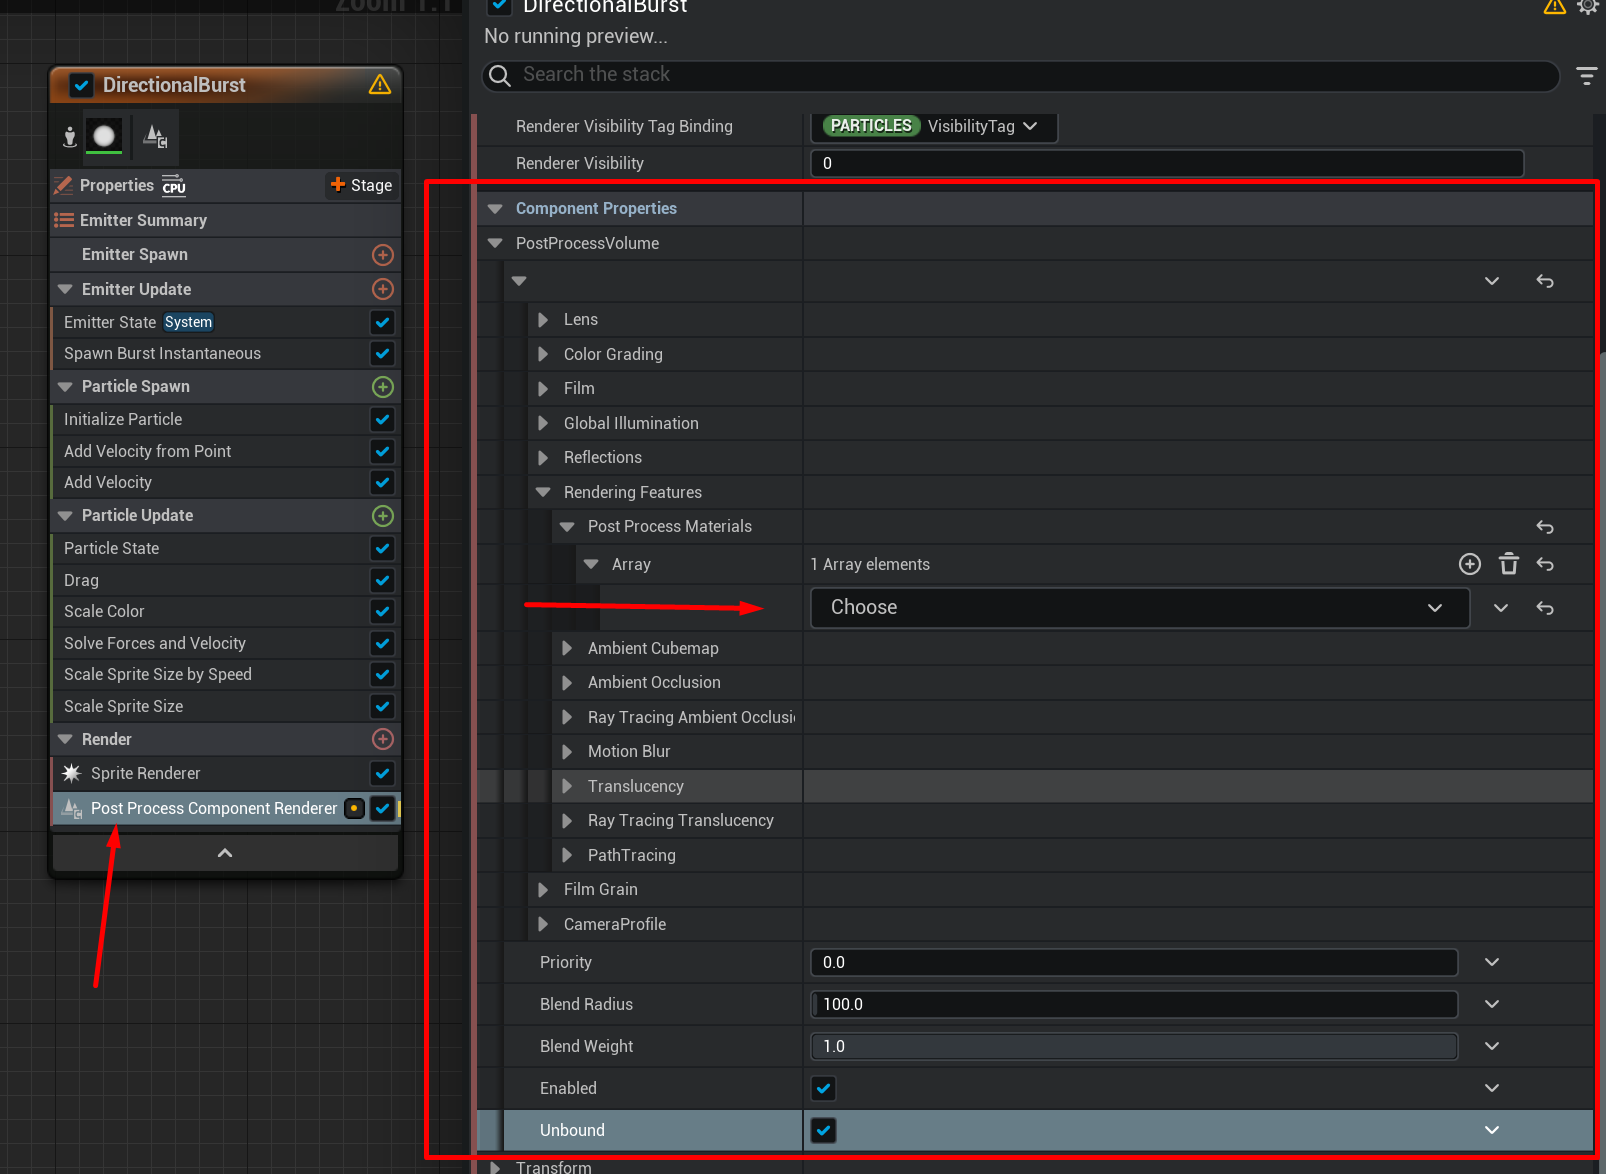
Another way that I have never tested before, which might work: Use the custom component renderer inside Niagara. Spawn a post process component with your Blendable Black&White post process material in it.
Unfortunately it’s a bit harder to animate the post process volume this way, but there might be a workaround.
I had posted this on Discord - message link here for posterity: Discord
I indeed did this with a sprite as well, not a postprocess effect.
Higher quality: Impact Frame effect from the Discord archives - YouTube
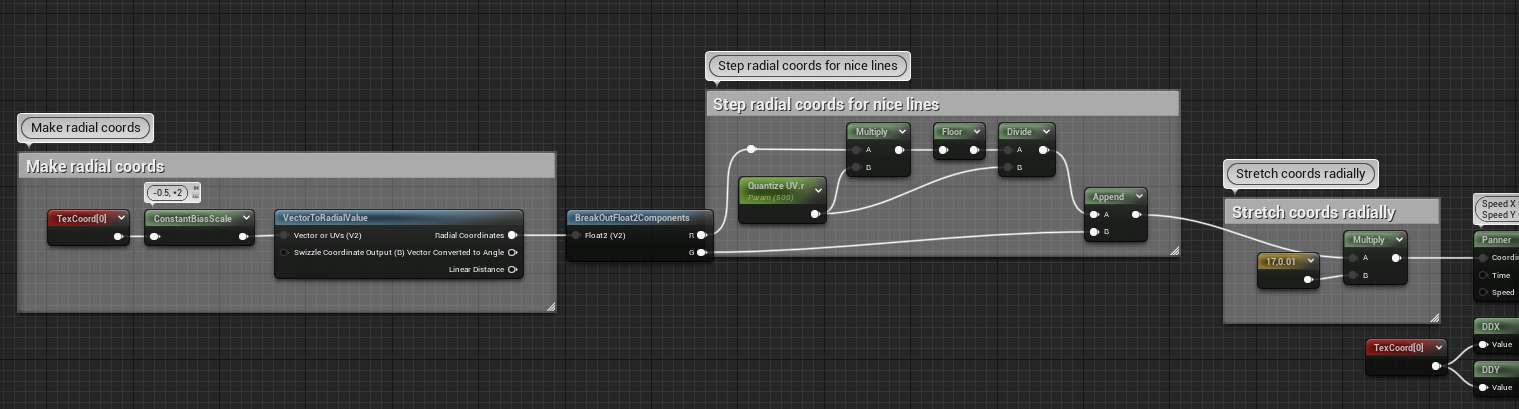
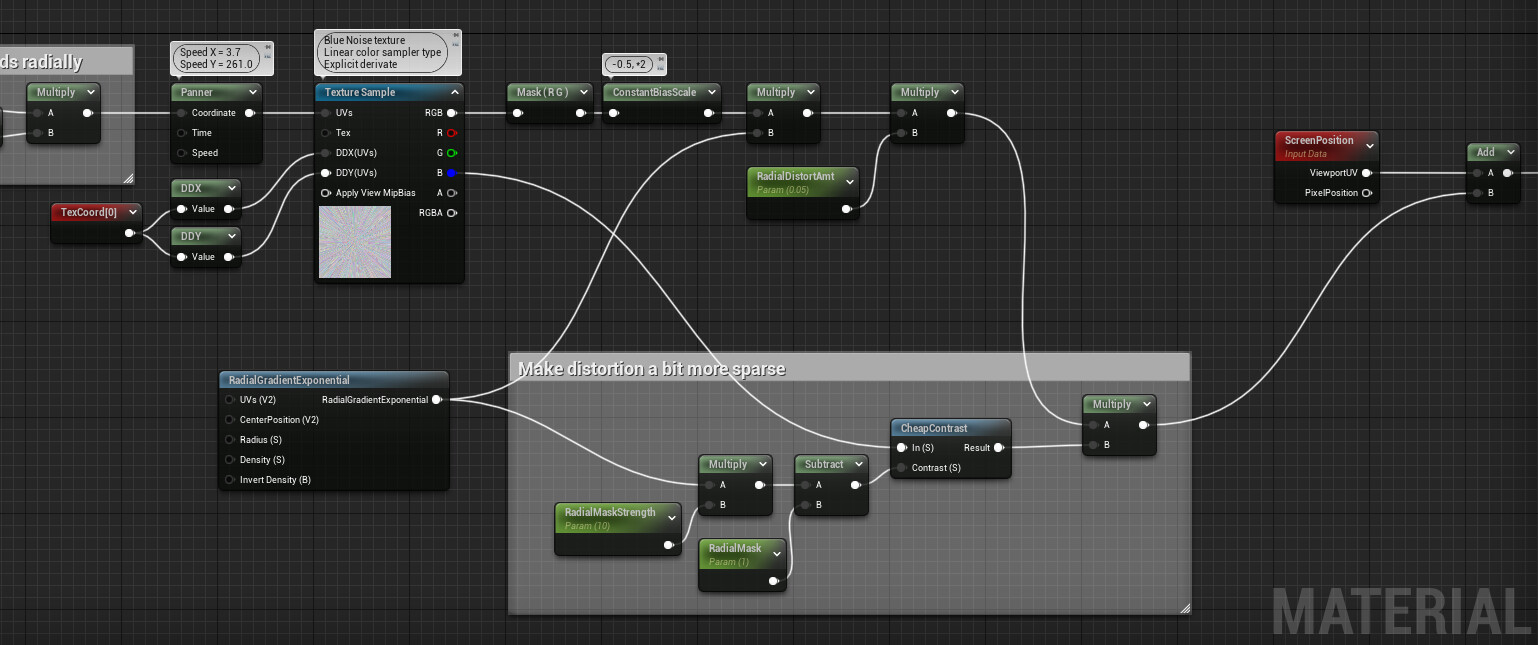
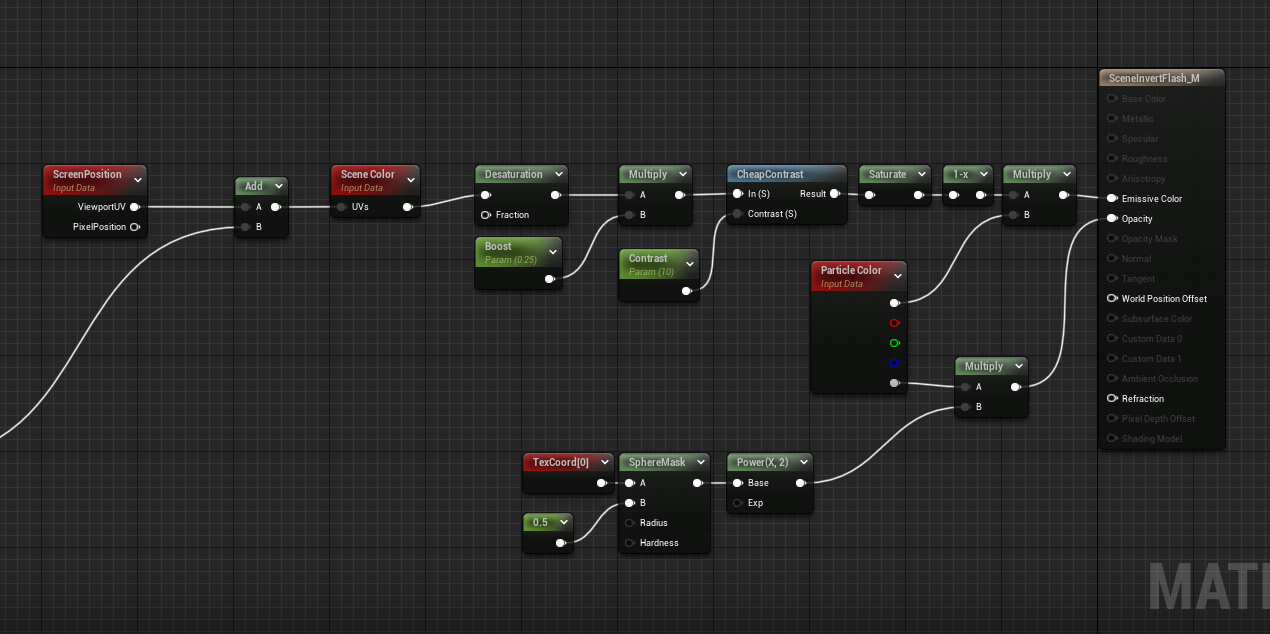
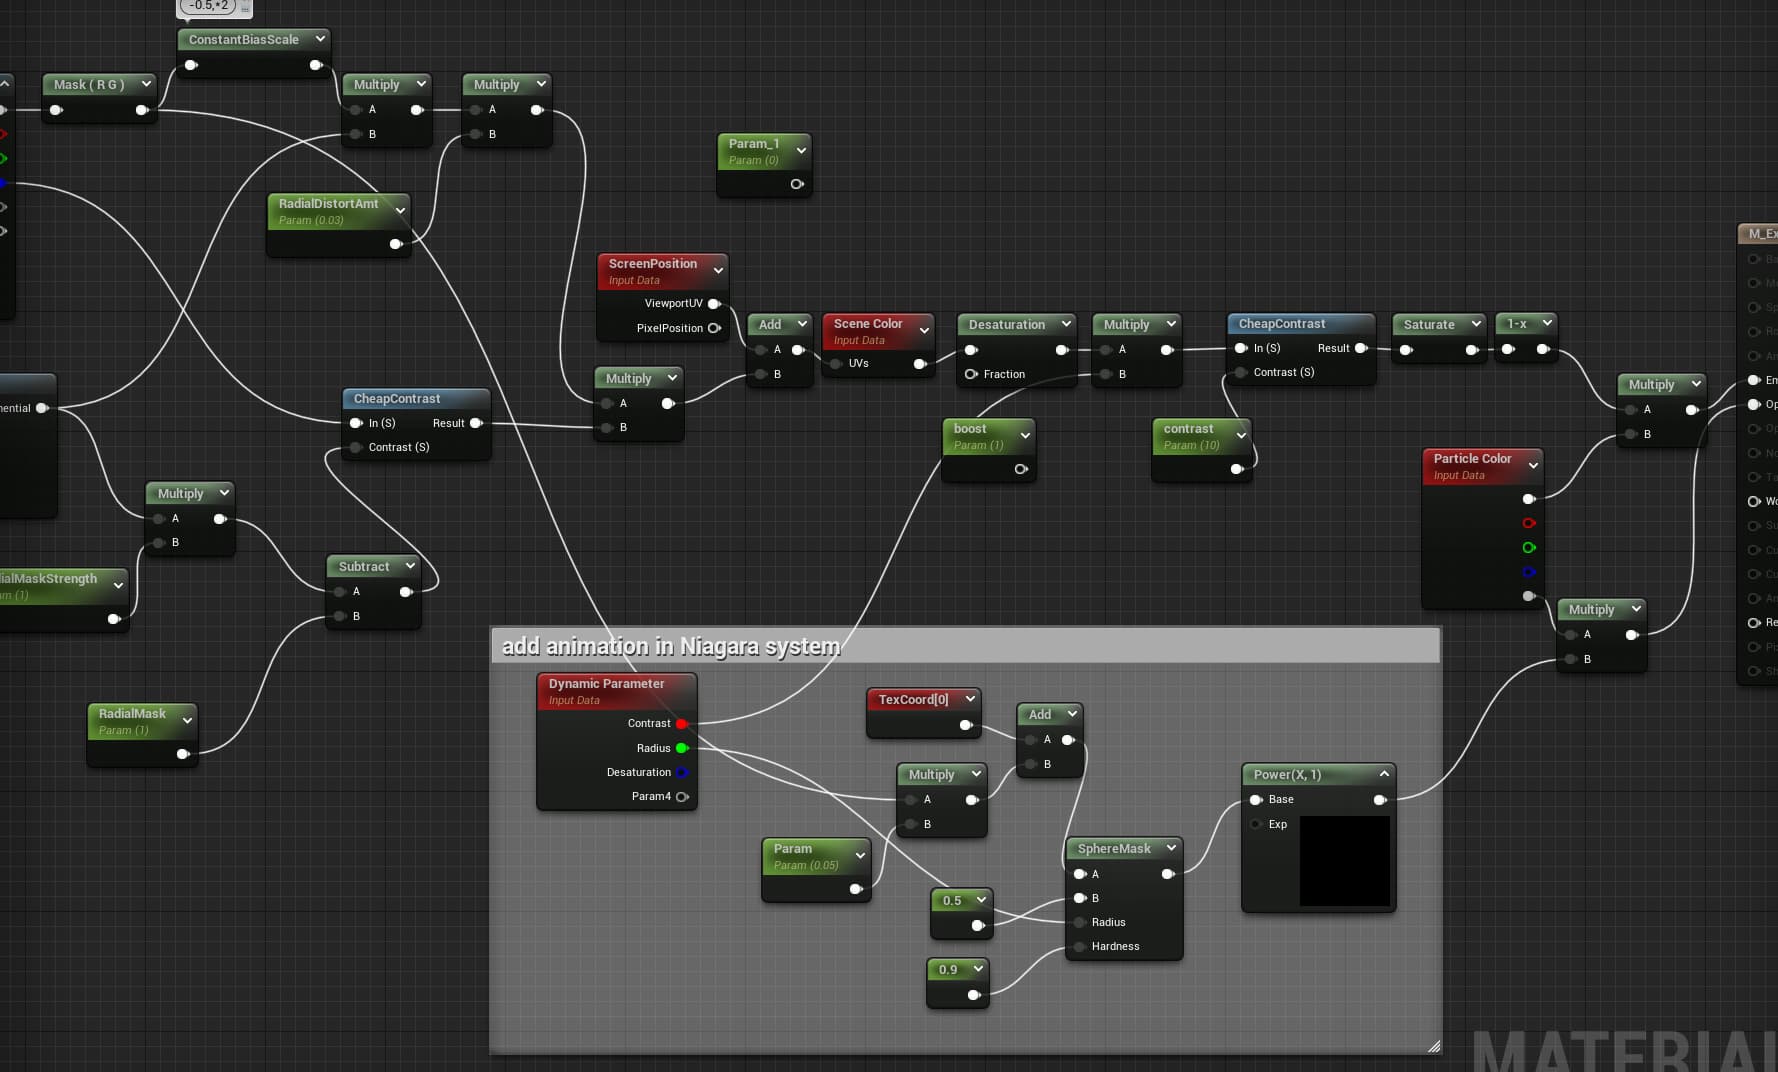
Material graph:
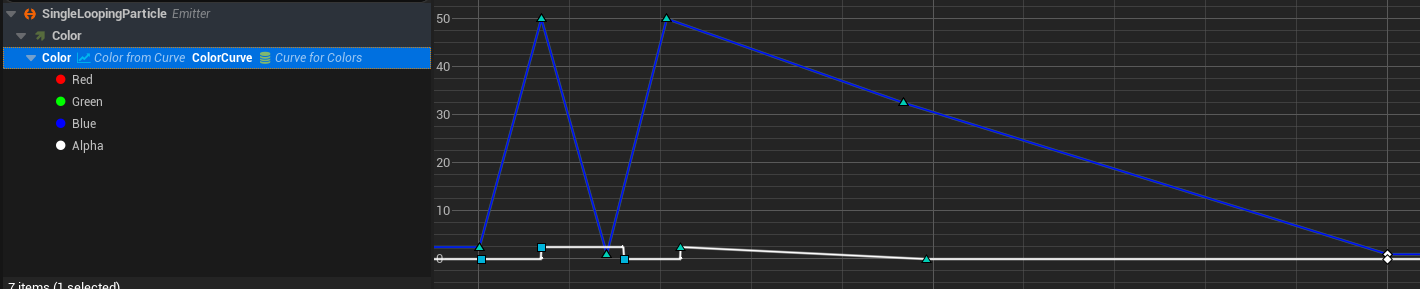
Applied to a Niagara sprite that flashes (white) color and opacity twice like this:
In general I would always prefer to do this kind of thing with sprites rather than postprocess materials, just to keep effects self-contained and dependencies to a minimum. I like my projects to optimize for the minimum amount of complexity needed, so that they’re easy to maintain and iterate on ![]()
Very cool! Hadn’t seen this before ![]()
and attach front of Camera in BP and spawning when shooting the gun.
hey @TobiasTobasco I found this chain a little late but was wondering if you could elaborate on how to spawn a particle that can cover the entire screen?
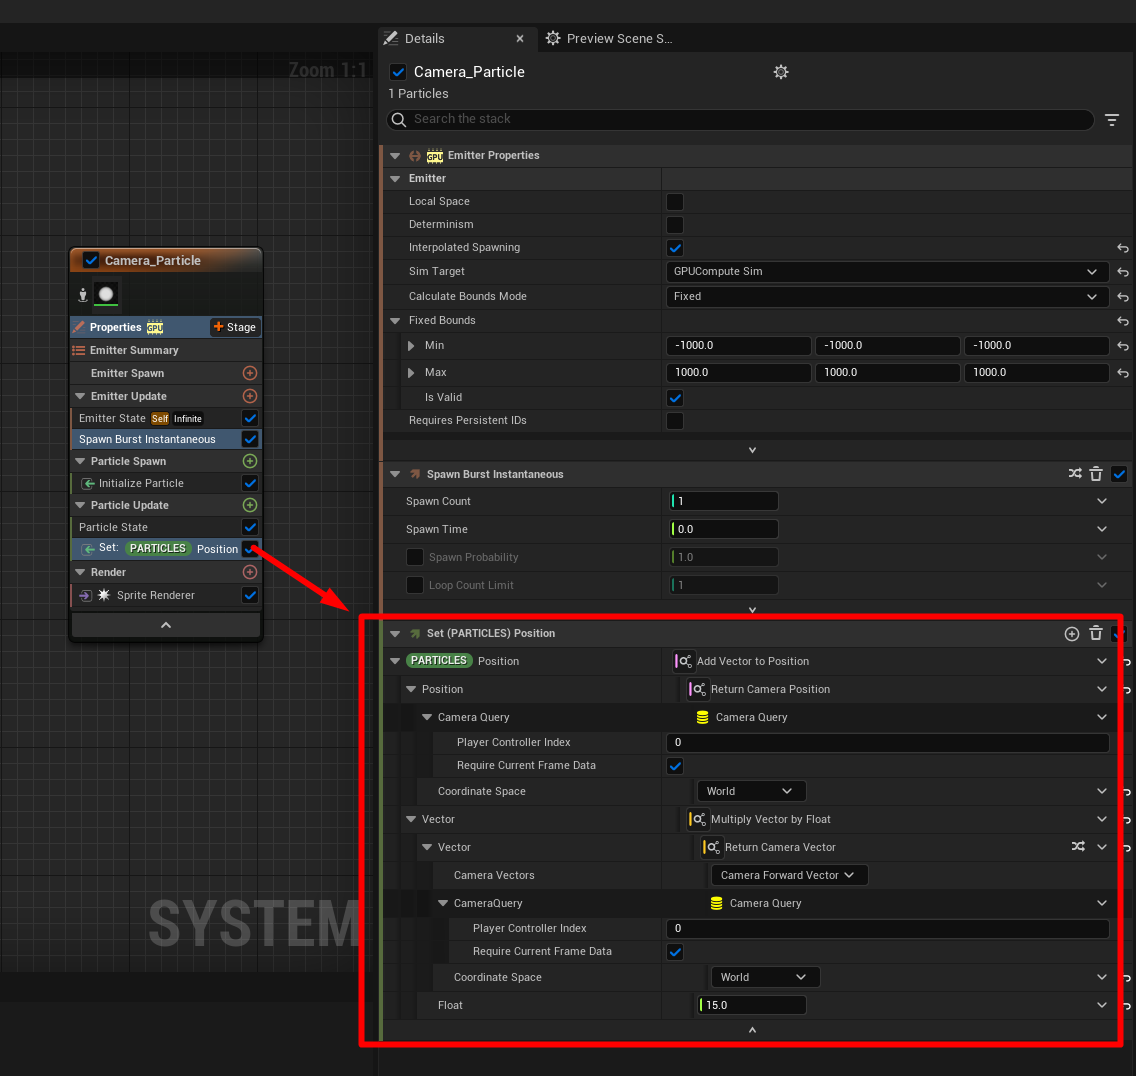
Just spawn 1 particle, then set the position (on particle update) to the camera position. And add a small offset to it. You can use the camera forward vector for the offset. Also make sure you use a GPU particle, as it seems to be faster at updating the camera position each frame (than CPU). You might get some near camera clipping, so an offset of about 10 units is good. Example:
(and one last thing: make sure your system is spawned roughly at the location of your camera. Otherwise your particle will move to the camera location (but the system will stay left behind), and the particle will go out of system bounds, so it will stop rendering. Or you can alternatively increase the system fixed bounds to a large value)
hey @TobiasTobasco thanks for the answer ![]() it makes so much sense and is so much simpler than I thought. It actually just might help with a problem that ive been trying to solve as well, how would one then go about and apply something like this locally? For example spawning a particle in scene causes the area around it to distort.
it makes so much sense and is so much simpler than I thought. It actually just might help with a problem that ive been trying to solve as well, how would one then go about and apply something like this locally? For example spawning a particle in scene causes the area around it to distort.
Hello, I have an animation and i would really like it to have impact frames in UE5. The thing is tho i copied the Material graphs that’s been uploaded here on this board. But I really don’t know how to apply it and i can’t seem to find the [set particle position] would anyone be willing to help?
I’m an absolute newbie to all of this ;-;
[set particle position] is basically setting a variable that is called position inside of a particle context each tick (cos we setting it in a particle update section). I’d recommend take some basic Niagara course (or at least couple hours crash course on yt) - I learned from Real-Time Magic, but it’s on russian only atm
Hey bro, sorry to bring up an old post but I’ve tried and still can’t seem to achieve the impact frame, I’m still using ue4, I created the material and even the Niagara particle just as it is in the image but the particle just spawns white squares on a loop. Would it be possible to guide me elaborately or better still let me download the files please?
Hey I’ve followed the material graph one by one but for some reason my sprite appears totally black. Do you know If they changed anything in UE 5.4 that might affect the material?
Glad I found this discussion. I was wondering about full screen effects yesterday and if u could just use a scaled sprite for them.
Hi Kashaar i added every thing the material niagara implimentation but for some reason it just out puts a grey color. please can i have somne help
HI GridaVFX i added all the material nodes and niagara implimentation but for some reason it out puts a grey overlay. please can i have help