That is a pretty cool idea and your results are awesome! ![]()
1 Like
Some peeps asked how to do this so here is a quick breakdown:
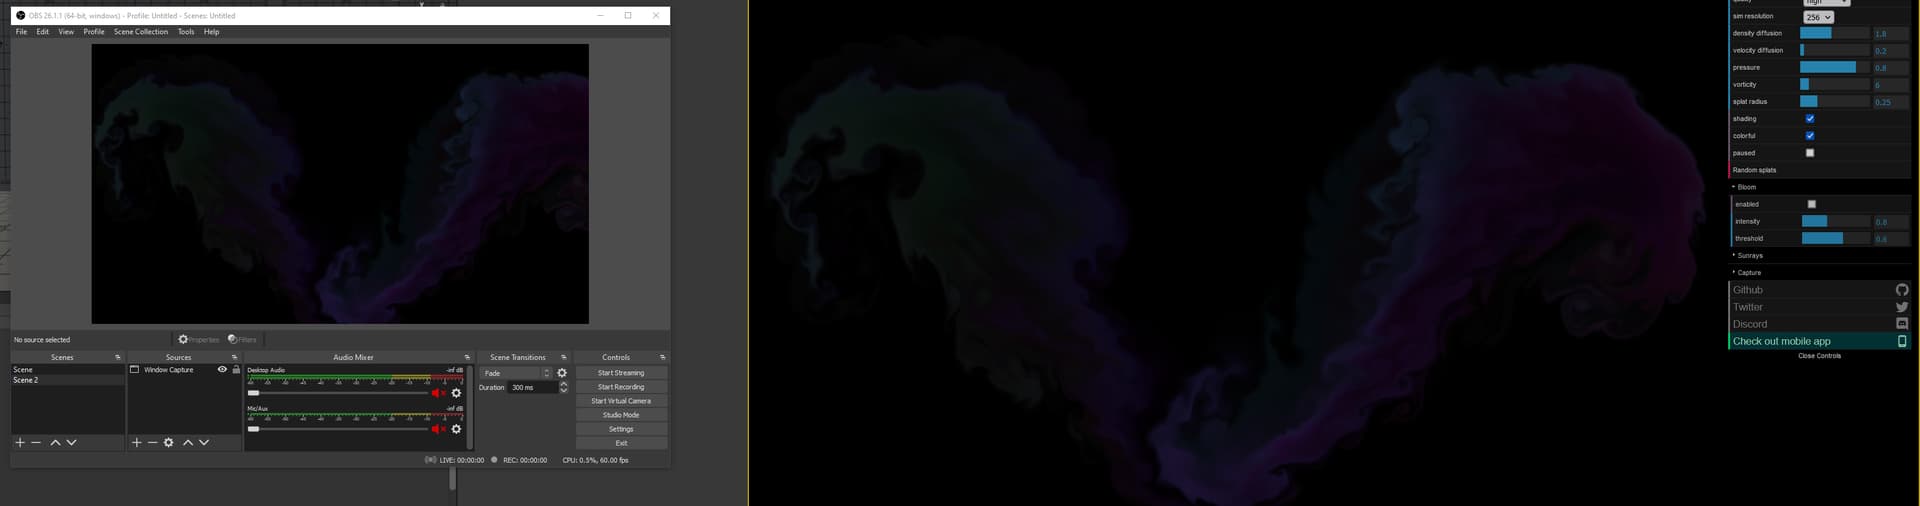
First of all I record some videos of the website I mentioned in the previous post. I use OBS and crop out the view so only the sim part is visible.
Then, export frames from the video. I used VLC because that’s what I had and it was quick enough for this test. I’d recommend using something else if you want more options and more fps exported. (I feel like there is a very simple way to do this, or record straight into frames so just get the idea of what is happening and do better than this ![]() hnnn…)
hnnn…)

Depening on the length of your recording you might get couple thousand frames so be careful ![]()
With all frames exported I remove all completely blank frames because they are useless anyway.
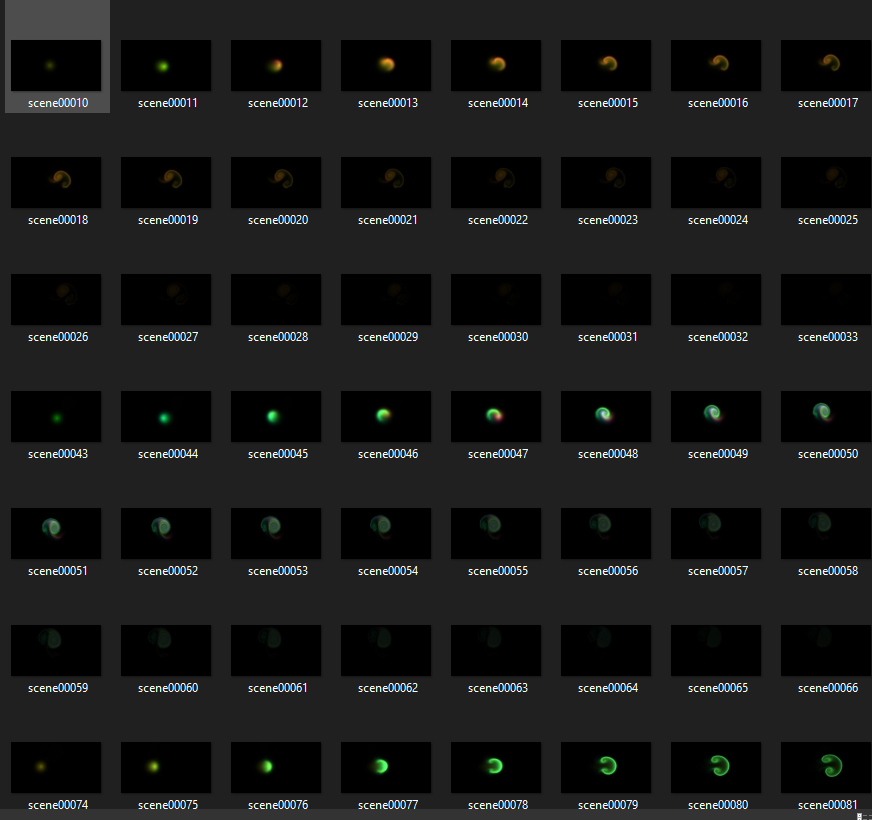
Next I choose the sequence I’d like to use and get it into Unity.
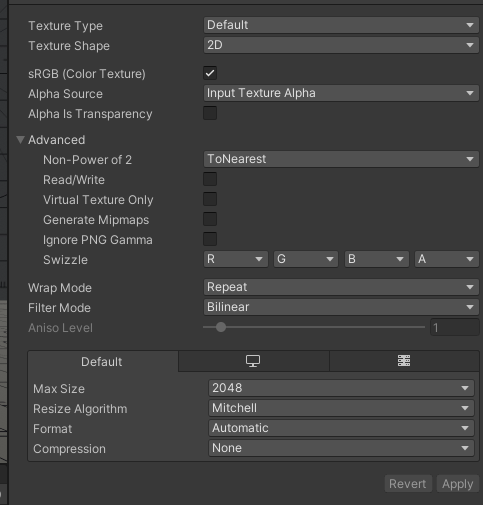
I disabled mipmaps and set compression to None. Those frames will be removed later and not used in game, but I want to process them in highest quality
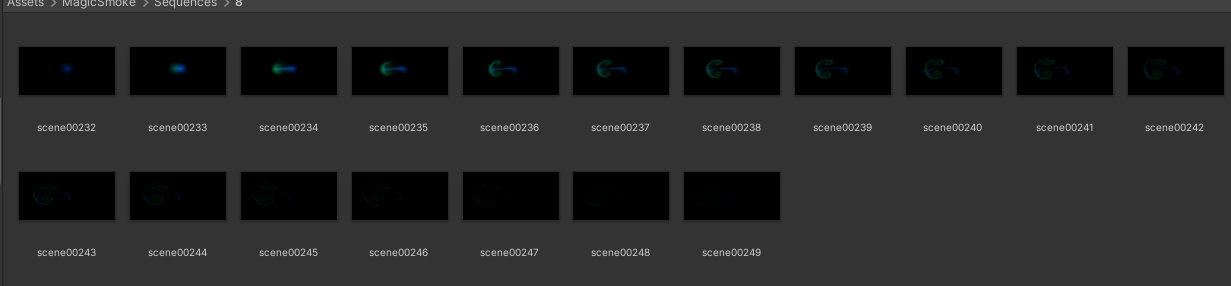
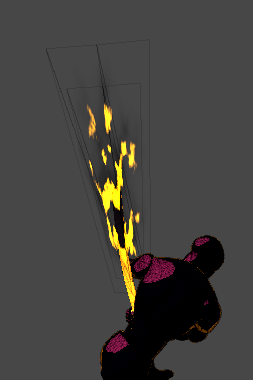
Unity has a very cool tool called Image Sequencer, which you can find in the VFX Toolbox preview package
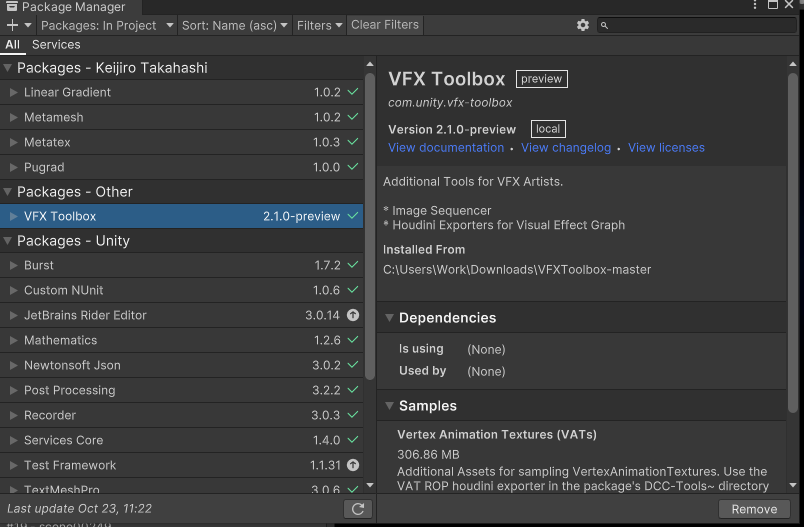
After creating a new Image Sequencer asset I import all needed frames and preview the flipbook
There is a lot of wasted space on there and I can’t be bothered to crop the sequence frames by hand so I use some frame processors:
There is a bunch of them provided, plus it’s easy to make custom ones by using a custom material to process the frames. There are some example shaders provided (like Blur, Rotate, Negative or HeightToNormal).
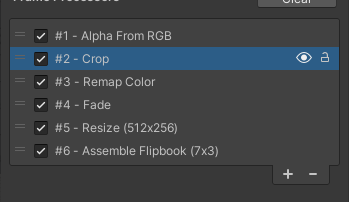
- Alpha from RGB - self explanatory
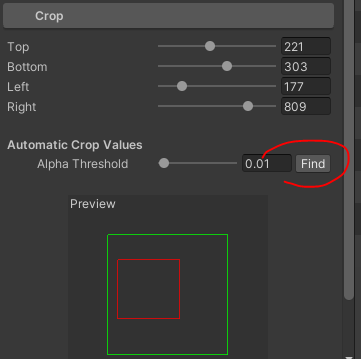
- Crop - crops all frames, but if you use an alpha channel you can use the auto crop option, so I did
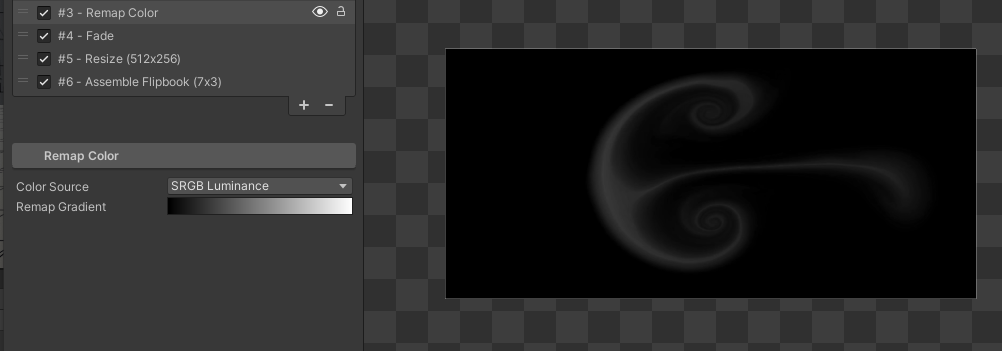
- Remap Color - the output is a bit too transparent and I want the result to be in grayscale without alpha so I remap the colour using the SRGB Luminance to make it a bit brither (probably could have gone a bit more intense here, but it was good enough for this test)
- Fade - I want to make sure that the sequence fades to black at the end so I fade out the last few frames.
- Resize - The frames are wide and still pretty huge so I resize them all to a smaller size of 512x256

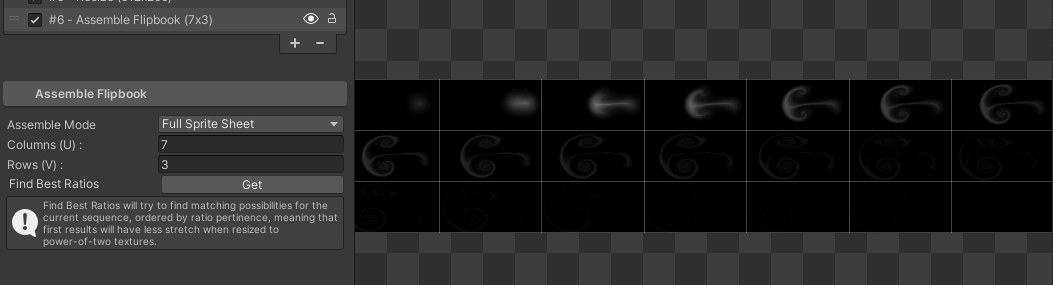
- Assemble Flipbook - after I’m happy with how it looks and plays I assemble a flipbook
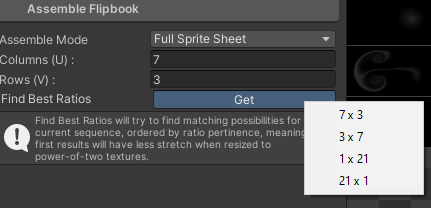
The tool recommends the best ratios depending on number of frames I used. 7x3 seemed fine so I used that (now that I look at it I probably should have used 3x7 since the frames are wider, but )
)
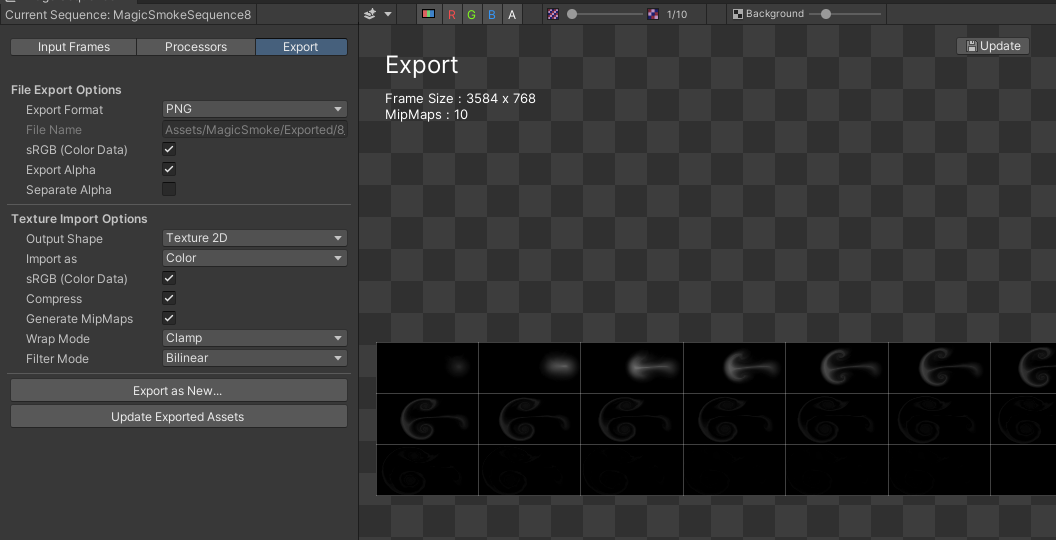
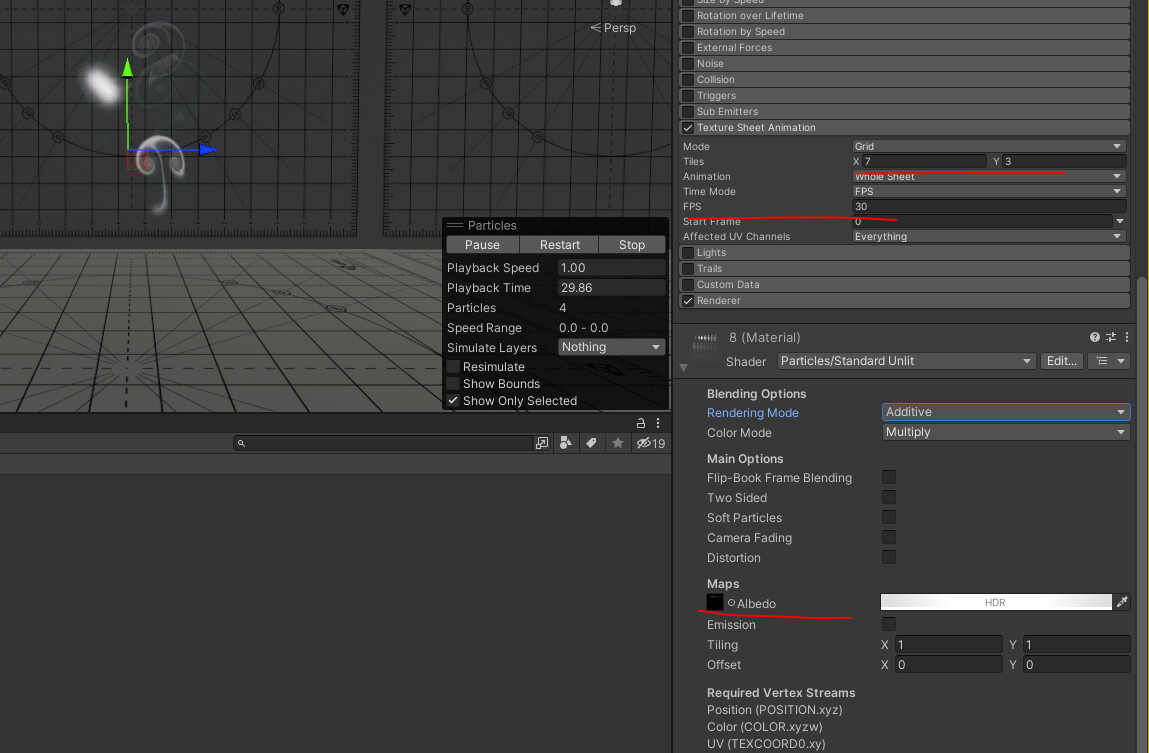
- I exported the flipbook as a PNG with the default settings and thats it!
Then it’s as easy to use as any other flipbook ! I used shuriken since I’m working in BiRP atm
It was a fun experiment and the same process can be used for already made videos or whatever you can get/find online with the correct licensing ![]()
10 Likes
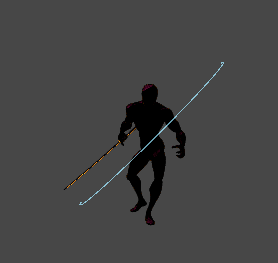
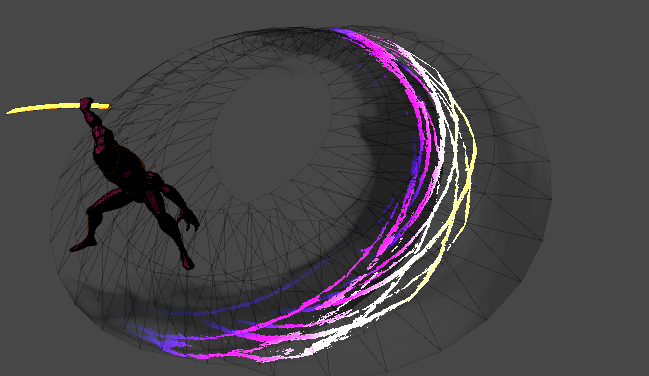
Sword slash vfx sketch
The VFX part took couple hours, was quite fun, especially since I never made it before hah. There is so much to doooo

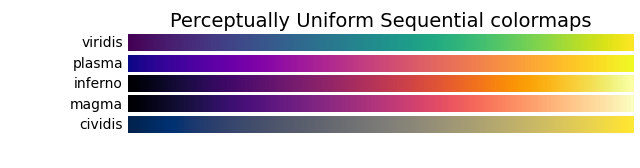
Colours are based on the plasma colourmap, I used it before and I really like it =3=
https://matplotlib.org/stable/tutorials/colors/colormaps.html
12 Likes
Some peeps asked for a breakdown for this so here it is:
I’ll start from the beginning:
-
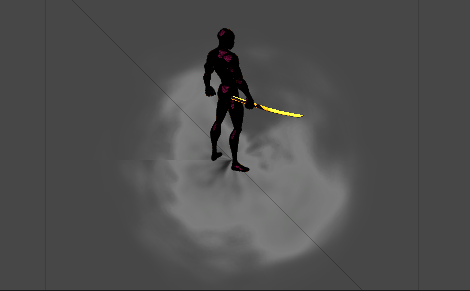
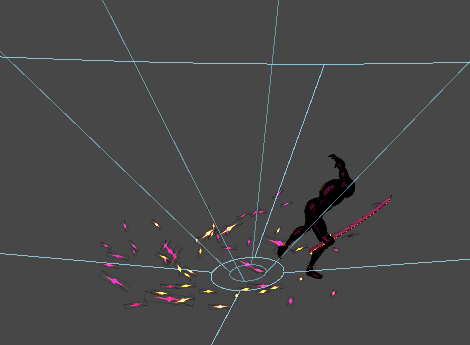
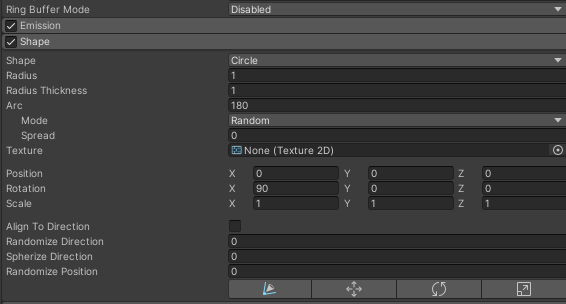
Charge bits and trails around the character
Just simple stretched billboards and trails spawned on the edge of the sphere shape with negative radial velocity so they fly towards the center + some orbital velocity on Y axis.
-
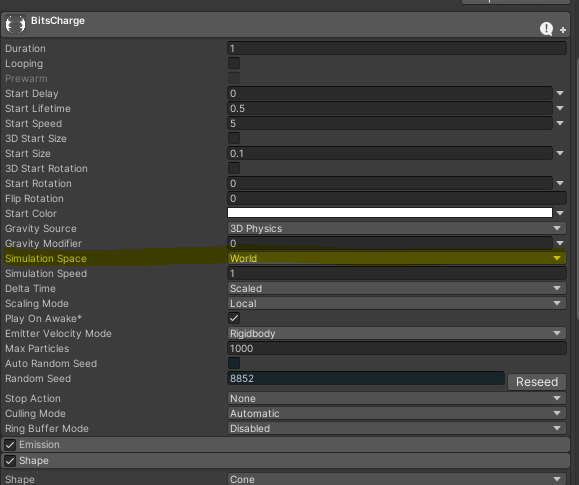
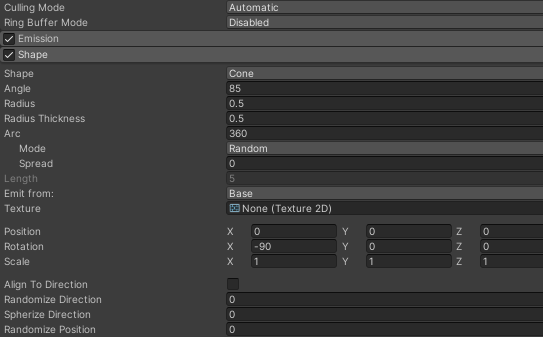
Charge bits from the sword end point
Same bits as before, emitted from the cone shape with initial speed. Simulation space set to world

-
Charge Smoke
The most boring part about I think, just needed something here so I did that. Simple quads with outward radial velocity and some orbital vel at the end.
One bigg billboard quad behind it all growing with time until the charge is done
And one quad on the floor.
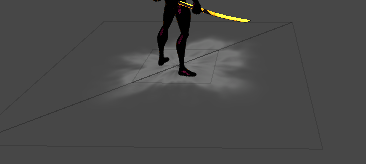
The materials have a soft depth fade so the intersection with the floor is hidden.
-
Charge Explosion
Same bits as before, emitted from the cone shape with initial speed so they fly out and orbital velocity.
-
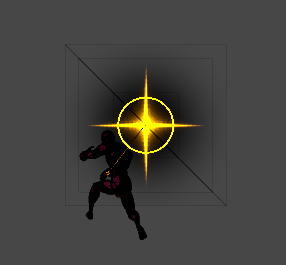
Charge done blink
Simple billboards that appear for 0.1 seconds. I put a dark ‘glow’ behind it to make it pop even more.
-
Sword Aura
It’s a mesh in this weird shape with a scrolling noise texture and a circular mask, nothing fancy. Changes colour and alpha cutout/opacity with particle lifetime. It’s attached to the sword mesh in the character hierarchy.

-
Sword bounce bits
There are some more bits coming out of the sword’s end while slashing, those have collision turned on so they bounce when they hit the ground. There is not much reason for those, I just wanted some spicy bounce
-
Sword slash bits
Same bits again, but spawned on the edges of a half circle with forward velocity (from front of the character)

-
Sword slash
That’s the mesh I’m using (the back part of the slash can be cut out to decrease the geo a bit since it’s transparent anyway)
I’m using three particles with this mesh here.
They all use the same radial mask so the edges are smooth with some scrolling noise multiplied.
- Is just black with some smooth slowly scrollng noise. Rotates around it’s Y axis and moves forward when emitted. It’s the slowest and disappears first out of the three.
- The glowyone. I’m using the gradient I mentioned before. This one is faster than the first one and has a longer lifetime, also stops spinning half way.
- This is the fastest one and lives the longest. Also it doesn’t roate over lifetime. I felt like the slash needed some residue up front so I added this
-
Impact lines or scan lines
(Glorious compression) It’s just a quad with polar uv’s and a noise texture scrolling outwards. It’s a Raw Image on Screen Space canvas so I can apply the invert filter on it.
I just realised that it was completely pointless, because I actually wanted to keep the black lines when inverting the colour
If I did it right it would have looked more like this. OOPS
-
Invert colours post processing effect
It’s a simple custom PP effect. Like, very barebones simple. I just enable it for 0.07 seconds with the scalines to make a spicy flash.

Shader Code
Shader "Hidden/Custom/Invert"
{
    SubShader
    {
        // No culling or depth
        Cull Off ZWrite Off ZTest Always

        Pass
        {
            HLSLPROGRAM
            #pragma vertex VertDefault
            #pragma fragment Frag

            #include "Packages/com.unity.postprocessing/PostProcessing/Shaders/StdLib.hlsl"

            TEXTURE2D_SAMPLER2D(_MainTex, sampler_MainTex);

            float4 Frag(VaryingsDefault i) : SV_Target
            {
                float4 color = SAMPLE_TEXTURE2D(_MainTex, sampler_MainTex, i.texcoord);
                color = 1 - color;
                return color;
            }
            ENDHLSL
        }
    }
}
C# code
using System;


namespace UnityEngine.Rendering.PostProcessing
{
    [Serializable]
    [PostProcess(typeof(InvertRenderer), PostProcessEvent.AfterStack, "Custom/Invert")]
    public sealed class Invert : PostProcessEffectSettings
    {

    }

    internal sealed class InvertRenderer : PostProcessEffectRenderer<Invert>
    {
        private Shader m_shader;

        public override void Init()
        {
            m_shader = Shader.Find("Hidden/Custom/Invert");
        }

        public override void Render(PostProcessRenderContext context)
        {
            var sheet = context.propertySheets.Get(m_shader);


            context.command.BlitFullscreenTriangle(context.source, context.destination, sheet, 0);
        }
    }
}
Hopefully that’s enough detail, it’s a very simple effect, just bunch of different parts glued together ![]()
11 Likes
Some recent explosion I made while trying to get out of the burnout phase:

4 Likes
Some more simple stuffs
7 Likes
Current bigger thingie I’m working on, an arrow charge and shot
8 Likes
These are crazy inspiring!!! I’m gonna follow that thread cautiously ![]() I love the breakdowns you make, I learn a lot from these !
I love the breakdowns you make, I learn a lot from these ! ![]()
2 Likes
Aw, glad you think so, if there is anything you ever need a breakdown of, let me know!
2 Likes
Continuing with the arrow shot, added a blink and another camera perspective after arrow gets shot. I think I need to make some residue particles alive for longer after arrow get shot
3 Likes
Started working on the proper hit impact, not sure if it fits yet, but it’s progress! ![]()
Here’s the finished effect

8 Likes
When I was trying to come up with a better arrow hit effect I tried something different as well:
Small update

4 Likes
Small sketch, I wanted to try something

4 Likes
Amazing work ![]() , can you please break down how you made that destructible sphere, when the parts rotate on the origin, is it made with VFX graph or a script?
, can you please break down how you made that destructible sphere, when the parts rotate on the origin, is it made with VFX graph or a script? ![]()
Thanks! And yeah ofc. Quick breakdown since it’s not too complicated:
- I fractured the sphere in blender to get some nice parts.
- The glowing cracks is just a texture on top of the sphere to fake the sphere cracking.
- The explosion in the top 2 gifs is a script that has the actual fractured sphere (this video from @GabrielAguiar explains it well Unity Tutorial - How to Fracture or Shatter Objects - YouTube)
- The bottom explosion is actually Shuriken system with like 5 (or so) different meshes on one emitter (the meshes I got from fracturing the sphere before). They are spawned in a sphere shape with random size and all that. With more pieces it would probably be better to do it with VFX graph, but with only couple of pieces like that it’s good enough honestly.
Thank you so much that was so beneficial !!, and oh I didn’t know that Shuriken system can do that, but for VFX graph i thought it can only store up to 4 Mech Count Max while using the output Particle URP Lit Mesh, but i guess it’s not the right method to do it, you mind tell me how you can do that in VFX graph? or maybe share a similar tutorial you saw before.
Well, you are right, you can have only 4 different meshes in one output, with different sizes and rotations that might be enought to fake the specific shape breaking down into those small bits.
If you want something more accurate there is also an option to use submeshes for each mesh. That could possibly give you 32 more shapes per each mesh. BUT they aren’t treated like separate particles in the vfx graph. With that you could simulate the explosion in a shader, but that’s a bit more complicated.
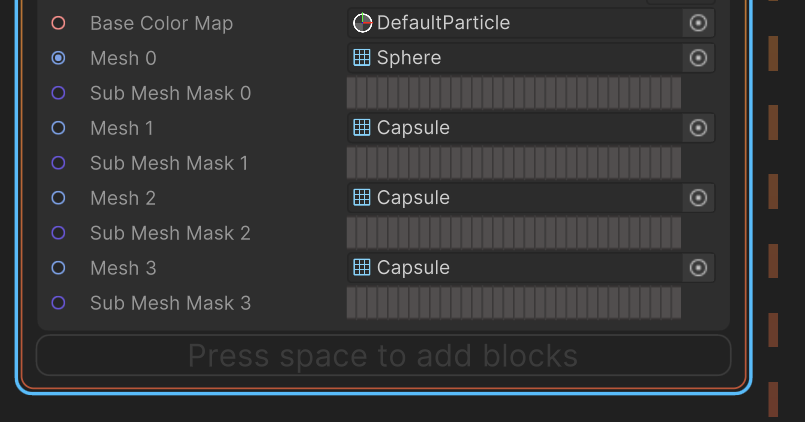
What I’d do is have a few outputs, this gives you 12 different meshes and it’s way easier to do
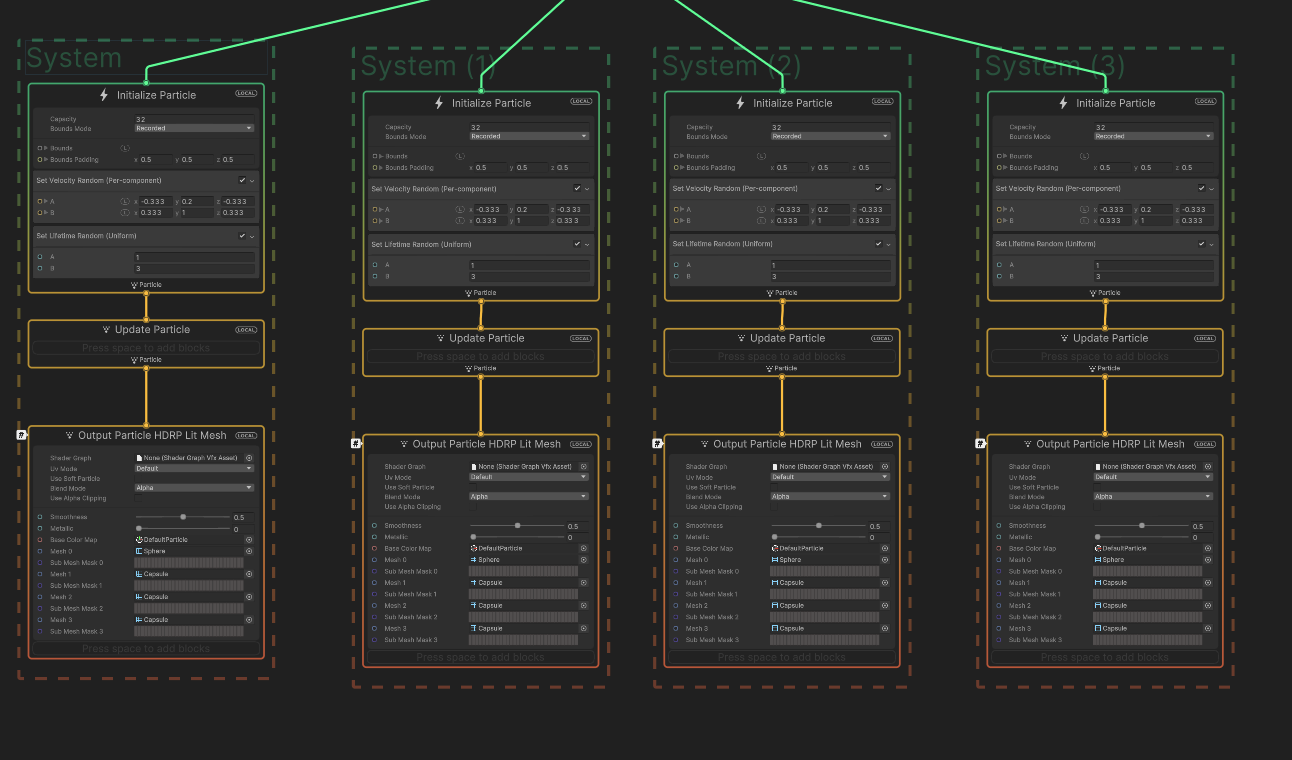
1 Like
I see! thank you so much for sharing your knowledge!! I didn’t know that you can use sub Mesh that way. I will try play with it an see what I can do. Thanks !!