This week, I took a small break to work on some more technical stuff. Currently, Unreal Niagara does not support using a spline input on GPU particle emitters, so I’d figure I was going to try to make it work. This can also be done with user parameter and some blueprint, but I wanted to do most of the editting work in Niagara. Here’s my result and how to achieve it.


Since this is not a tutorial about using splines in Unreal, I’m not going to focus on that, but I personnaly have a blueprint that I call SplineUtility that I can drag in the world and use to create the curves I want. I’m also going to assume you have a good amount of knowledge in blueprint and particles in general.
STEP 1 - Setup
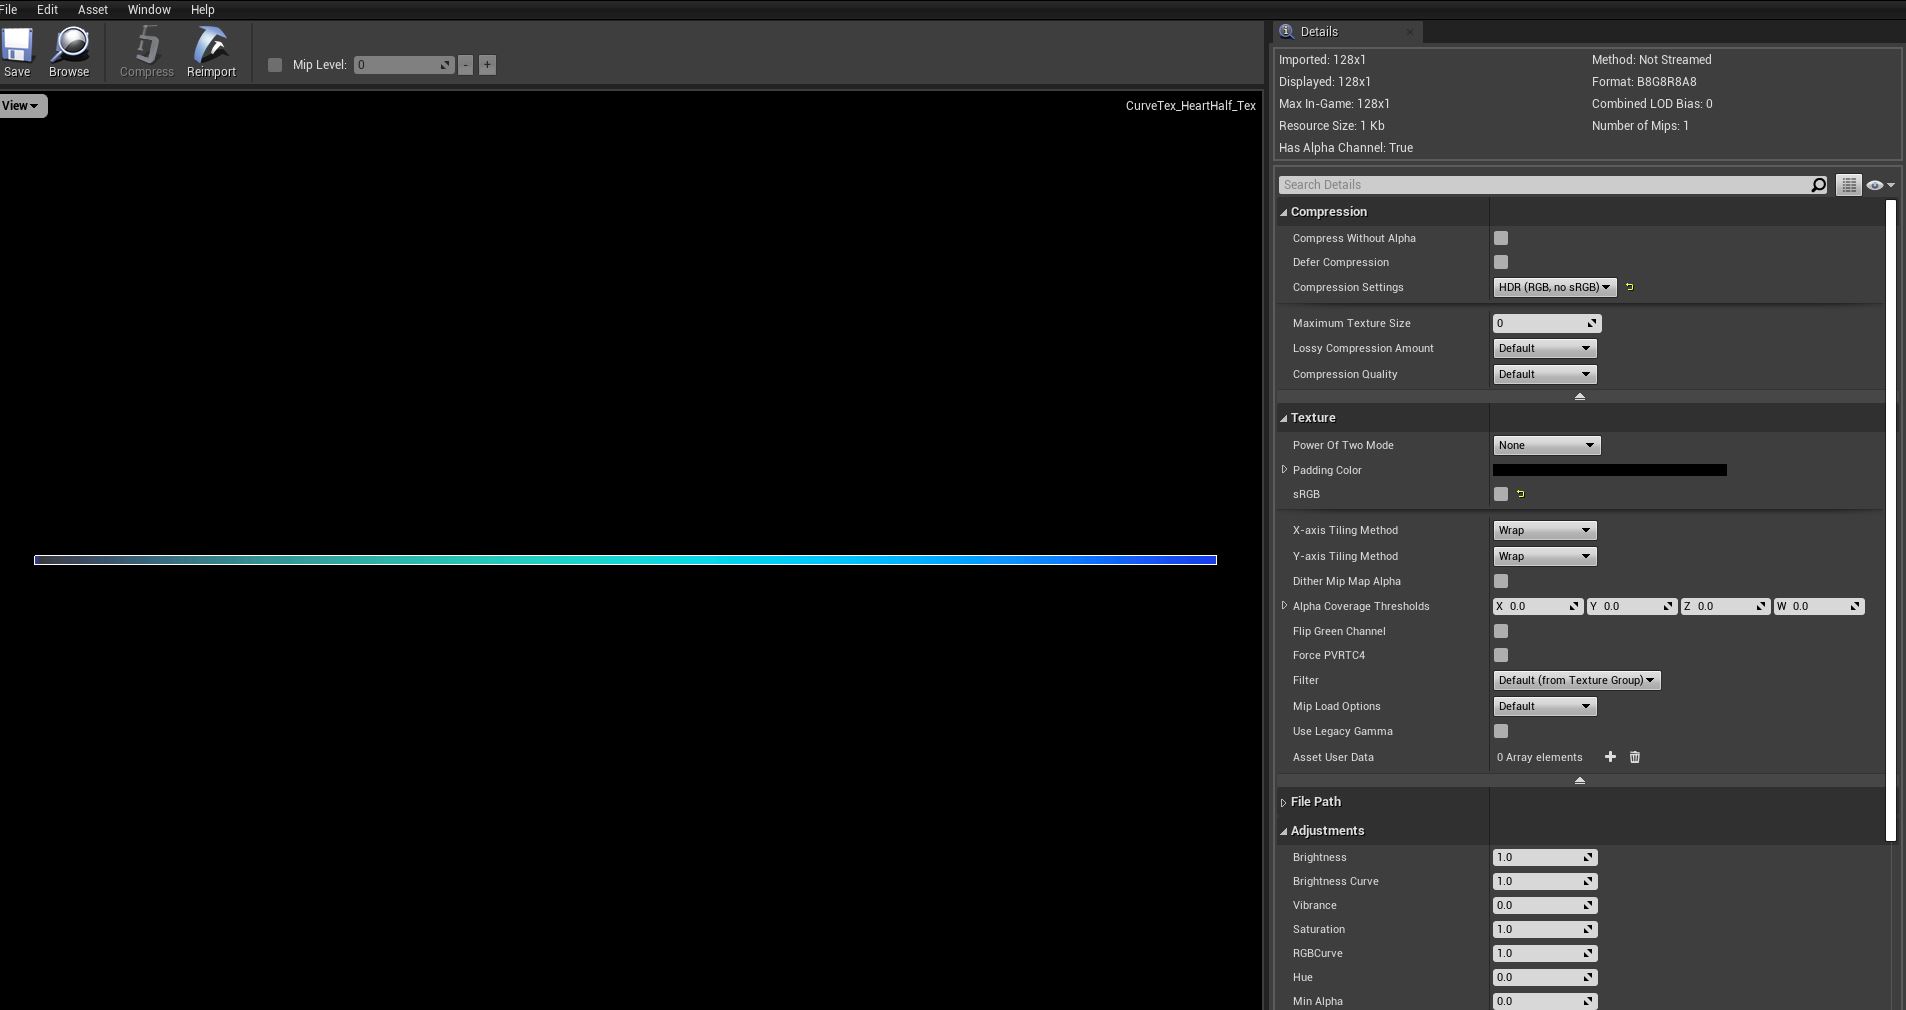
Since splines can’t be read by GPU emitters, we need to create our spline using something else. The way we are going to do this is by writing the curve we want to use to a texture. I’m only going to cover static splines, since I dont believe animated splines are too common in Unreal. Here’s the kind of texture we are going to get.
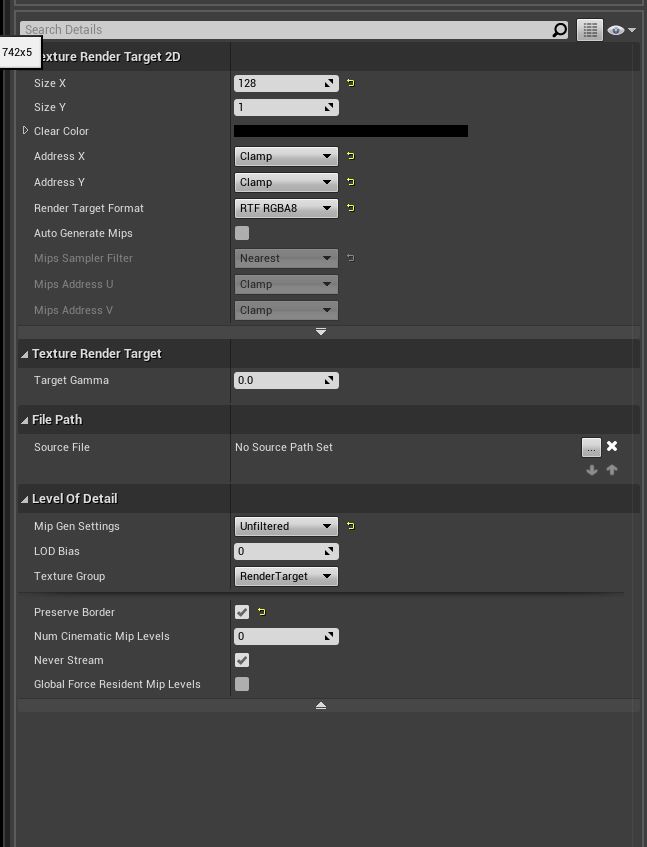
You’re going to need to create a new blueprint and a canvas render Target.

In the target render texture, set the size X to 128 and the size Y to 1. You can copy the other options, but I don’t believe they matter too much. I felt that setting it to clamp usually gave more accurate results.
STEP 2 - Creating the blueprint
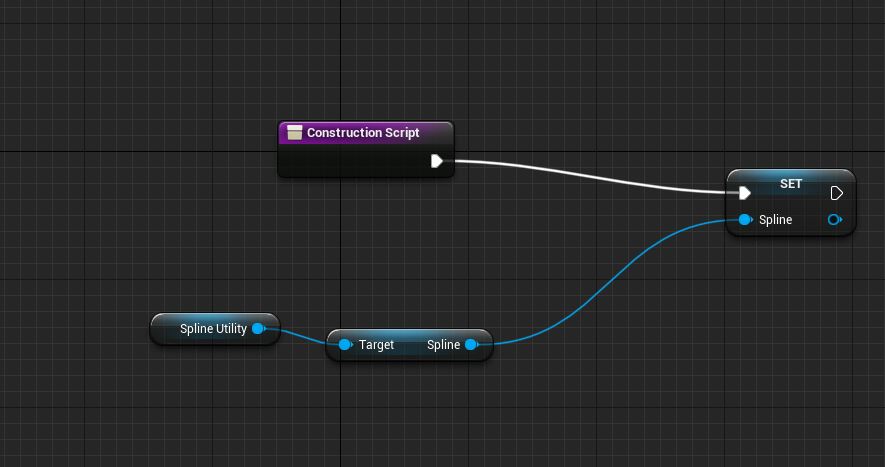
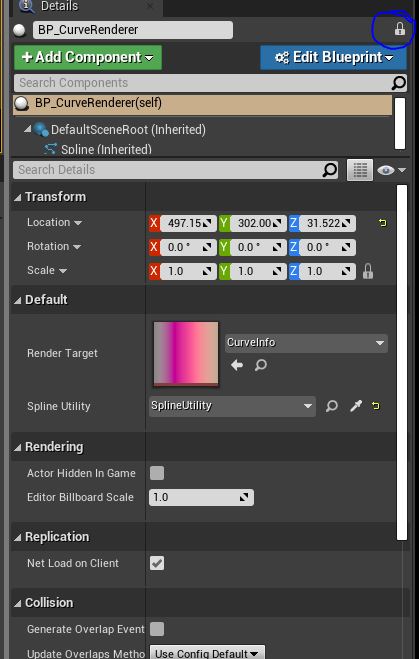
Now that we have the basics setup, create a new blueprint actor and call it something appropriate. Add a spline component and then setup the blueprint this way.
- The Construction script lets me set another spline in the tool to render a texture from.
(Optionnal, you can also just use the spline component you just created, it can even be easier and less buggy)
2.Here’s how the event graph looks. I commented it as much as possible and kept it as simple as I could. Let me know if you prefer this or a step by step process.
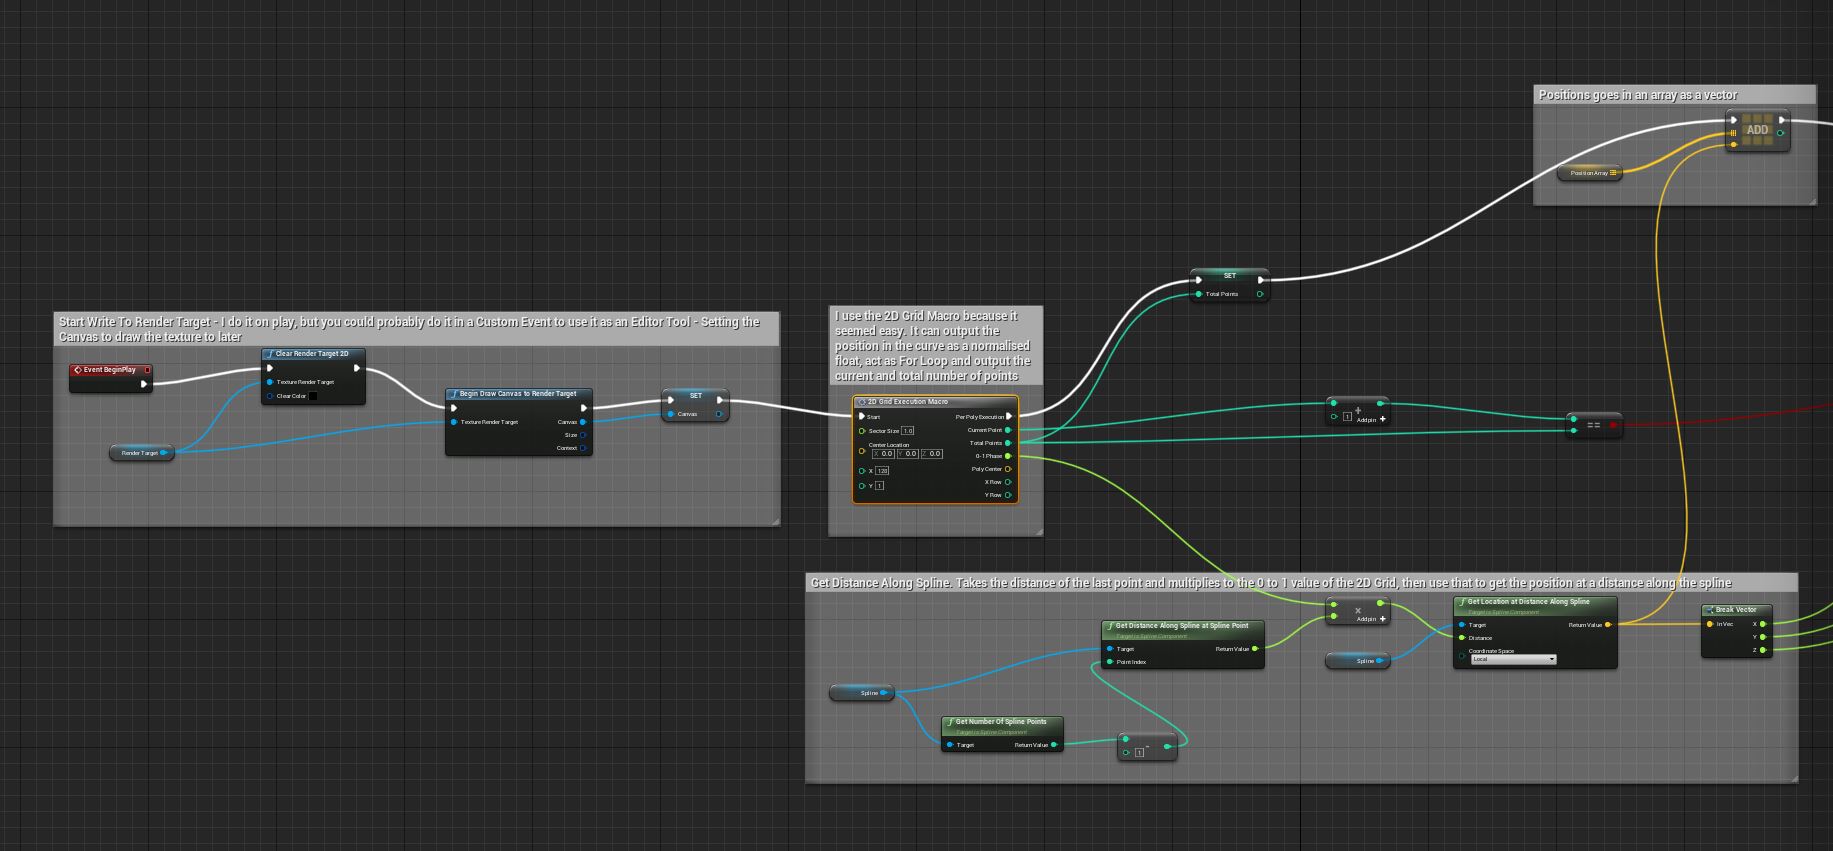


Make the render target and the spline actor you want to use public, so that they can be accessed when you will drag the actor in the world.

The prints node on the last image are very important. If you’ve ever worked with vertex animation textures, this workflow is going to feel familiar. The min and max position are necessary to get values between 0 to 1, and then by getting these positions in the output log, you’ll be able to copy paste them in the Niagara Module that we are going to create. If you want to learn more on how to use render targets, you can watch this video https://youtu.be/jWxdEhz9Zmo by @simonschreibt. While you’re at it you should also watch this one if you haven’t https://www.youtube.com/watch?v=aYZEmaQUrAo. This one inspired the idea of writing the curve to a texture.
Once you’re done with the blueprint, compile it, save it, drag it in the world and set up the default variables you want to use. If you’re using the construction script method, you’ll need to use the lock to drag the spline actor into the spline utility input.
STEP 3 - Creating the texture
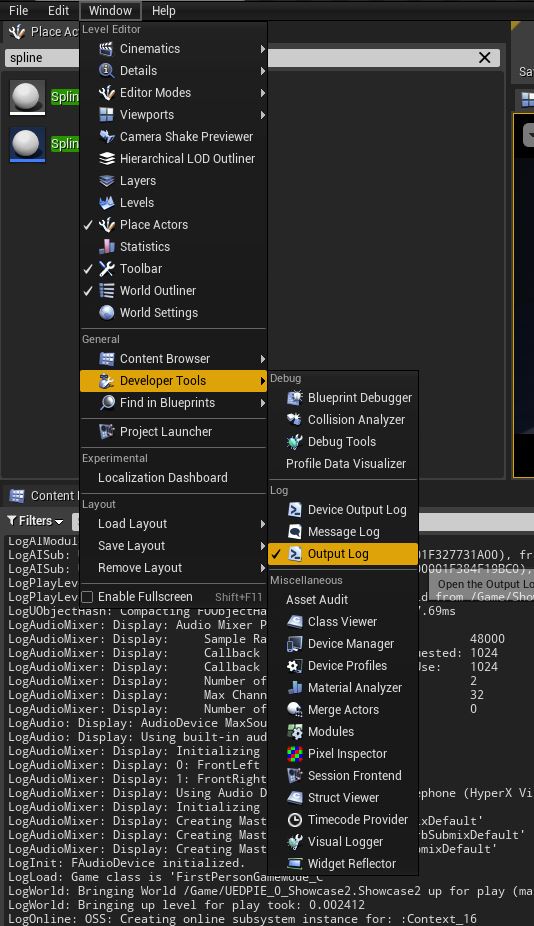
Go in windows and in developper tools, enable the output log. Then with the blueprint in the world, press play. The min and max should be printed in your screen, and also in the output log. If they’re not, go back to the blueprint and click on the print to log checkbox on both the min and max print string node.
It should look something like this:

The texture should now be inside your render target. You could use it directly, but I prefer to change it to a static texture. You can do that by right clicking on it and clicking on create static texture near the top.
Set the texture to HDR. If you want you could also change the filter to get more accurate data, but in this case, I didn’t. By that point, you can delete blueprint from the world if you want. Now that we have our texture, we can finally get to the fun part!
STEP 4 - Creating the particle system
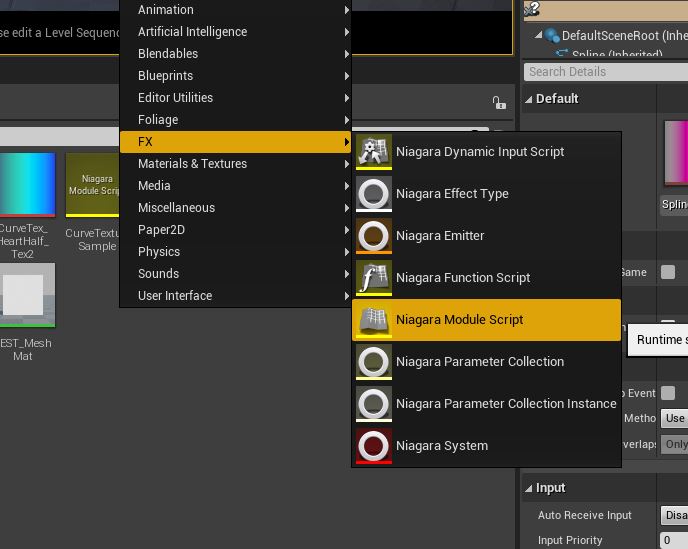
Setup a simple gpu emitter, make sure it is set to local, and go back to the content browser and create a new Niagara Module Script. We don’t technically need to create a new module, as we could do the math directly in niagara and use a texture sampler, but this should be cleaner. On my side I called it CurveTextureSample. You could also use a scratch pad module if you prefer.
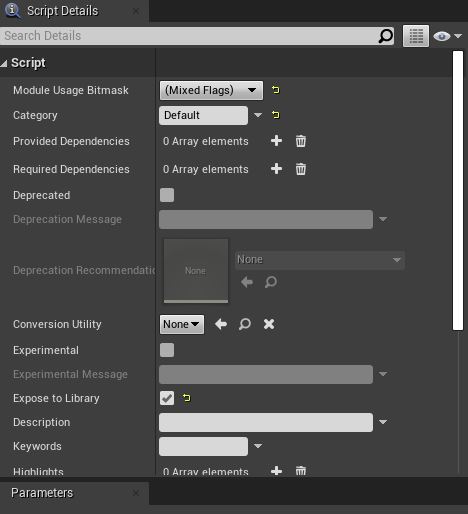
Expose it to the library, otherwise you won’t be able to see it.
We’re almost there! Add a texture sample input, a Vector2D(UVs), and two float(min, max), and copy the setup. Copy the setup and add a new Vector output. You can assign it directly to Particle Position, but I prefer to call it something else and set the parameter afterwards. I add the module name as a namespace modifier for clarity. The maths we use here to go from the color to the position are (TextureValue*(max-min))+min
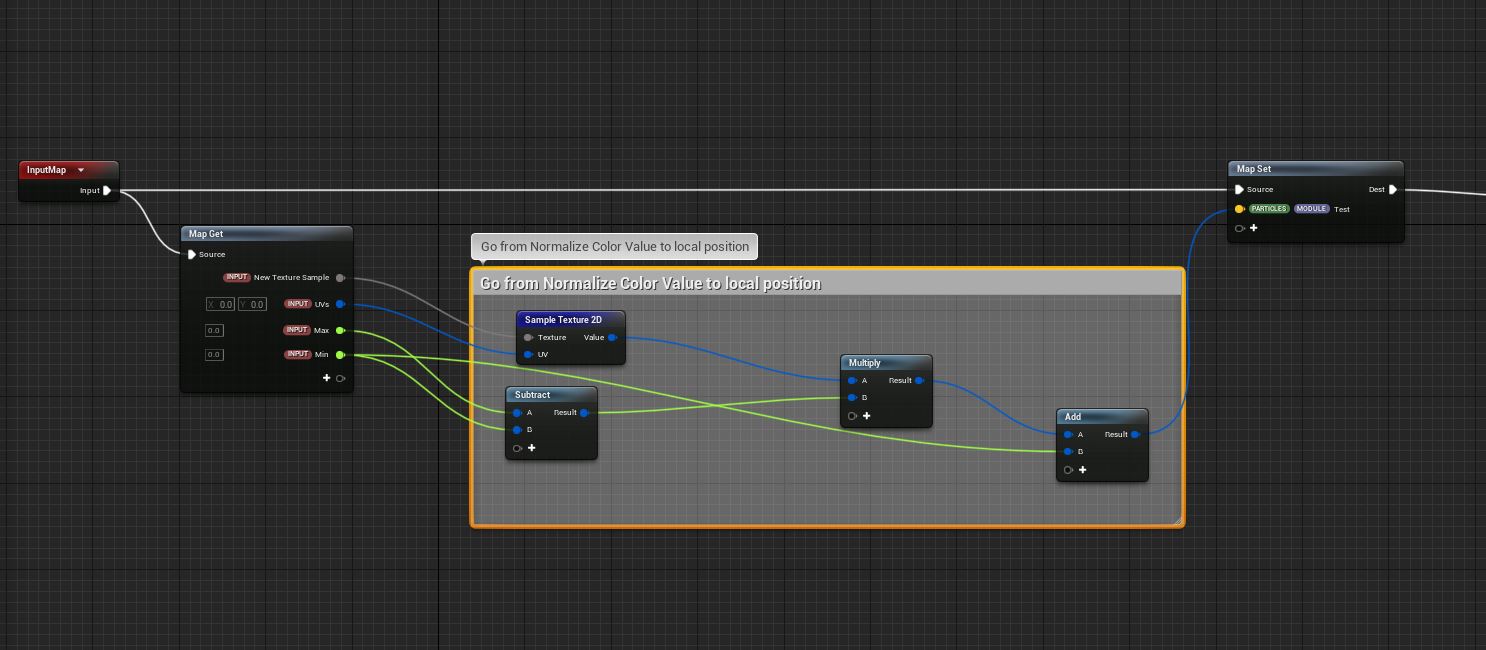
Finally, let’s go back to our Niagara System, and fill in the min max value and our texture. You can break the vector2D to get two float value, and then use a curve to animate the spawn position over the normaliszedLoopAget, or do something else, I’m not your mom. Create a set parameter module and assign the particle position to the particle attribute you created in your new module. Notice that here, I used it in the spawn section, but you could also use it in the update, and have particles move along the spline and die at the end. Or have them spawn randomly along the spline, and also move along the spline in the update by adding a new value to the UV. You could also multiply or add the value you get from the texture with a float or vector curve to scale or modify the curve. There’s a lot of possibilities!

If you want to improve on this you might want to write the min and max value directly in the texture,or use another texture/row to write the tangents, or try using it with bigger texture and bigger curves! You could also change some elements to make it execute in the editor instead of when starting the game. Let me know if you make something cool!
Writing this ended up taking way more time than I thought, so let me know if you enjoy those or if there’s anything I could improve! I don’t often work on more technical stuff, but I still might do more from time to time.
Hope you guys are gonna have fun with this! Feel free to ask questions and post your results here ![]()
Shoutout to Niels Dewitte for working on his own implementation on this in C++ and for pitching ideas back and forth during the week!