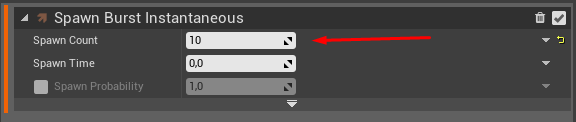
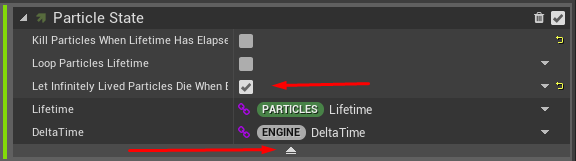
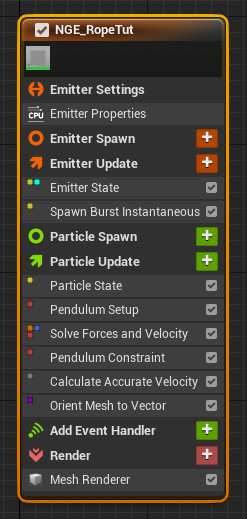
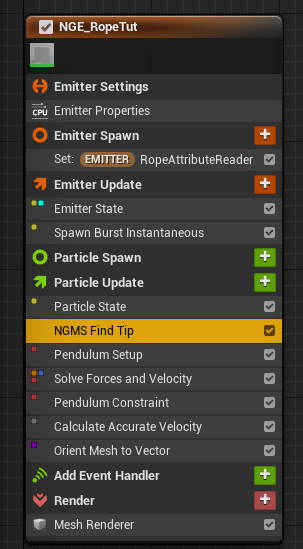
After that add pendulum nodes to Particle Update section Pendulum setup and Pendulum Constraint (press fix issues so it will add Calculate Accurate Velocity node also).
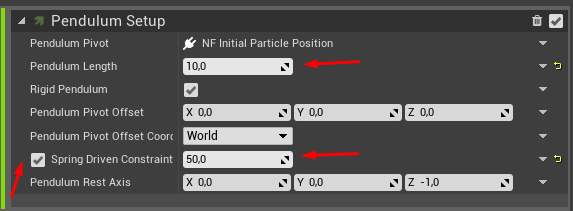
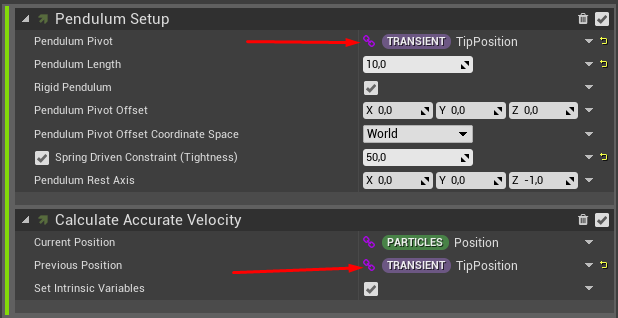
Enable Spring Driven Constraint in Pendulum Setup and update module with those parameters:
Also Enable Calculate and Output Potential Energy in Pendulum Constraint node.
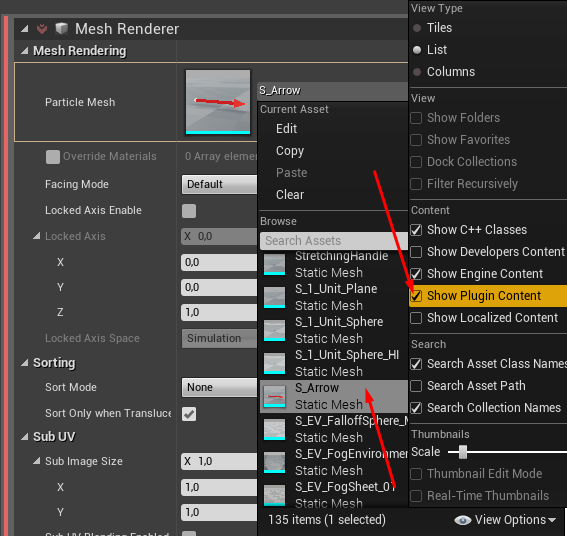
Add Orient Mesh to Vector module and set look at direction to be Pendulum Axis:
If you create system from it you will be able to see simple spring constrained particle that will follow motion of emitter.
Now lets create module with basic logic for our rope.
The point is to set Pendulum Pivot to be the end of previous particle.
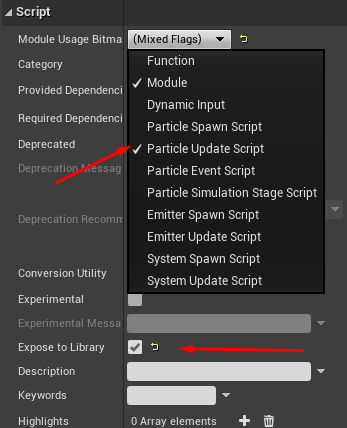
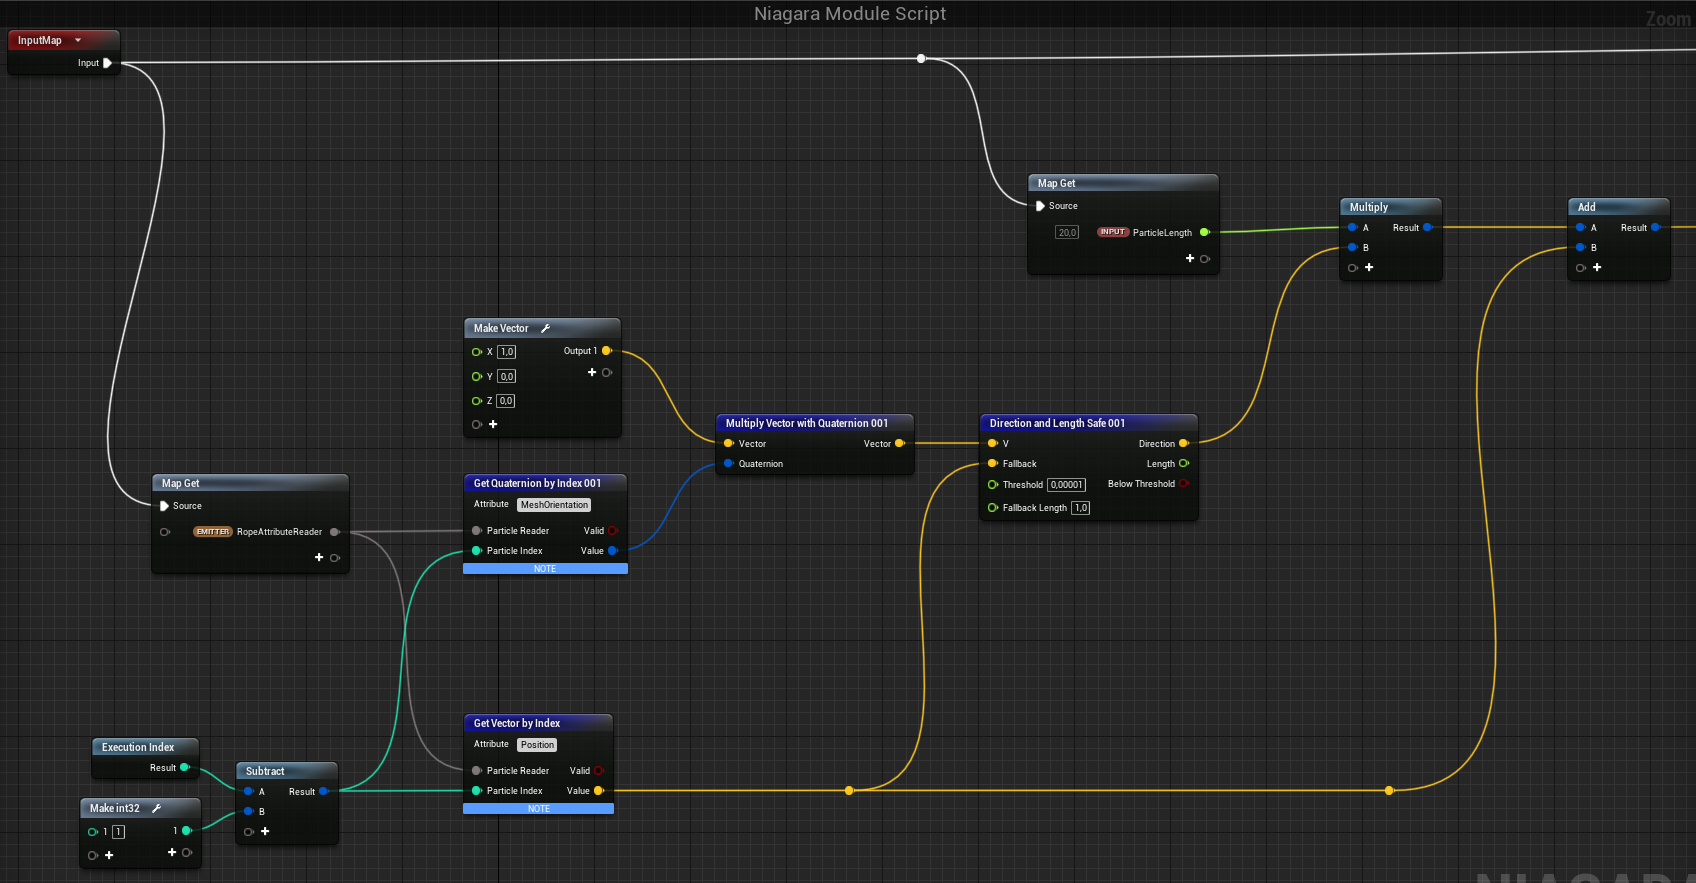
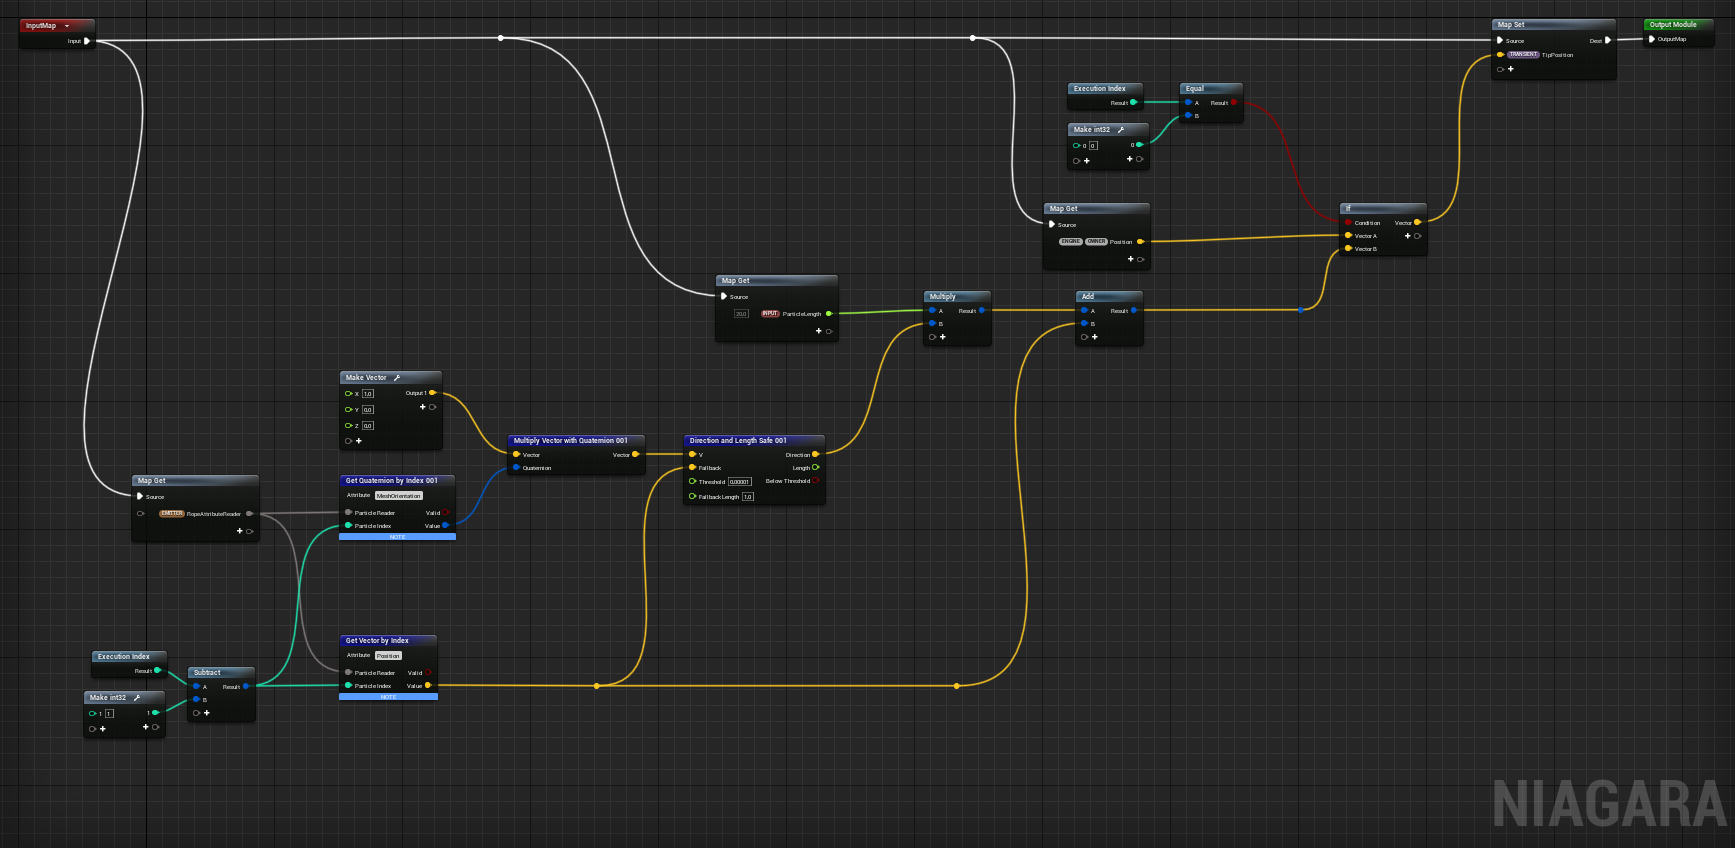
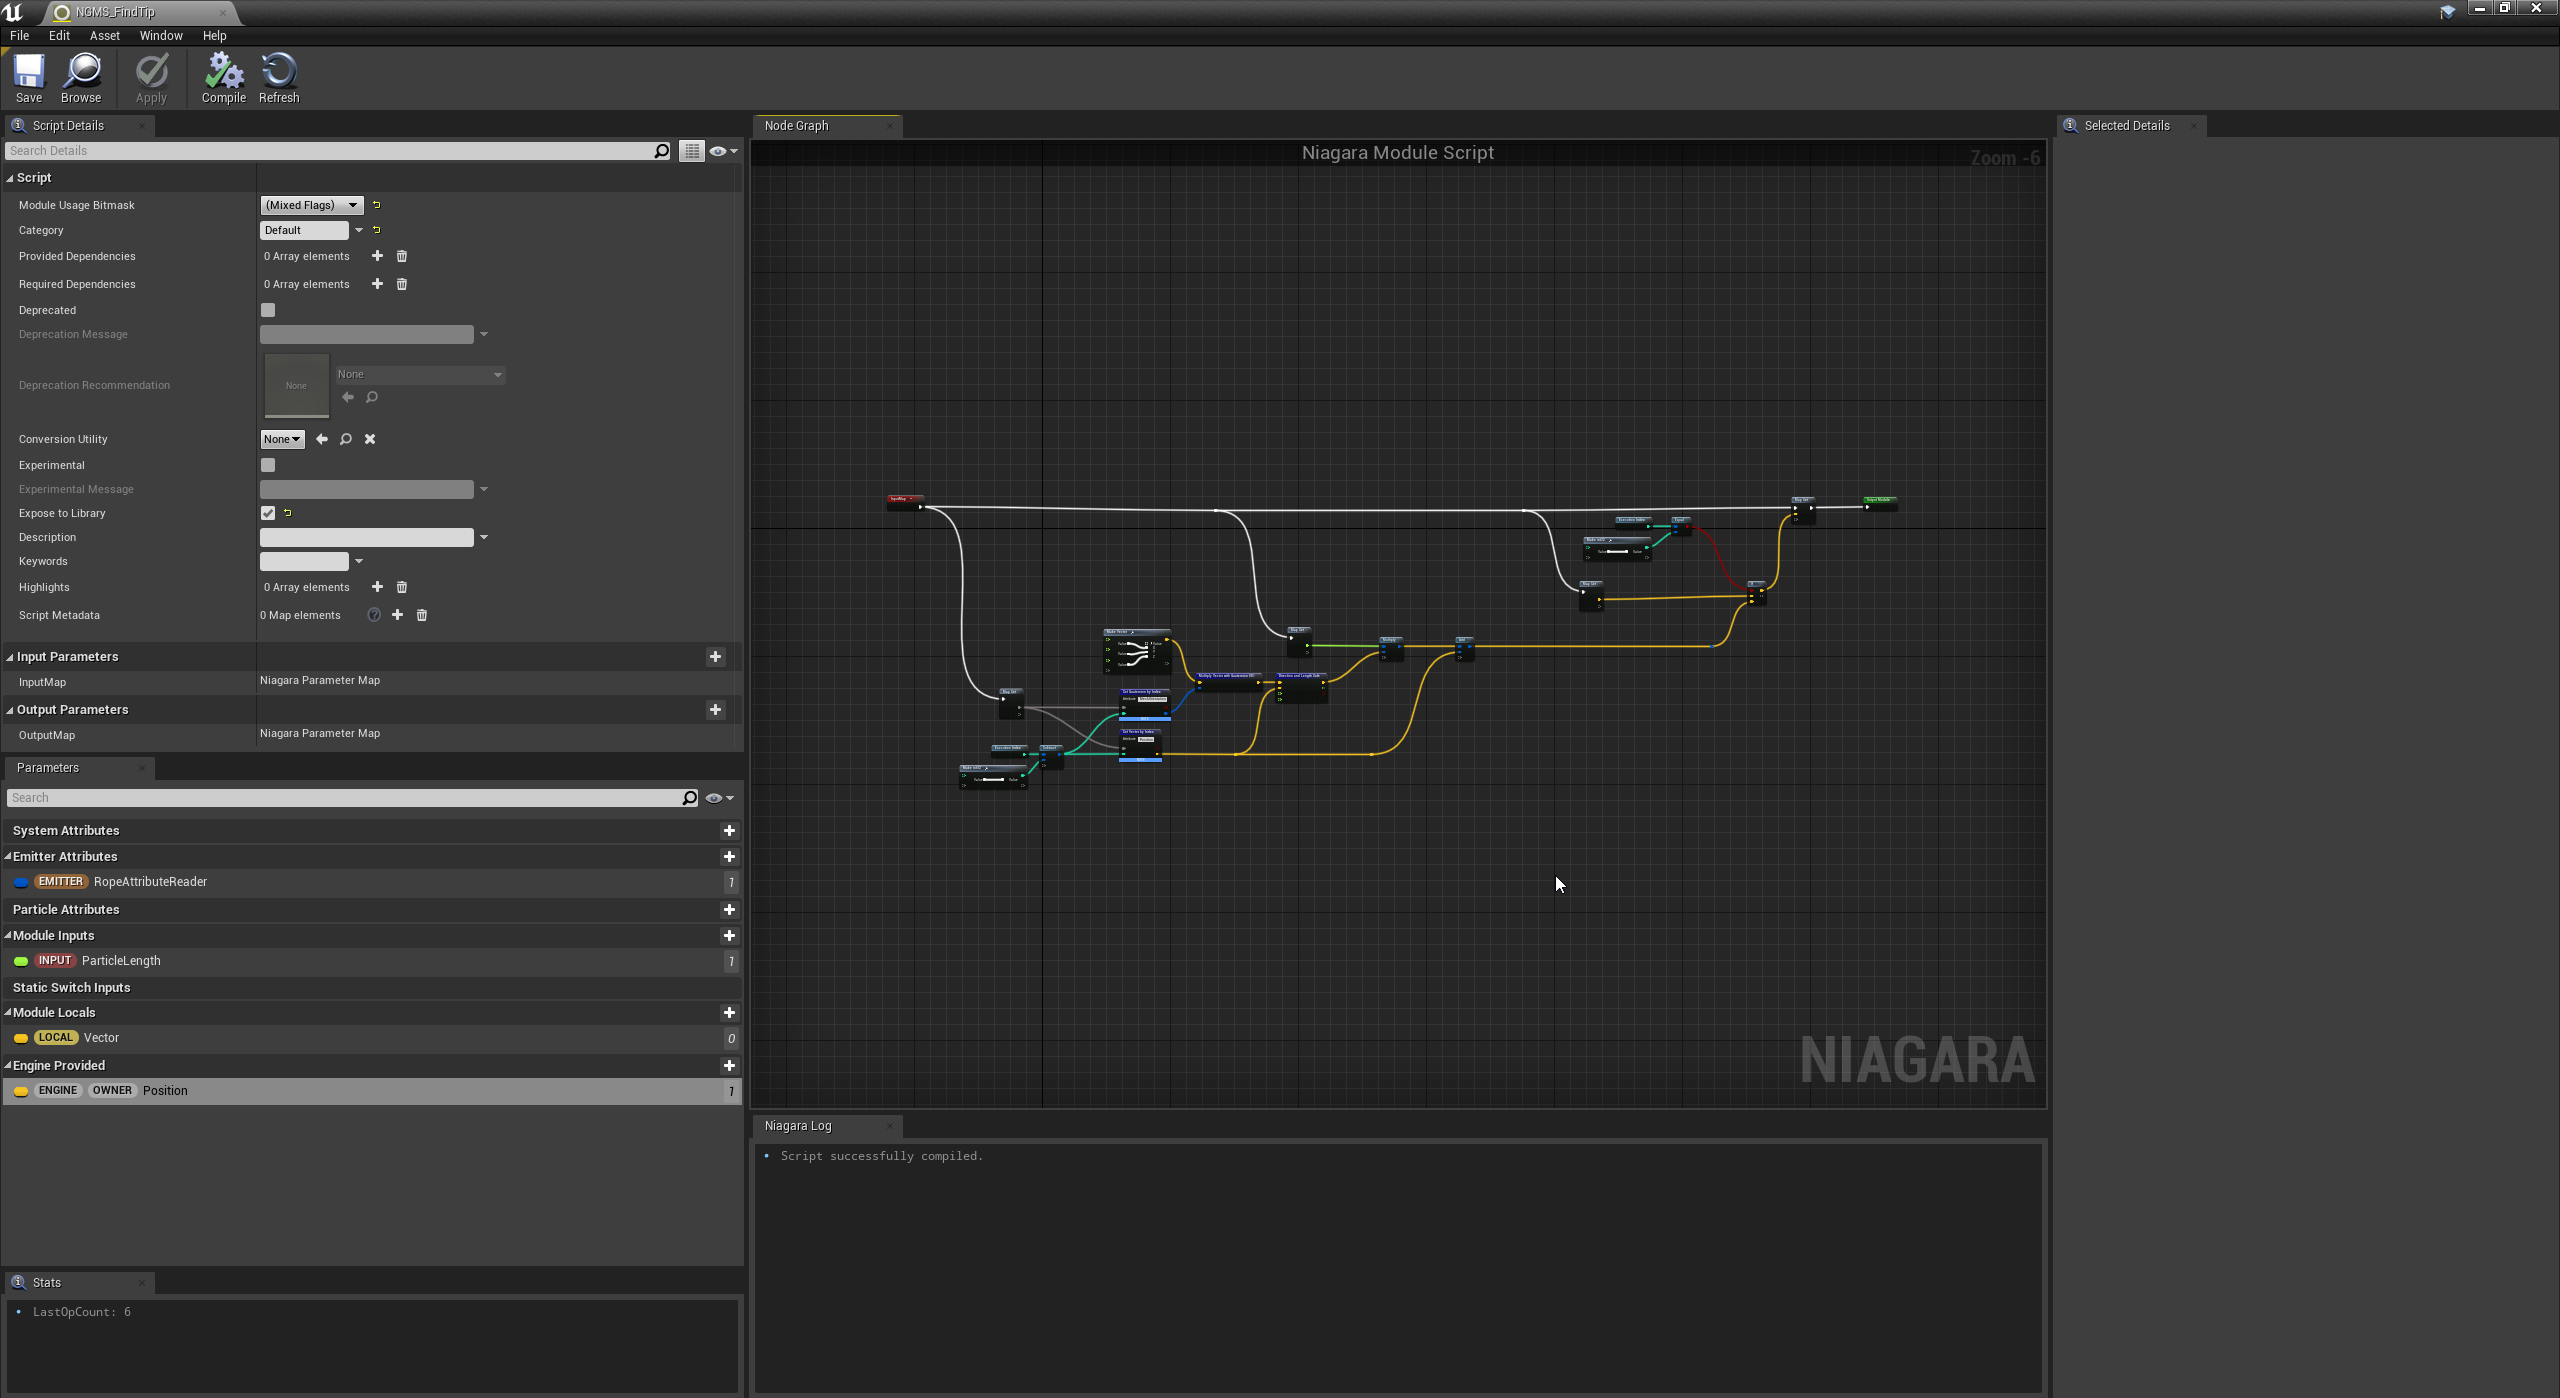
Lets create new Niagara Module Script and call it NGMS_FindTip.
Set usage flags to Particle Update and don’t forget to expose it to library:
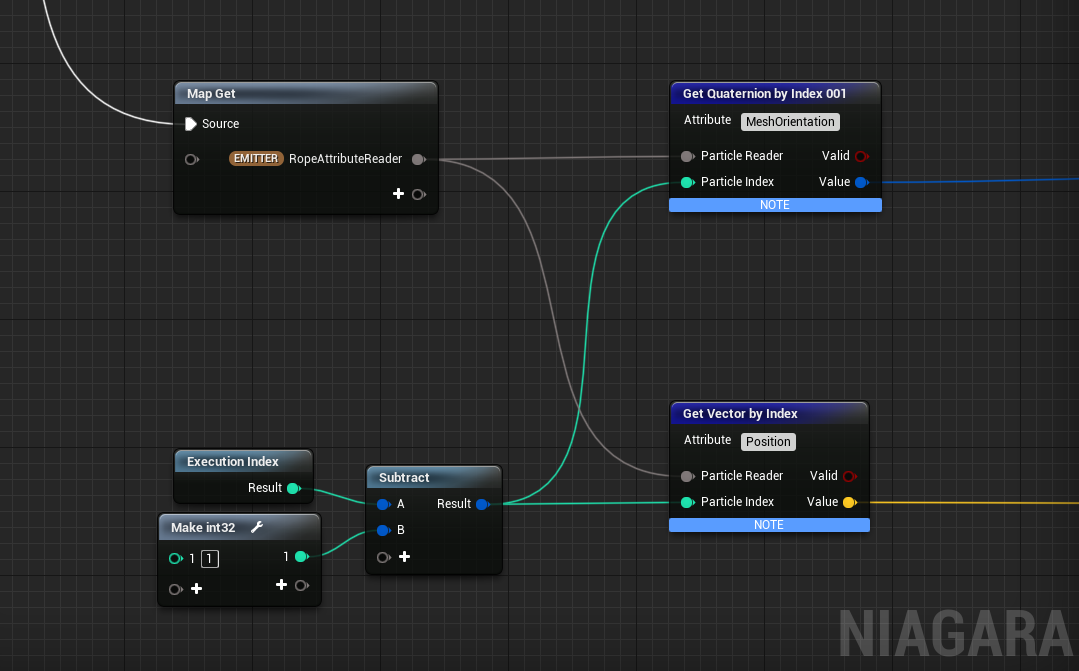
First of all we will need to get information about previous particle in chain so lets add ParticleAttributeReader for it, and call it something like RopeAttributeReader(i did mine with Emitter namespace)
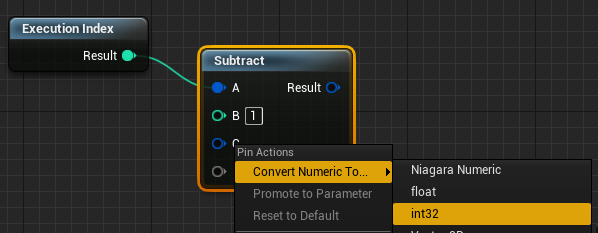
Now we are able to read attributes from previous particles by getting its index and subtracting 1:
Out of curiosity, what would the main differences be between using a rope in Niagara vs using spline physics? Are there different implementations that would make one better than the other?
Yeah @HowardM said everything right. This tutorial wont give you perfect rope physics - the thing is that you can use this tutorial as starting point for some complex effect, or use it in completely different way to grow trees for example, or other stuff)
Very cool stuff, I made an extremely similar behavior using a custom dynamic input and the maintain distance between points module, but the problem with both of these is that the rope points dont really have a nice inertia like you’d expect (like we can see in the niagara youtube video where the lead tech guy shows that kind of behavior off - how did he do that???)
If you find more out Id be very interested to hear!
This is so cool, I can’t wait for more documentation so I can get a solid grasp on Niagara and scripting. I was wondering though if this could be used for tail simulations with a local transform?
I cant see your node network due to the resolution, so it’s hard to tell if your script is off or not.
Also, make sure you don’t have anything funny going on with your Position in Initialize Particle module as i know OP doesn’t use it in his example. Lastly, have you checked the usual Local/World Space params?
As i can see from your module screenshot you created local vector instead of global one for TipPosition. Local variables are working only inside your module(like local variables in functions), so you cant link them after.
Teeny tiny remark
you don’t actually need to make int32, you can add int32 inputs to the subtract node and just fill it in.
I believe that should do the same thing, but it is neater than the swivle nodes.
Hi, first off super cool work, thank you very much!
I’m extra new to Niagara so I must have missed something but I can’t find what for hours now ( tried to restart and remake).
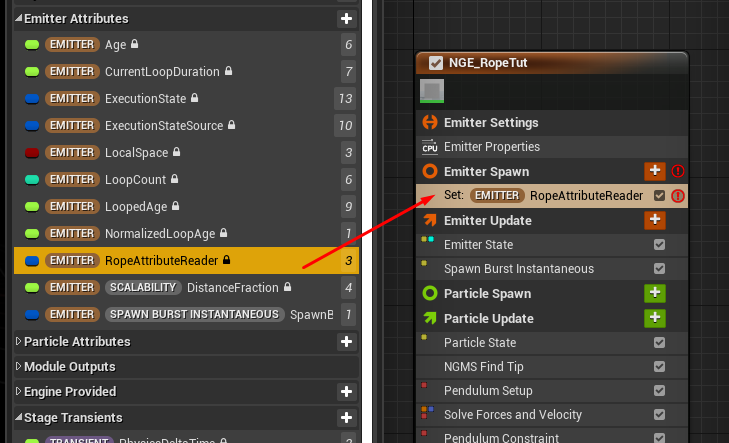
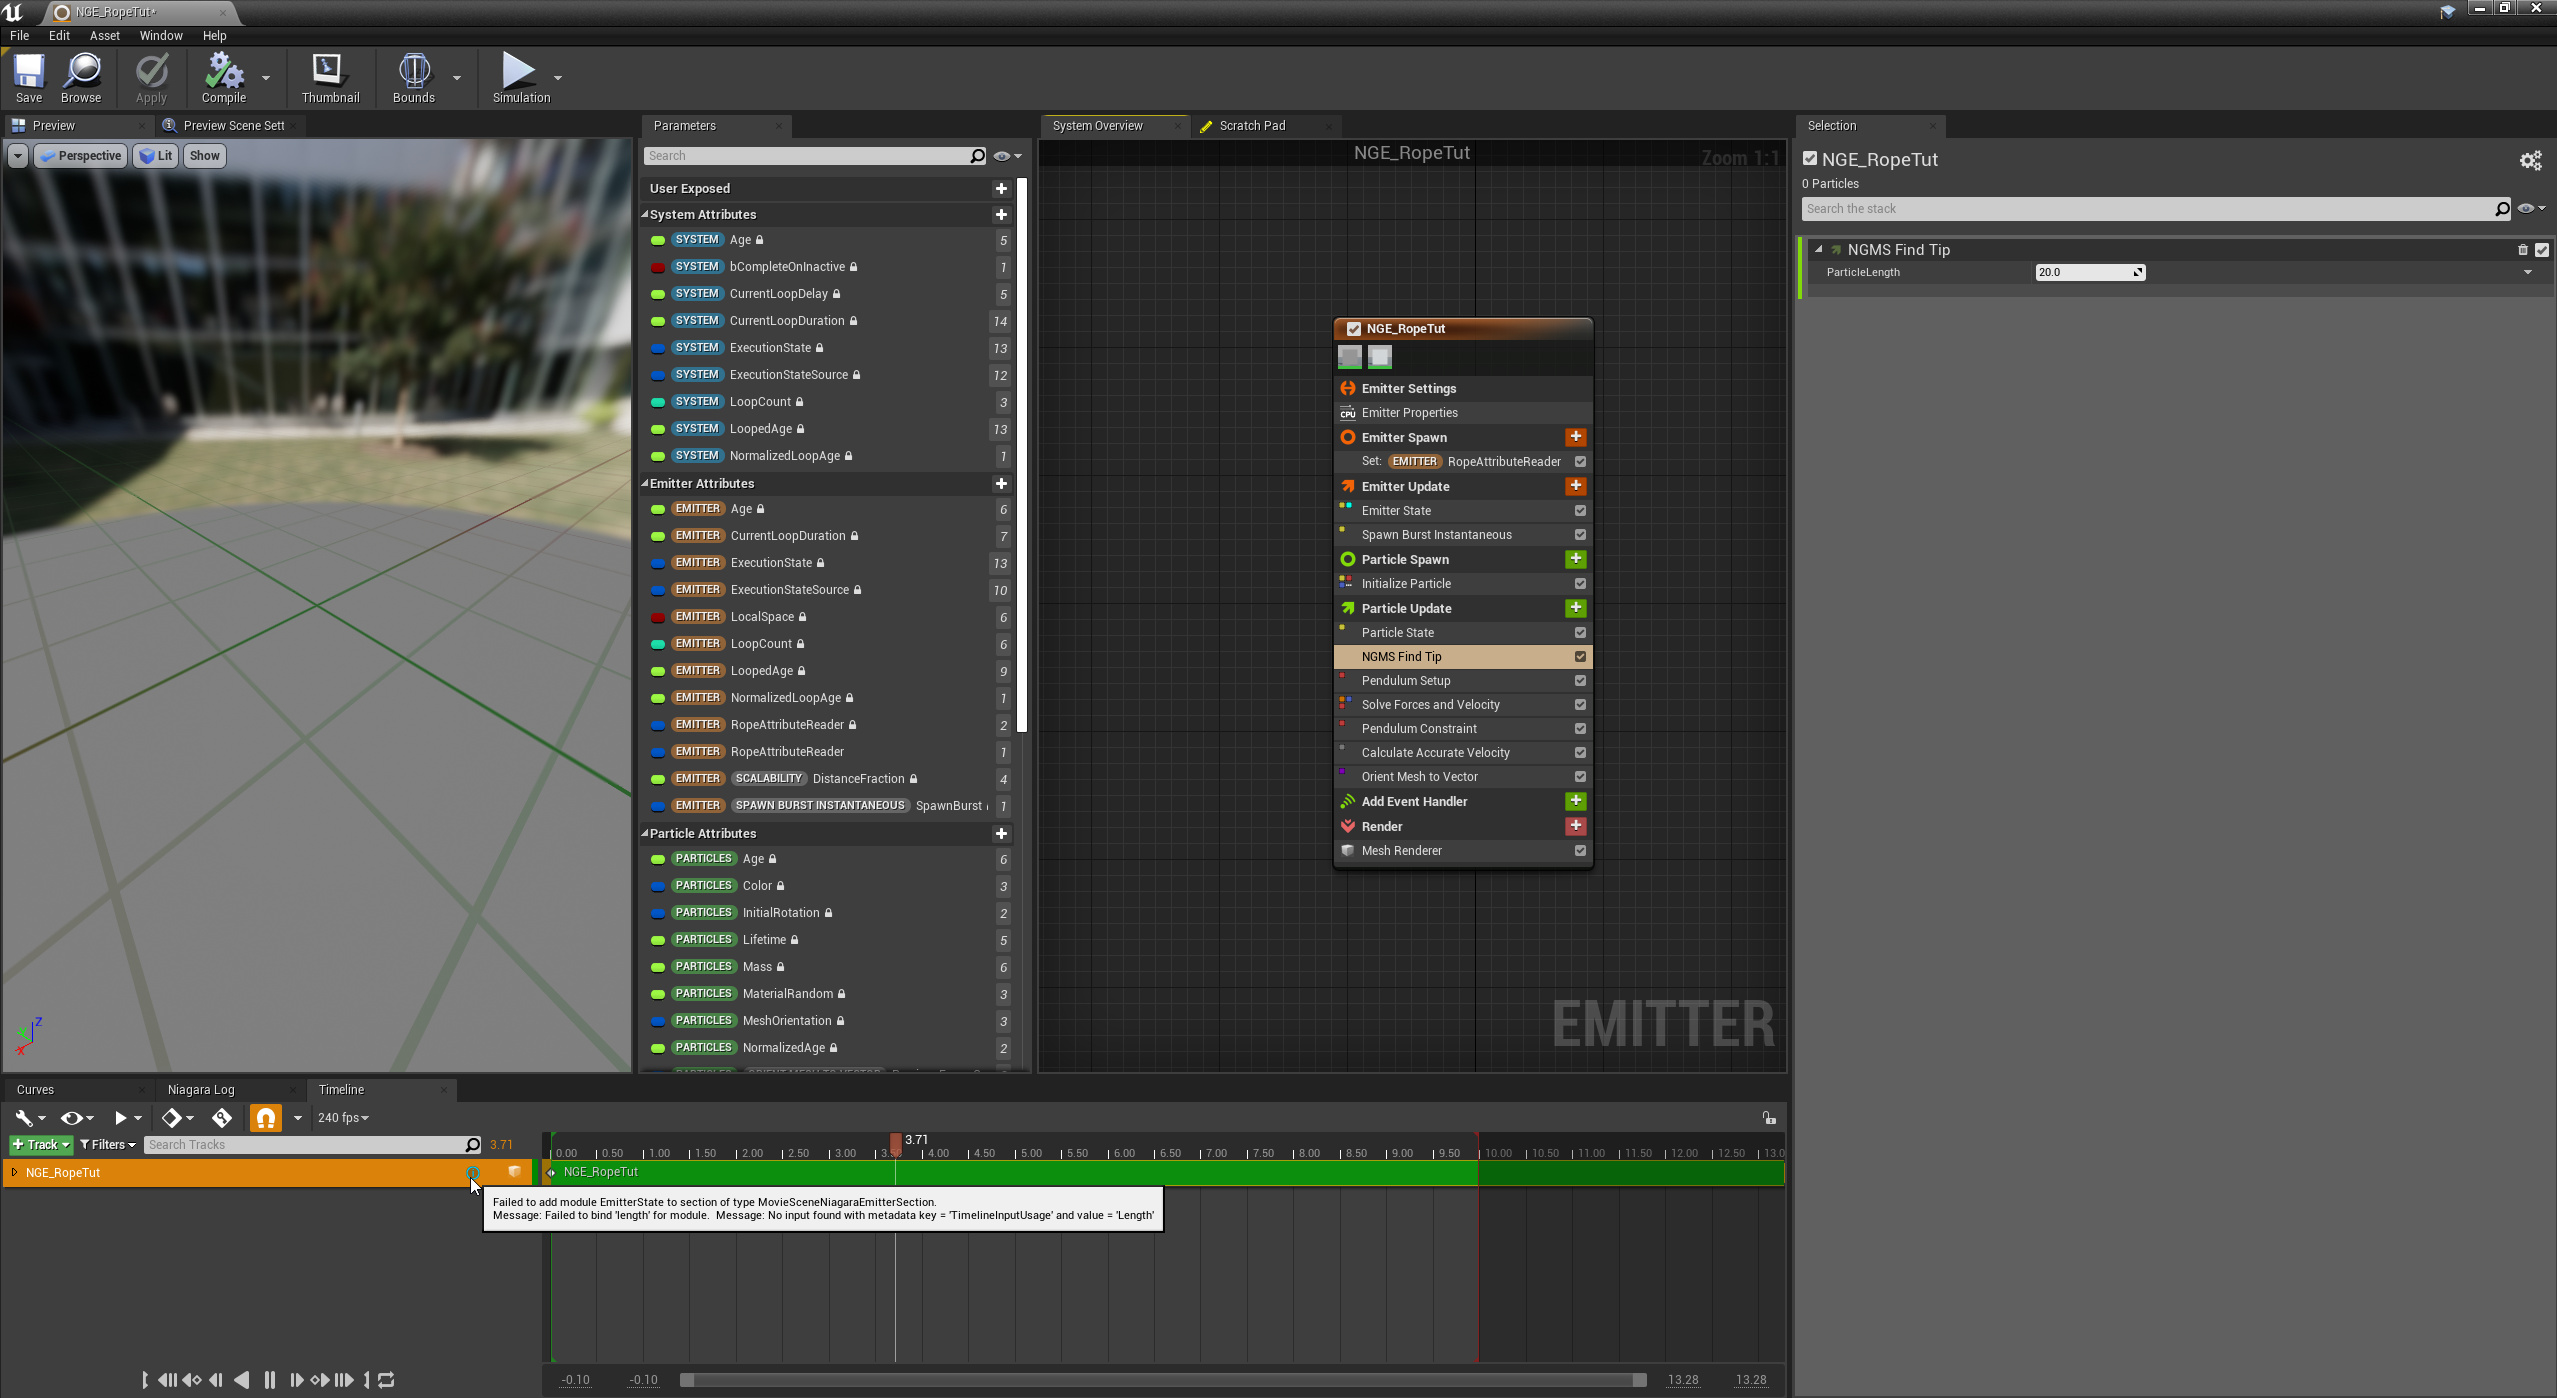
Issue: RopeAttributeEmitter isn’t exposed in the Niagara system’s Emitter Attributes (I checked the expose to library)… Maybe worth to note I updated to 4.25.3 today.
@pirate_sheep sorry i’ve messed the order of steps - first you need to add module, then attributes will be exposed so you can use them.
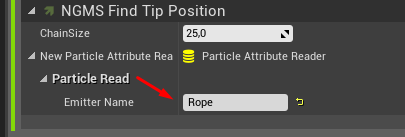
Other thing that maybe better is to make AttributeReader set to Particle instead of Emitter namespace - if you do that, then you will be able to set EmitterName in same module and could skip this step completely: