[Niagara 4.25] Particle Location Module Mini Tutorial

Particle Location Module Mini Tutorial


***Note: A Particle Location Modules is included in VFExtra : Niels Dewitte - Game VFX Artist ***


Warning: Check sim targets, attribute readers can currently not read between cpu and gpu so your source and target sim targets need to be the same!


The intention of these mini tutorials is to have easily searchable reference for implementations of some of the newer (or altered) features in Niagara.

Using the particle attribute reader data interface we can make a reasonably optimized particle location module.

The goal is to find, on execution, a valid particle in the chosen emitter to take the location over from.

There is two ways to follow the tutorial, either you make it yourself using the descriptions and images, or you copy over the contents of this pastebin to a new module script, and then just use my steps as explantions of the inner workings
Here is a pastebin to the raw code of the module, you can past this inside of your module editor and it will convert it to nodes.

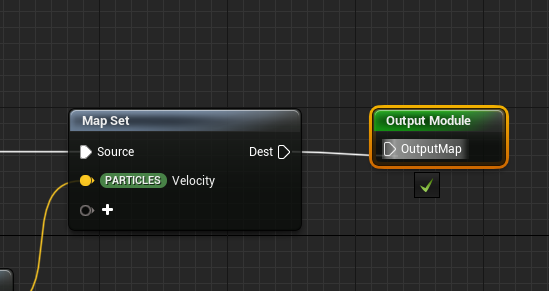
don’t forget to plug into the Output node after copying.
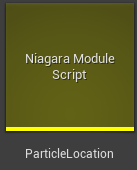
image

Step 1.

  • Make a new Niagara Module Script
    image

Step 2.

  • Open the module, we are doing to start by setting up our particle attribute reader
  • Add a Particle Attribute Reader Parameter to the Map Get Node, and call it something like PAR
  • Pull a Get Num Particles to find the amount of active particles in the Map you are reading from.
  • Also create a Random Range integer and with an input between 0 and Num Particles-1
  • Call Get Vector By Index with the following inputs
    1. Attribute = Position (This return Particles.Position of the chosen emitter)
    2. Particle Reader = our particle attribute reader parameter
    3. Particle index = the random integer we generated

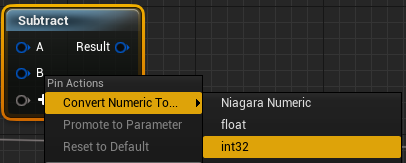
      Blue nodes like this can be converted to static inputs, in this case we are working with integers, so choose int32
      image

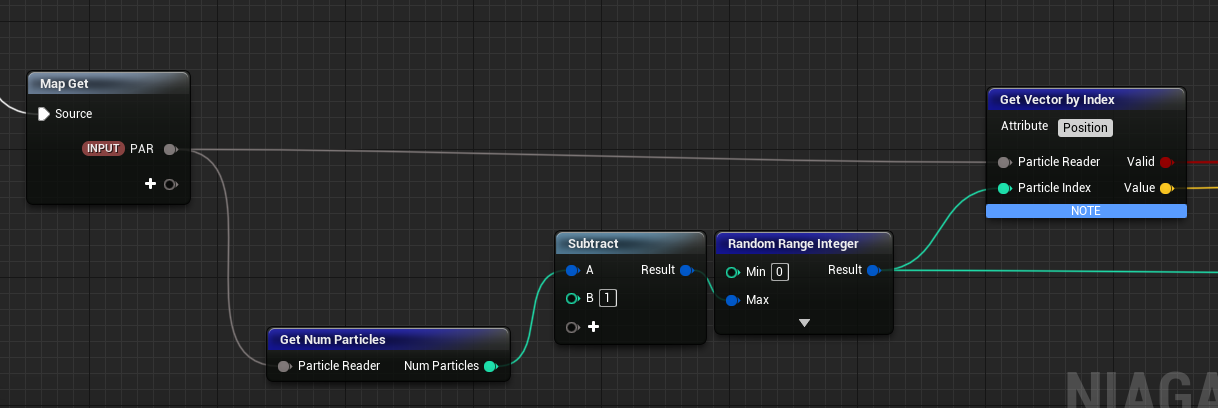
Get Vector by Index will return two outputs.

  1. A bool expressing wether the value you just tried to pull is available
  2. The value of the Map at the index position for the given attribute.
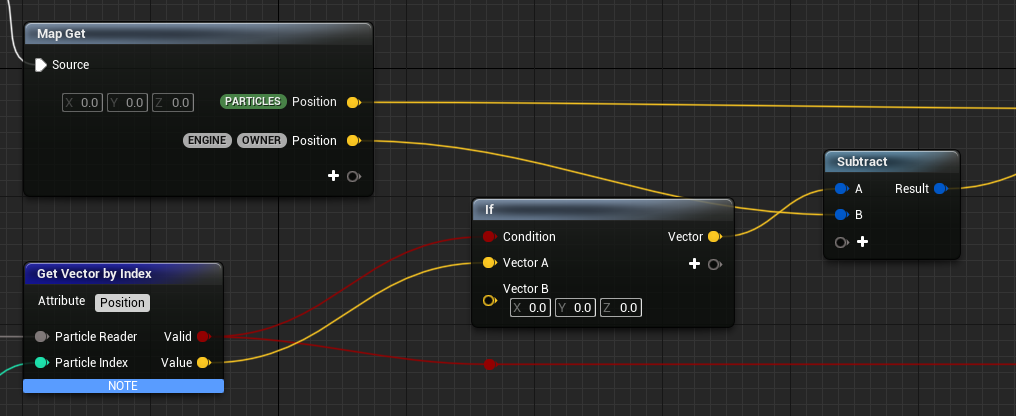
Step 3.

  • Add another Map Get node (we could do it with the original one, but it will get a little bit messy)
  • Add an if node for the validity check inputing vec3(0,0,0) in case of false (this is technically not nececary as the default value for the pull is also vec3(0,0,0), but this is safer and easier to read)
  • Subtract Engine.Owner.Position from this value to find the local position of the particle. We need local positions because we plan to add this into the current particle position instead of overwriting earlier location modules.
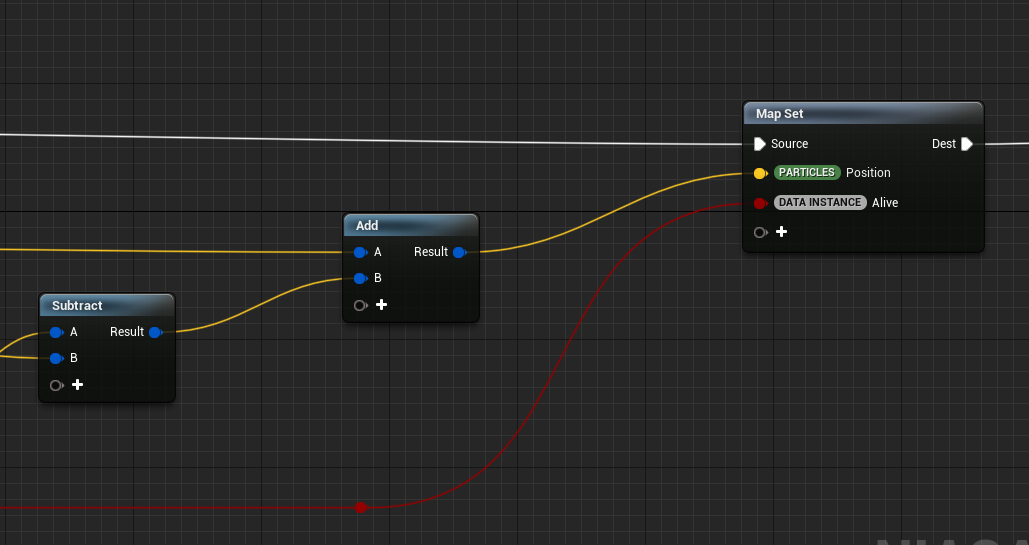
Step 4.

  • From the subtract node, add this value into Particles.Position, then in Map Set, assign it to Particles.Position. (This is usefull if you already used a sphere position node to create offsets, these offsets will be preserved)
  • Also drag out the Valid output from Get Vector by Index and feed it into DATA.INSTANCE. Alive, this will kill particles if there is no particles to spawn from. (There is a little performance hit for spawning the particles in the first place, but it still better then simulating those particles every frame for no reason)

And thats pretty much it if you just want to spawn particles at another particles’ position.
I do suggest adding a velocity enheritance to this module as well, as that is very useful for a plethora of effects.
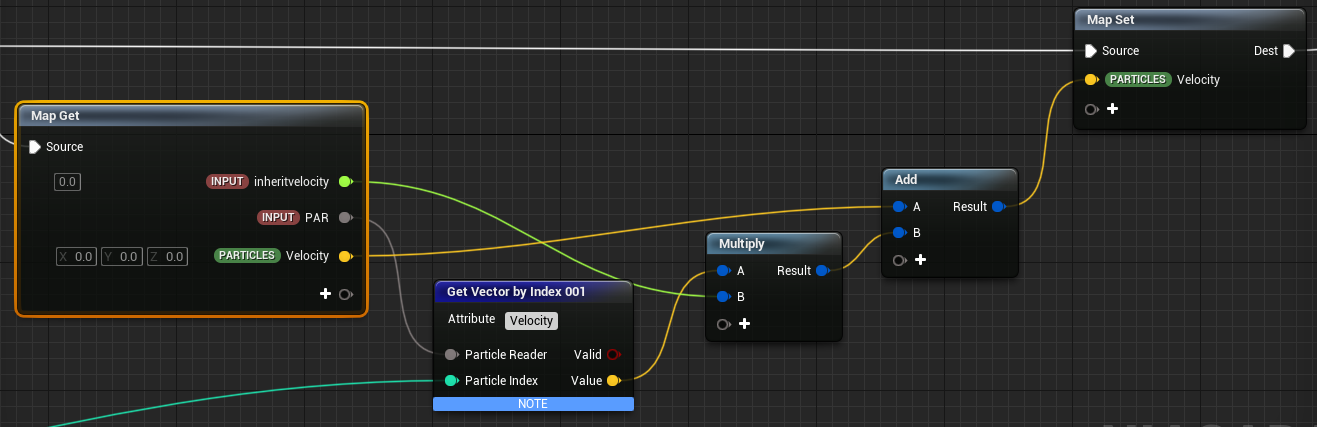
Step 5.

  • Add another Map Get and add a new float input inheritVelocity
  • We can also add our Particle Attribute Reader input from earlier by clicking and dragging it from the parameter window.
  • Call Get Vector by Index on our particle attribute reader parameter with the following inputs :
    1. Attribute = Velocity
    2. Particle Reader = Out particle attribute reader parametere
    3. Particle Index = The same index as calculated in Step 2
  • Multiply the return value with our inheritVelocity parameter, this will give us control over what fraction of the source velocity will be inherited.
  • Then add it to Particles.Velocity and set Particles.Velocity. Same as for the position, we want this so this module doesn’t overwrite our values calculated in previous velocity modules.
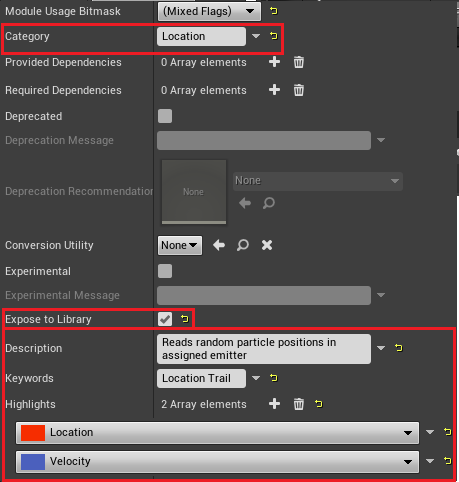
Extra

It is useful to expose this module to the library under Location (that’s where it was in cascade at least :D)
The highlights will help you identify the type of module in the emitter stack.
And the description is useful for your teammates, or yourself in a few months
image

Please let me know if you don’t understand something, or if I made a mistake somewhere.

26 Likes

Thank you for taking the time to share your knowledge on this, @Niels. I’m still learning the Cascade side of things with UE4 but have started gathering Niagara learning resources as well, and these short-but-sweet tutorials will be a great help

Hi great tutorial. Thank you very much for it. Could it be used for making readable event in BP? I’m looking for the way to spawn decals at particle collision point inside Blueprint. And can’t find, also I no so skilled in coding :frowning:

Hmm, I don’t think that is possible right now. I’ll have a look into this if I find a bit of time.

Oh dear sir, that would be cool. Unfortunately, there is so little information about this side of Niagara. I thought there must be some way to read the parameters from the Niagara system or even get an event. It is very strange to have a way to do this in Cascade and not to have in a more powerful Niagara.

I had a bit of time to look around, but I cannot seem to find anything usefull for sending data from Niagara back into bp.
Yeah, they said Niagara was shippable, they didn’t say anything about feature complete, so let’s hope they add this.

On one of the streams they also hinted quite heavily at decal renderers coming to Niagara at some point, so that would be neat.


That being said, there are other more sneaky techniques to make decals we can use for now. I’ll try and make a post a bit later detailing one technique that has high potential in my opinion.

Tahnk you very much for research!
I switched from a Stingray’like engine a couple years ago. There was pretty simple pipeline with decals. Just a mesh box with decal material using in Particle System like mesh particle.

Why Epic didn’t do something like that. (rhetorical question)

I added an edit in the original post, but the source and target sim target need to be the same for this to work. GPU and CPU sim targets cannot read eachothers attributes right now.

If you struggled to make this work before, be sure to check this.

How would I be able to set a spawn rate/burst on a per particle basis? E.G. Spawn 3 particles on each particle, instead of having it randomly assign particles on depending on spawn rate which i have know if i increase the spawn rate, some have 5 particles and some have none.

Easiest way is to use a counter modulo number of particles instead of a random range as the source.

If you know you spawn the right amount of particles, executionIndex%number of particles for example

2 Likes

yes you can read particle attribute within blueprint, just folllow the setup here (translate it in english) UE4 ParticleDataを使用したNiagaraとBlueprintの連携 - PaperSloth’s diary

1 Like

Oh, good point! Yes indeed, epic has added the ability to send information to blueprint in 4.26. If Japanese isn’t your thing, have a look in the content examples fo advanced Niagara, they have a whole implementation+ explanation!

Thank you so much for laying this out!
Would there be a way to burst spawn a number of particles as each new leader particle is spawned over time?

I don’t think it is possible using gpu particles, but with cpu particles, I think you can make a location event in the spawn section, then use that event to spawn a number of a particles from the event section of another emitter.

If that doesn’t work, you can also just do a frame one check on a normal location event generator.

Best of luck!

1 Like

I did get my use case working with CPU particles and events, unfortunately this will be using a lot of particles and I’m not sure it will be performant enough.

Thanks for the info!

I think it’s one of the things that is still missing from Niagara at the moment. Exporting Data from GPU to CPU and vice versa. Events from GPU particles, all of that. These are a bit tricky to handle because of the way the GPU works.
If I remember correctly though, Wyeth said on the discord that they are aware of this and these things might come in the future.

Thanks so much for this tutorial! One dumb thing I am stuck on (and pardon me if this is really dumb, still super new to Niagara)… now that I’ve made this, how do I use it with the two emitters (the parent and child)? I wasn’t sure which attribute(s) to input this into.

Thanks again!

Hey Scott.

On the parent emitter, you don’t need to do anything special, just make sure it has a good name as usual.

On the child, add this module, and there will be a textbox to input the name of the parent.

Awesome, thank you! And thank you especially for the swift response. :smiley:

One last thing; the extra part with the inheritVelocity… how do I control that in the emitter?

There will be a float input called inheritvelocity. You can keep it at 0 if you don’t want to use it.