Lush: Sketch #32

FINAL EFFECT

Hi there!

Loot boxes are such an interesting concept hehehe :sparkles:

I’ve been playing a wide variety of videogames lately. Some spectacular things come to my mind when thinking about possible loot box concepts.

https://youtu.be/dbGD_d2cGEk?t=393

I’d like to create something like this. Death Stranding themed. A monster shaped like a box. It opens its mouth, and then the camera goes into the mouth to reveal the sweet loot you just got!

Let’s have some fun! :gem:

14 Likes

Been playing the game for a couple hours now, the art is just amazing. Found a background that could fit what I’m trying to achieve.

Made a fast sketch in Photoshop!

I like the dark gooey splats and the golden sparks from the dead bodies necrosis. So the effects will revolve around that hehehe

Here are some references:

1 Like

Like that black stiky mass) Lets fun, man!)

1 Like

This morning I was on my way to the office and drew these concepts in my phone!

Gonna get some rest now and I’ll be posting my progress on the environment + general blockout soon.

1 Like

Just made a Trello board to keep track of “to do” stuff!

Lookdev time. I messed around with the scene as usual until I got something I liked. Seeking that dark look.

Decided to try out Raycasting for this sketch. Pure awesomeness.

While creating the basic materials I’ll be using later on, I thought about using an HDRI to spice things up. And then I thought: “would be cool to create my own HDRIs lulz” and so I did.

I used Blender to create a simple scene and rendered out some HDRIs. The process is pretty straightforward.

Pro tip! Denoise the HDRI render using D-Noise, an awesome Blender add-on that uses NVIDIA’s OptiX AI Accelerated Denoiser.

Once in Unreal, just import the HDRI and play with it.

Next up: blocking out the lootbox opening scene and such.

5 Likes

really inspiring to see how you prepare everything - even the to do lists. i love seeing how people manage their work :slight_smile: one question: this color-sheet you placed in the scene: is it to calibrate the values somehow? i know in movies they use those color sheets a lot and i’m wondering if it’s a step to get the colors right.

1 Like

Hey @simonschreibt!

Thanks for stopping by! Means a lot to me. :sparkles:

That’s a Color Calibrator. It’s mainly used (mostly in filmmaking) to color correct the footage. Then, from a balanced neutral looking scene, you can easily lookdev without messing stuff up.

If you start working on a scene without color calibrating or using a neutral post processing profile, you could be working on your particle systems, materials and textures, lighting, etc., without seeing their “true colors”, thus, making it harder to iterate and achieve the desired look.

I usually leave the calibrator there until I’m done tweaking stuff, which tends to be by the end of the project hahaha

Grab your Color Calibrator now!

4 Likes

Remind me of the lootbox set from Star Wars Battlefront 2 ! Don’t know if you had this in mind for the effect, may be worth to take a look :slight_smile:

1 Like

Thanks for pointing that out @Jordanov! Just checked out some gameplay footage and those lootboxes look great, gonna have those in mind when creating mine hehehe

Made some progress this weekend!

This is the workflow I’m using for this project:

Firstly I create a new Blender project. Then, I import the Unreal Engine Mannequin to use it as a scale reference.

Then, I model whatever it is I have to model, always keeping an eye on both the references and the Mannequin.

Export the models as .FBX files and import them into Unreal.

Create some awesome materials and apply them to your meshes.

I made a cool “hologram” shader which supports LUTs (color indexing) and Chromatic Aberration amongst other features like rotation and such.

This is how it ended up looking! Pretty happy with it. This will be used ingame to “reset” the lootbox.

5 Likes

Quick update!

Soon I’ll begin crafting the lootbox animation + effects and such, but this is what I’ve got so far.

Again, using the Unreal Engine’s Mannequin plus some references, I created the bracelet, which is the device that will allow the player to open the lootbox.

To create my references layout I used Kuadro, a super useful software! Kuadro

Created some generic materials using Material Functions, so I have more flexibility to iterate and create variation. Blending those is super easy!

1 Like

Been playing with some LUTs to enhance the look of the scene!

If you want to know more about it, check out UE’s docs:

Essentially, you just take a screenshot of the scene you want to edit and then you import it to Photoshop along with a reference Color Neutral LUT.

Then, I like to use the Camera Raw Filter to adjust the colors and such.

Save the reference LUT texture and export it back into Unreal!

Also, had a fun time using Cine Cameras and their rigs. Making the initial cinematic cutscene using the Sequencer was really easy.

1 Like

Take a loot at the current state of the project!

Super happy so far. It is all coming together pretty nicely and I feel like the effects will be noice.

Hope you don’t get too jealous about the fact that I got Norman Reedus himself to play a starring role in my sketch! hahahahaha

7 Likes

Damn dude, are you sure you’re still making a Loot Box? :laughing:

5 Likes

Insane stuff! What a madskillz :laughing:

1 Like

Hahahahaha yes! @Niels The Loot Box is already there, it’s just that I won’t show it until the end!

@Un1horn glad you like it hehehe

I’m working on some RnD right now. These are the Loot Box rewards. Skins for the main character.

These are not too complex but I’m having fun using some new techniques I’ve learned.

The first one is a “Scanner” skin, just like the ingame feature that allows you to scan the environment to find new loot and such.

The second one is an “Iridescent Rock” skin, inspired by the rainbows you see ingame.

And the third one… well, it’s just glass hahaha

Here’s a screenshot of the moodboard I’m using for this project!

3 Likes

Oh no :scream: what a tease.

1 Like

Had the pleasure to be mentored by a big friend of mine, Fran. He’s one of my biggest inspirations!

Check out @phrancisco’s ArtStation profile here:

https://www.artstation.com/phrancisco

I was working on some fluids when he told me about the techniques he used to create blood effects in the Assassins Creed 3 Remake. He has an article in 80lv explaining the process. Check it out:

So basically, I used Blender to create a fluid simulation. It was way faster than having to set up everything in Houdini, plus my laptop wasn’t suffering at all. It just took me a few iterations to get a shape I liked.

When I was cool with a splash shape, I added a displacement modifier to displace its faces inwards to reduce the blobs and sharpen it, almost to emulate surface tension or the sheeting of the surface. Then, I subdivided it to make it look smoother before rendering it.

Found an angle I liked to fit the shape in a 2048x2048 texture. Baked the normal and the diffuse map.

To bake an “opacity” map, I assigned a fully Emissive material to the mesh and baked an Emissive pass.

Took those textures into Substance Designer, and I used the Distance node to get a nice gradient to alpha-erode the shape.

I used smaller values to get the gradients right for the thinner bits of the shape, and then bigger values for the big shapes.

Merged those together in Photoshop, and reimported the texture back into Designer to get a normal from that. This normal will help blend in the borders of the shape while eroding, so it looks like a volume and not just a cutout shape.

This is the material I’m currently using for the liquids. I’m using a cool technique I learned back in the day from @imbueFX, using the Reflection Vector to fake some reflections using the HDRIs I created a few days ago.

This is how it looks!

I’m using Niagara to create every effect. This allows me to create 3 different versions of the fluid fountain using only 1 emitter. If I ever change anything to the base emitter, those changes will propagate to all the systems. So powerful!

Now you might be asking… what are those fluids for? What does this have to do with a lootbox?

Soon… hehehehehe

6 Likes

Nice walkthrough! I have seen a lot of liquid sims made in Blender’s built in FLIP lately that look quite good.

Just a few more days… I’m looking forward to see what you are hiding from us
(´ ω `♡)

1 Like

Seeking for references, I stumbled upon an Epic Live Training stream:

They mention this demo I saw a couple years ago. I was really impressed by it! The way the meteorites fuse together, the bubbles… Back then I had no clue on how it could be made, so I moved on. But now, I felt like recreating it.

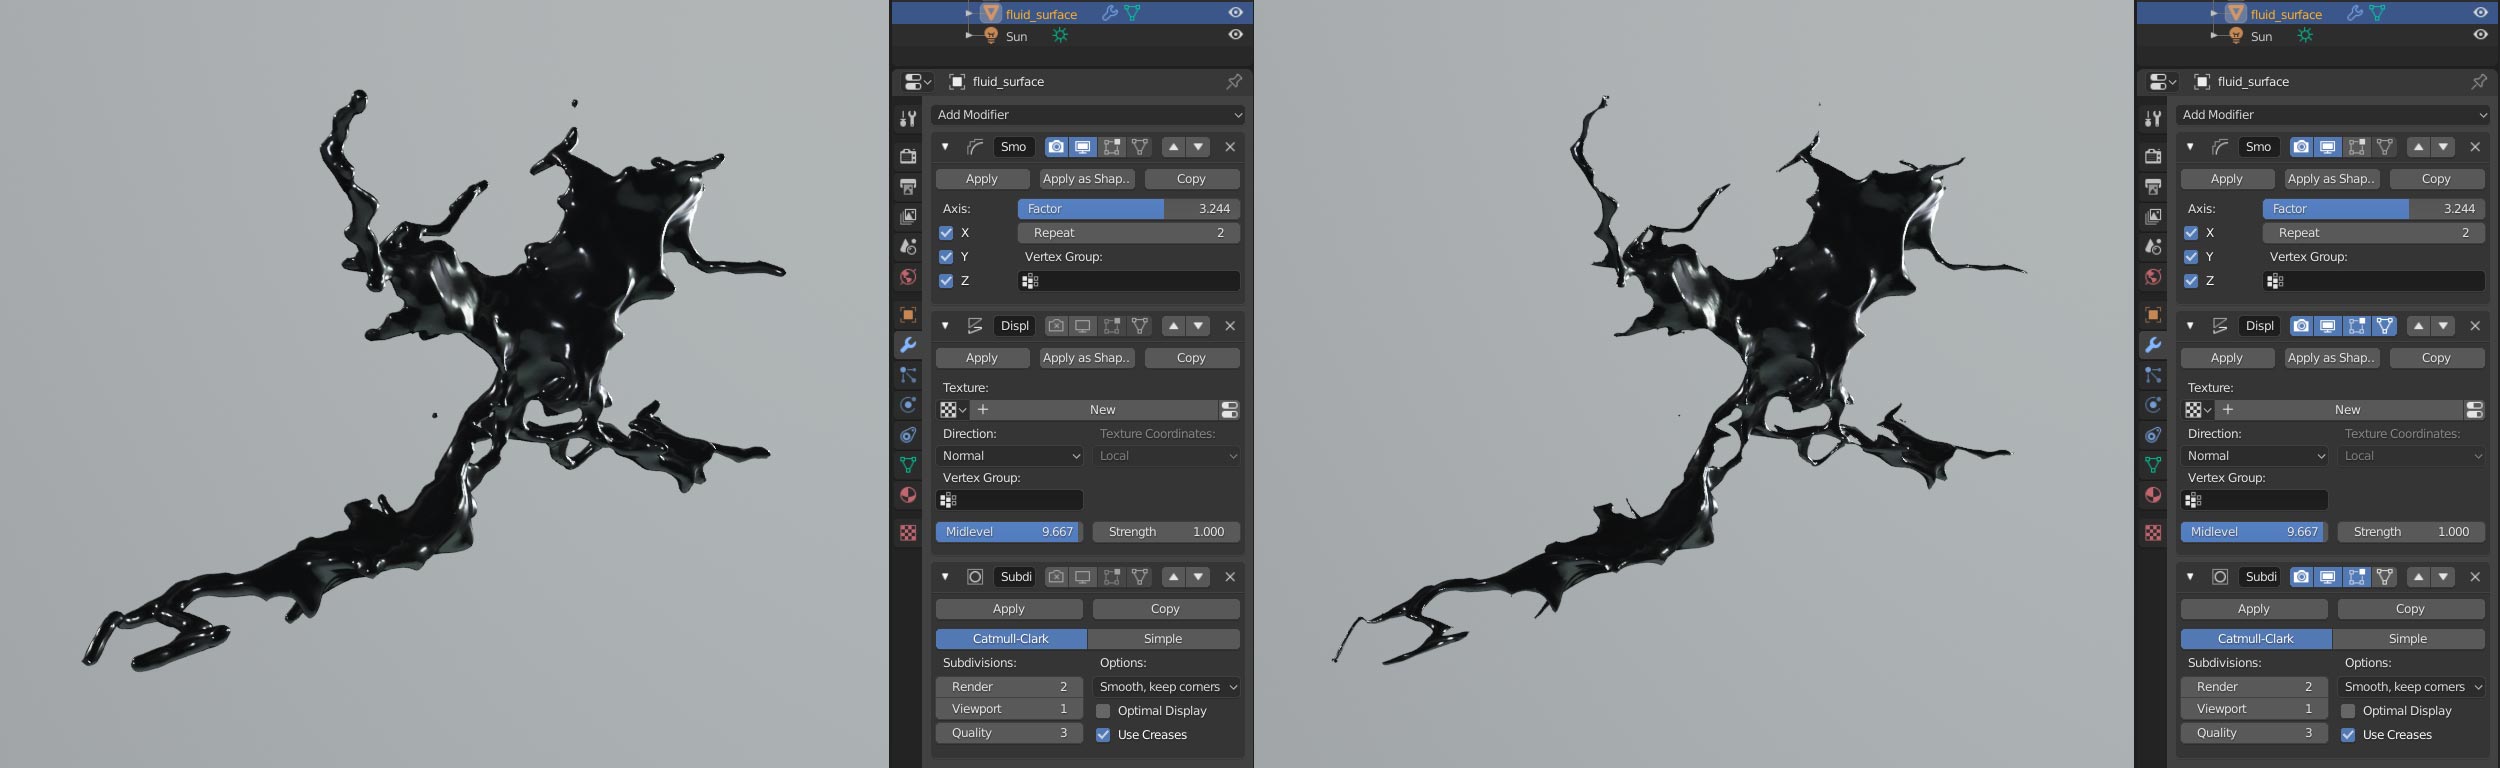
Also, while watching the stream, I remembered a cool slime I saw a long time ago…

Turns out, this blob was made by Marien Elalaoui, an awesome Technical Artist, member of the Epic team!

https://www.artstation.com/marienelalaoui

He also made a super useful tutorial, I highly recommend watching it if you want to learn about the Custom Node and some HLSL coding. He doesn’t go too deep into the topic, and keeps the vid interesting and fun to watch. I have experience coding in HLSL so this was pretty easy for me to follow.

There are multiple approaches to it. I tried them all, and I went full screenspace mode since I didn’t want to enable Mesh Distance Fields.

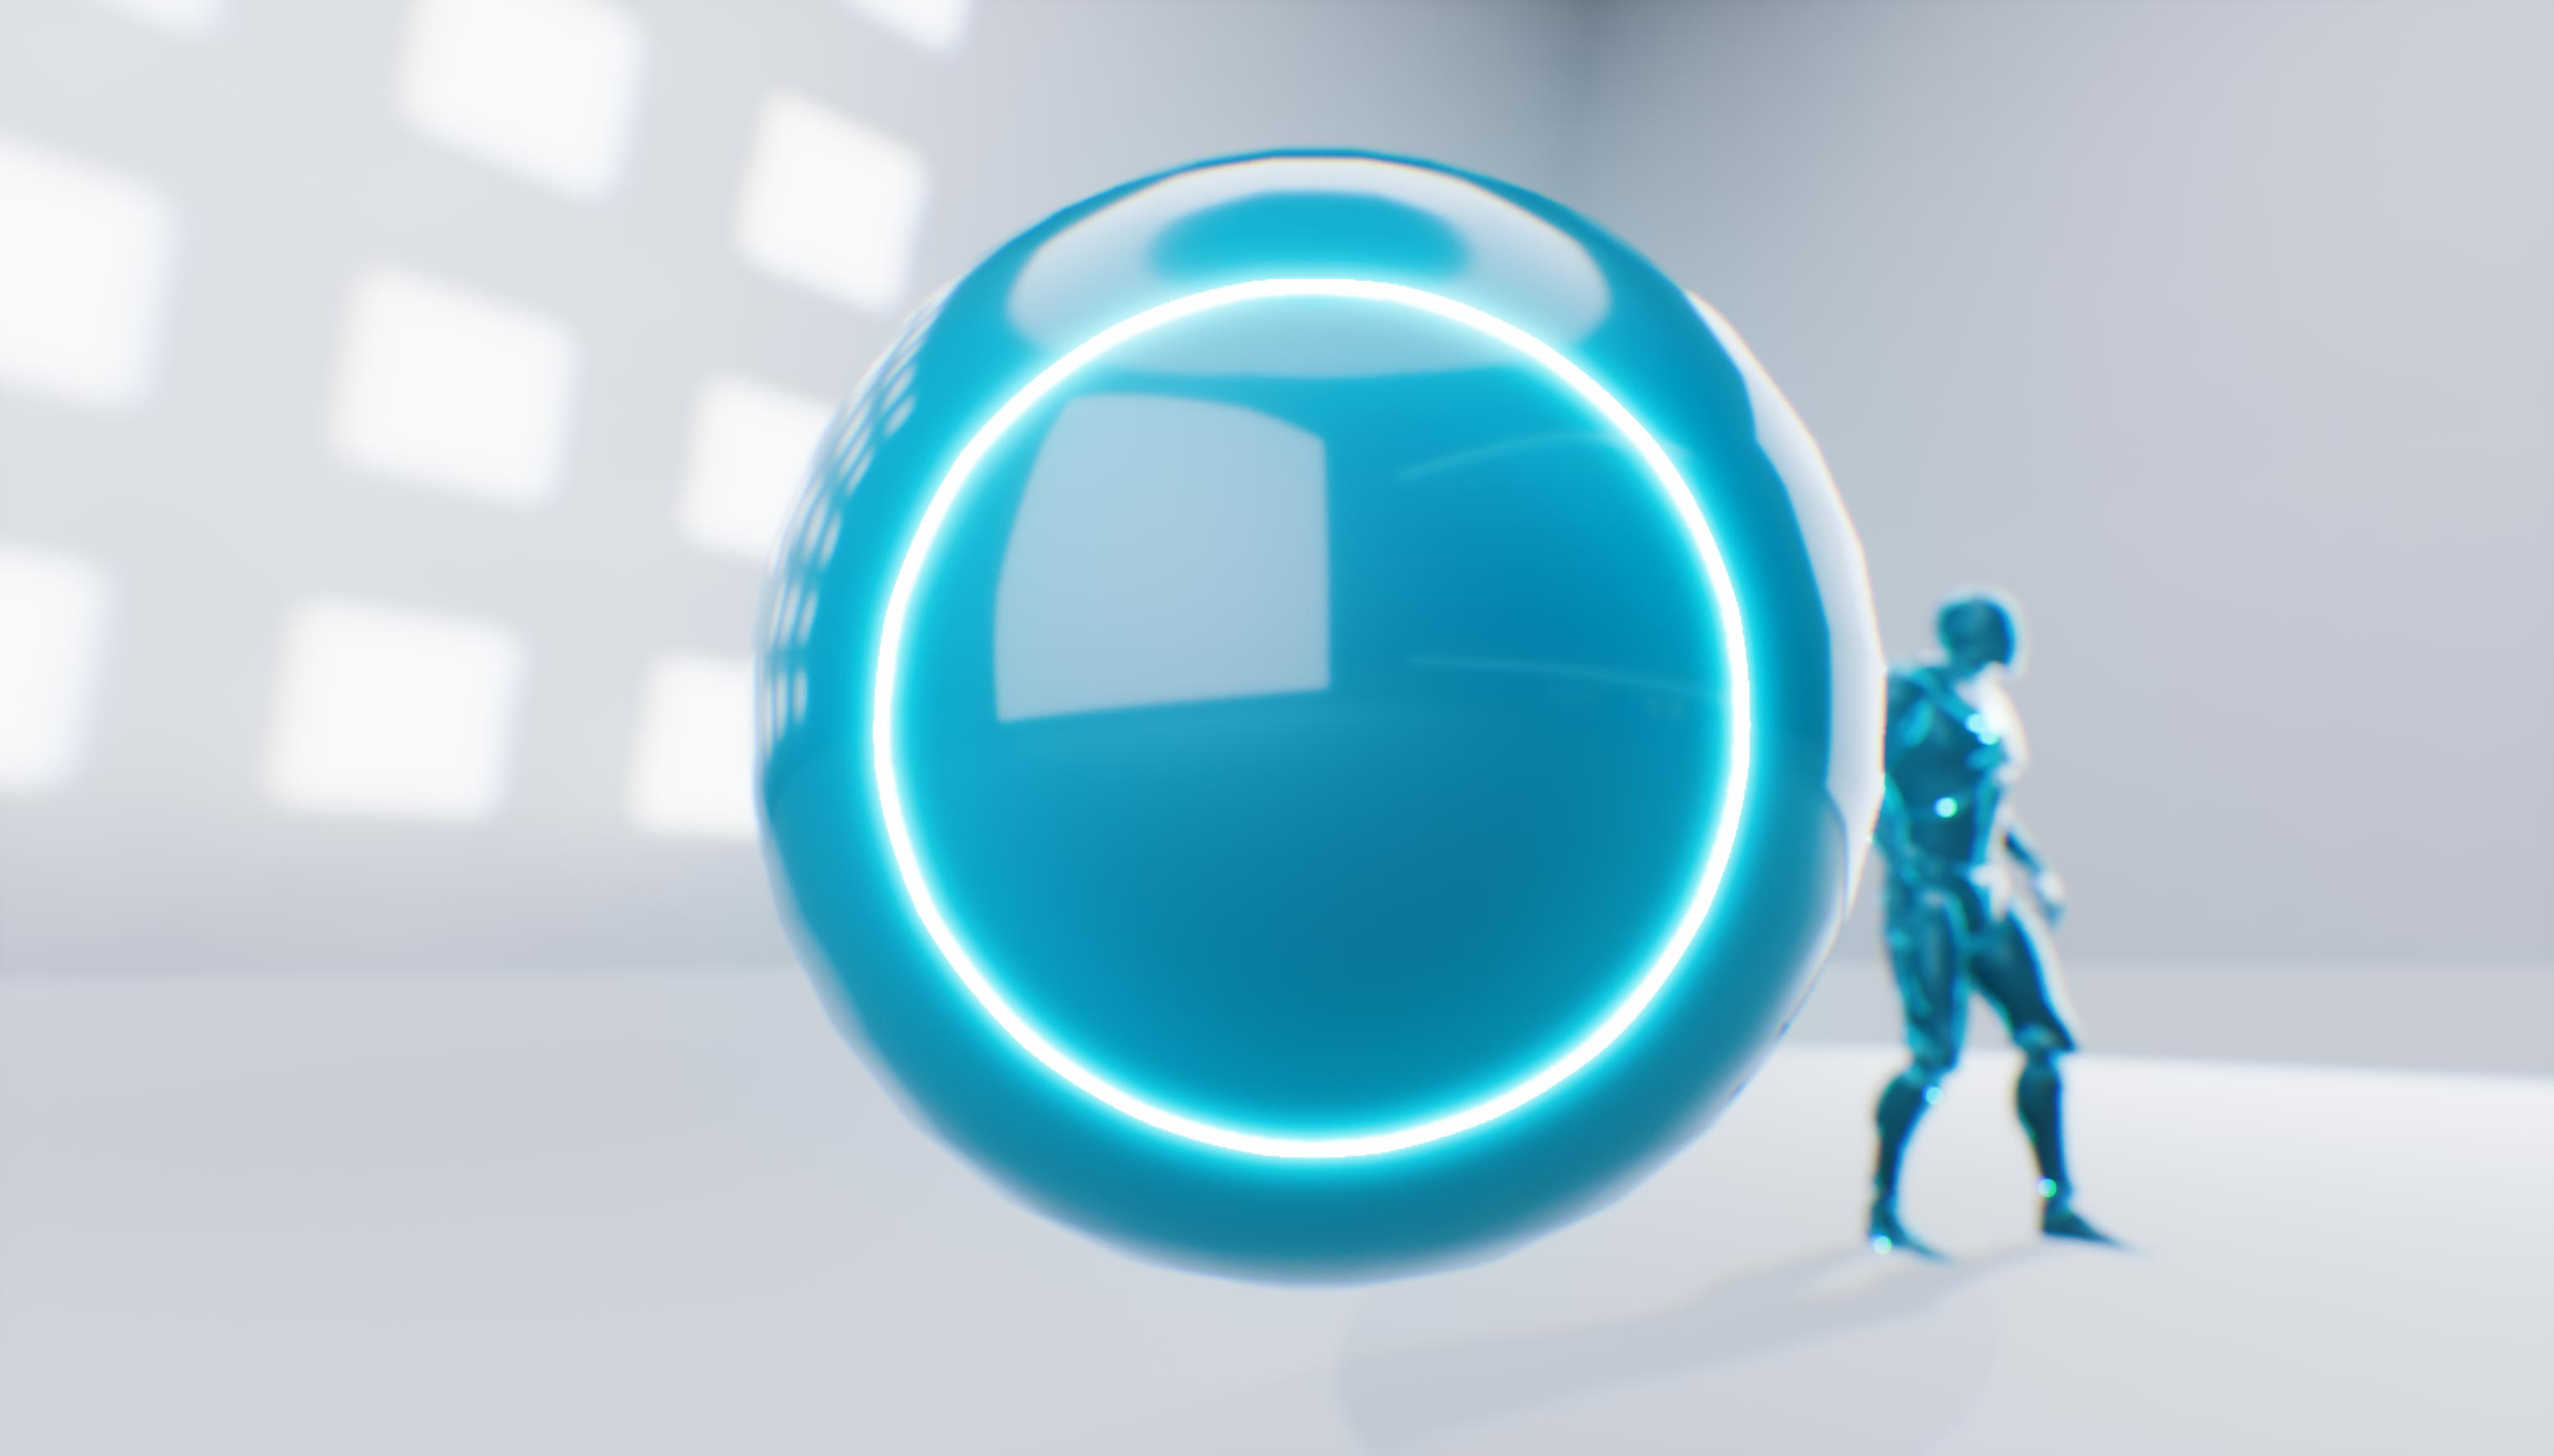
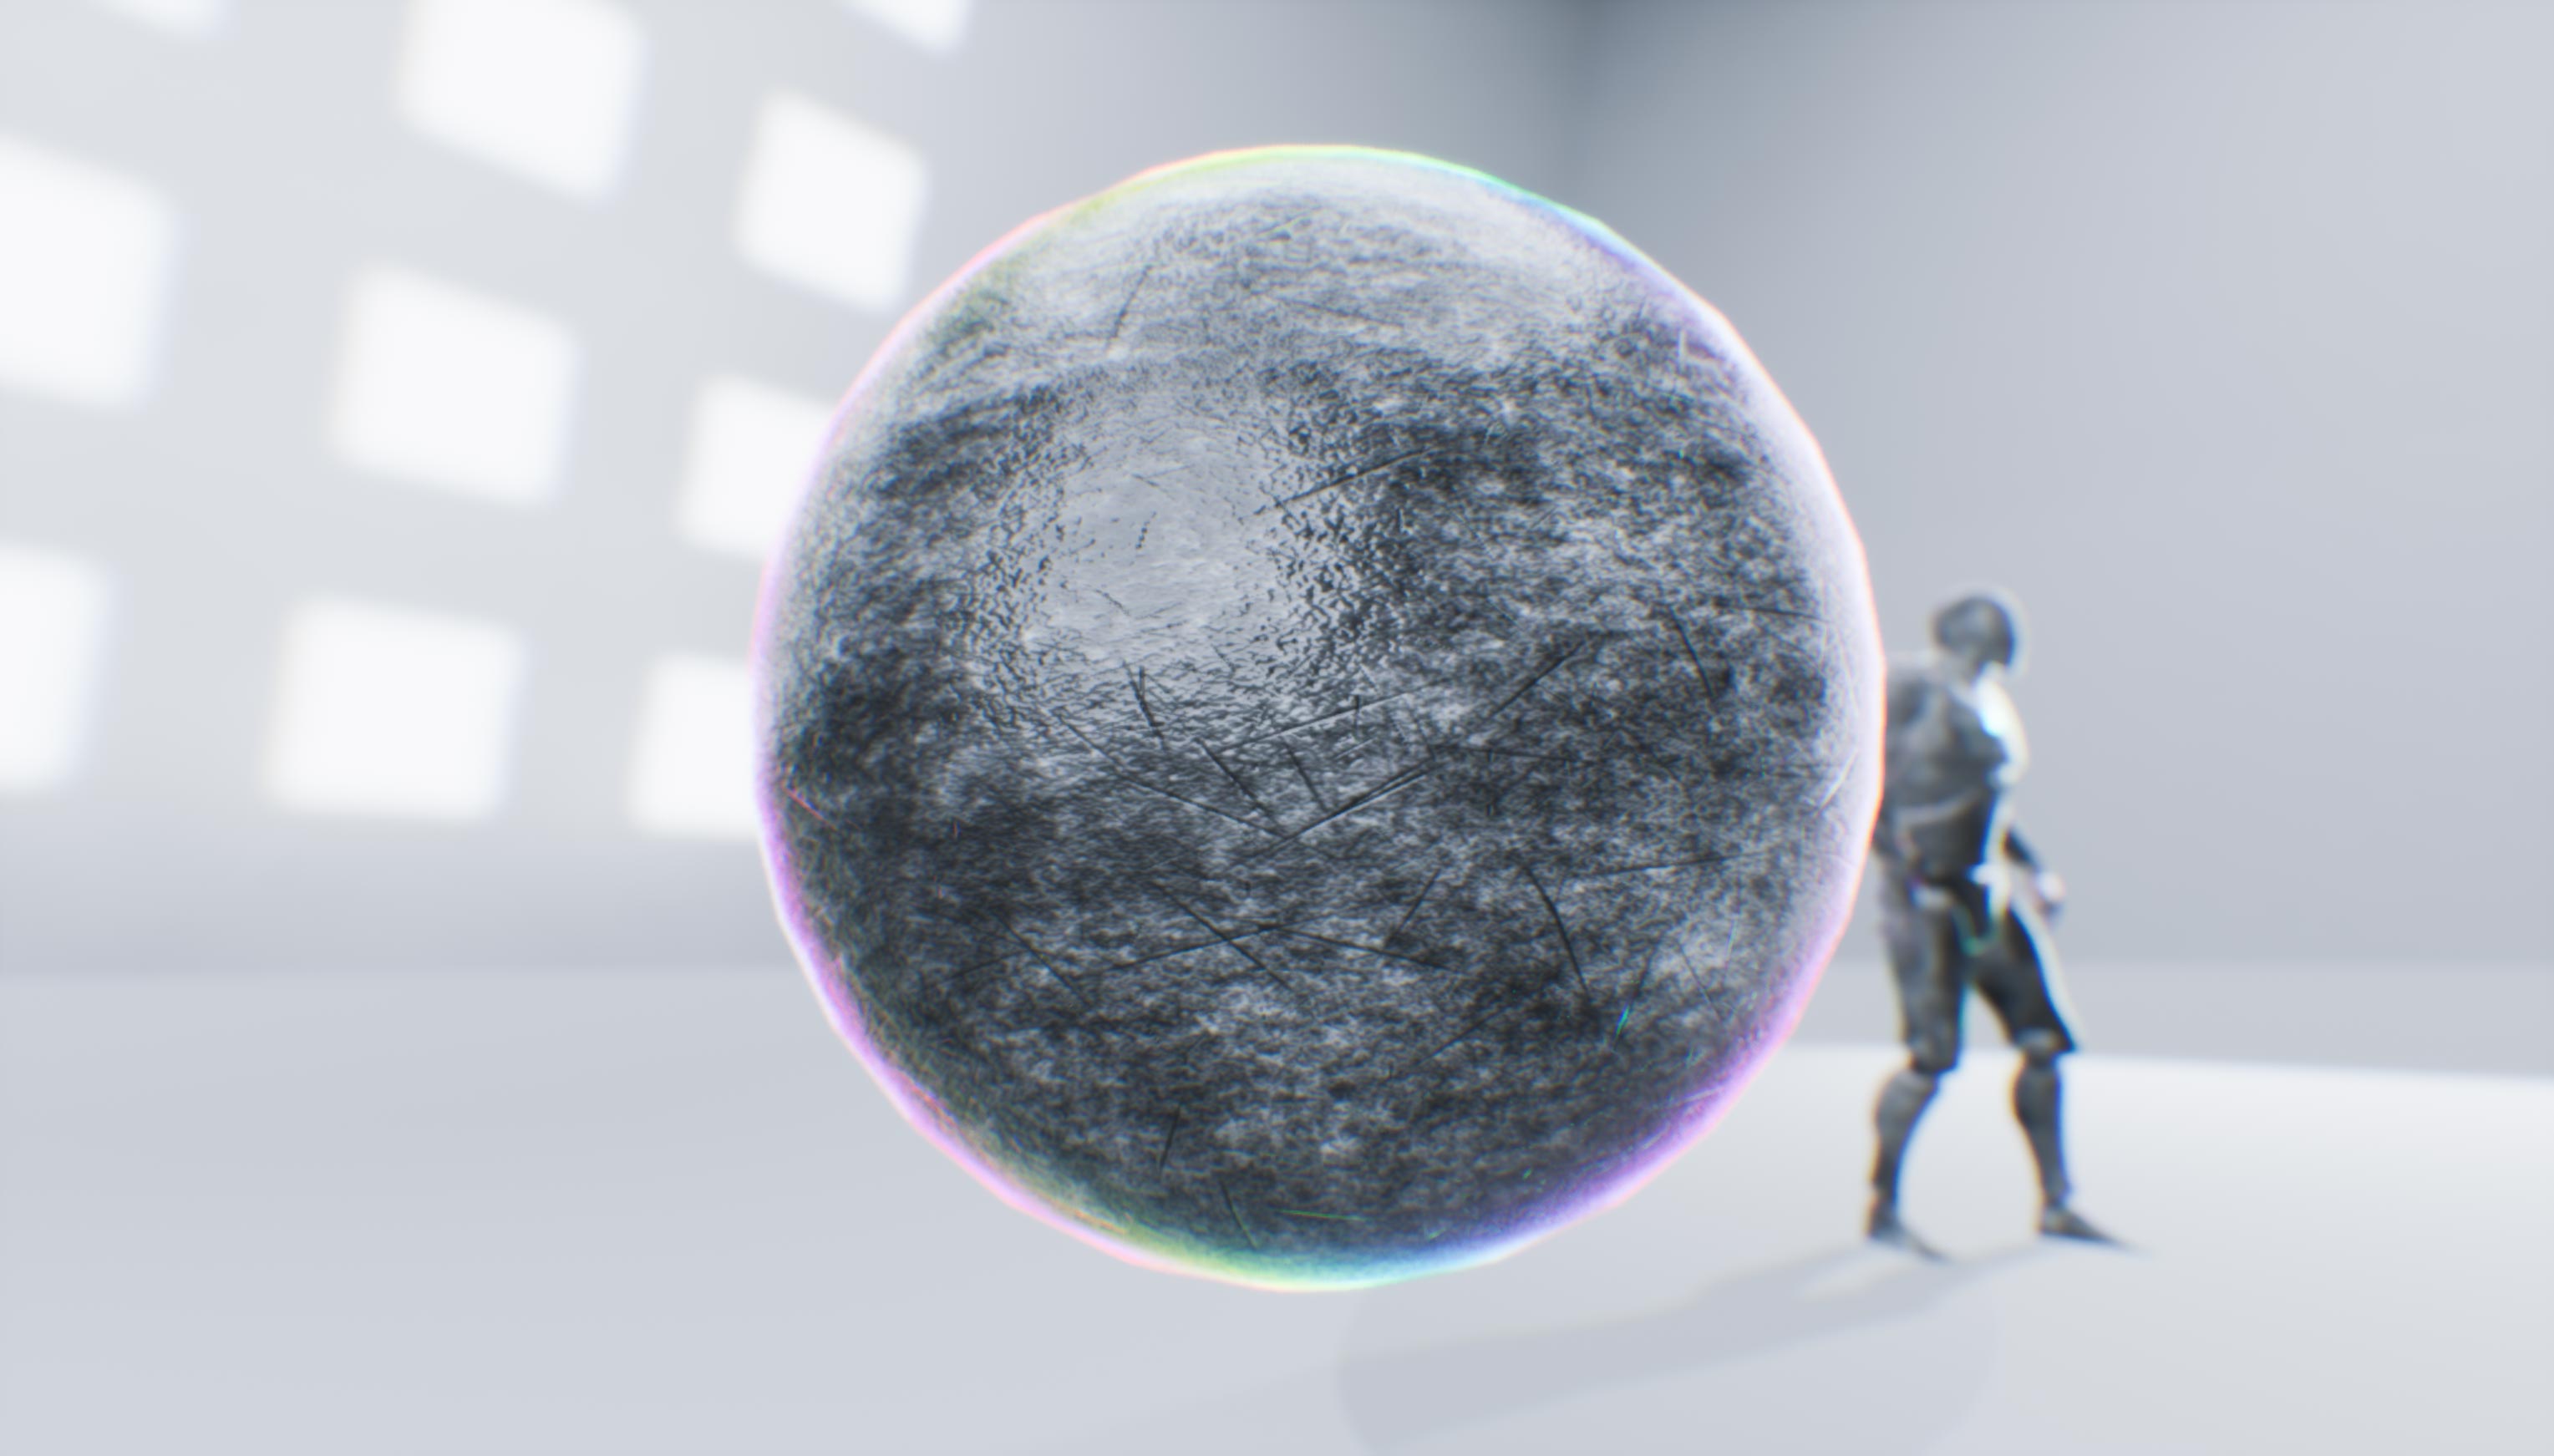
First test! As you can see, it is not perfect since it has some artifacts on the edges. These are caused due to multiple factors, such as the sample resolution or the step length took into account by the mixing function.

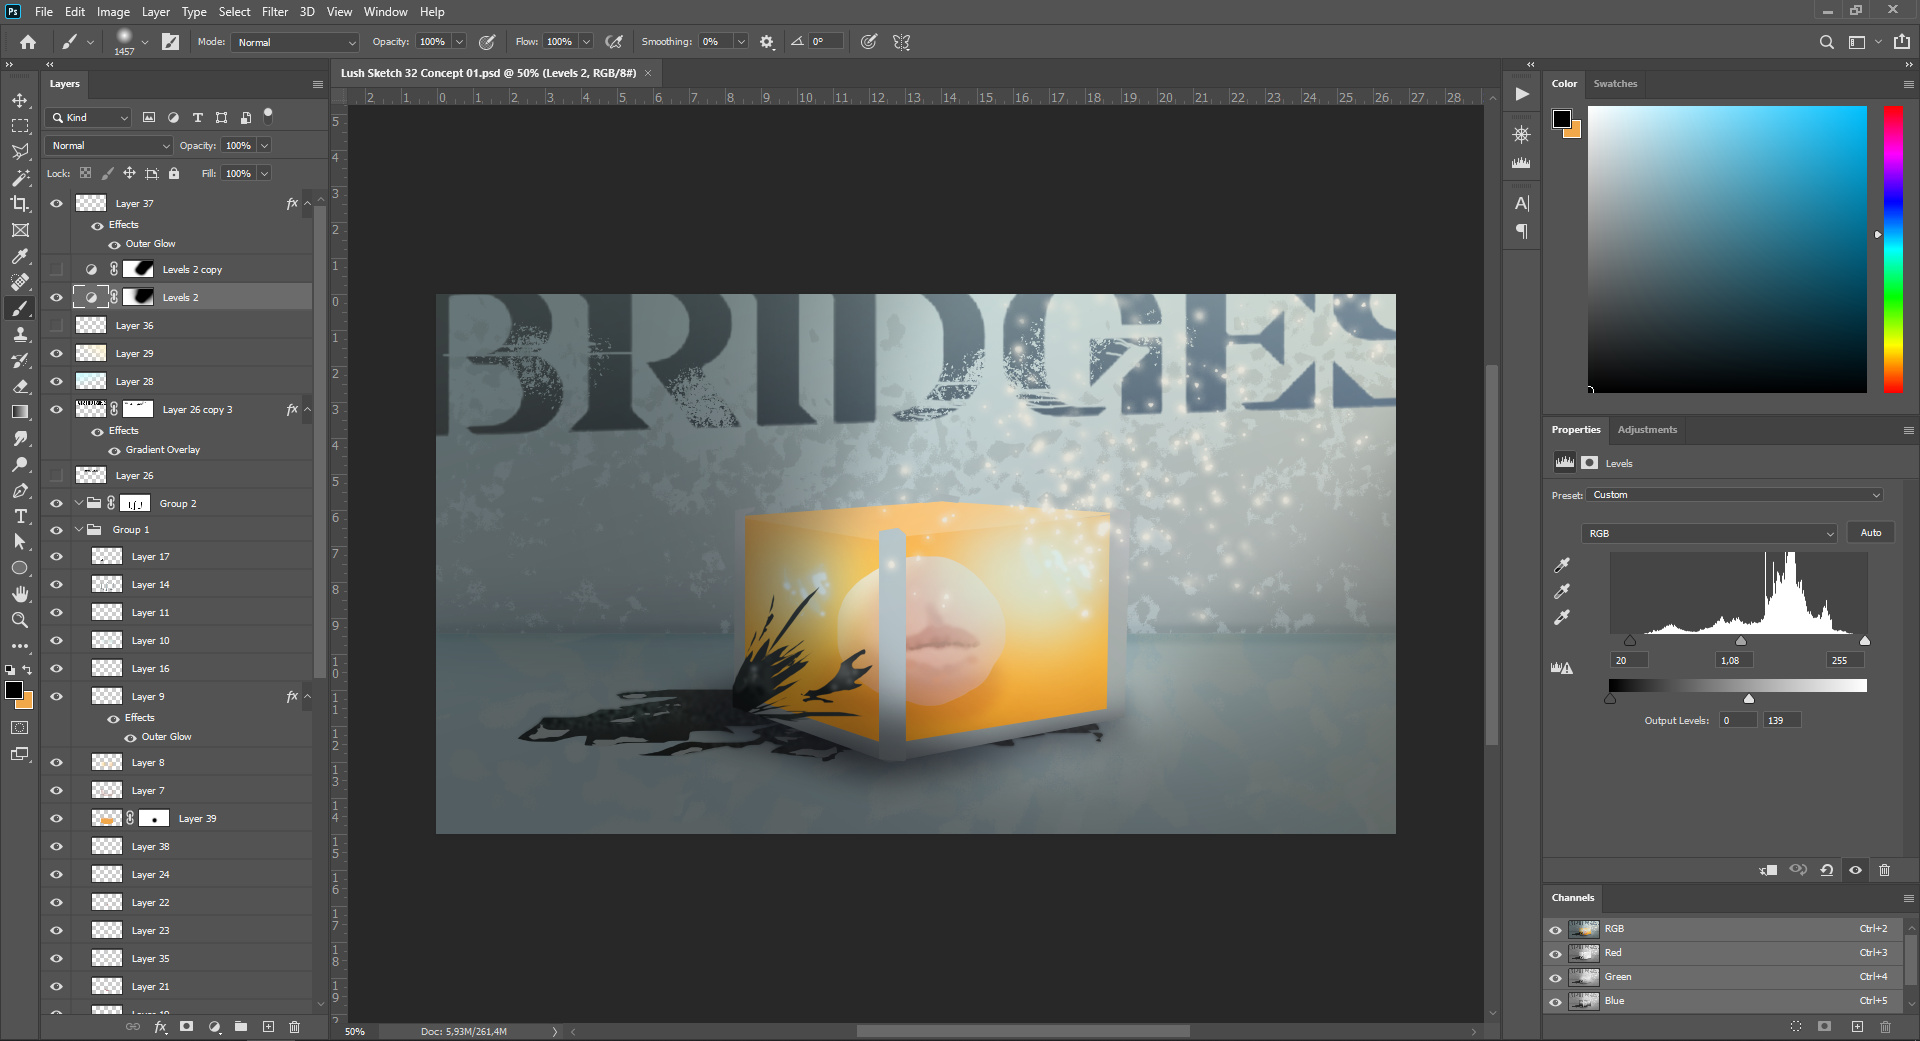
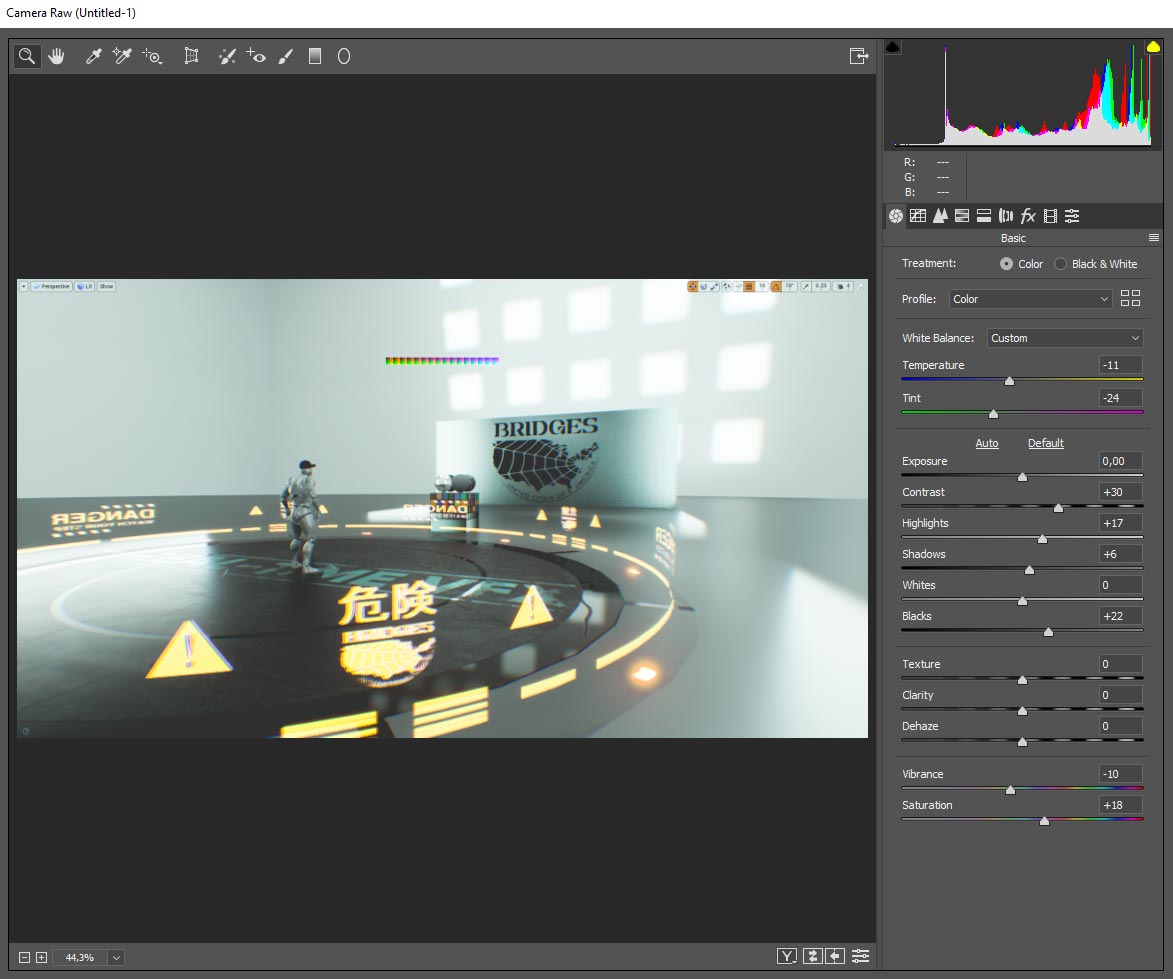
Here you can see me messing around with the look of the metaball. Changing stuff like the radius, the sample resolution, the fake reflections intensity, the secondary blobby movement, the index of refraction, the iridescent fresnel, its opacity, the blend range and smoothness, its colors, etc.

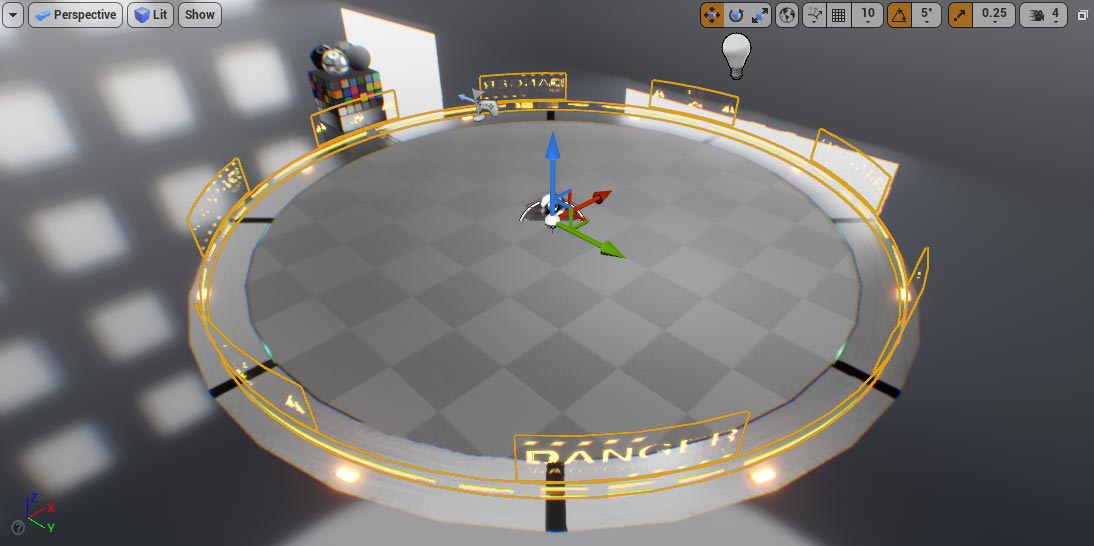
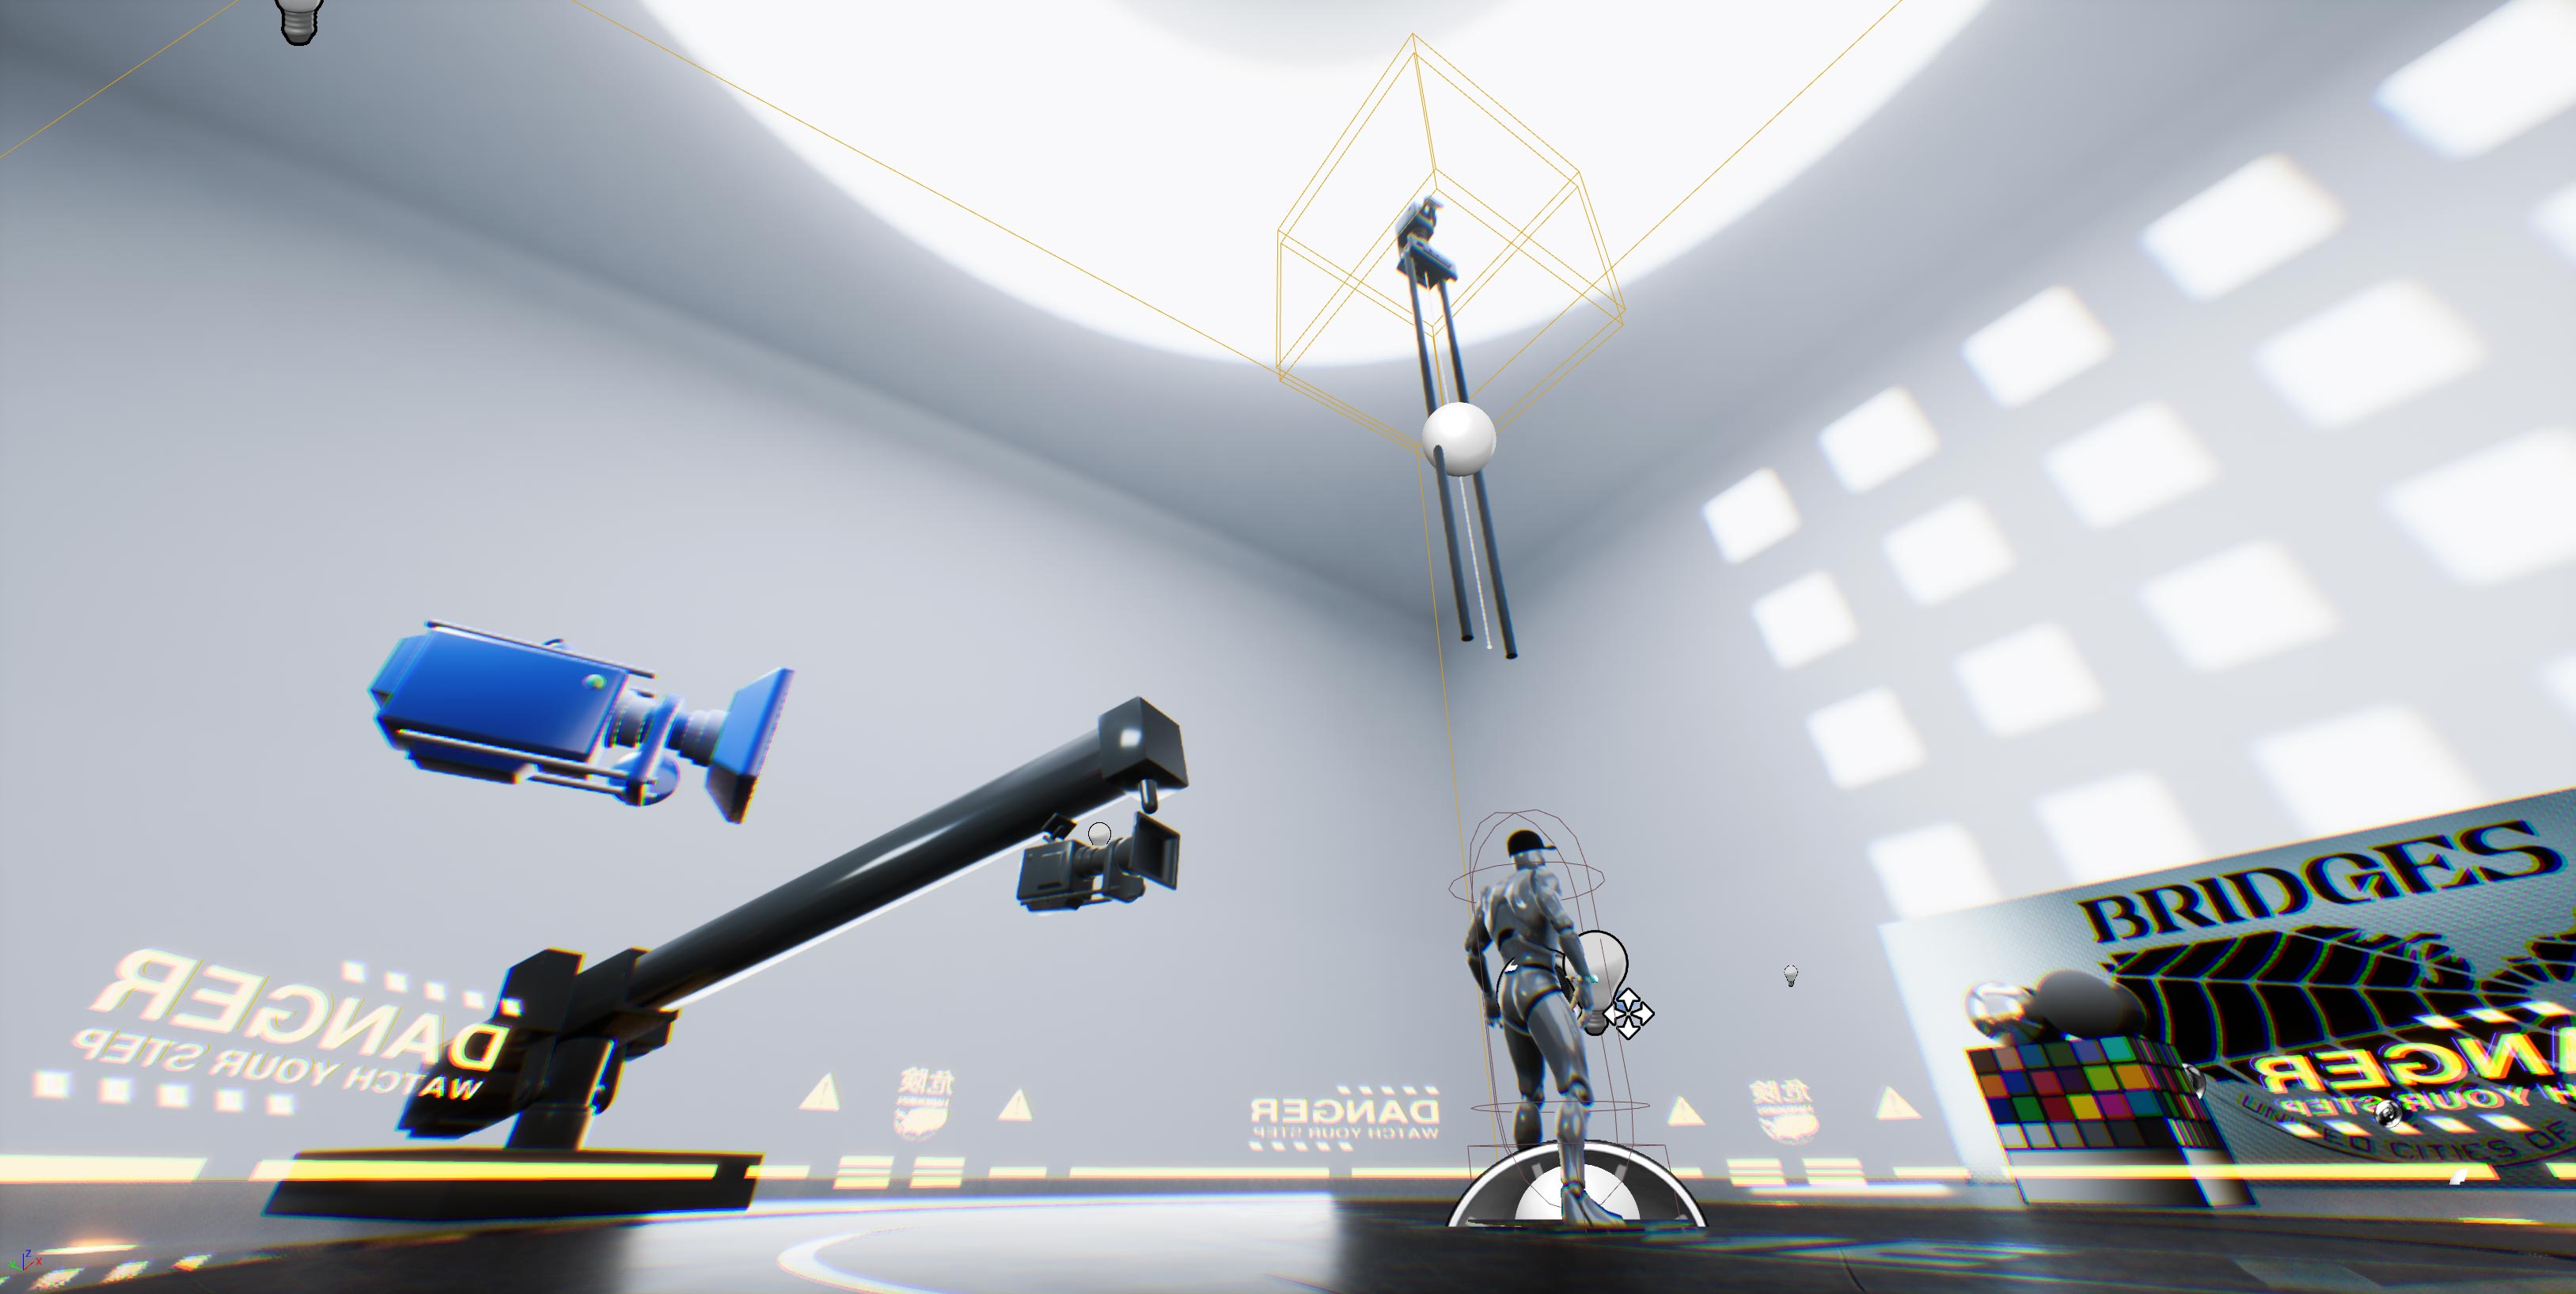
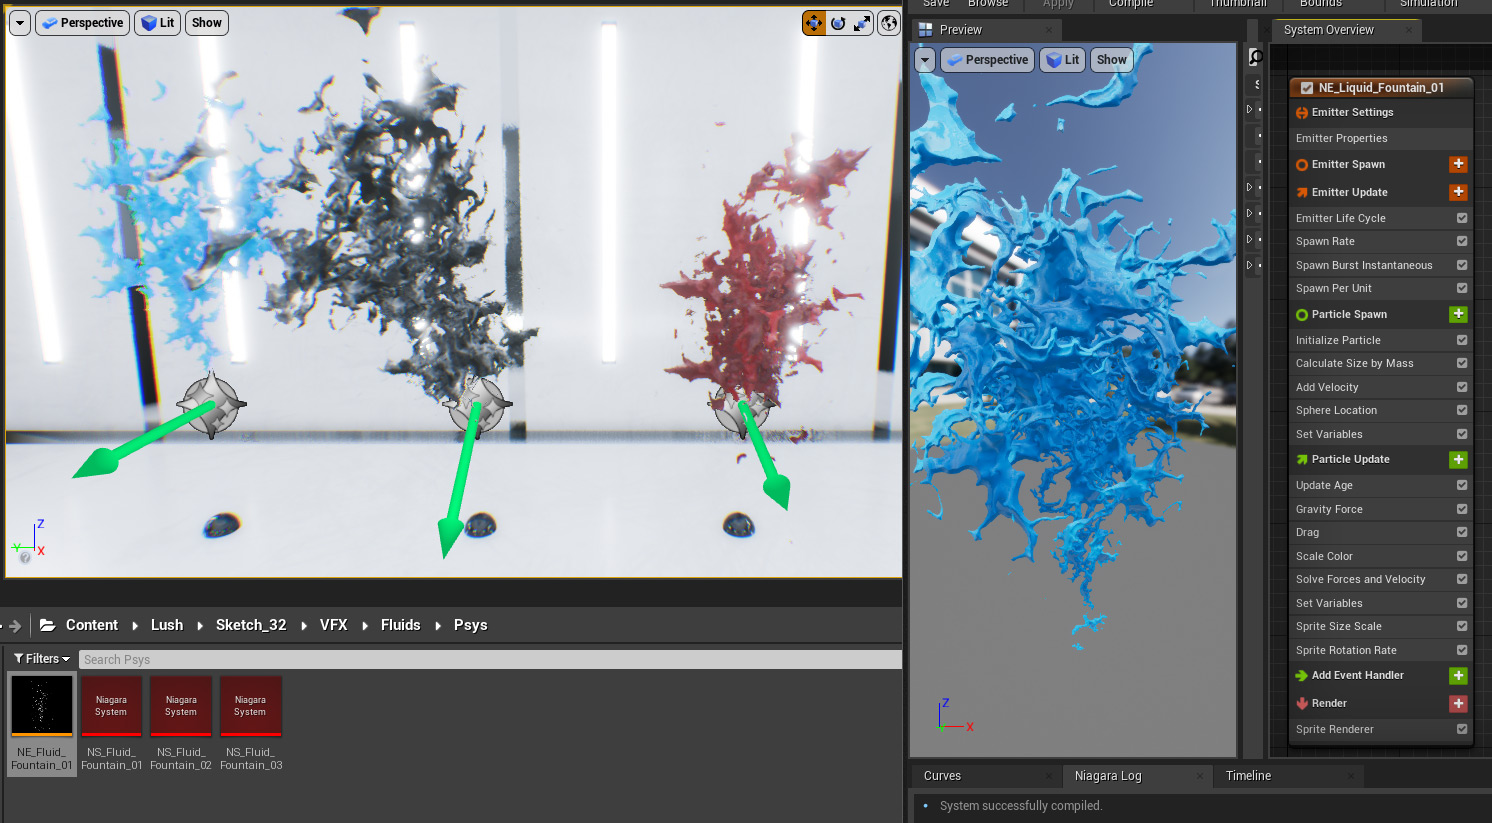
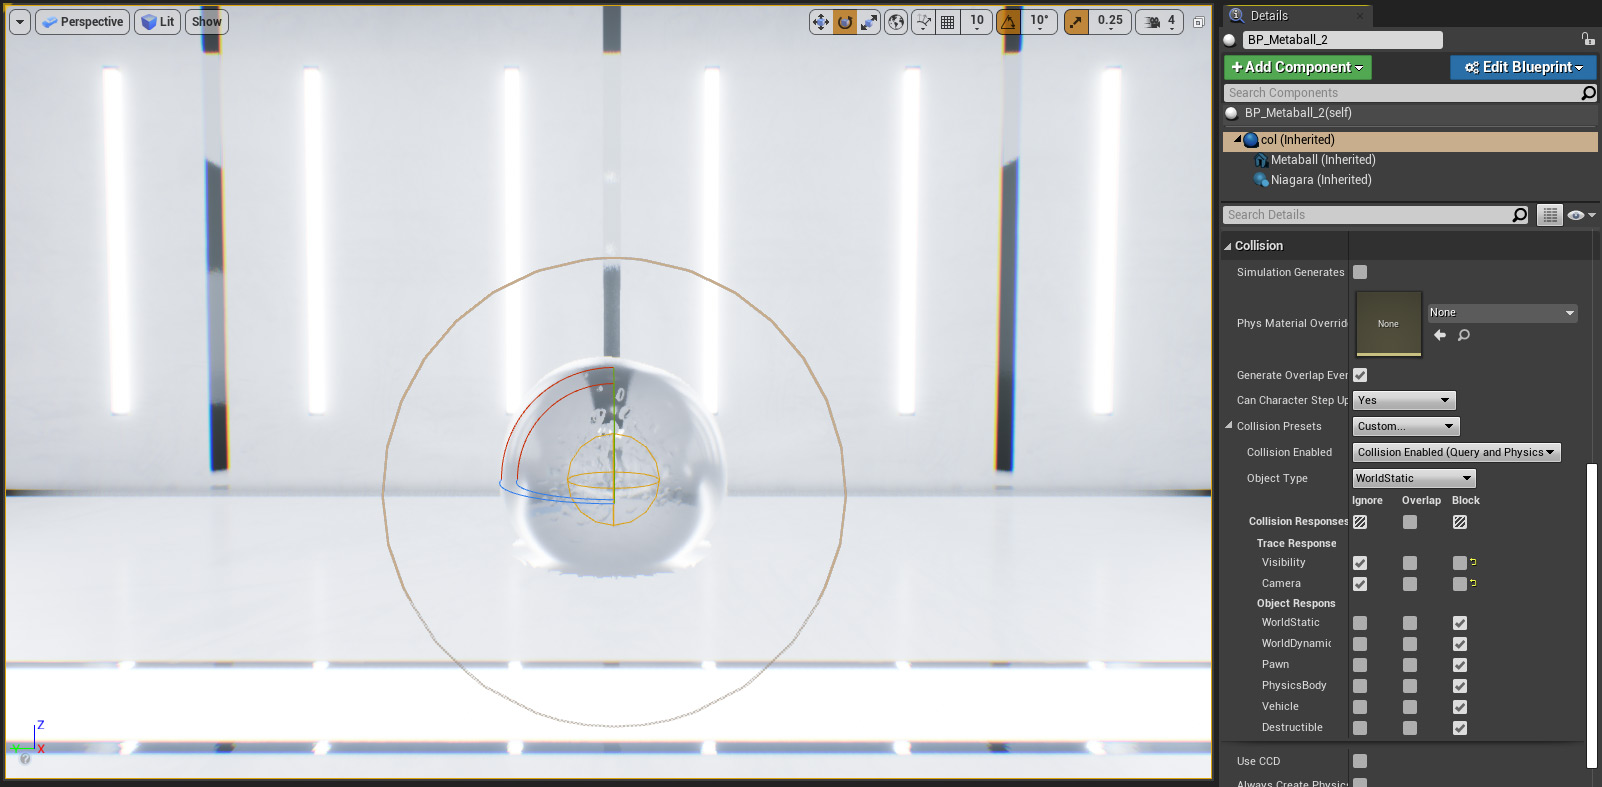
The metaball setup is pretty simple. A big sphere with no collisions renders the metaball. A smaller sphere with collisions and physics enabled handles the movement. And then, a Niagara System to spawn some bubbles inside the metaball.

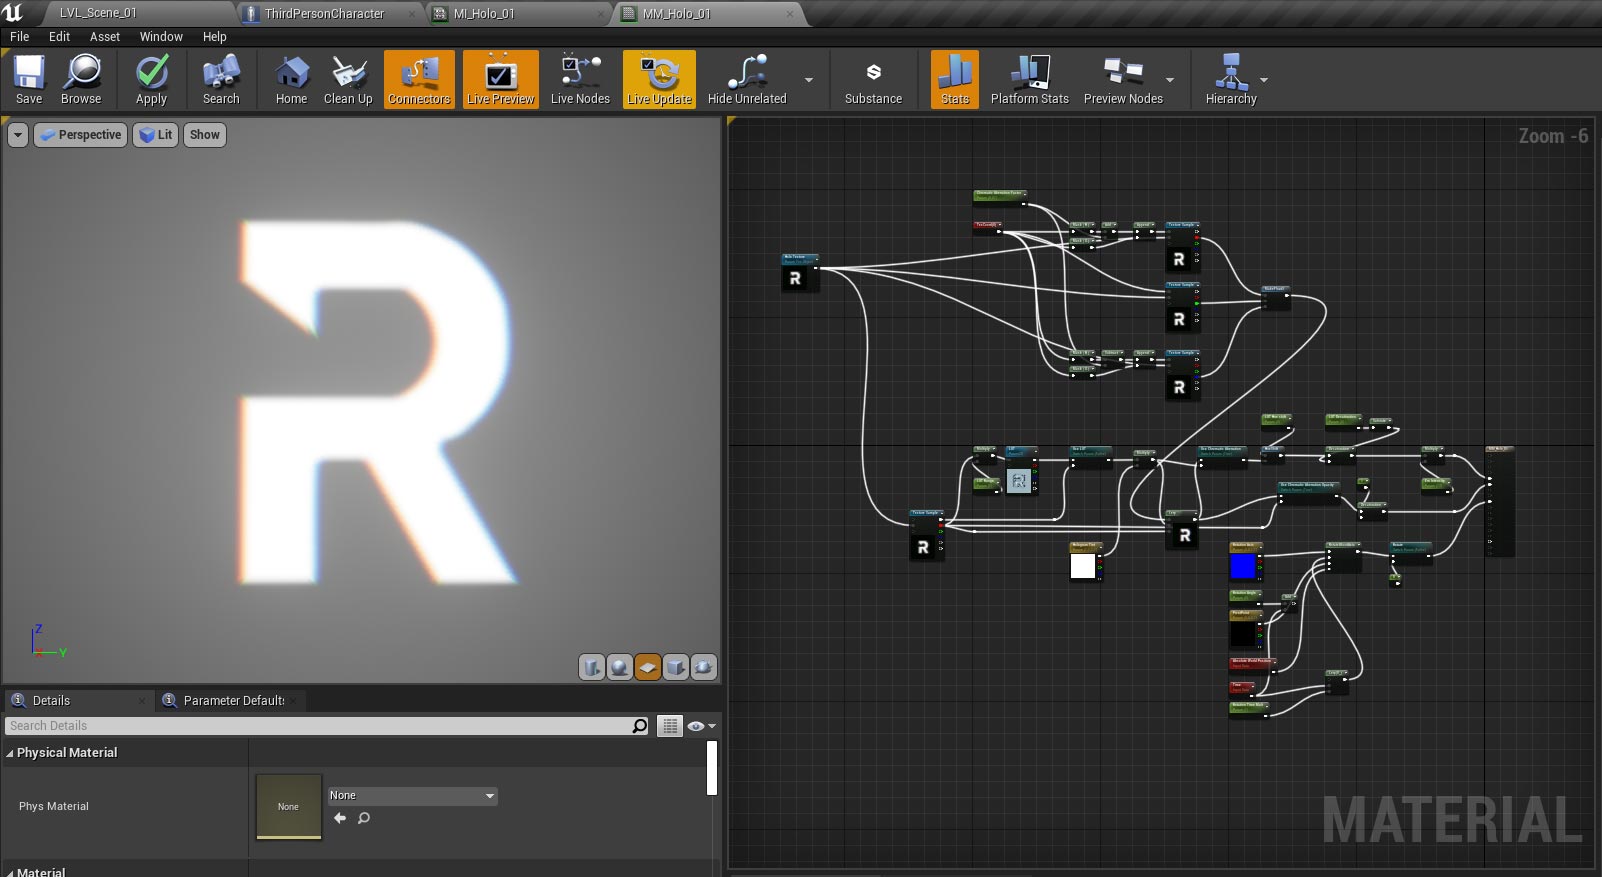
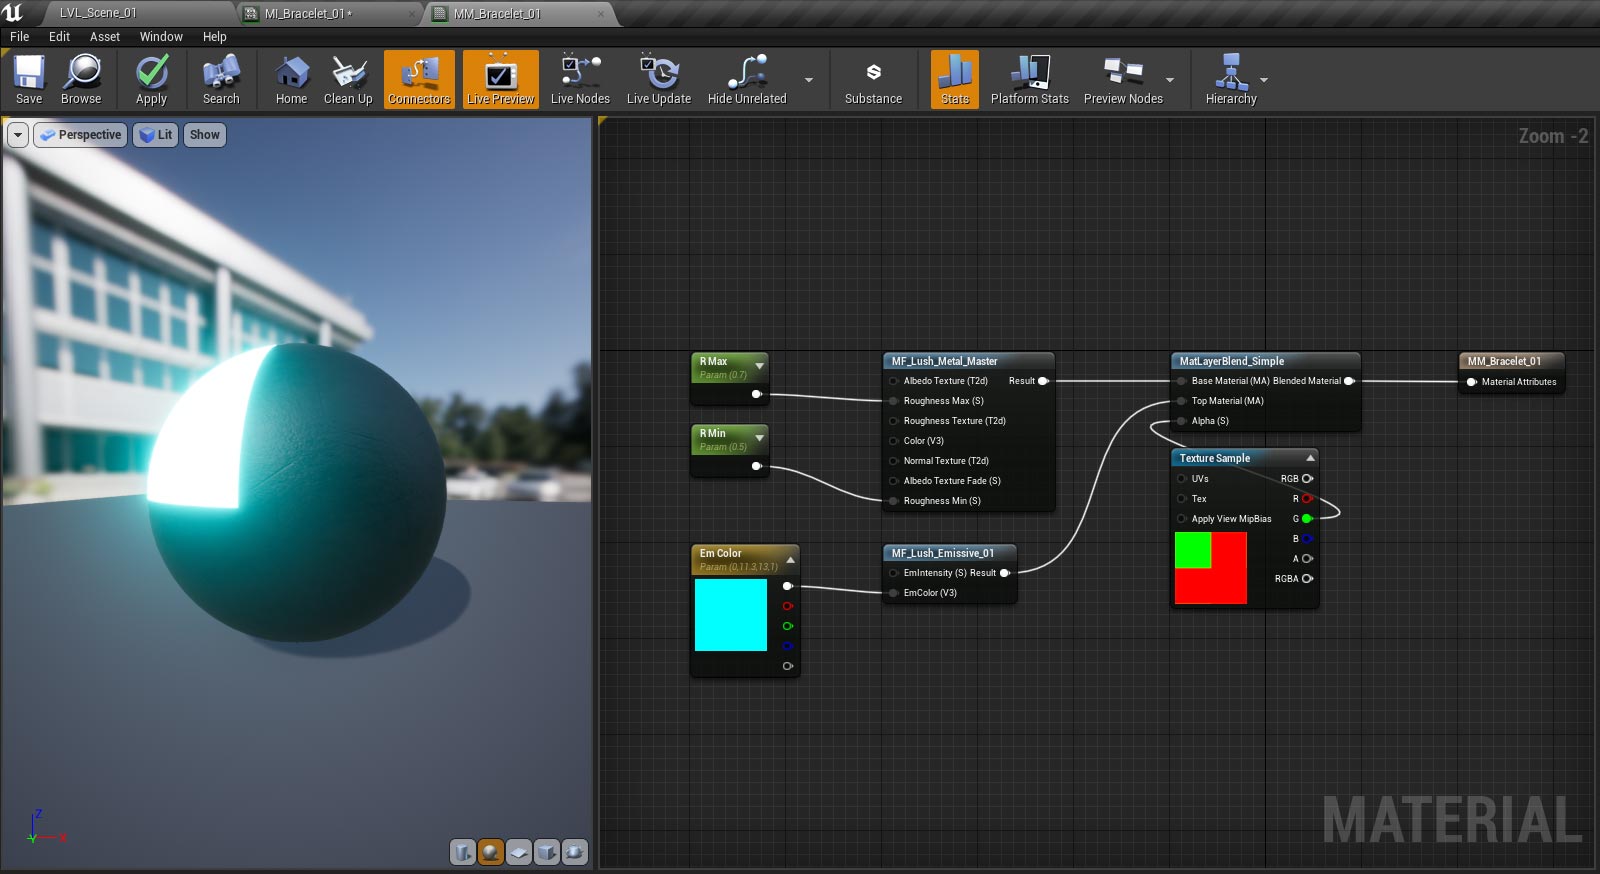
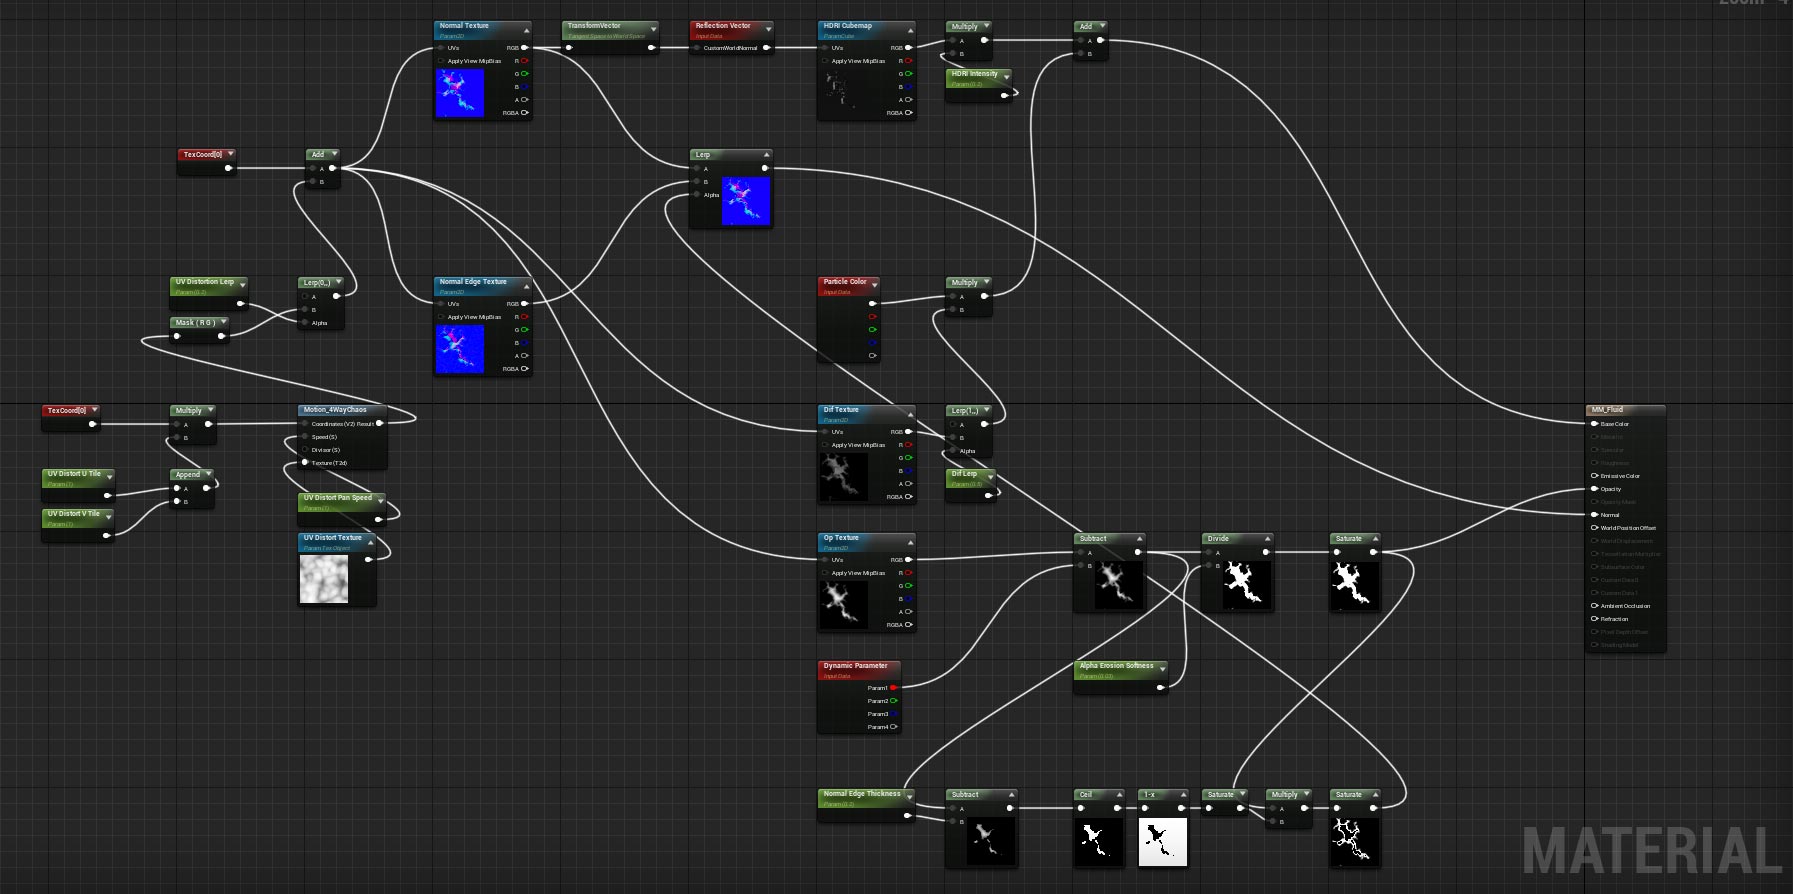
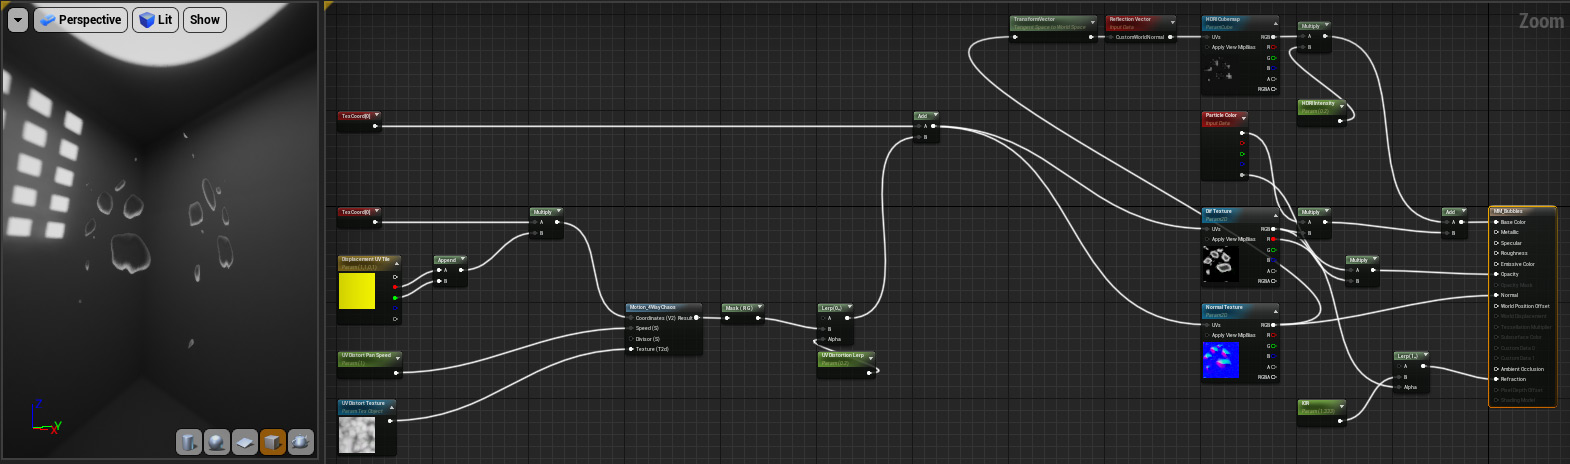
Here’s the metaball material + the bubbles material!

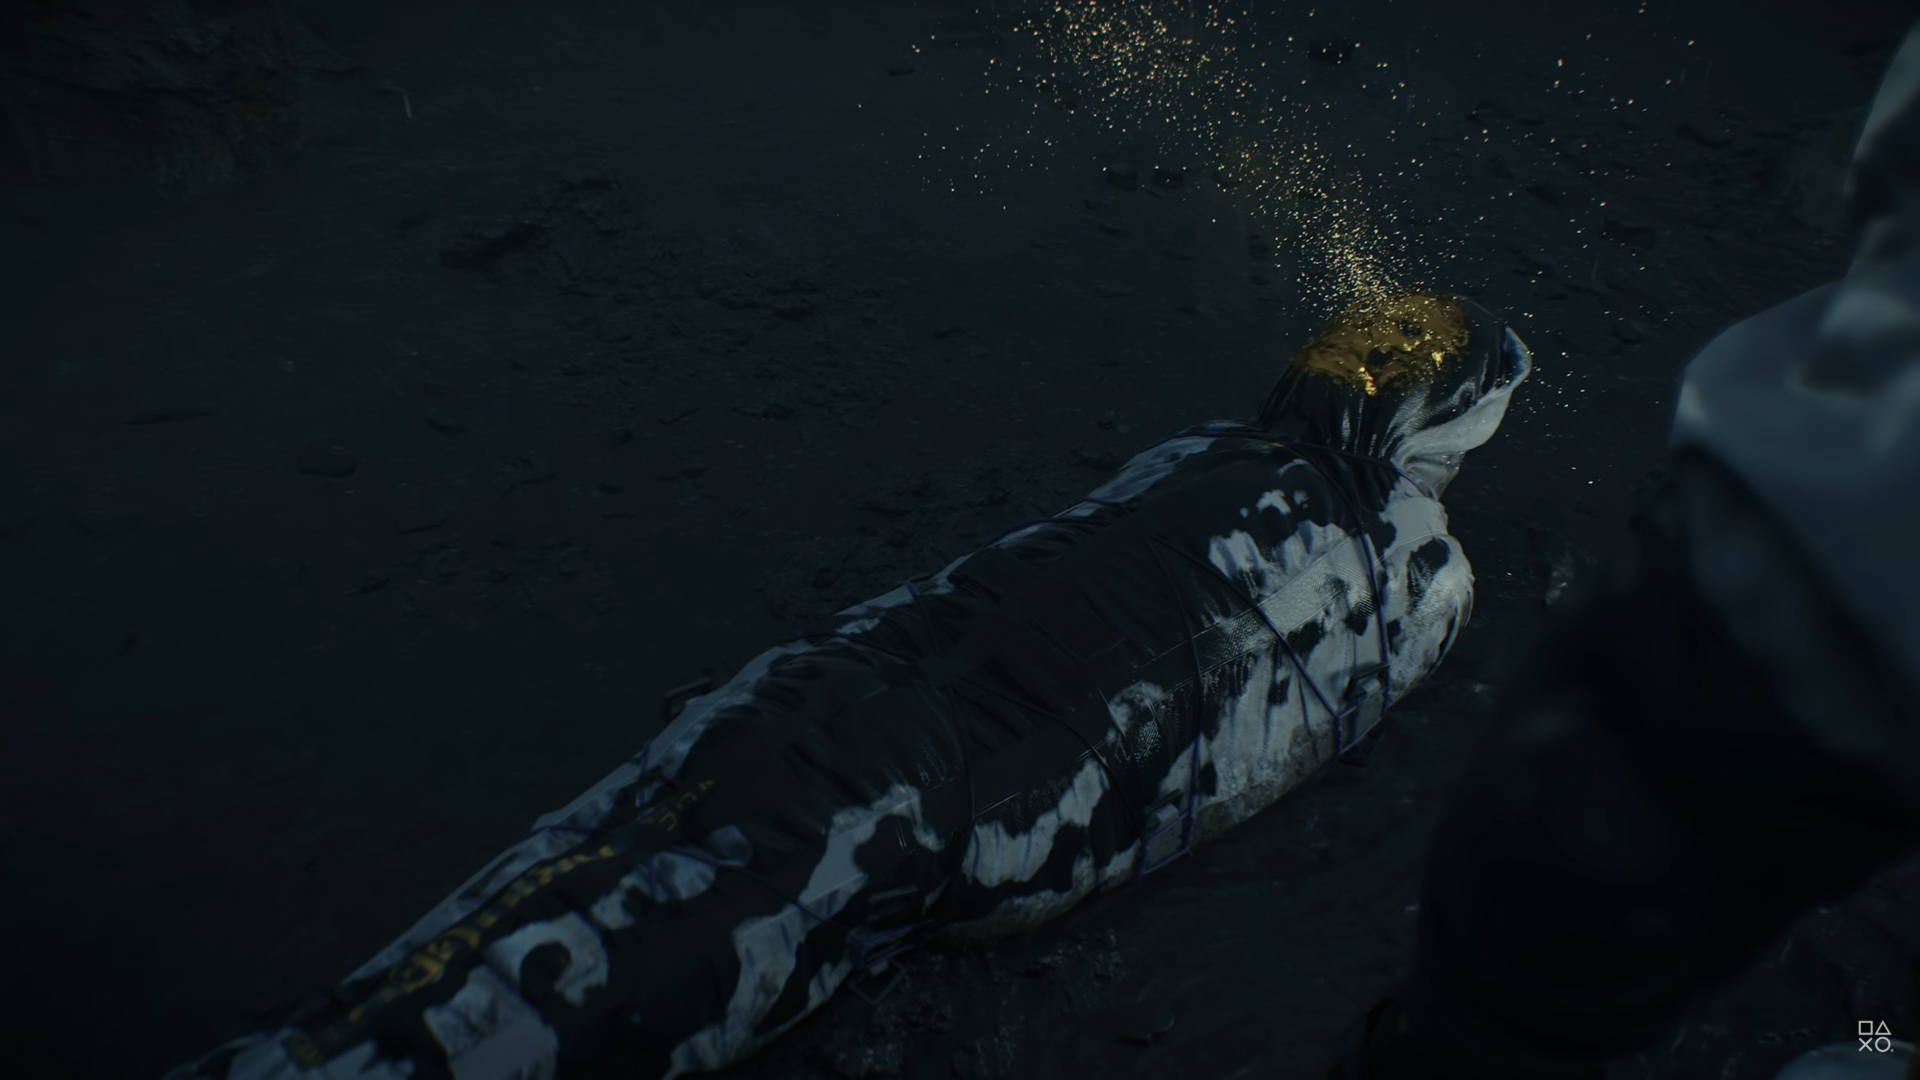
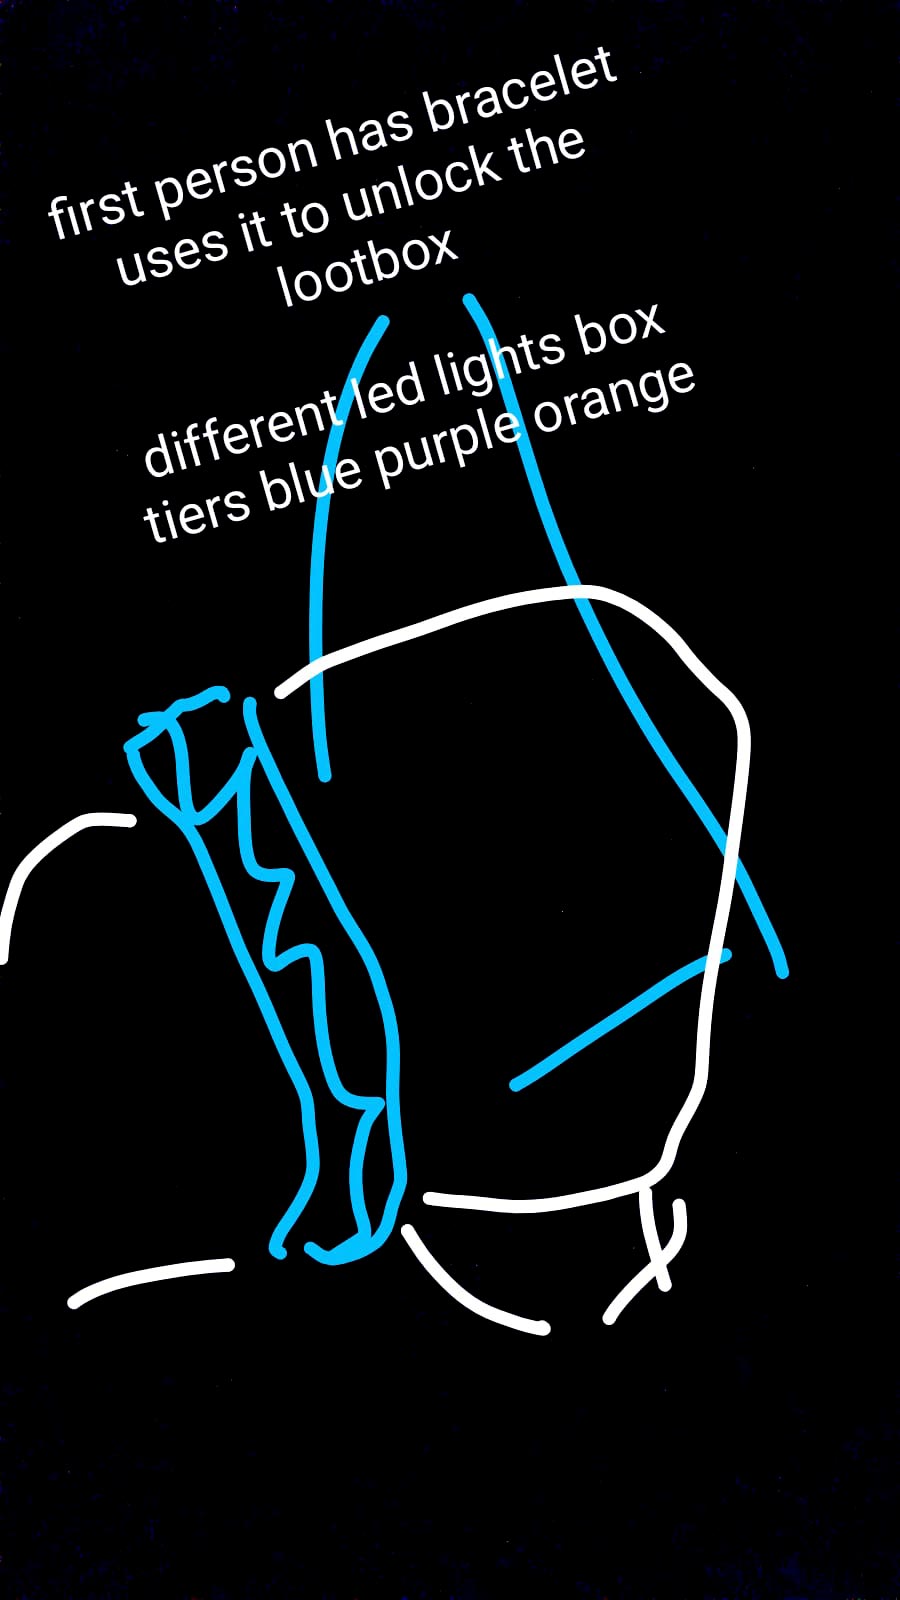
I’m planning on using a main metaball as an envelope for the loot, so the player has to reach for it. Then, I’m going to use smaller metaballs with lower resolution to add extra detail.

3 Likes