Hello everyone,
I thought I could show you something I learned some weeks ago by reading math books, so maybe someone can benefit from it. I am learning so much by reading this forum and I would like to share the few things I know. I hope this can be useful for someone. ![]()
So, here we go:
What do we want?
We want the particles to move when they are close enough from a specific object. The movement should look like the particles are being pushed and creating a path to the object itself. This is a video reference:

How do I move particles when the object is close enough?
We need to do two things:
- We need to calculate the distance between the particles and the object.
- We need to create a direction for the particles to be pushed.
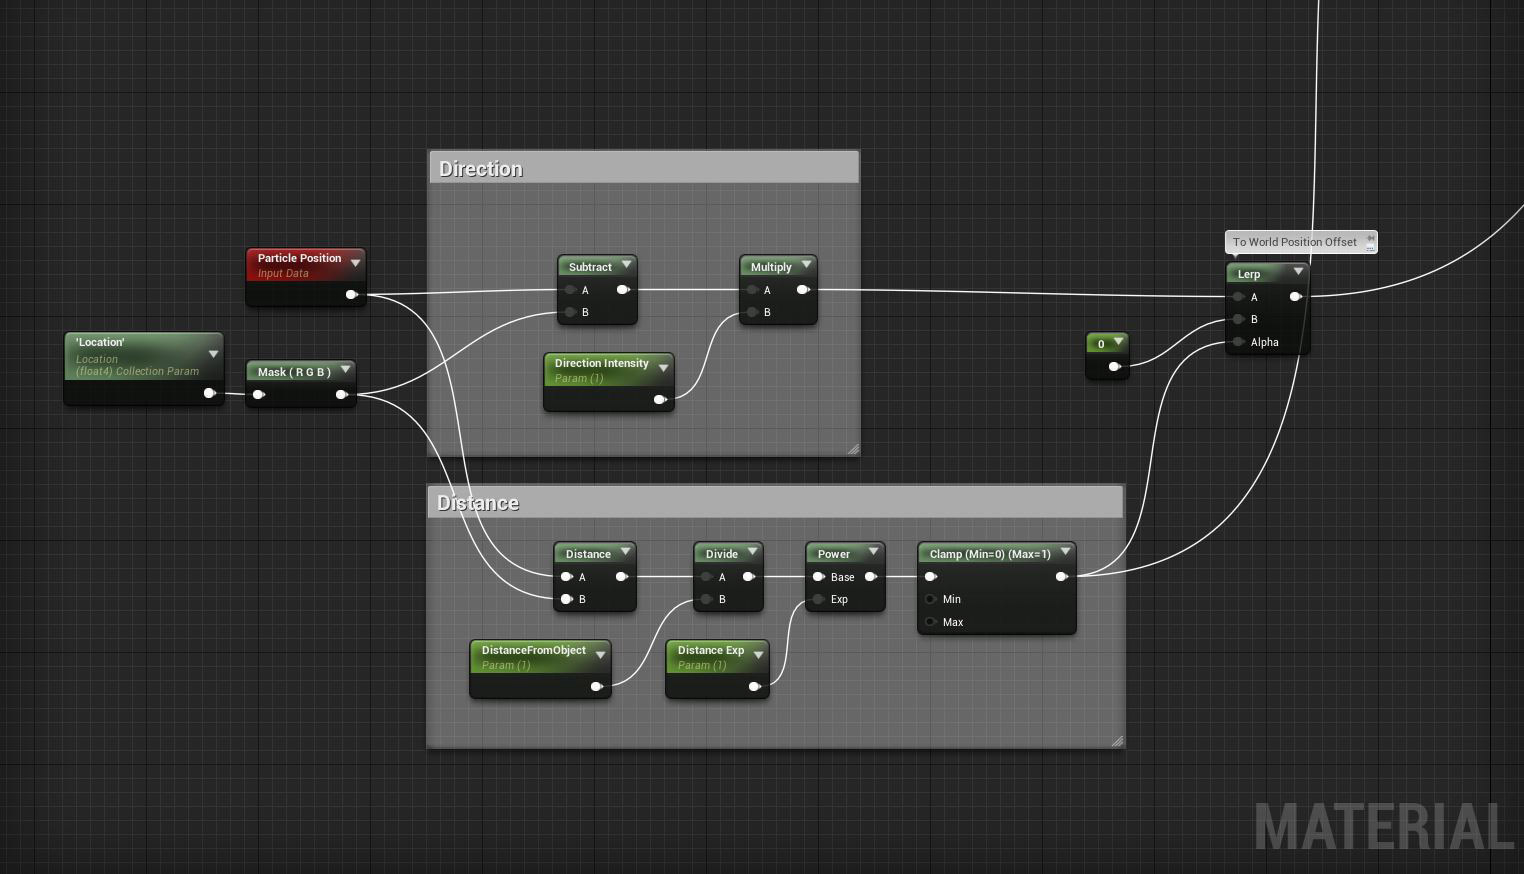
That behaviour can be created in the Shader itself. I will show you the graph, but I would like to explain part of it.
Note: (I didn’t find a way to move the particles inside Cascade in this way, but maybe it really exists and I din’t find it)
Distance
You can use the “Distance” node to calculate the distance between two points. Besides that, I added two more variables.
- DistanceFromObject allows me to get more particles by increasing the distance and be affected by the direction.
- Distance Exp is creating more contrast. When you use a Power node in a greyscale texture, for example, you are creating more contrast (bright values will be brighter, dark values will be darker). In this case, this variable is sharpening the area.
The reason I am using a Clamp node is because I don’t want exaggerated values in the Lerp Alpha and I don’t want to move the particles except if they are close enough from the object.
Direction
Next, we need to create a direction (this is the vector we want to the particles to be pushed). To create that direction, we just need to figure out what is the Source and the Target of this direction. You could imagine an arrow, the base of the arrow would be the Source and the spiky part would be the Target.
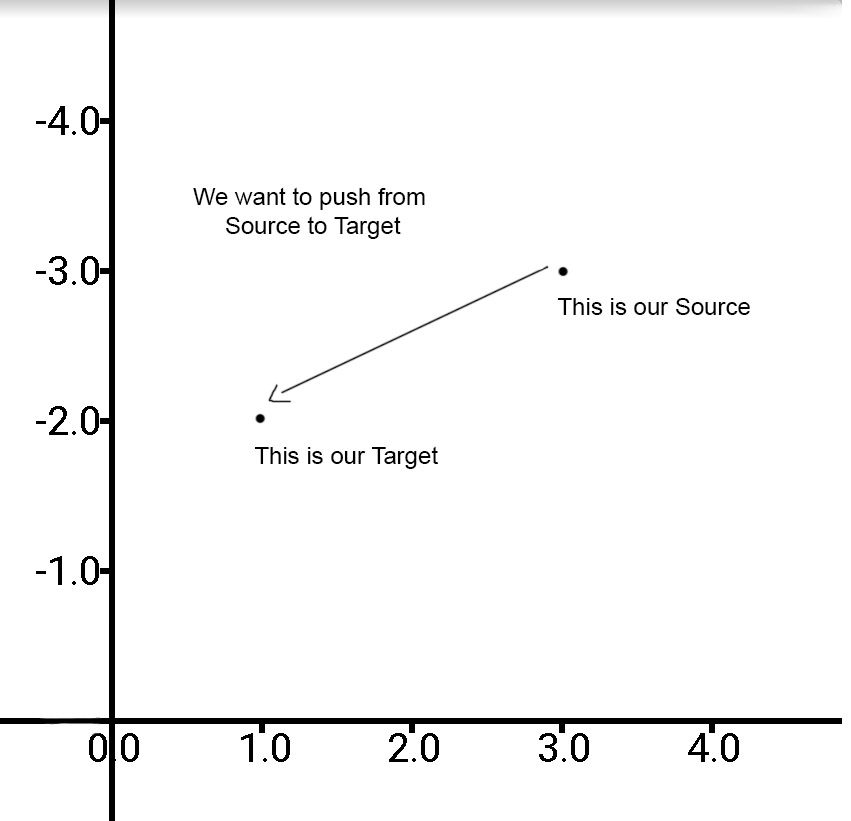
Note: This graph is in 2D, but same thing works for 3D.
We can define the Particle Position as the Source and the location of our object as the Target. Inside the Material Editor, when we are subtracting the Particle Position and the Location node (it is a parameter collector), we are creating a vector in a specific direction and, because we are using Particle Position, all particles using this Shader will benefit from this behaviour.
We just need to do one more thing before trying this in the scene. We need to update the position of the object in real-time, so we will create a Blueprint Actor. Thanks to this, the particles will react as if they are creating a path for the object.
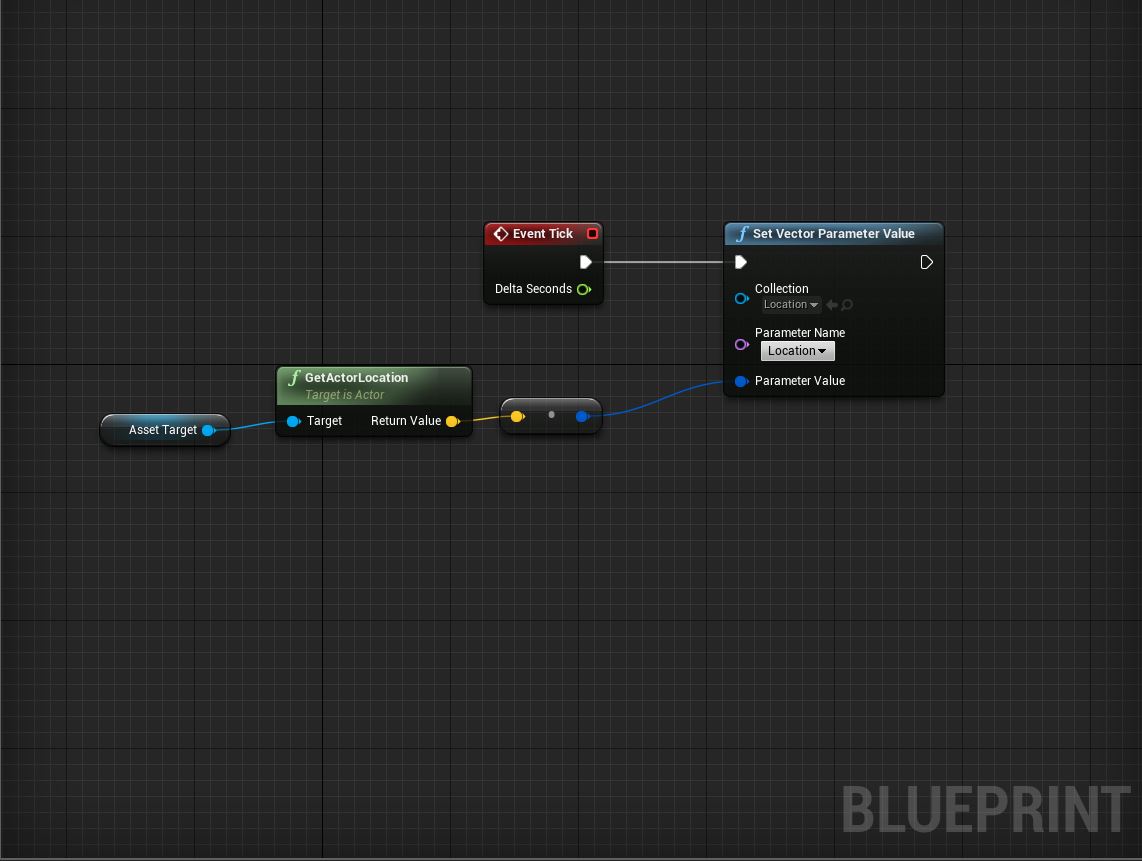
In this case, I created a variable (type = Static Mesh Actor) to get the location of the Sphere, but you can get the location from another object or Blueprint if you wish. You just need to change the type and select the specific object you want to use.
One idea to do the animation more interesting could be creating a timeline and a Timer in the Blueprint. For each time, the Timeline will start and create and impulse to displace the particles. You just need to update the Direction Intensity parameter we have in the graph.
I hope you like it and can be useful for someone. If you find this confusing let me know about it.
Keep the good work!