so I could get a deeper understanding of shaders and other nodes, and make a cool effect on the way. @TitanLeGrand posted a dope breakdown of the shader graph on his artstation.
While I dont have a problem with simply going through and copying what he did, and trying to reverse engineer it. I’d still like to know why what i’m doing isnt working haha.
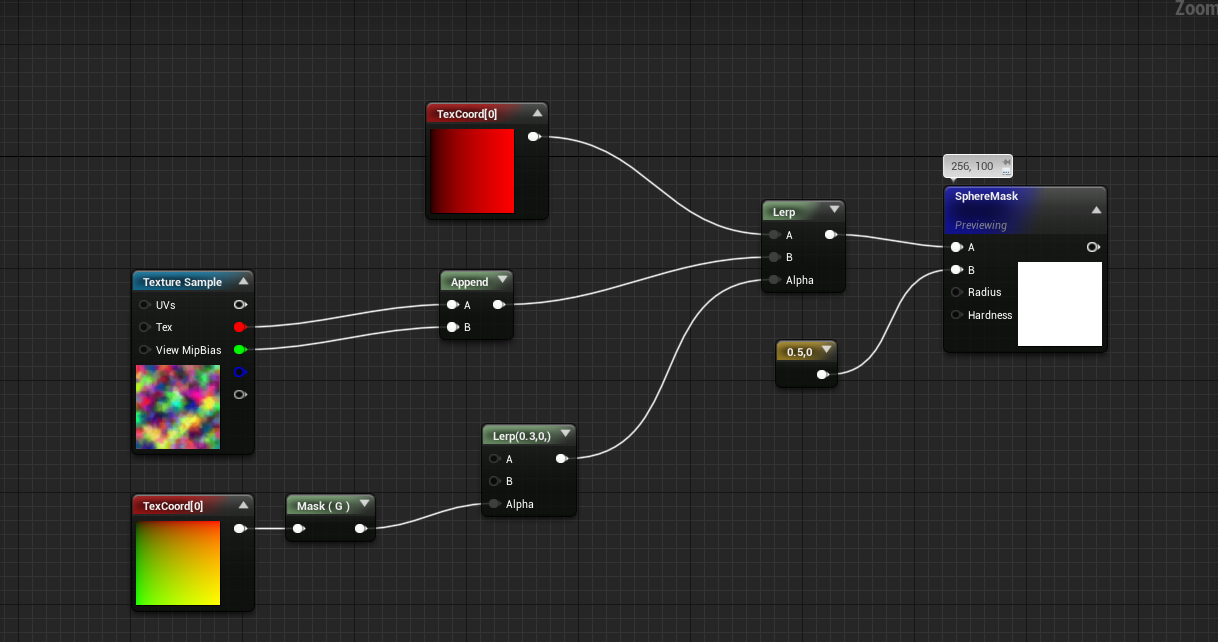
Right now, I’m starting from the bottom with this here.
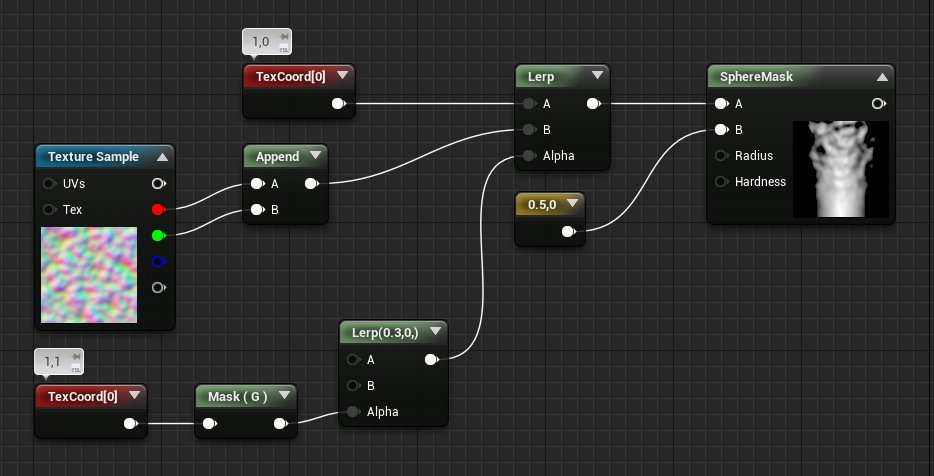
However its not, as you can see in the preview. I thought I followed Klemen’s example to the T, but it doesnt seem to be getting me the same result as his.
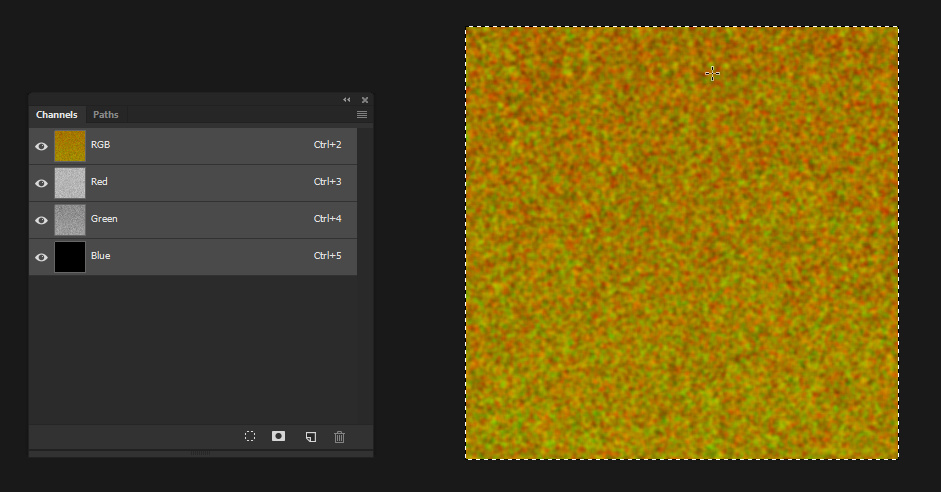
on thing i thought could be the issue, was the fact that his noise clearly loks like a normal map. He says its a UV noise texture (blurred noise in the Red and green channel) Maybe I’m misunderstanding then, because when I put noise in those channels, the result is the same. Heres the texture I tried using.
I guess the next thing I can try is just using a normal map with some random noise, and/or changing the compression settings on my texture to normal map.
Either way, could you guys give me a hand with this one? not sure what I’m doing wrong…
Also, not really sure whats happening here. I’m GUESSING that we’re subtracting the camera position from the object position so we can eventually get thi sjoker to always face the camera? but now i’m wondering…what is this yellow for?
It depends if your input A and B are simple Scalars or Vector2/Vector3. You can check the HLSL code in Unreal (Window → ShaderCode → HLSL Code).
In case of a Scalar input A and B, SphereMask will turn into:
(notice that I cheated with Hardness, because it will turn into these multipliers: hardness = 0, you multiple by 1; hardness = 50, you multiple by 2, hardness = 75, you multiple by 4 etc. and at hardness 100 it’s clamped at 100000, I’m too lazy to find the math equation for that )
That’s 2 easy. Think about it for a second. Don’t be distracted by the color. Read it as:
Camera Position (X,Y,Z) * (1,1,0) and it should be clear why you are doing this
Not sure i completely understand, but it sounds like, You get the above equation only if you’re using Scalars, and not Vectors. I guess that equation is how the sphere mask works then?
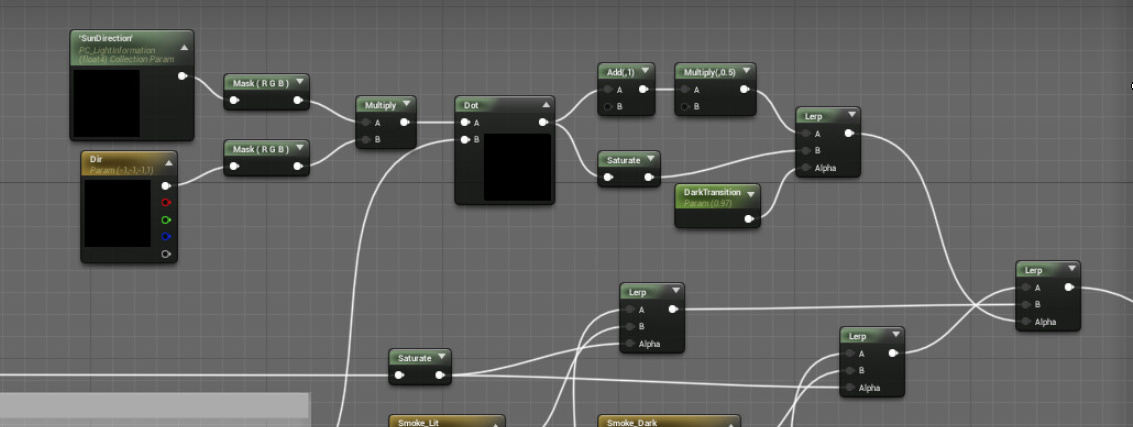
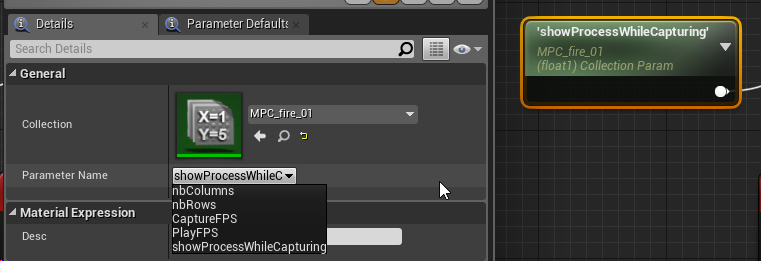
Also, not super sure what this part means. I mean I understand what its trying to do, but I dont think i get the Sun Direction node. I though it was a custom node at first, but i’m not really sure what it does…
Looks like a material collection node. Which you fairly easily can plug into blueprints and that way get the sun direction. I’ve barely used them myself but quite sure I did something similar for some cellshaded shader
Edit: Quite sure this tutorial covers the part about how to setup that in the first 5-10 minutes
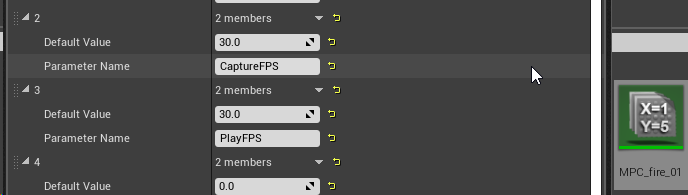
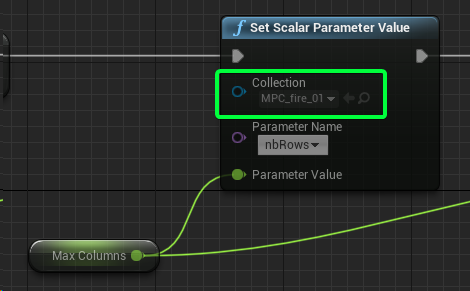
Material Parameter Collections are amazing to share global variables across all materials and blueprints. I’m using them right now for defining the FPS for the capturing (important for the blueprint) and playing (important for the material) of my fire-flipbook (which gets created during runtime).
First you create such a collection and define values:
I think I understand. When you use Material Collection parameters, You can set a parameter across multiple materials. I guess I’m having a hard time understanding in what instances you’d use it. Or for example, why its used in klemen lozars cloud test.
I followed the cel shaded tutorial, and it looks like, its used to gather numbers from the suns forward vector, where he then put the material collection into a dot node.
So i guess you’d just put that in other materials if you want that same “effect”?
I gotta take a second away from this to finish some freelance stuff, but i’m gonna be coming back to it.
In RIME we had a material collection which contained the “time of day” (brightness) and the “day color” (orange in the morning/evening, blueish over the day) which we used to tint our materials. We often used unlit/emissive materials to get a stylized feel to the VFX and needed to colorize our effects depending on if it’s day/night.
For that such materials collections where amazing! You don’t want to write code/blueprint which changes every single material one ofter another. The code just changed the daytime/color and everything was adjusted.