I’ve been wanting to recreate this specific effect for a while but so far have been kind of stuck on the initial moving in of the particles towards the center.
I feel like I may be missing something super obvious, so I decided to ask here.
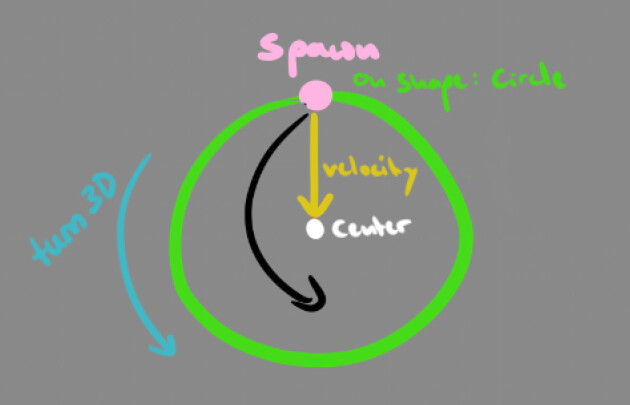
Essentially: I understand particles can be moved towards the center using -Particle Direction for the Velocity
and Rotate 3D on the Position to make them move in an arch.
So far so good.
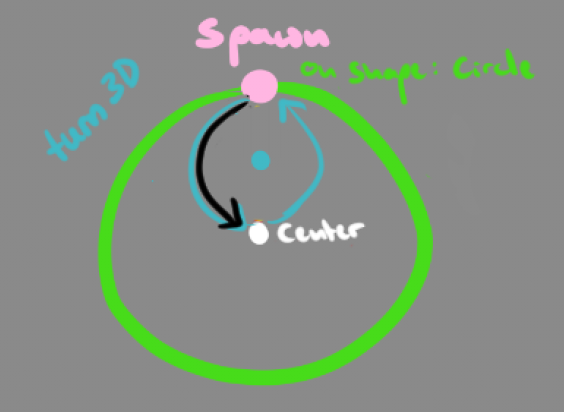
The issue comes from the fact that Rotate3D rotates everything around 0/0/0 right now and so my particles aren’t moving towards the center, but just pass by it. Makes sense.
So my idea was to (for every particle) move the center of the rotation to a spot halfway between where the particle is spawned and 0/0/0, so I could (theoretically ) get a nice arch towards the center.
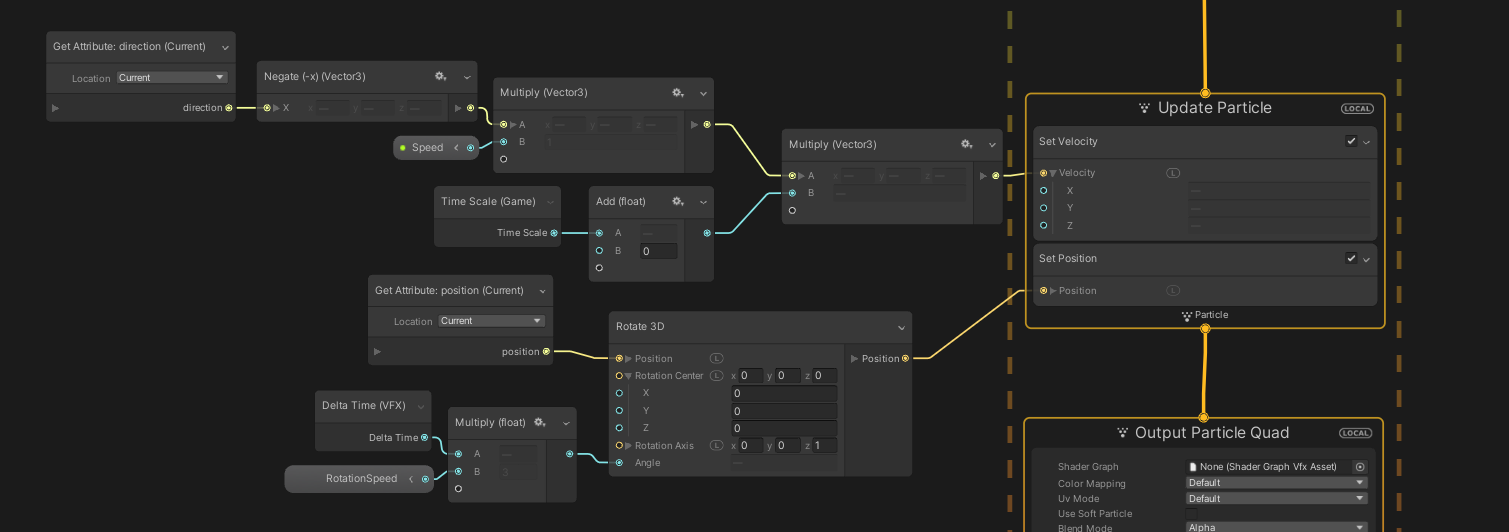
The way I thought this would work was this:
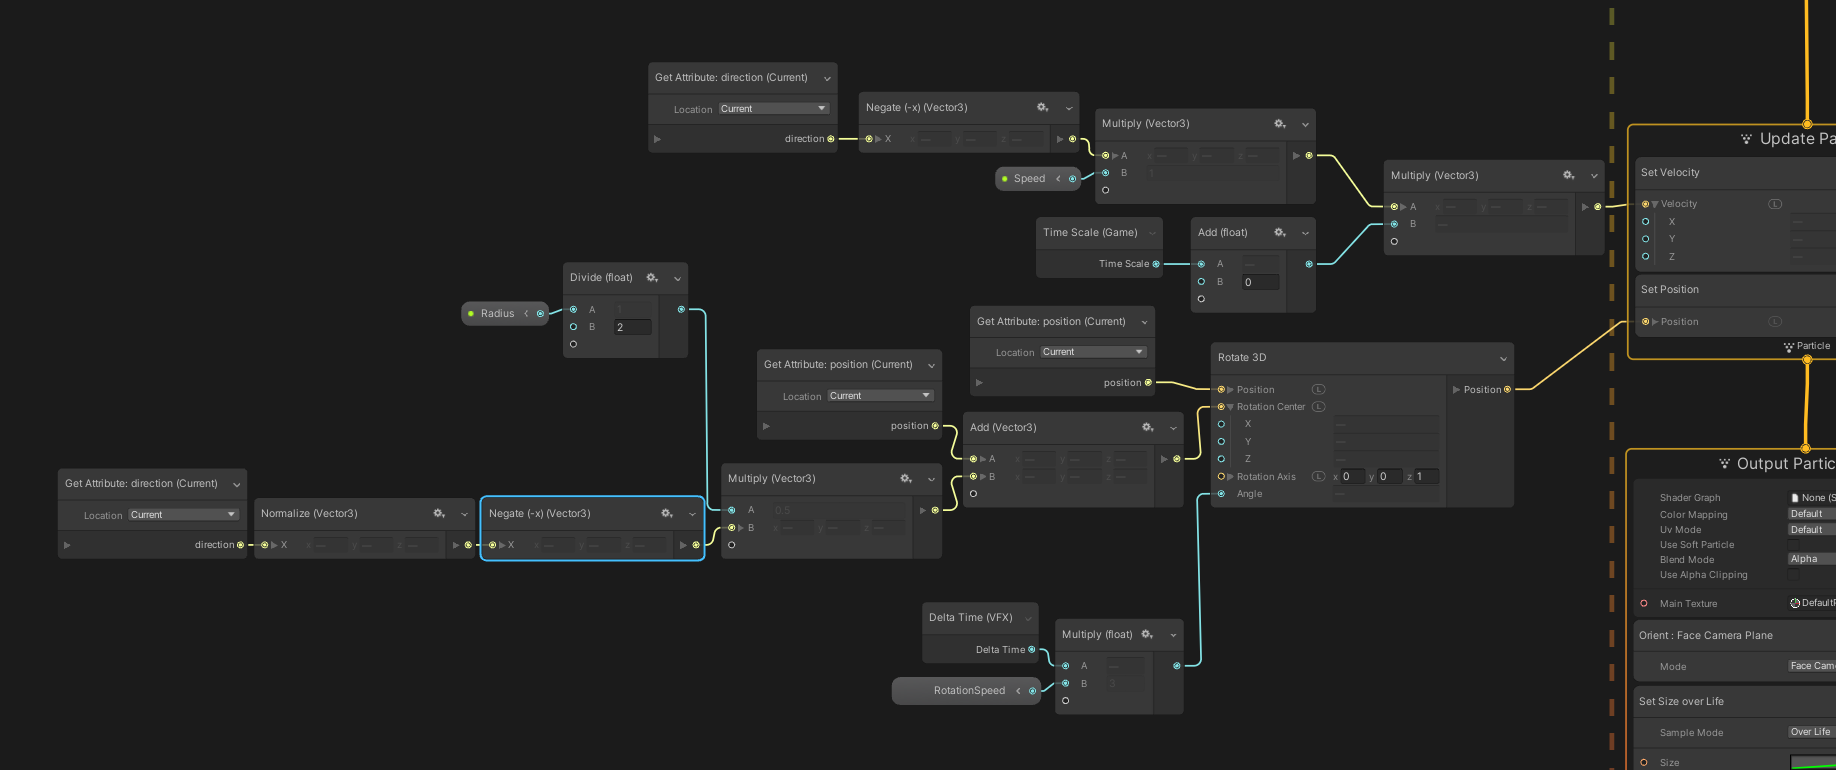
Essentially I’d get the Position of a Particle as well as the Negated Particle Direction Vector and the Radius of the Circle where the Particles Spawn.
Multiply the Negated Particle Direction Vector with half the Radius and then add that to the Spawn location of the Particle, so I can get the Point halfway between the spawnpoint of the particle and 0/0/0.
Then plug that into the Rotation Center of Rotate 3D.
So I’ve been fiddling with this and thinking a bit more and what I’m assuming is happening is this:
It looks like the Position (and Old Position) Node returns the Particle’s Updated Current position like every frame/second/somesortoftimeinterval.
Because of this, the newly calculated center of the Rotate3D Node is constantly updated and moved along with the Particle, which is probably why it’s now moving in a straight line instead of getting, well, rotated.
For this effect in particular, I can definitely get away with just putting in the Rotate3D center for each of the 4 particles by hand.
But this feels like kind of a cop-out and will also not work if I decided I wanted to make multiple, randomly placed particles have this behavior.
Is there an easier way to go about doing this?
Or is there maybe a way to determine the location a particle had at spawn?
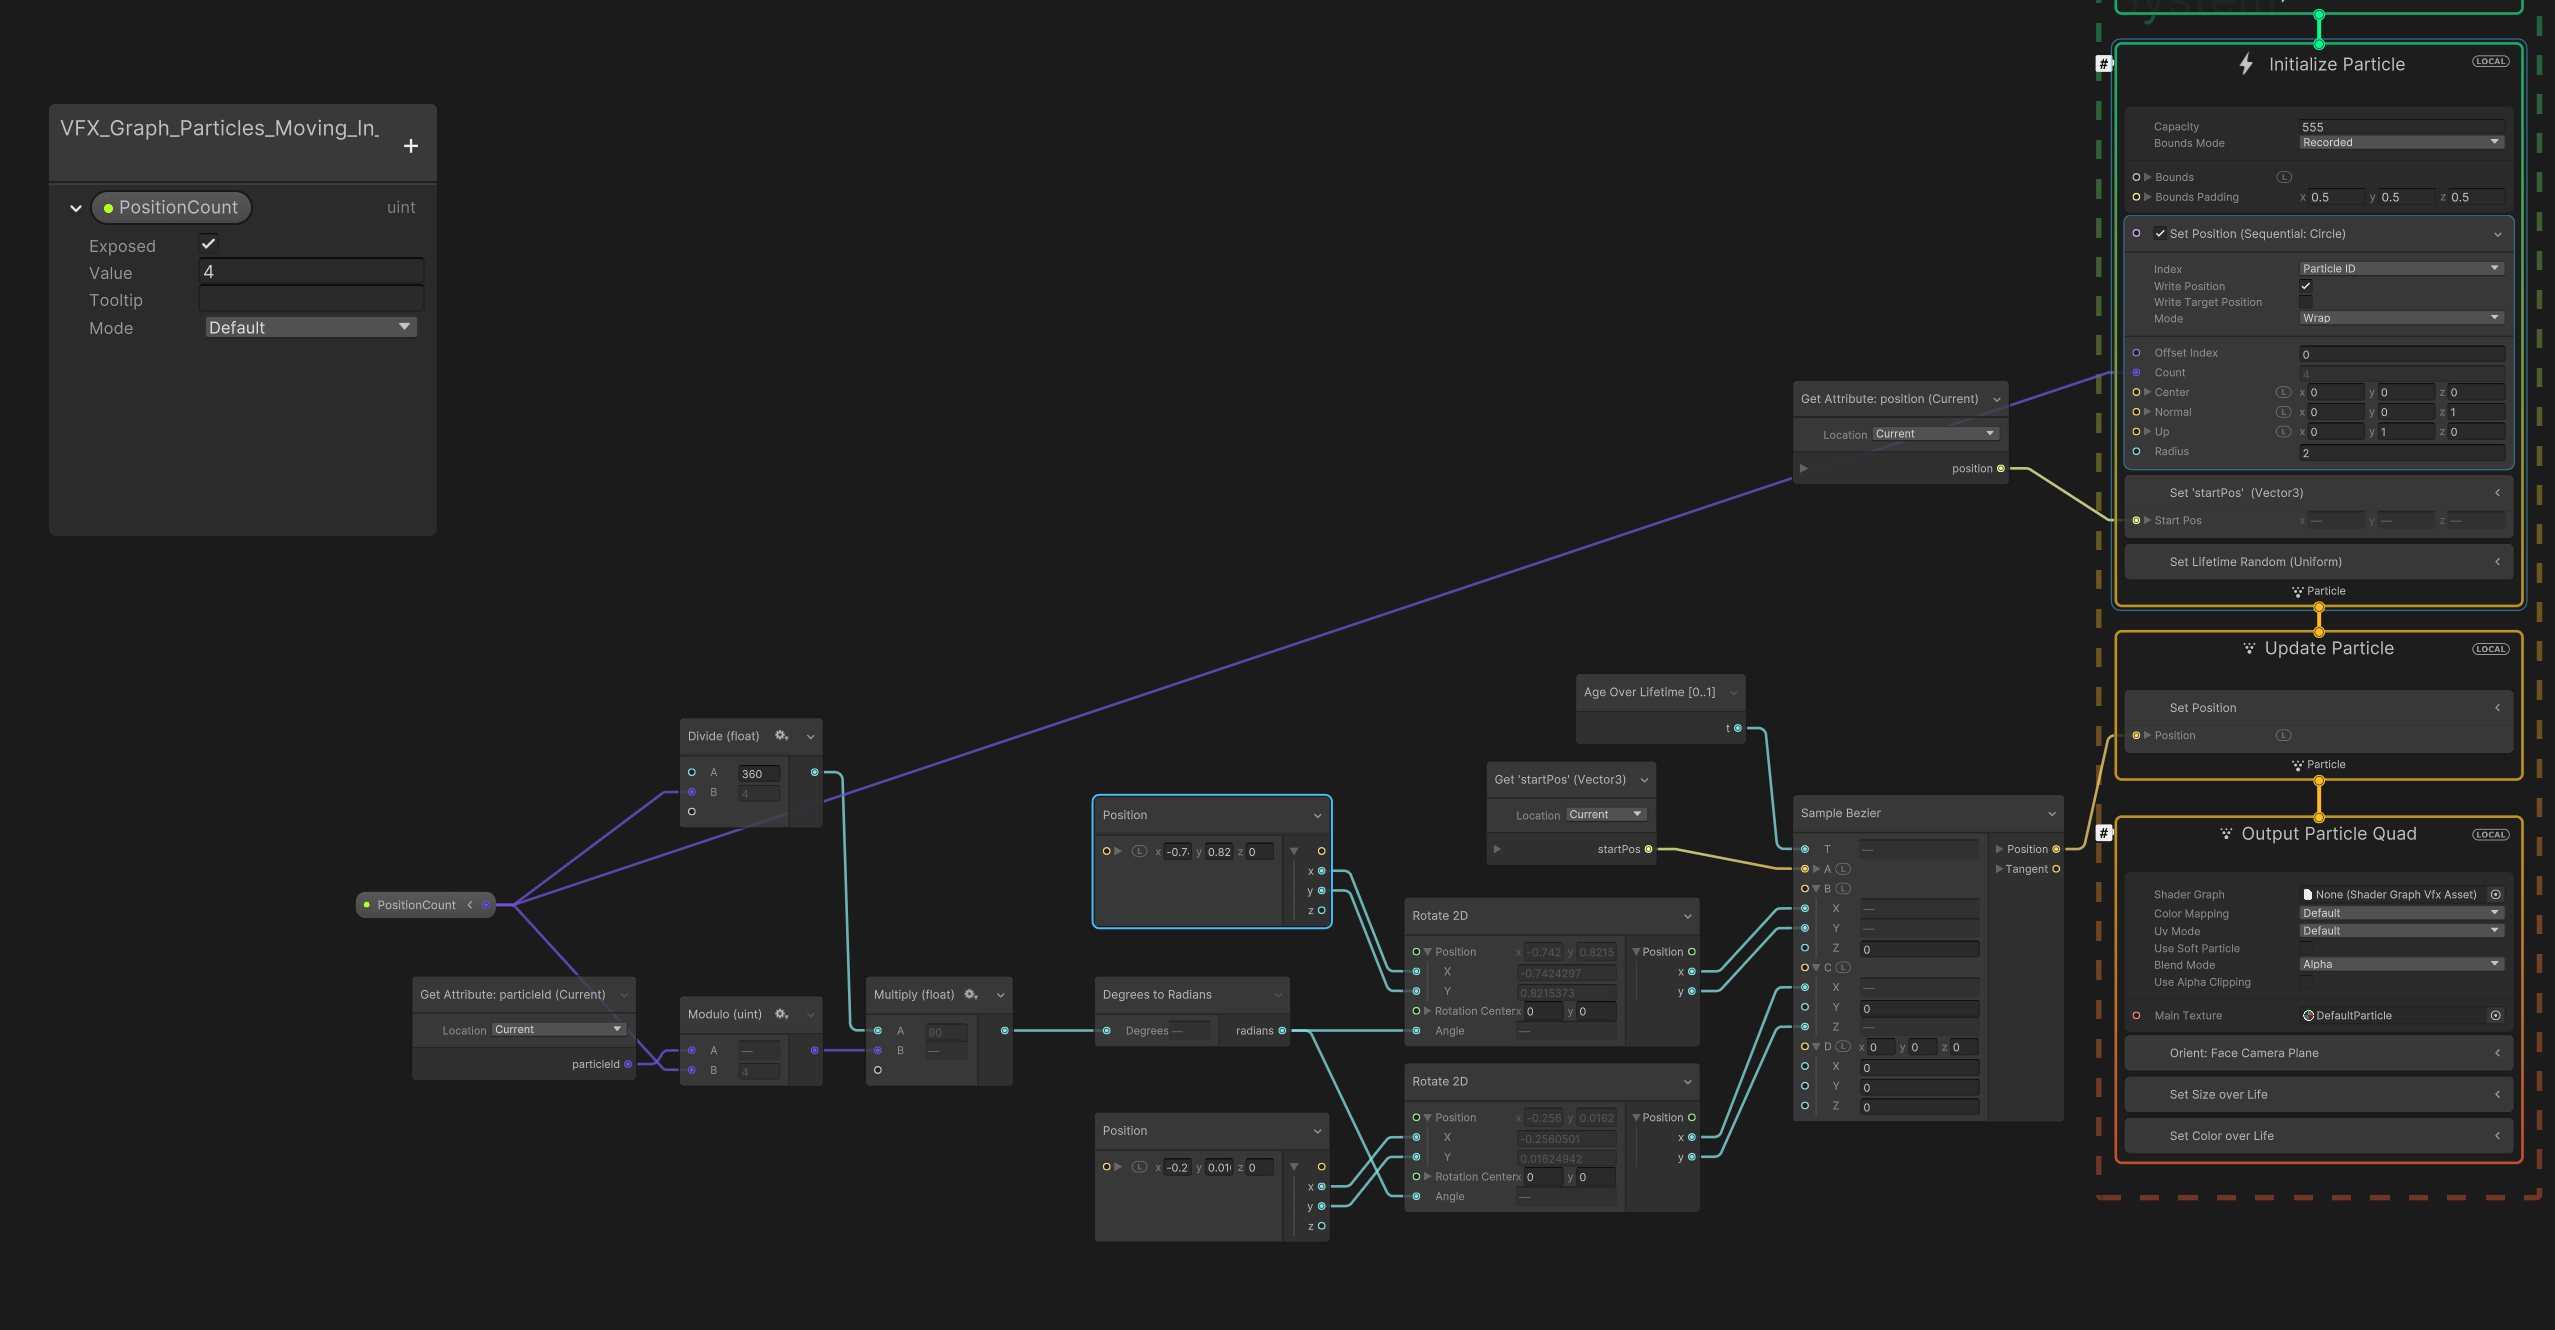
First we setup a CustomAttribute called something like “startPos” to record each particle’s start position.
Then we use the Sample Bezier-node to setup a curve that we’re happy with. Plug your new custom attrib “startPos” into the Sample Bezier-node’s A input - that’s the starting point of the curve. The D input of the bezier node is the end point of the curve, that should be (0,0,0) in local space. Now you can modify the B and C input bezier handles to make a nice curve. Hint: It’s easier to do that if you set the “PositionCount” variable to 1 to only get one “arm”. Another tip is to use “Position”-nodes, that way you’ll get a nice gizmo in the scene view.
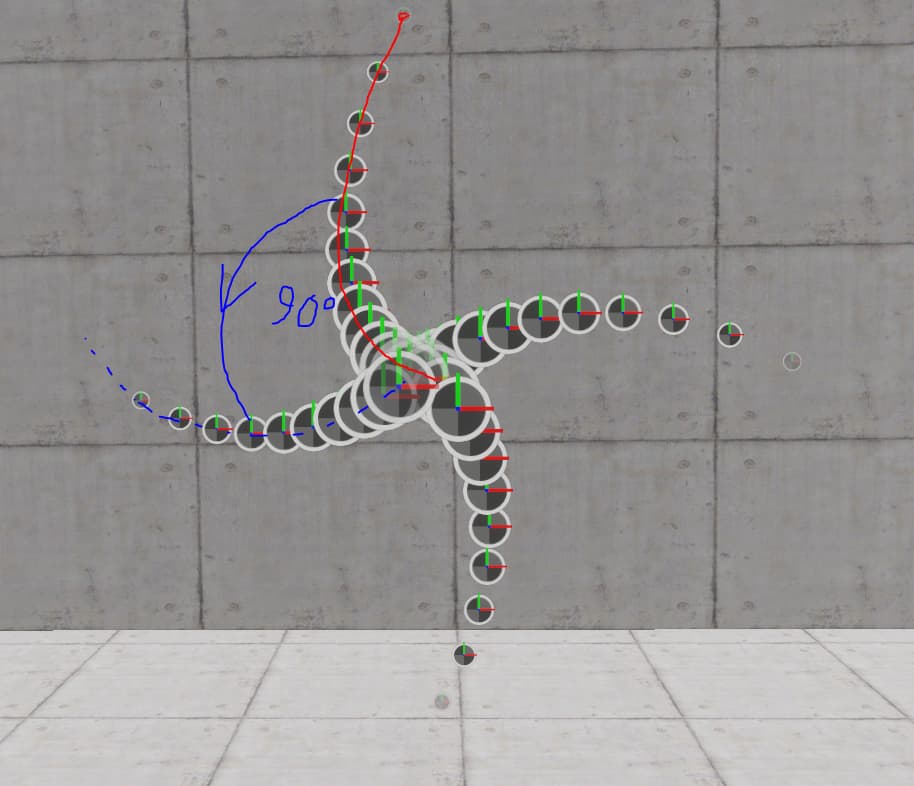
You only have to setup the bezier curve for one “arm”, because we’ll rotate it now.
Let’s rotate the bezier handles with a couple of Rotate 2D-nodes. Assuming we have 4 arms, that means we have to rotate each pair of bezier handles by 90 degrees four times to get the entire revolution. If we take the particleID through a modulo we get a number going from 0 to 3 repeatedly. Multiply this with 360/4 (the number of arms) we will get a sequence of numbers that are 0, 90, 180, 270 which we can input into the Rotate 2D.
No, I hadn’t figured out yet how to properly do this in a way that would remain properly scalable (instead, I’d hardcoded the positions of the rotation centers I’d need for all 4 of the particles spawned in at the beginning :’ D yes… I know.)
Definitely true when they say if your only tool is a hammer, then all problems look like nails.
I actually didn’t know you could use bezier curves inside vfxgraph. This opens up a lot of possibilities and is definitely a lot more elegant and easy to control than my approach!
Very glad to work on this effect as it’s been teaching me quite a bit.