How would you go about this? I’m using UE4, by the way!
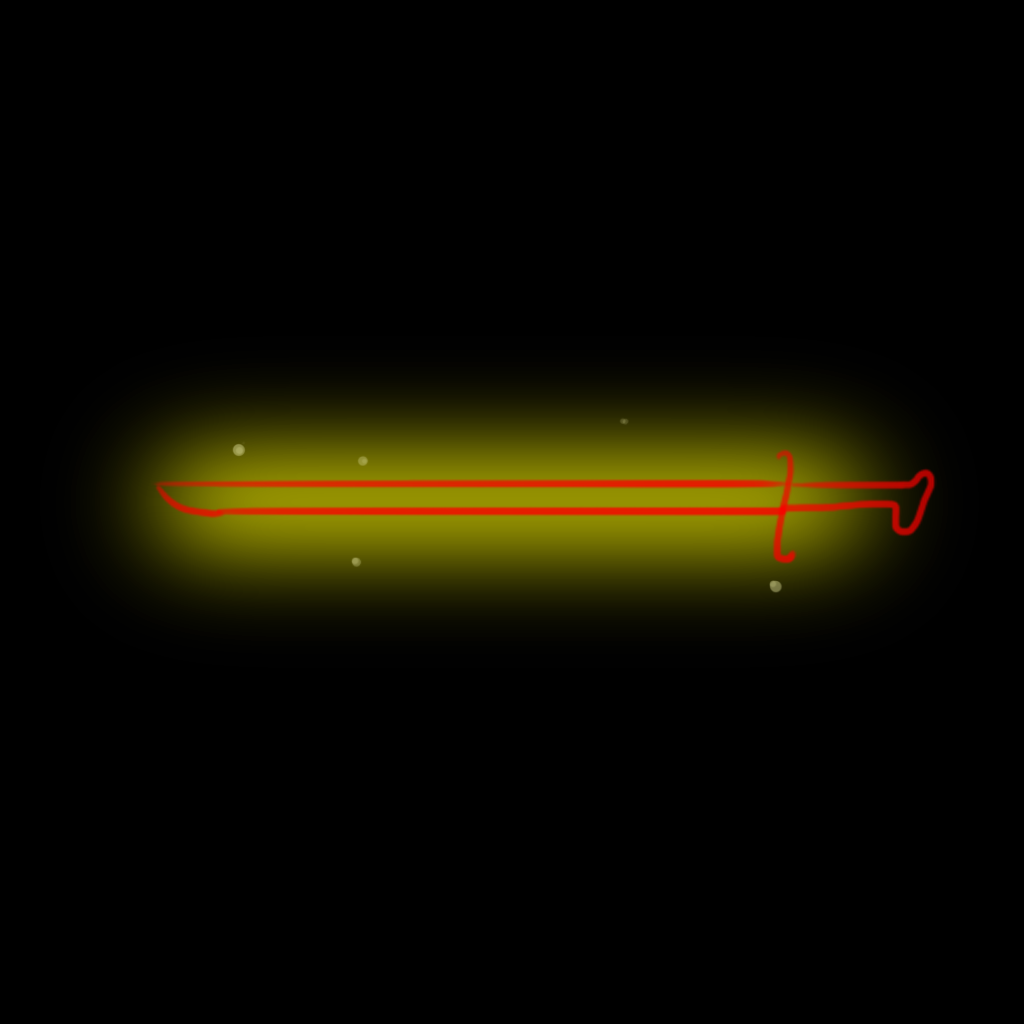
What I can see is that it is a mesh, but no matter how much I work on the material i can’t make it fade away so softly like that picture. I also have some troubles with the UVs, cannot make it look so smooth (I’m using a capsule primitive, but UVs come all squashed)
I know this is a lot, so to summarize…how’d you create a material for that kind of glow? or maybe its not a mesh and its a different method?
ANY kind of aid will help me a lot, thank you so much!
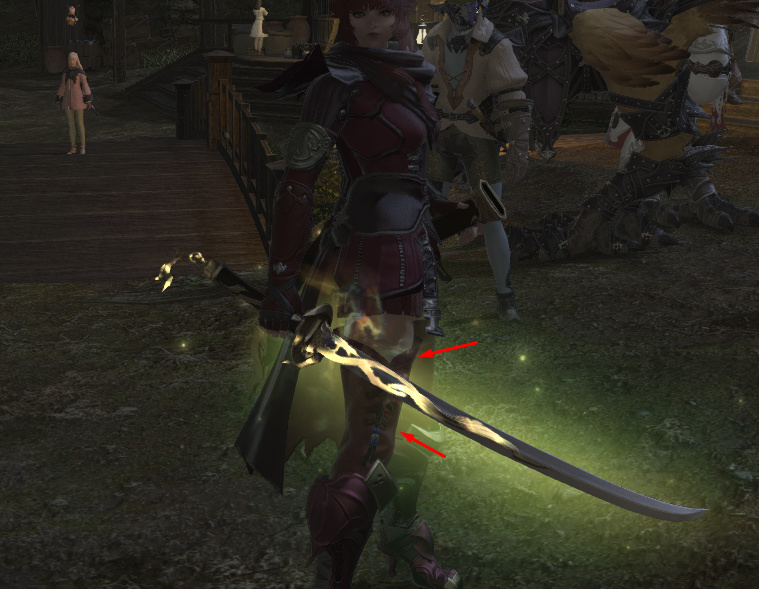
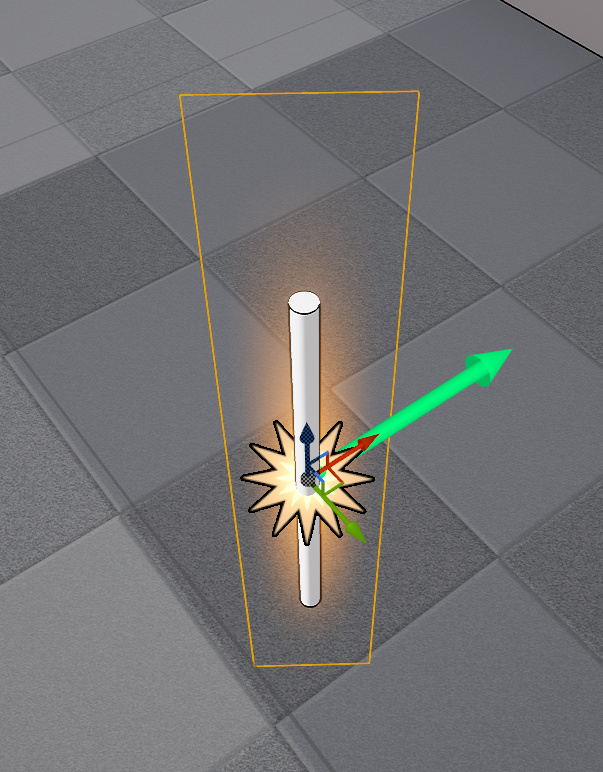
@b1ackt3a but if it is a plane, wouldnt you be able to see its edges when you pan the camera? or is there a trick you can use to avoid that?
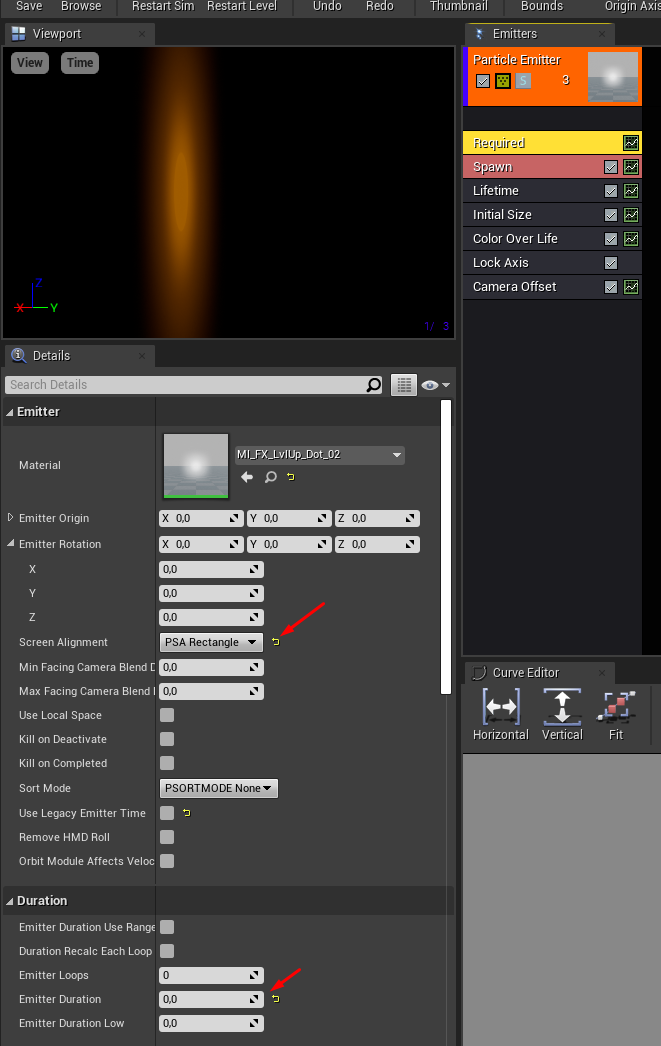
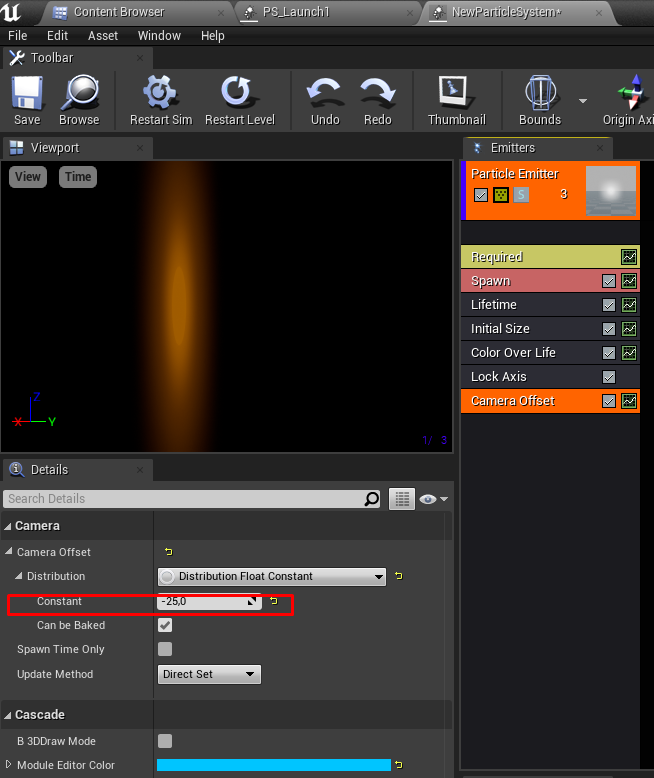
@valentin_pantyukh how do you add a negative camera offset? i tried making it a single particle sprite (no mesh) and whenever I panned the camera it would look very weird!
If you put the particle texture alpha/ color output in the opacity of the additive material, you shouldn’t be able to see the edges of the mesh since they would be invisible. If only the edge is visibile you can clamp the textures U and V in the Texture File. (i only know how it is done in Unreal) If you want the effect to be seen from all perspectives i would make the material two sided too.
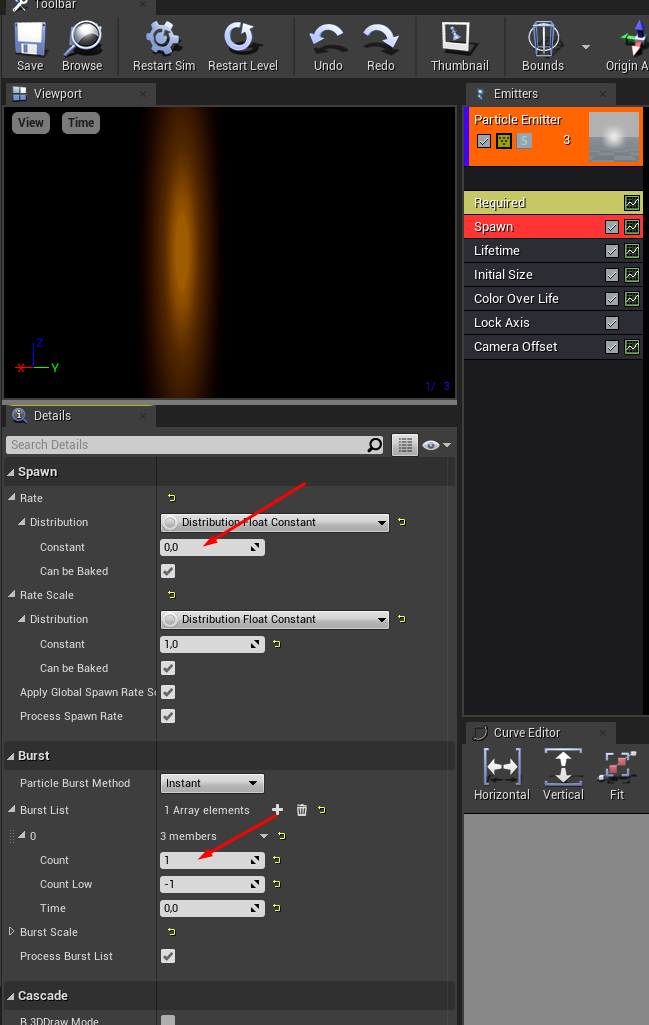
As valentin said, this example is just a particle Sprite and not a Mesh Particle since a mesh is not needed.
In unreal i would recommend using Niagara Systems. I dont know what program you are using to create the FX.
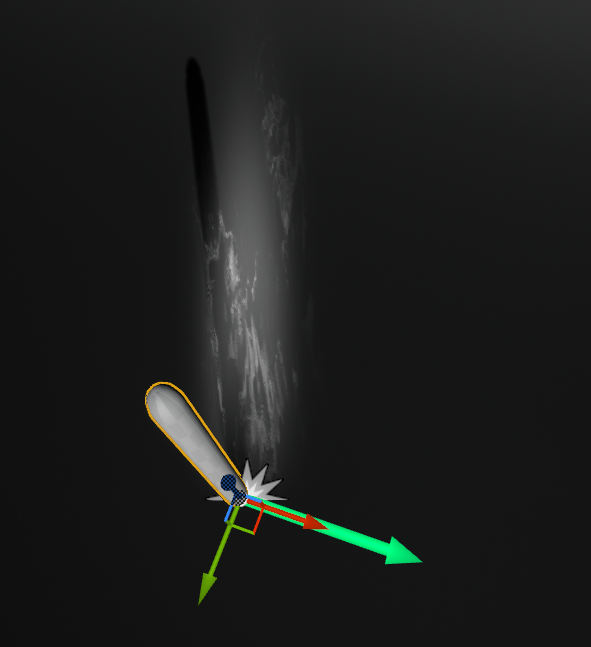
Breakdown of what i asume the Effect is consisting of:
Particle Sprite, Additive Material for Blade
Particle Sprite, Additive for Handle
Particle Sprite, Additive, with Erosion and Distortion for the Glowy white fog
Particle Sprite, Additive with high Value for the little particles
Additional Material Mask for the hilt,sword and little asset at the end of the sword to glow too
IMO: In unreal you can get the glow behind the sword by changing the sort order aswell, no need to add a negative camera offset
Take this with a grain of salt since i am unexperienced myself
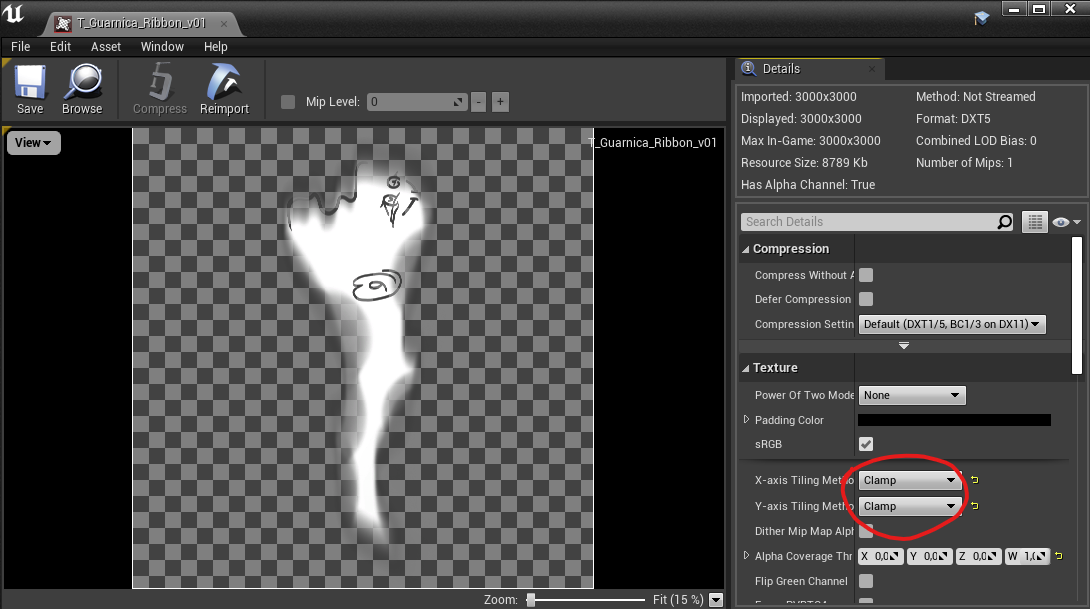
Please, be sure about your texture resolution - it must have power of two demensions. For example 8x8,16x16 … 1024x1024, 2048x2048, 4096x4096 and avoid this 3000x3000. Just notice
Hahahaha yes i know. I had some weird settings in Photoshop when i created this texture, thats why its so big and has such a weird number. But thanks for reminding me. I usually use 1024x1024 and 512x512, i don´t need higher resolutions since my camera distance is far enough away most of the time. Sorry for this faux pas
Can you explain the technical reason why you wouldn´t use resolutions that arent the power of two?
Do you have a link or resource? I have always avoided these measurments naturally and don’t even know why.