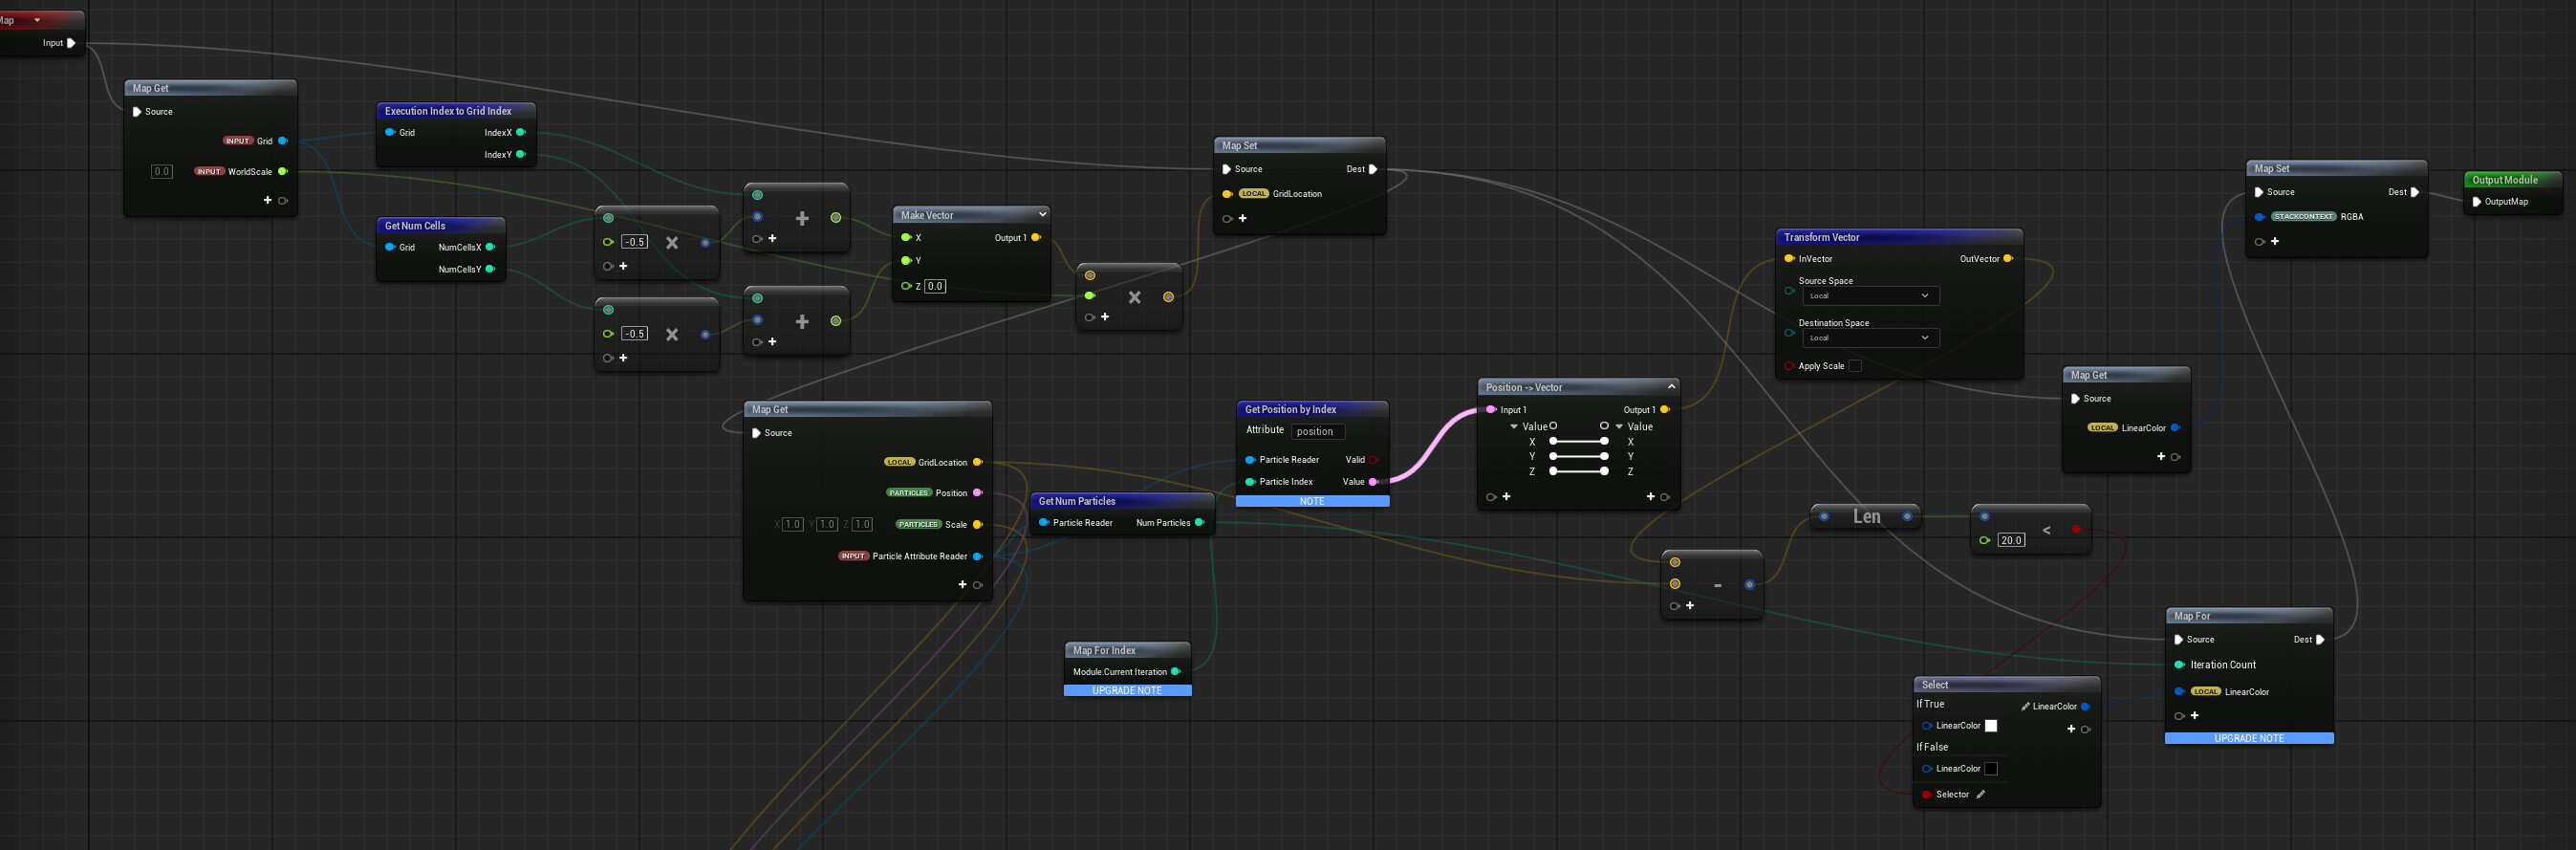
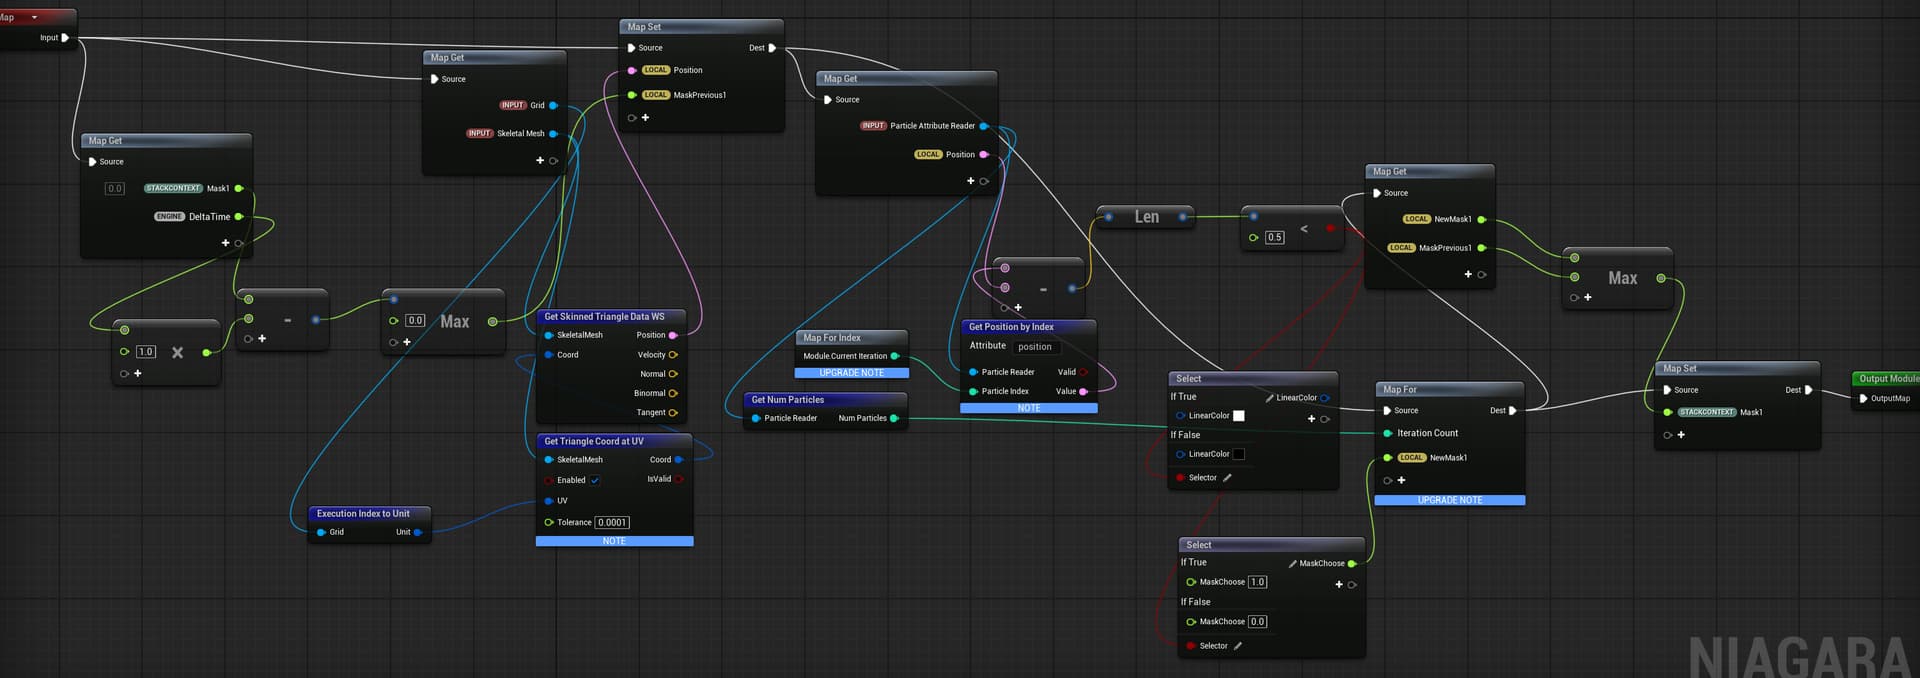
Hey guys, I’m new here! I’m working on an effect where I spawn water droplet particles on a skeletal mesh and have them drip down the mesh using a TraverseSkeletalMesh node. I got that working no problem, but I wanted to take it a step further and make each particle “paint” to a grid 2D system hooked up to the character’s UVs and a RenderTarget, that way each particle could leave a sort of stream as it flowed along the mesh. I’ve followed this tutorial https://youtu.be/3fW5xjiDm-A?si=q_SYIOugWcuVguPC which covers a similar concept, using particles from a blueprint to paint onto a grid2D texture, but I haven’t been able to fully adapt the system to what I need it to do. Essentially, because I have my particle positions handled in my emitter, I’ve tried to use that to get the locations of each particle with a particle attribute reader, but the end result has a bunch of dots of various sizes appearing and disappearing very quickly, only one at a a time, none of which seem to move, and they all spawn in roughly the center of the Grid2D, which doesn’t seem to match my actual character’s UVs. Any help would be greatly appreciated! I can share more information on the setup as needed. I tried to hide some of the redundant nodes from my testing in the picture provided too.
I should also mention, I’m doing this for a rendered cinematic in pathtracer, I don’t need it to be super performant or anything, I just need the effect to look good when I press the render button, and my current thought process is to take the RenderTarget and add it to the character’s material to mask in areas of low roughness and maybe add a bump to the character material, but obviously i need to find out how to fix the Grid2D not drawing particles in the way I had hoped first!
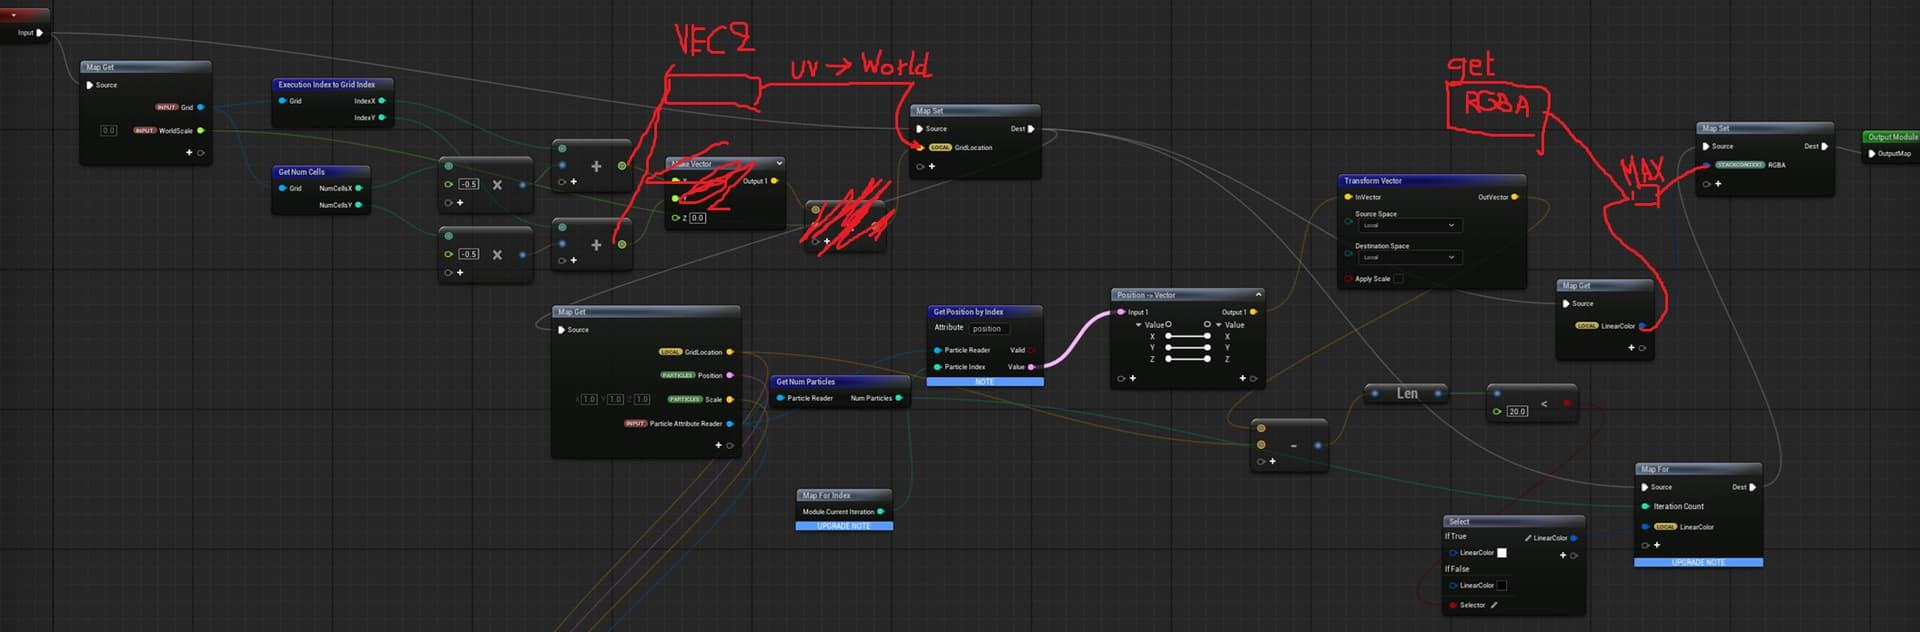
My first though is that the world position you’re finding isn’t actually based on the UV of the skeletal mesh. Instead you just seem to be making a flat worldspace xy grid (so you’d get results as projected onto the floor plane [ish ])
You’ll probably want to use your grid index divide by your total grid size to make uv’s to sample on, then convert those into world positions using the skeletal mesh data interface (I vaguely remember it having that functionality). Now you have a position you can test against using your particles world positions.
The other thing I’d be suspicious off is that you’re currently writing your resulting value into the stack context RGBA values (so it overrides any existing value the grid 2d might have held) so unless you have some way to combine this with values already existing in your RT you’ll just be removing the result of your previous frame’s tests when writing the current results.
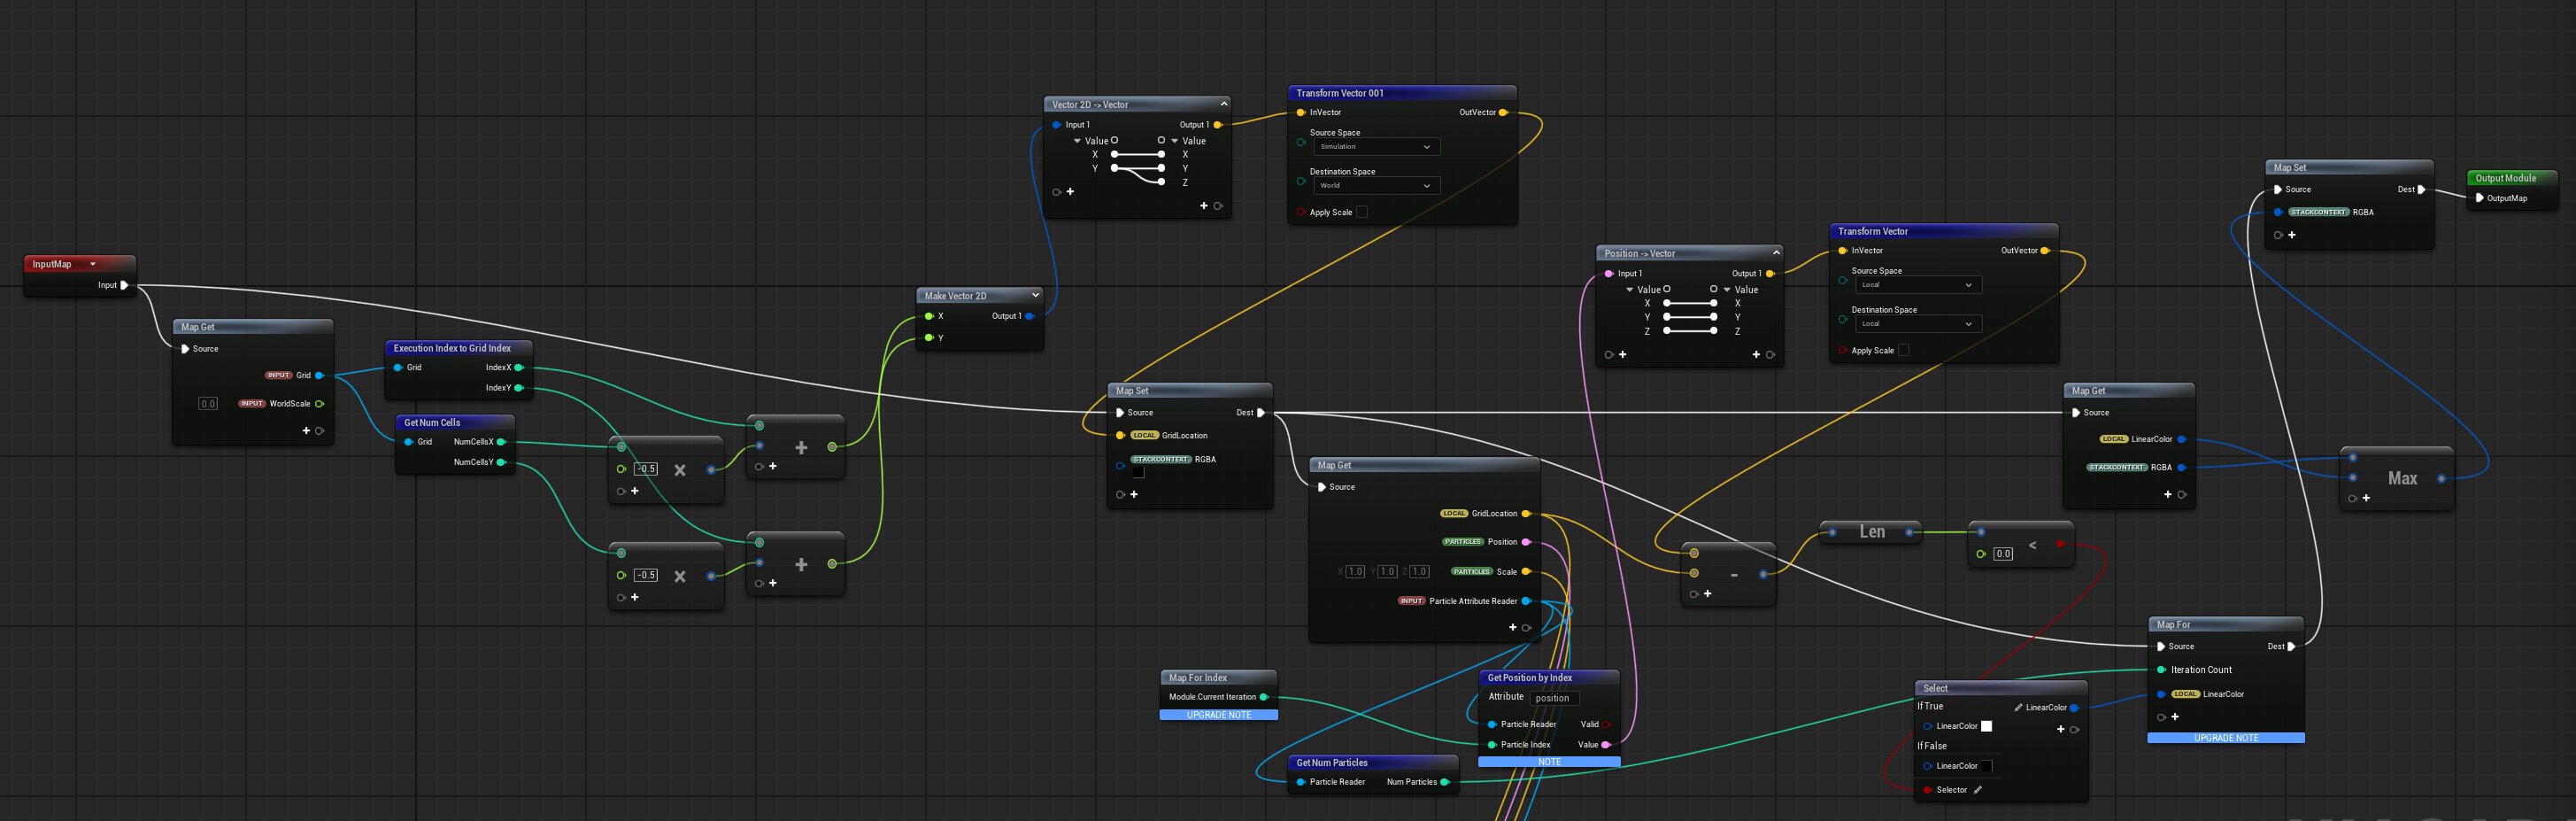
Thanks so much, I think your right, I had a similar suspicion about the UVs being mapped to a flat worldspace grid. I just tried what you showed in your drawover however and its still doing the same thing, I don’t know exactly how to do the skeletal mesh interface thing you mentioned either, definitely a consequence of being pretty new to this haha, I’m trying to look into it but I’m not sure exactly what to look for.
Interestingly, when I take the max at the end like you suggested, the entire rendertarget lights up. I tried setting the RGBA to pure black before running the for loop, that way its defined and can actually be pulled from when using the max operation, but it seems to work better without it for some reason. Im not sure exactly why it lights up like that, I tried setting the scale of the particles in the distance calculation to 0 to see if its just that theres so many particles that are all too large that the entire thing gets covered, but even after that adjustment it stays completely illuminated. I may have also just set up the nodes for it incorrectly, I’m not sure The rest of the systems operations are a 1 to one match of the one in the tutorial I referenced this from. This is the only scratch pad module I’ve adjusted to try and fit my system specifically.
yeah I think like this all grid points will be inside a super small 0-1 unit square right? So maybe that’s what it’s fully white at all time?
Bit hard to say though
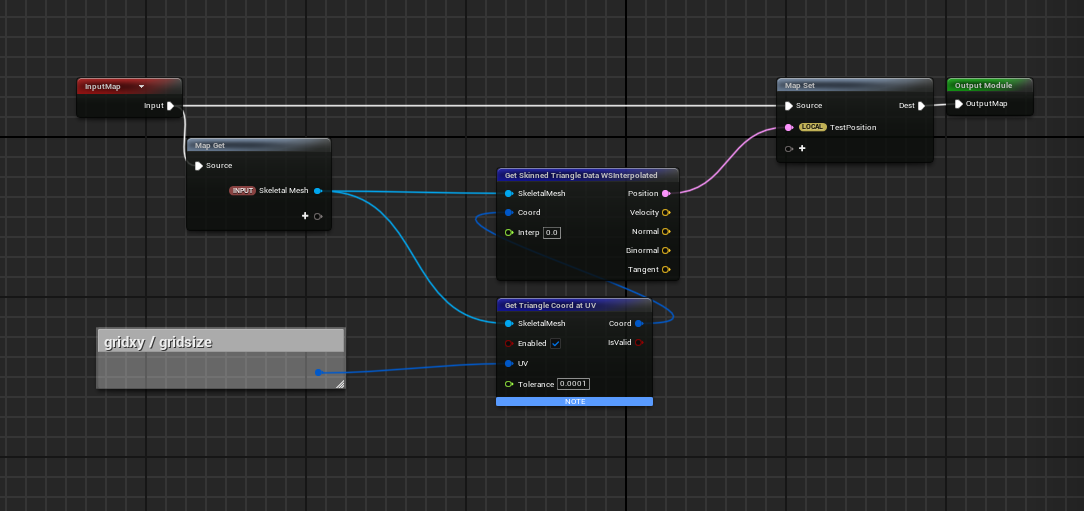
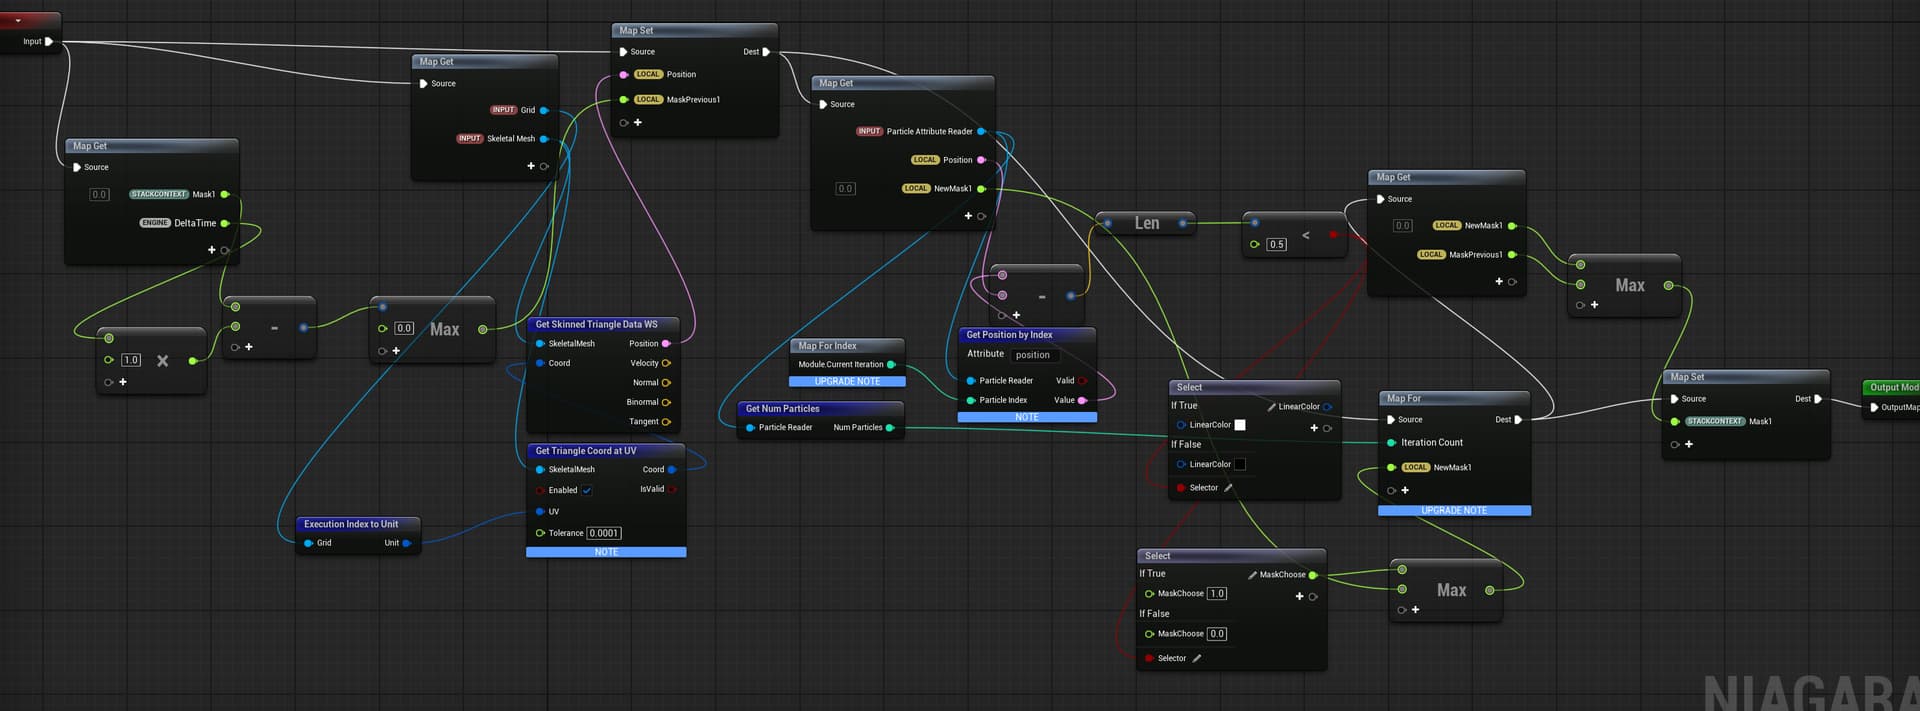
I think the ws fetch will be something like this probably.
Essentially, we’re constructing grid uv’s by dividing the current grid index by the largest possible index.
then using the SK di to find a tri coord for that uv, which we can then convert into position with optional frame interpolation.
Thank you for this! This helped a lot! I’ve done some tinkering and I’ve got the particles drawing on the mesh now, with the UVs working properly and everything! For some reason though, it only likes to sample the last particle spawned, and it doesn’t sample any of the other particles. It looks like it can only sample one particle at a time? I’m not 100% positive. If I set the particle spawn rate low enough to make sure only 1 particle is ever on the mesh then it works as expected, but I need to figure out how to make sure it samples all particles before outputting the mask float, at least that’s my understanding of what needs to happen.
As I was writing this I figured it out!!! Thanks again so much for all your help, this genuinely wouldn’t have been possible without your help! Here’s the final node setup! One thing I did notice is that the particles don’t handle high speeds very well (It paints a circle around the particle’s exact position each frame, so if it moves too quickly it makes a sort of dotted line) but that might be fixable by pre-baking the particle sim in the sequencer, I’m not too sure yet and will need to do more testing)
Performance is not a concern, especially as I plan to use pathtracer for rendering. I’ll experiment with drawing multiple circles by storing the previous position of the particles and see if I can use the current and previous positions to calculate an inbetween. I’m not sure exactly how to pull it off yet but I think I have an idea, thanks again!