Help creating additive shaders in Amplify Shader Editor

Hello! :wave: First of all, i want to say a few things: I’m not a native english speaker, so i apologize for any mistakes; and i’m a total newbie in VFX and in forums (this is my first forum post ever!), so sorry if this post is unnecessarily long or lacking something.

Well, as I said, I’m a total newbie in this field, so I stumbled upon an issue while trying to make a basic additive surface shader following SirHaian’s tutorial on making sparks in Unity.

My problem happens when adding the particles to the scene. After creating the particle system and adding the texture I previously made in Photoshop, the particles appear with a black background, even though I managed to follow the steps of the tutorial for creating an additive shader correctly (or at least I think I did :sweat_smile:)

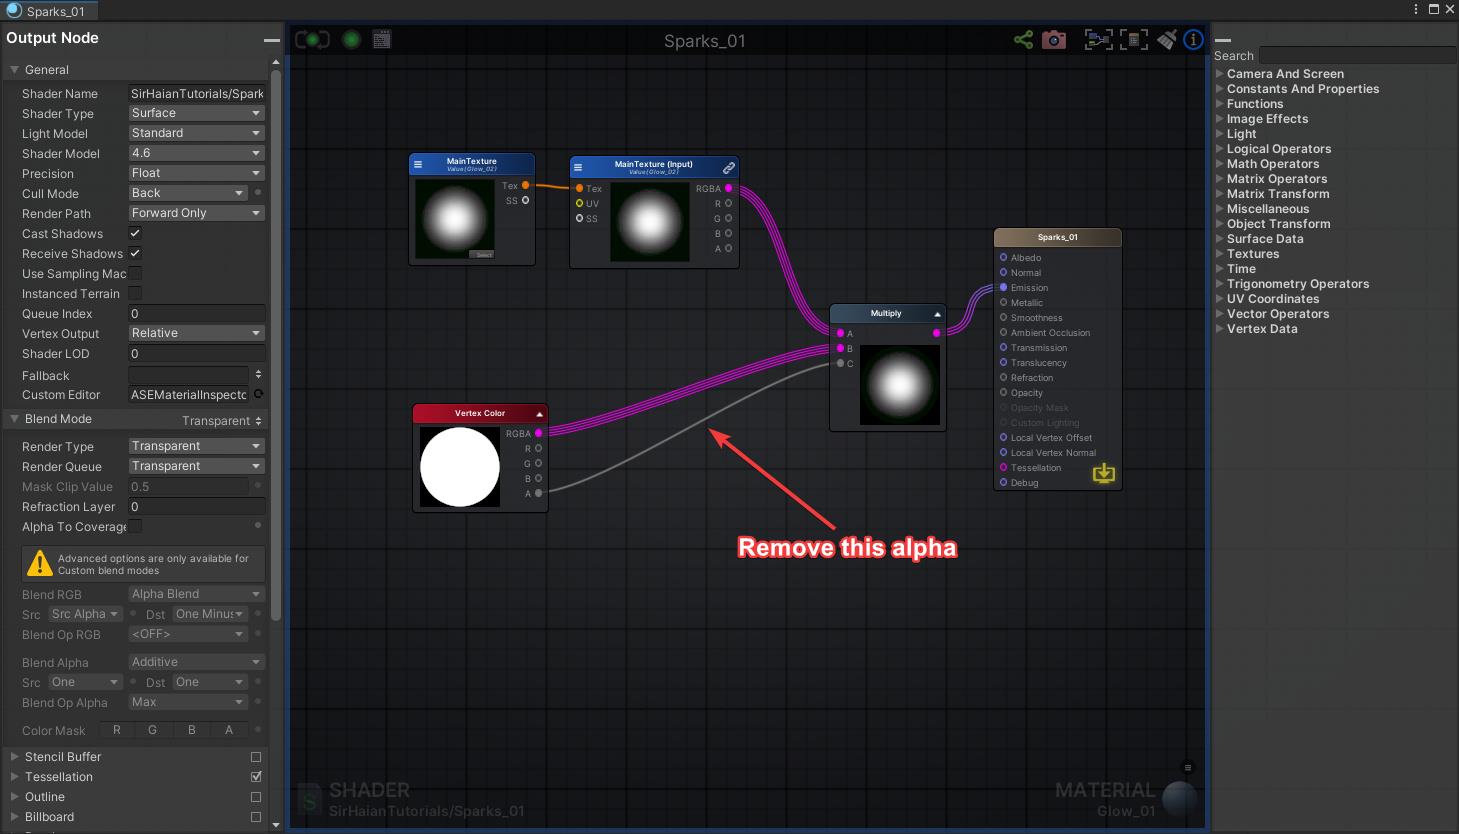
My first ASE settings when i encountered the issue were these:


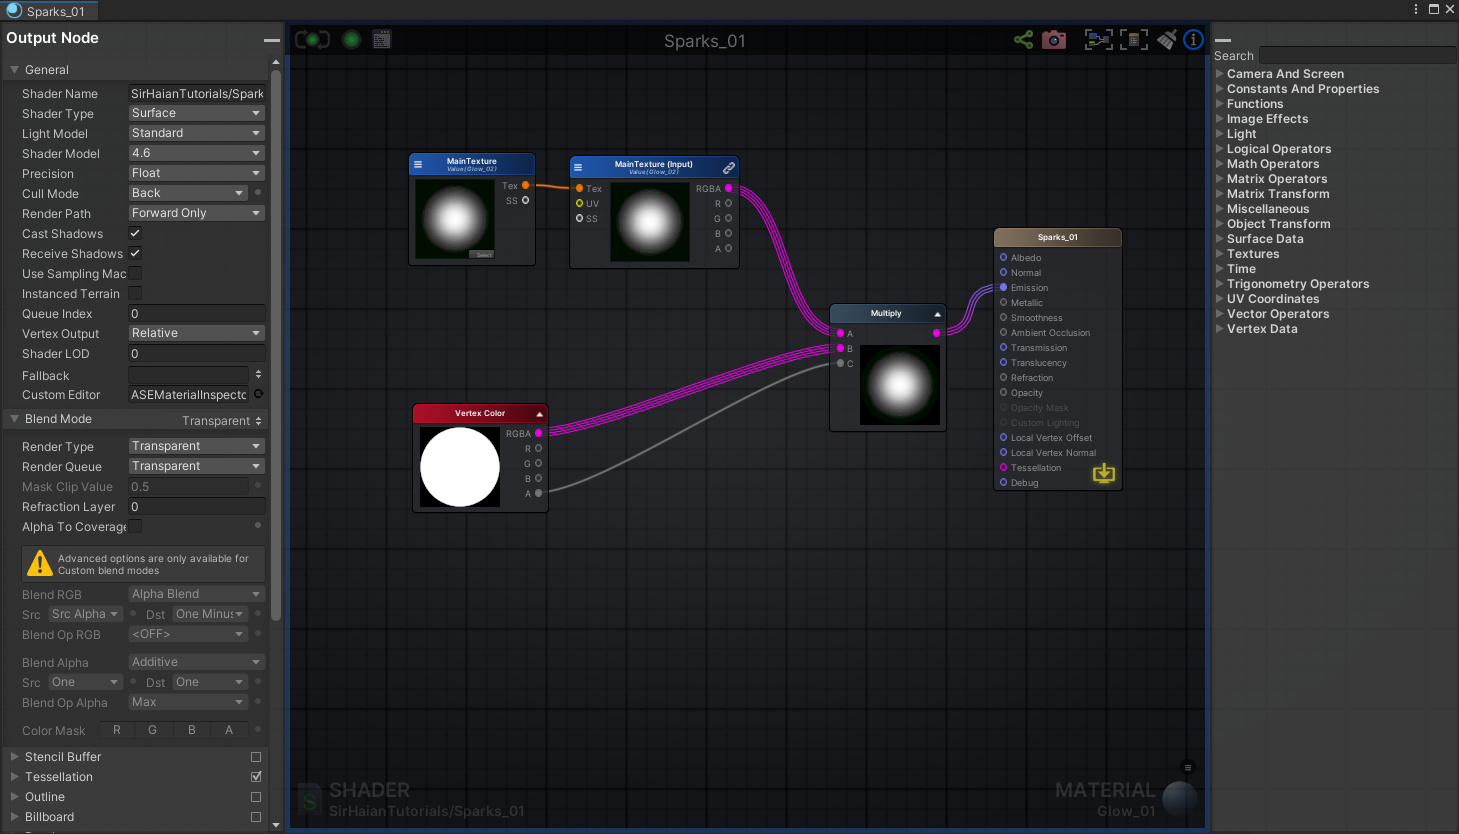
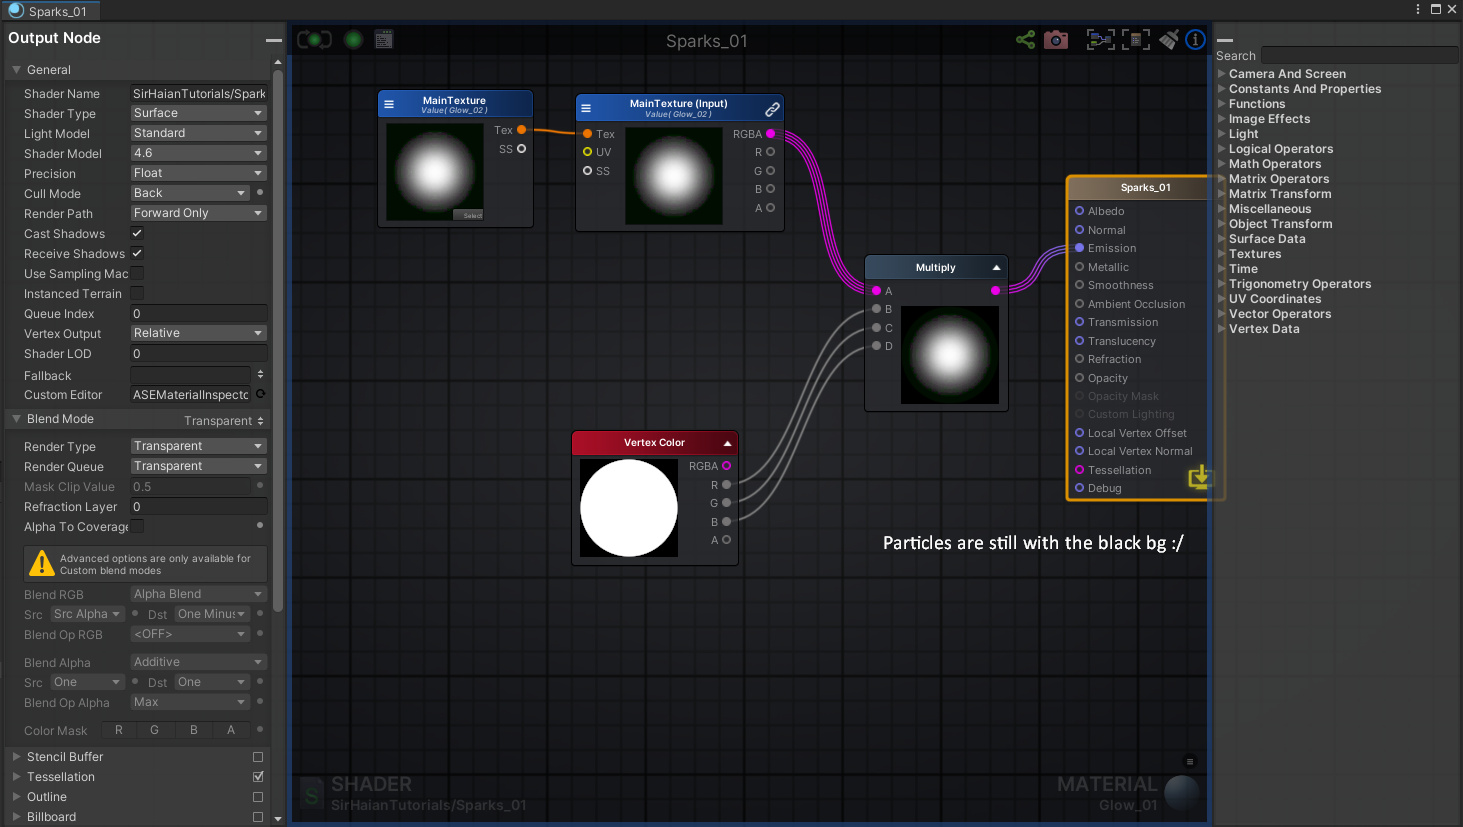
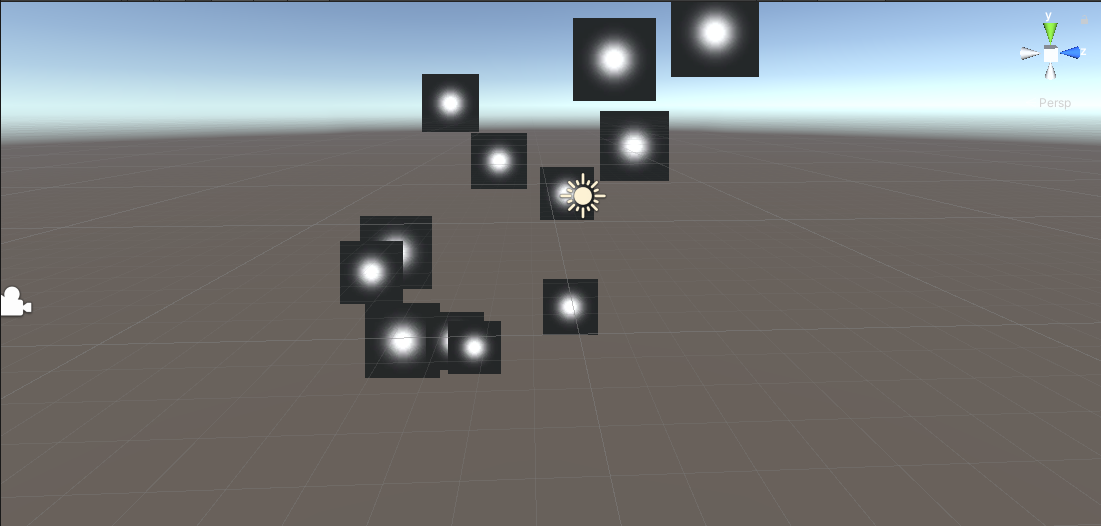
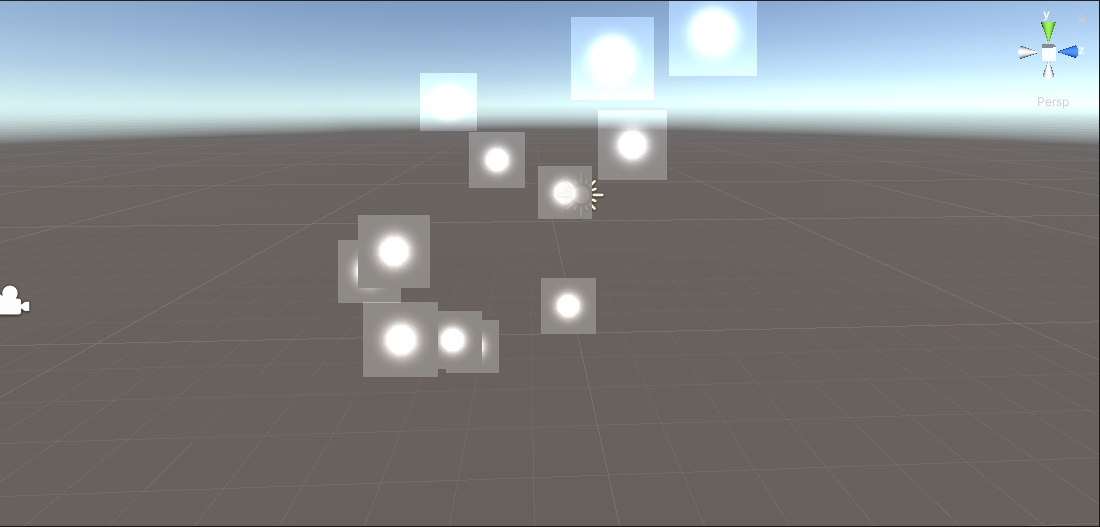
The results i was getting from these settings were these:

Then, after a really long time messing with some parameters, i figured a way to make the background of the particles transparent, but not quite the way i wanted it to be.

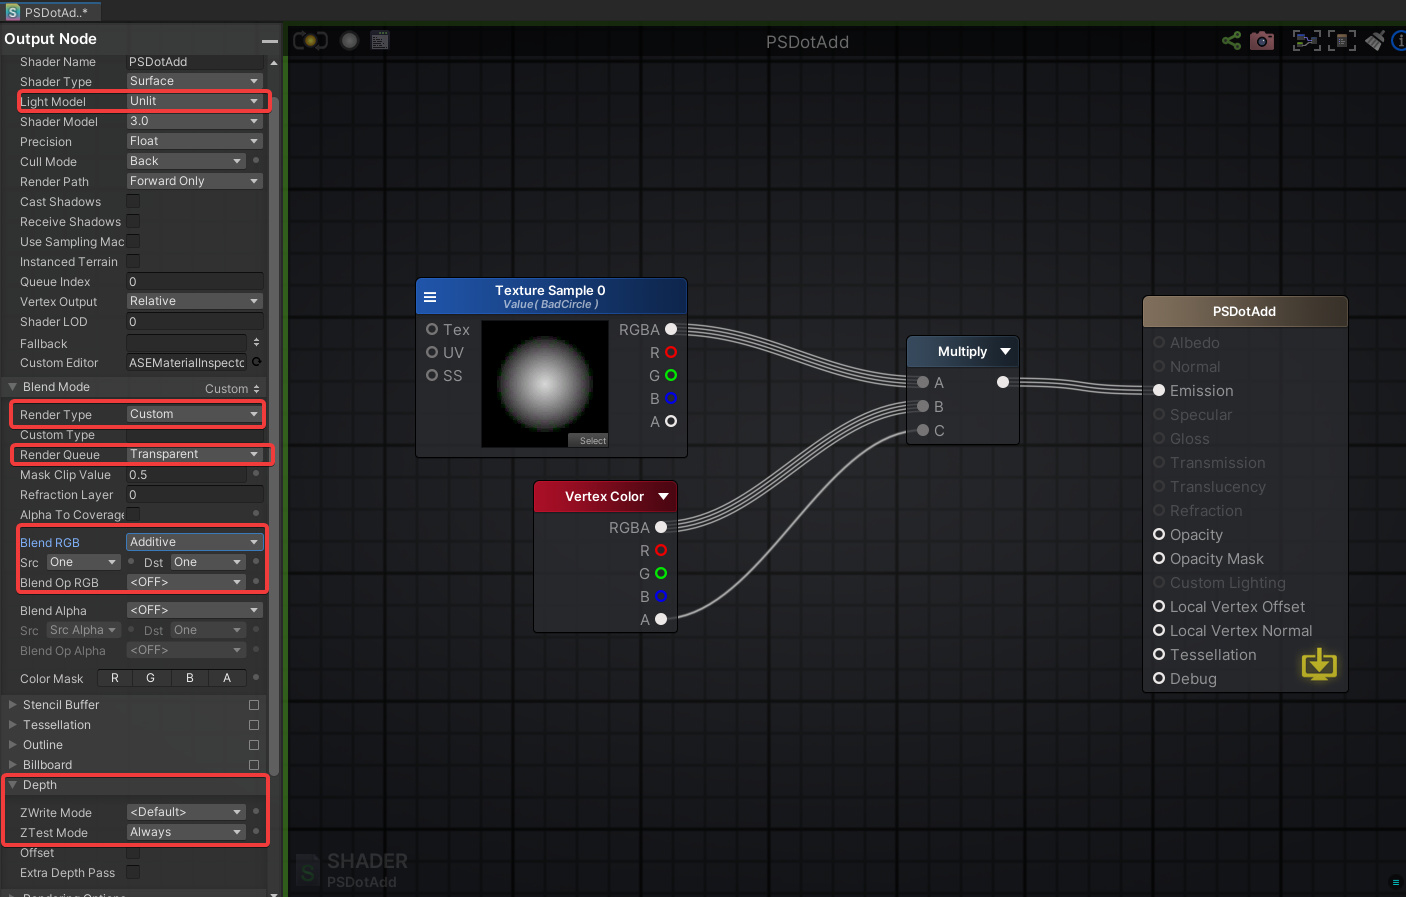
These were the settings i used:


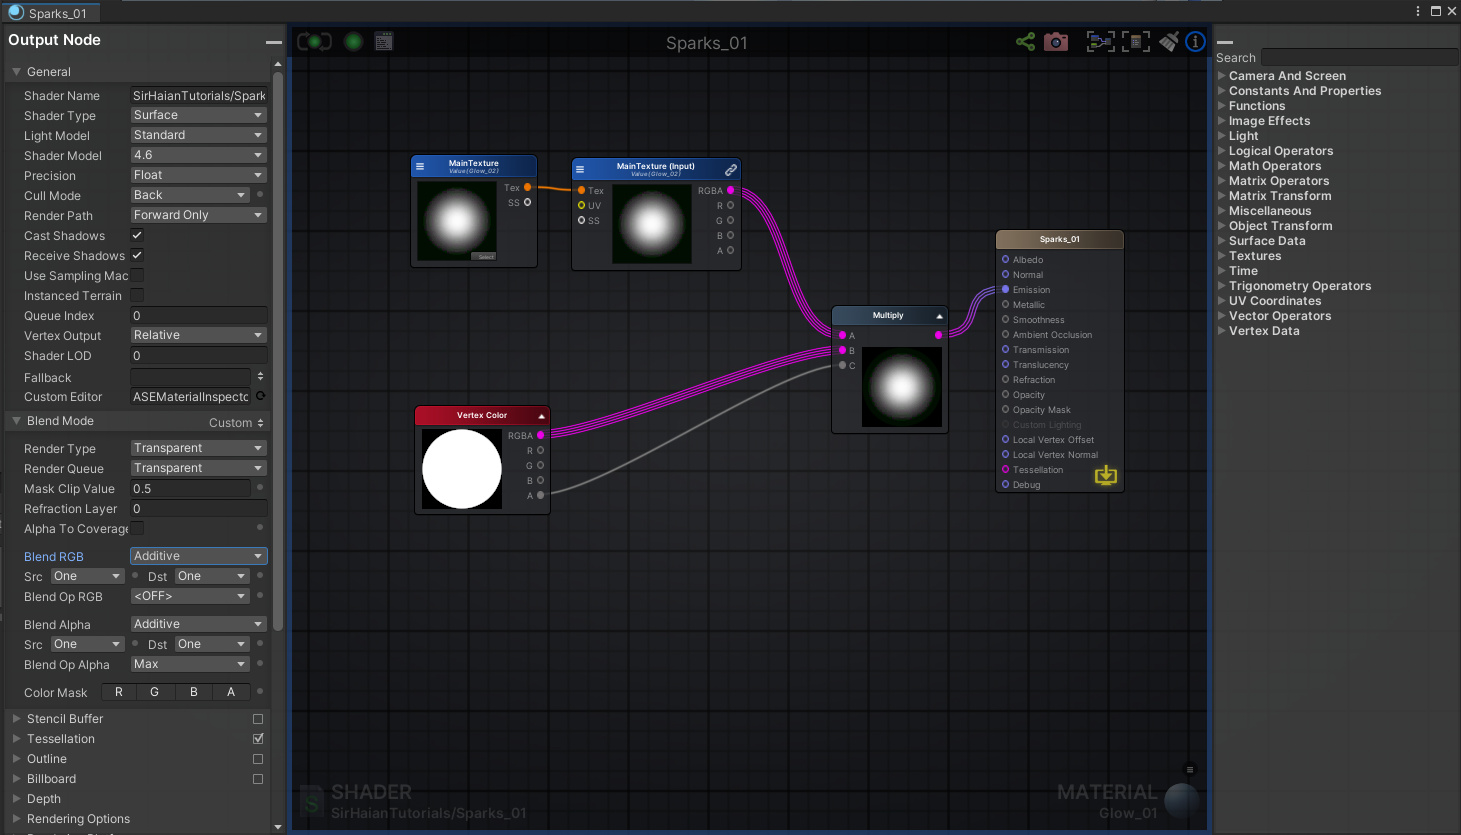
And these were the results:

Turning the “Blend Op RGB” setting to “Max”, i achieved this result:


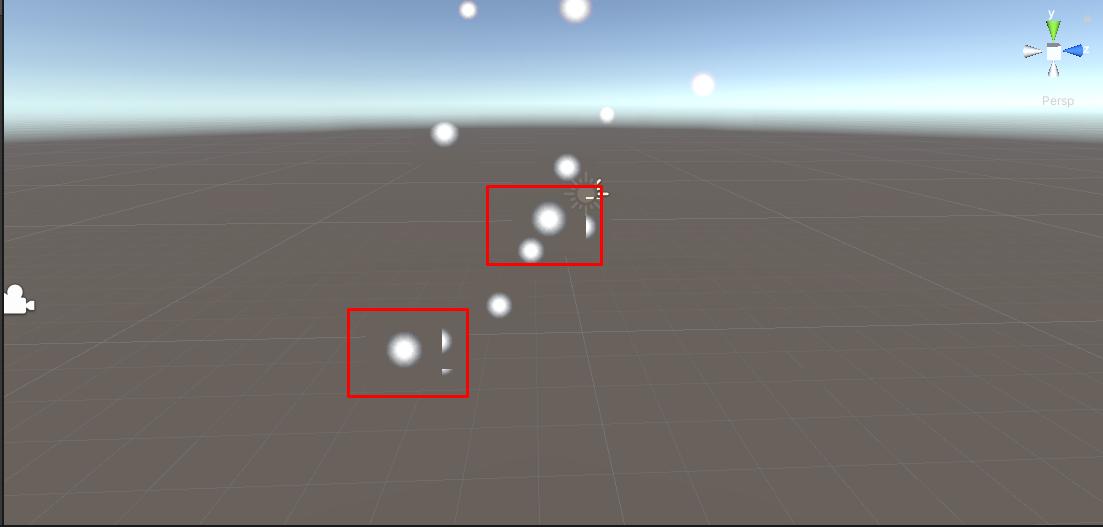
The particle’s background may seem transparent, but if you look closely inside the rectangles i drew, you can see that the background’s outlines in each particle is still blocking other particles from the view.

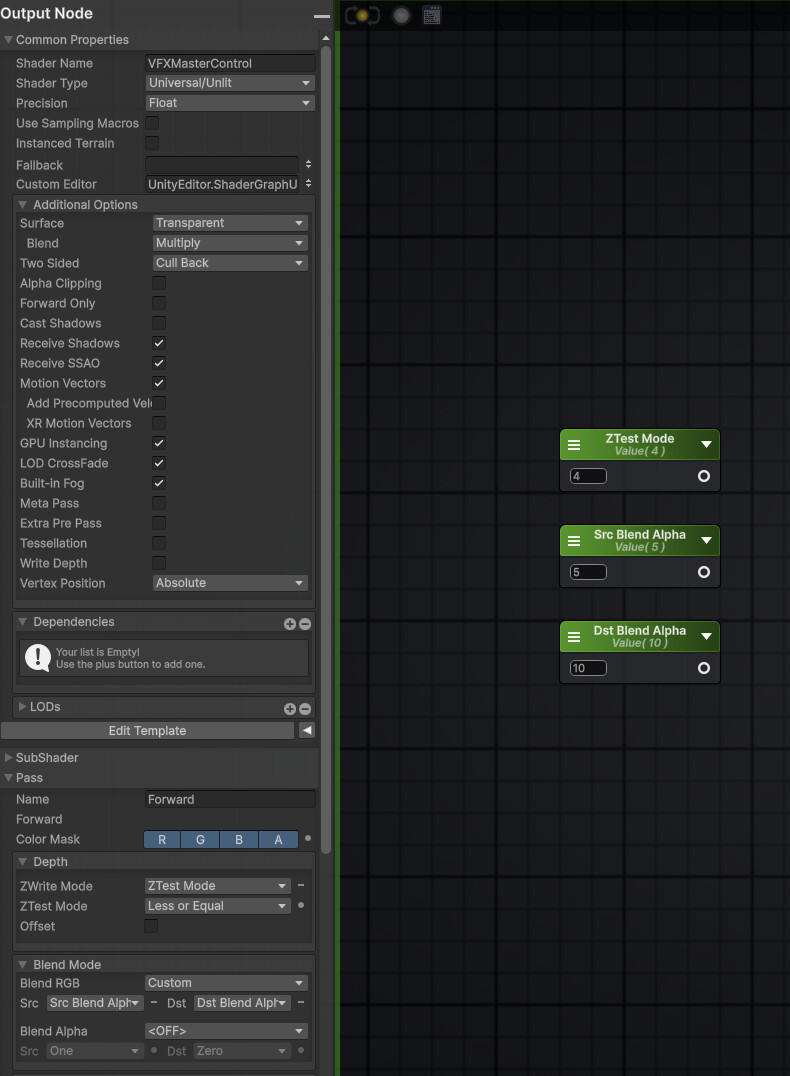
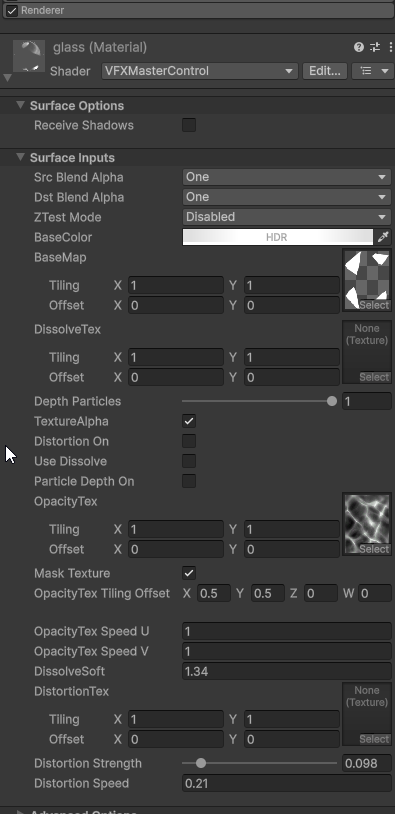
I then managed to get this problem (half) solved by applying these settings:


Which gave me this output:

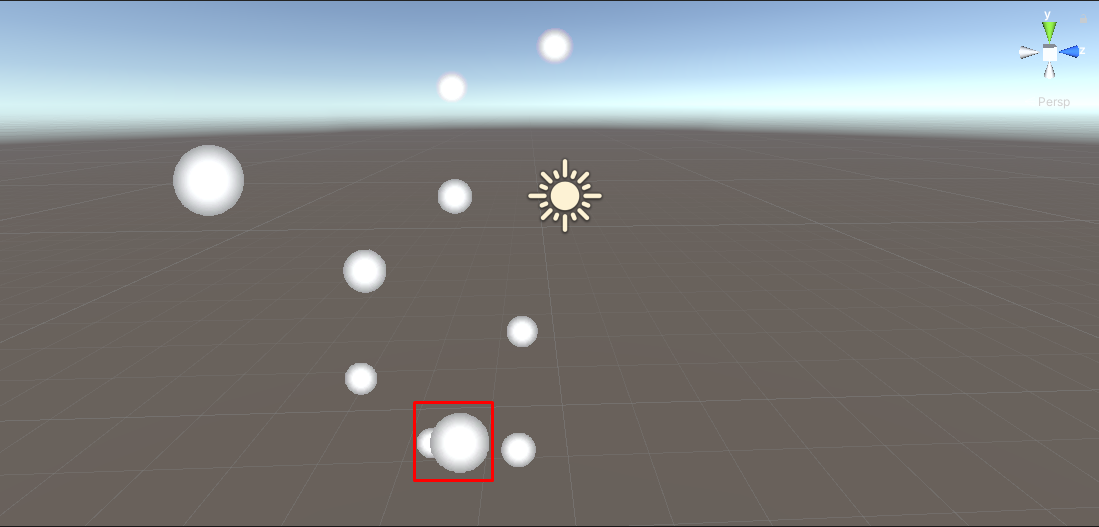
Now, the background of each particle is transparent, but the particles themselves now have rough edges, no glow and are fully opaque - this is not quite the effect SirHaian achieves on his tutorial

So, I want help to make the particles have the glow intended by the texture, and to make them see-through objects, like SirHaian’s. I also tried to add an alpha channel to the texture, but to no avail in achieving the effect i wanted. Thanks for your attention, and please let me know where i’m going wrong here! :laughing:

Hello zanfafx,

I think the error is pretty simple to fix:

Shader Forge(SF) is used in the tutorial and you are using Amplify Shader Editor(ASE). These have some bigger and smaller differences, so you have to keep an eye out when transferring shaders from one to another.

What’s happening here is, that in ASE, the bundled output is “RGBA” and not “RGB” like in SF. Therefore, you are multiplying alpha again on top of the alpha.

Also, it should not be needed to change anything in blend options on the left.

1 Like

Hi! Thanks for the answer, I really appreciate it

I’ve tried doing this, and it actually doesn’t change the results I was getting from the first time I found the issue, the particles still come with a black background :confused:

And following what you said about multiplying the alpha, I did this, but again to no avail (I thought it would make sense :sweat_smile: please correct me if I misunderstood what you said):


Thank you again for trying to help, and I hope I’m getting closer to the solution in any way haha

thanks for the awesome information.

Okay,
Now I get what the problem is. There is a small quirk with ASE for that. As you have to specify the DepthTest / ZTest. I think SF does that automatically when you switch to additive blend mode.

Here is the setup that should work:

I hope this helps :slight_smile:

2 Likes

Wow, that solved my issue! Big thanks, you really helped me here! :smile:

Only one more thing, would you mind explaining/directing me to somewhere that explains what exactly this DepthTest / ZTest thing is? I would like to know what exactly this had to do with the problem.

Imagine that your scene is stored somewhere temporarily. In this case inside the depth buffer, which kinda stores how far away things are from the camera. Here it will be checked if things in the scene are behind or in front of a certain area (or pixel), which is called ztesting. If the new thing is behind the stored pixel, it will be discarded, as it doesn’t need rendering, if it is in front of the stored pixel, it will replace the former.

Here is a nice visualization by SimonSchreibt:
(http://fragmentbuffer.com/images/posts/depthbuffer_example.webm)

What causes the error in the shader, is that it defaults to just do the ztesting in specific cases, and then sometimes things get discarded, that should not be (as they are all transparent obejcts)
As far as wording goes. Depth and z mean the same thing afaik: the direction the camera is facing. But to make it more clear, sources like the Vulkan guideline always say “Depth Buffer” and “ZTesting” (and “Zsorting”)

If you like to more about technical stuff under the hood. This is a good read for people coming more from the artist side: GPU Performance for Game Artists | FragmentBuffer
(It also has some “further reading” lnks at the bottom of the article)

1 Like