Really nice work as always look forward to breakdowns and the final project that this will go into would be great to see if your allowed to post it once done ![]()
1 Like
Thank you, more breakdowns as soon as I get some free time.
1 Like
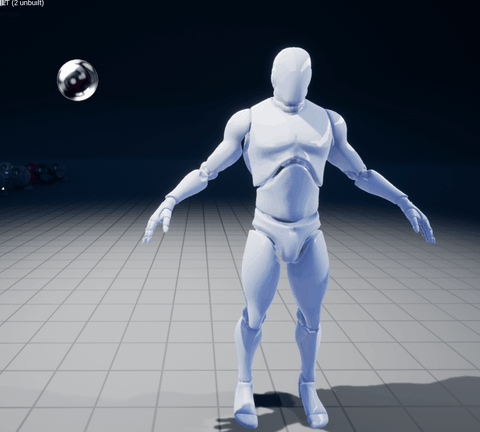
Of course I will. The gist is we are making a car commercial type thing, it’s a Film VSFX focused project, so live plate with CG Object integrated, only thing is we are rendering out CG objects in realtime from Unreal.
1 Like
Hey Banana,
[regarding rain]
One trick I think you’d get a lot of mileage out of is setting up a couple mask layers. One is the “address” layer, which would be all your circles from a little brighter than zero to white. If you pipe a ramp through the coordinates, your circles would be ramping individually, but be offset.
Then you have the mask layer which you multiply by that output to keep the space between the circles showing.
Gah, I don’t have the old test i did.
My big takeaway is that you can randomize the drop location by using the address mask. The one thing I remember as being bad was that because it was random, some of the drops would “play” twice rapidly which kind of gave away the show. BUT, the concept is useful for other stuf.
Sorry I’m not present enough to actually build the example.
1 Like
Hmm…That’s an interesting approach for a varied ripples. I think I actually remember seeing something like this on twitter, I think it was @simonschreibt or Klemen Lozar who had posted. I’ve meant to go and update mine using their technique but just been busy with other stuff lately.
1 Like
that’s a common excuse…“i can’t update my stuff because i’ve been being awesome”
![]()
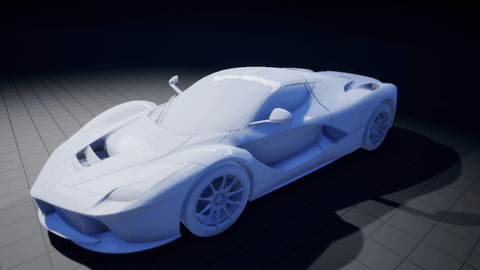
This car transform made me think, “what if the car did a 180, or a 90 degree turn by transforming”
that’s a common excuse…“i can’t update my stuff because i’ve been being awesome”
Haha, I will get to it eventually.
This car transform made me think, “what if the car did a 180, or a 90 degree turn by transforming”
You mean like a sequence where the car transforms into the new direction instead of turning regularly?
1 Like
lol, Couldn’t help myself , it had to be done

28 Likes
This is what I am working towards. Combined with your burning shader breakdown and this… Amazing!
1 Like
One More Car Transition shader
14 Likes
I made a quick version of Klemen Lozar’s Fake RBD Fracture shader. I used houdini to store pivot locations for each chunk in additional UV channels and then controlled the fracture in the shader, you’ll find the setup below.
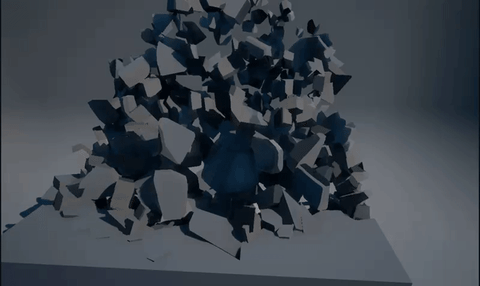
Houdini Export Setup:

Point Wrangle Code:


Mesh Pre-Fracture:

Shader in Unreal using Pivot Painter Data:

42 Likes
Whooooo, this looks so cool! ![]()
1 Like
thanks for sharing all the nodes, code and examples! <3
3 Likes
My VEX knowledge is a little limited but it looks like you’re setting the pivot for each piece and putting it in a class or something? Is that close?
1 Like
class is an attribute created by the connectivity Node. I’m creating groups based off that attribute. And setting pivot points at the centroid of each group. If you read the name of the point wrangles, it’ll make more sense.
1 Like
Ahh nice, I believe there’s another tool for this as well, ‘the static fracture exporter’. It creates a subnet with all the pieces and their pivots centered at each piece.
I learnt this as I was looking at taking a fractured object and passing it through apex etc and then into the editor for a destruction object :). Houdini’s destruction tools are particularly intuitive.
1 Like
Unfortunately, I don’t think that would work for this PivotPainter setup, as it breaks them into separate geometry pieces for export,I assume it’s used for the regular RBD workflow,
In this case we export one mesh, we just need to group the chunks and scatter points to the center and match attribute names to use with the PivotPainter SOP.
2 Likes
We’ve used this trick a couple times over the years since Jon first wrote the pivot painter script, one thing to play with that’s fun is to use a few cross products to make the rotation axis orthogonal to the impact point so they tumble “away” from the center point of impact, then you can use a random vector to inject randomness into that so they aren’t all perfect.
You can use that same trick to make “impact craters” where the pieces all crumble inward from an impact location as opposed to randomly jumble.
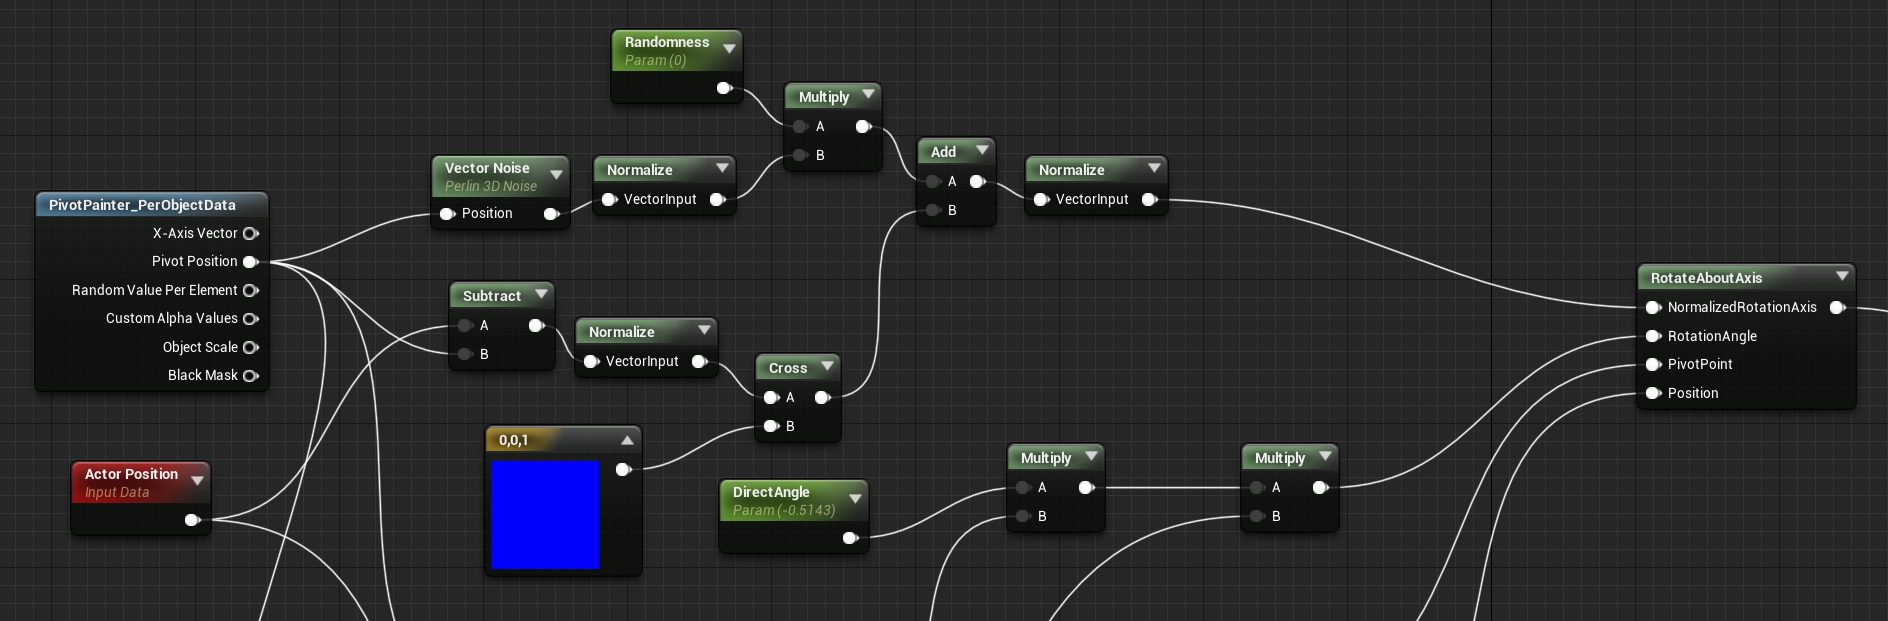

Related to Houdini, you can use extract centroid aftter your connectivity sop and it autogenerates your pivots for you, and inherits the name attribute, which runs right into the pivot painter. A little easier…
28 Likes
Aah, clever, I hadn’t thought about that!