Alex Fedorov: Sketch #33

Latest version:

Hi! Decided to participate in this month sketch. The topic is so interesting =)

Here is a first super-rough prototype of an idea:
Because of material restrictions, I wanted to test if I can use Niagara particles to author the motion and then hook it up to skeletal meshes and get plastic and dynamic from bones and cloth simulations?
So it appears to be somehow possible and here is how it looks now:

Next:

  • TONS of motion polishing
  • Experiments with meshes
  • Actual texturing and work with photos
28 Likes

So cool, looking forward to your progress! :smiley:

1 Like

Didn’t have much time. Was thinking about different ideas for an attack spell. Decided to try an “angry tornado” option =)
Here is an update:

Still skeletal meshes with bone dynamic. Meshes are driven by particle system. Alpha on material is from taken photos. Textures will come next too.

4 Likes

Hiho, awesome effect! Would u mind telling me what bone dynamic means? ^^

1 Like

Ну ты как всегда впечатляешь, подобного эффекта я еще не видел, всегда интересно смотреть на что то новое, желаю победы на скетче)

2 Likes

@Hovl спасибо большое!)
@Vastir Sure! It means I have a skeletal mesh which is skinned to a number of bones. And I have additional setup where this bones behave in a physics-like manner. So I can set a position for a one root bone and the rest of the chain will follow smoothly after.
dyn

After a sketch I will make a complete breakdown of the effect. =)

6 Likes

Cool! What engine are you using, and how are you driving the bone positions with particles?

1 Like

Cheers, I am so psyched for this tutorial when you are done! :smiley:

1 Like

Thank you! I am using Unreal Engine. I have an array of objects and an array of particle positions. So I set object position to a corresponding particle every frame. And root bone position is initially set to be the same as object pivot so object position is the root bone position.

Nice! Is this Cascade or Niagara? How are you getting the array of particle positions?

It is Niagara. There are methods for getting emitter attributes in BP:

4 Likes

Probably the final version. With textures now!
I like stupid things so here it is:
Angry dirty laundry tornado ball. It will come for you if you are not a responsible adult. (I am not)

Now I will try to write breakdown in a couple of days.

4 Likes

Here are meshes used with photos as textures. And some still shots:
Meshes are just squares with noise in geometry.

And some stills:


Another view:

2 Likes

I made a breakdown! =)
So as I said earlier here the basic idea of the effect is to create motion with particles and then drive with it some meshes with bone dynamics.
So here is a steps. You can open images in a new tab to see a full size.

Step 1. Mesh creation
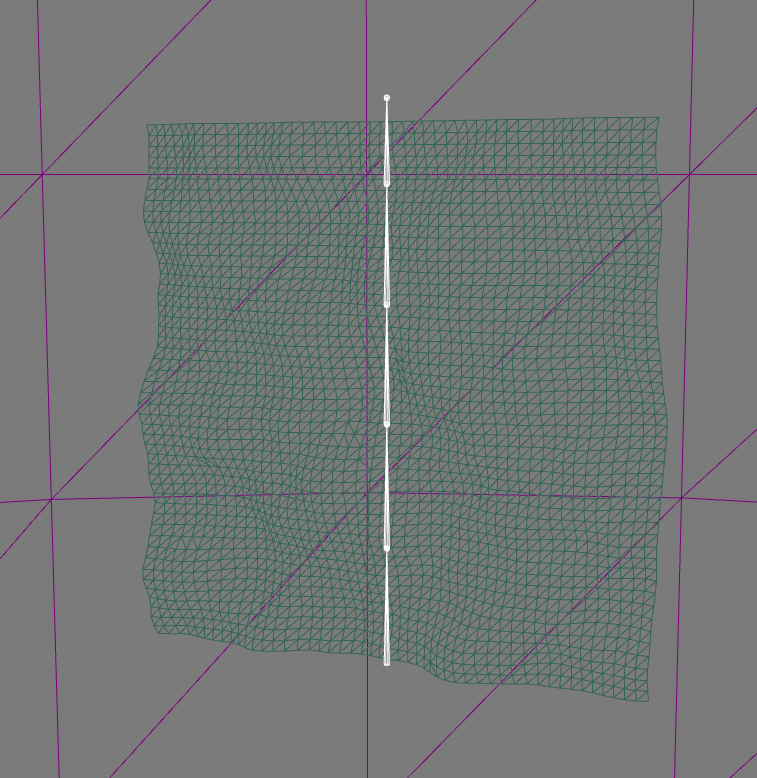
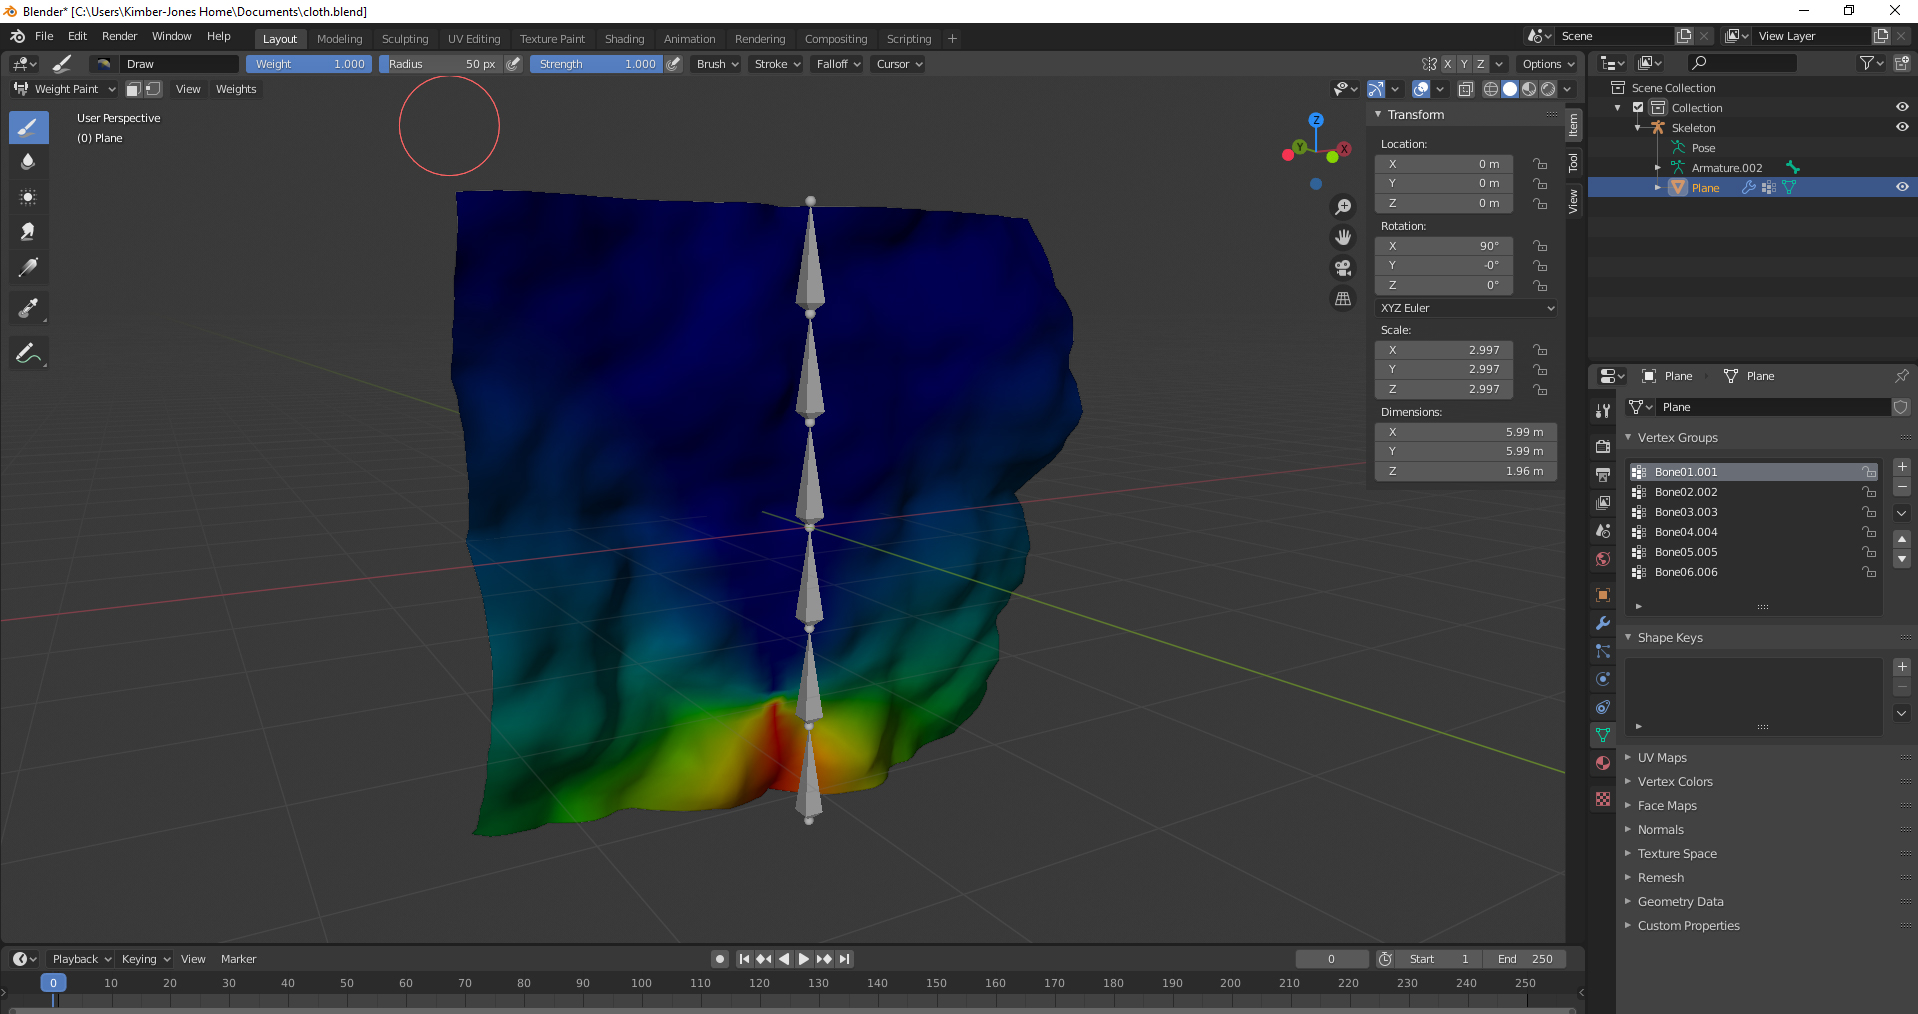
Mesh is a quad with geometry noise applied beforehand in Blender.
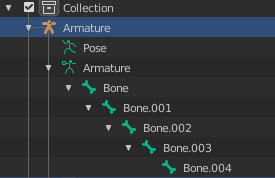
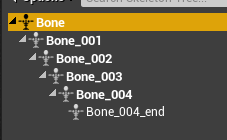
Mesh is skinned on a simple bone chain. I used default auto weighting in Blender.
Also mesh pivot is the same as the root bone position. That way when we drive actor position we move bone chain visually correct.

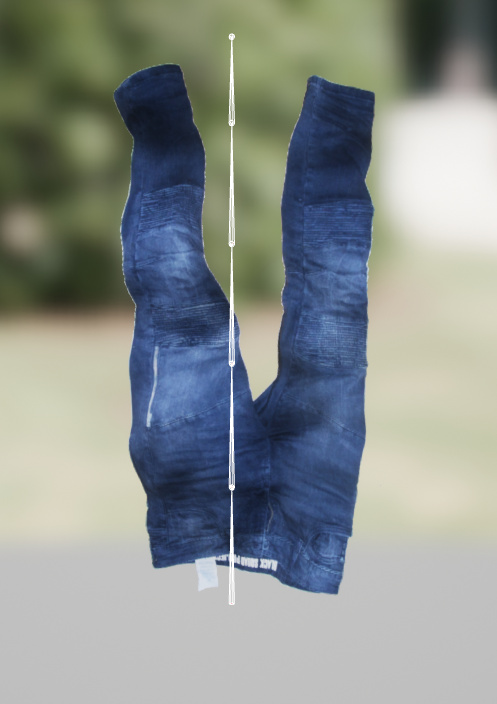
Then lets assign a material. I just took a photos of my clothes on the floor and cut it out in Photoshop.

Material is super simple:

Step 2. Particle system creation

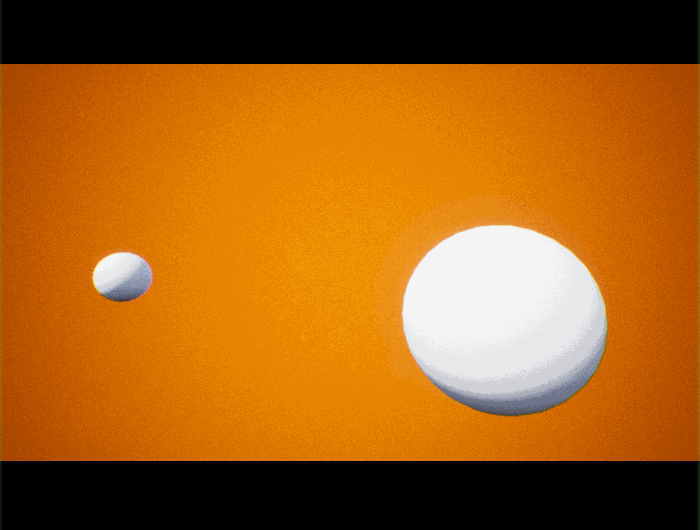
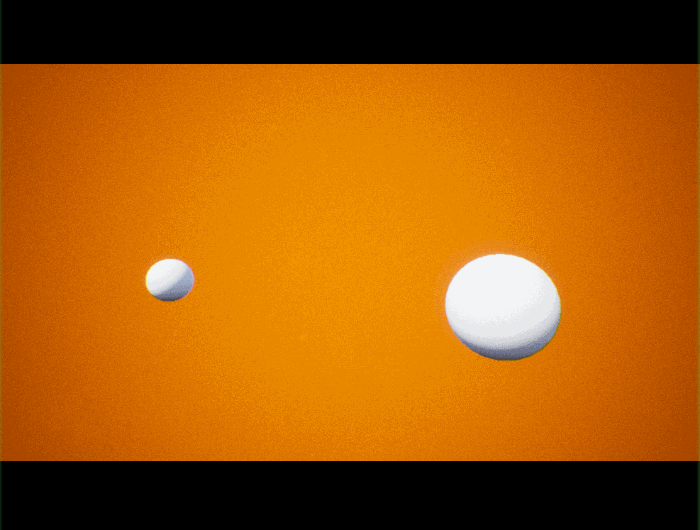
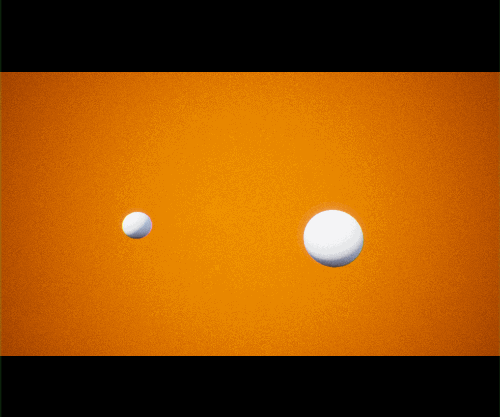
Here is the same effect but only with particles:

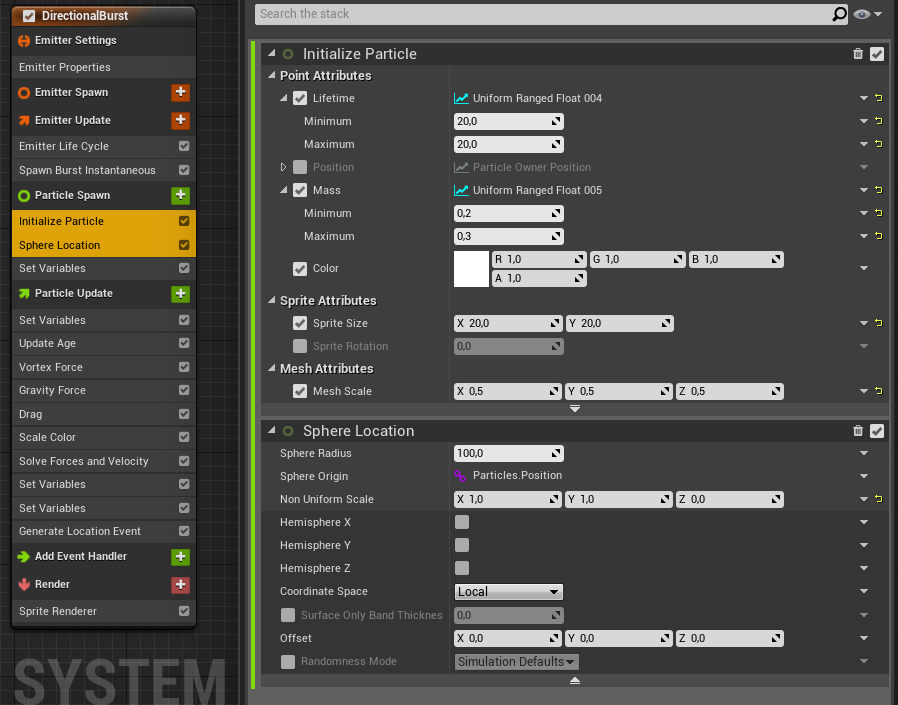
About system setup. This is a Niagara Particle System with only one emitter.
Standard particle initialization. They are created in a circle (sphere with zero Z scale).

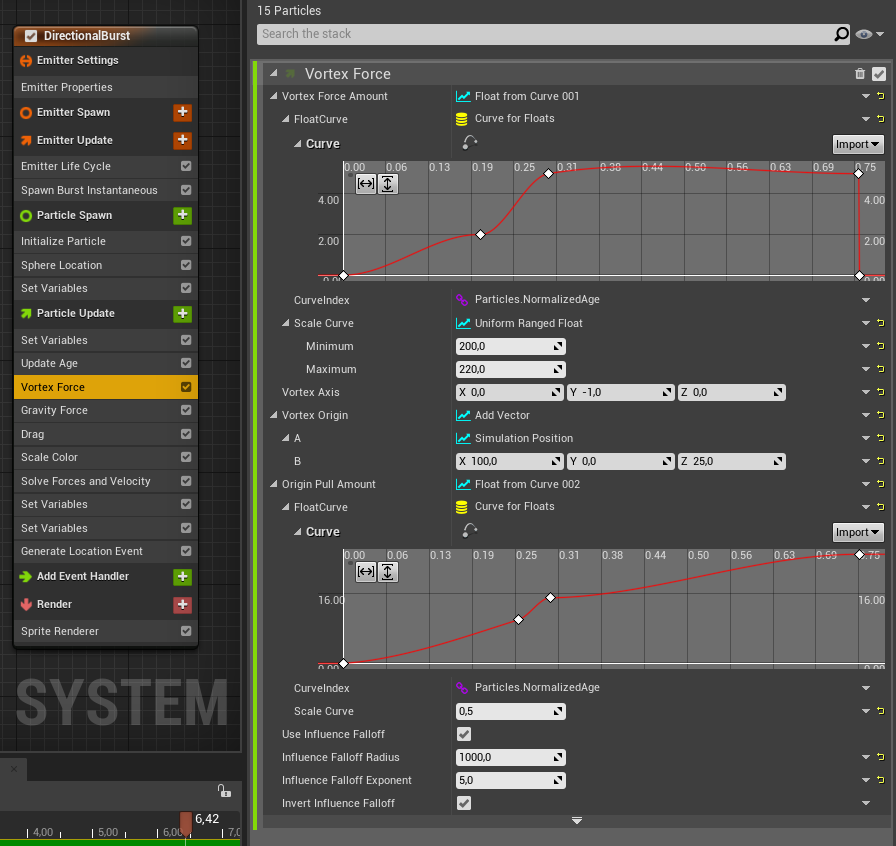
Circle motion is done with the Vortex Force module. It does literally that. Attracts particles to a point and spins them around a specified axis. Origin Pull Amount parameter controls how strong particles will be pulled toward vortex origin. Vortex Force controls spinning force. In combination with Origin Pull Amount and Vortex Force we can control the size and speed of the vortex. So I drive these values with curves to get desired motion. At the end of the effect I just drop Vortex Force to the 0 and with the rest of the impulse and gravity particles fall down.

Gravity module is enabled in the end to pull particles to the bottom.

There is a tricky part in how moving particles forward was made. At first I was changing Vortex Origin Point in the Vortex Force module. But it was too slow in motion because of inertia and forces. It was hard to control. So I choose a less smooth but more precise method.
Every frame I offset a simulation position by a curve controlled value. But to not ruin the simulation and mess with the velocities I need to simulate at the origin first and offset then.
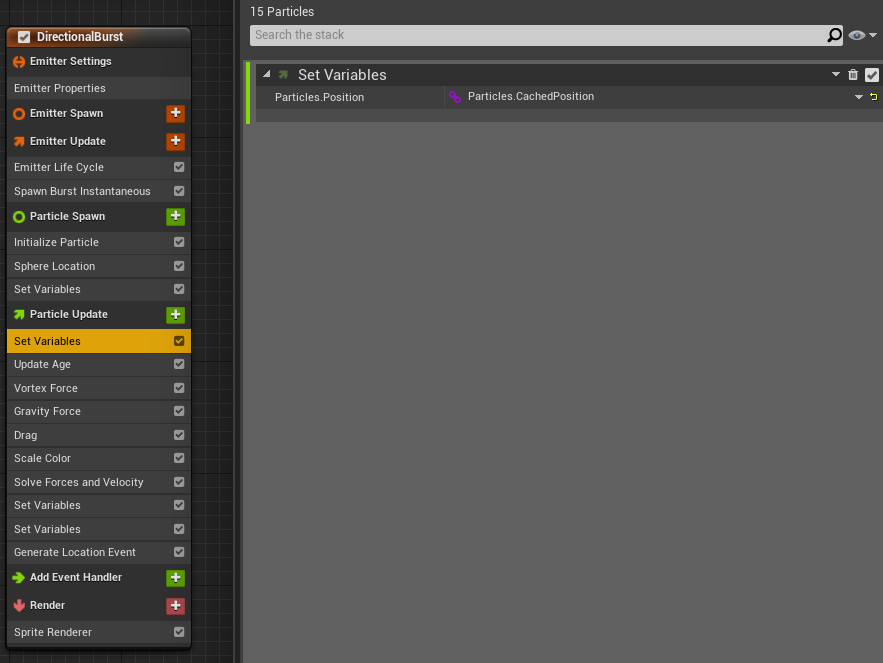
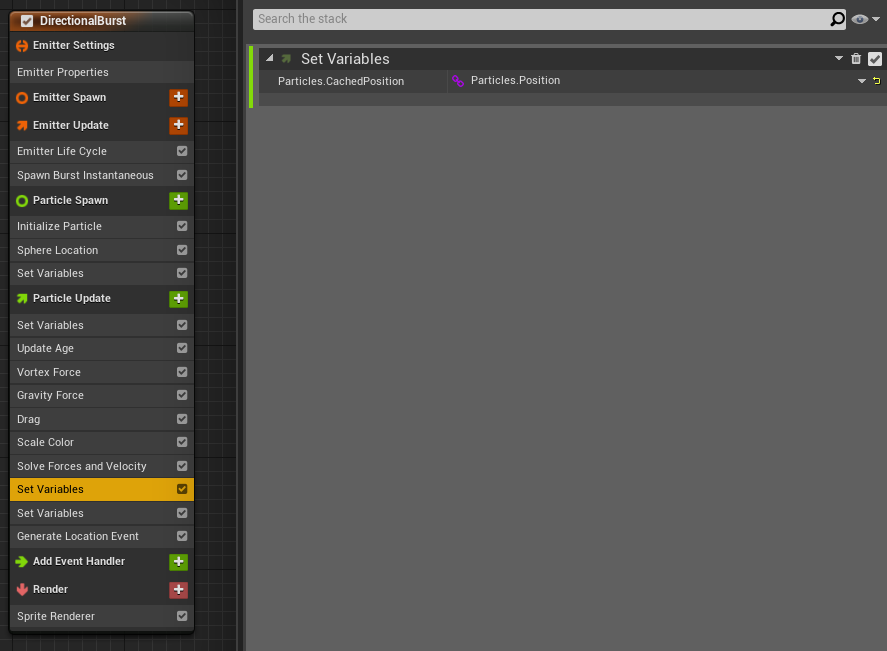
So I created a variable CachedPosition and store in it particle position right after the physics solver. Then I offset the particle position by the needed amount. And in the next frame I restore the particle position from CachedPosition to continue the simulation without offset. And then offset it again.

The order of the operations/modules is important.
Variable has to be initialized somewhere. Usually on spawn:

Restore particle position without offset before simulation:

Cache Particle Position after the physics solver.

Offset the simulation by curve:

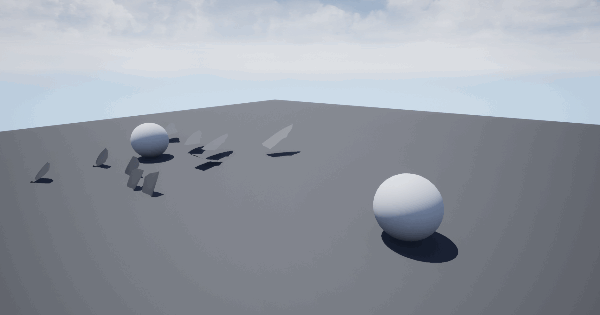
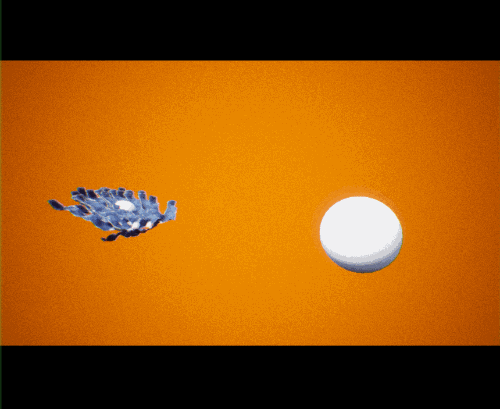
Step 3. Attach mesh to particles

So next lets attach our mesh to particles.
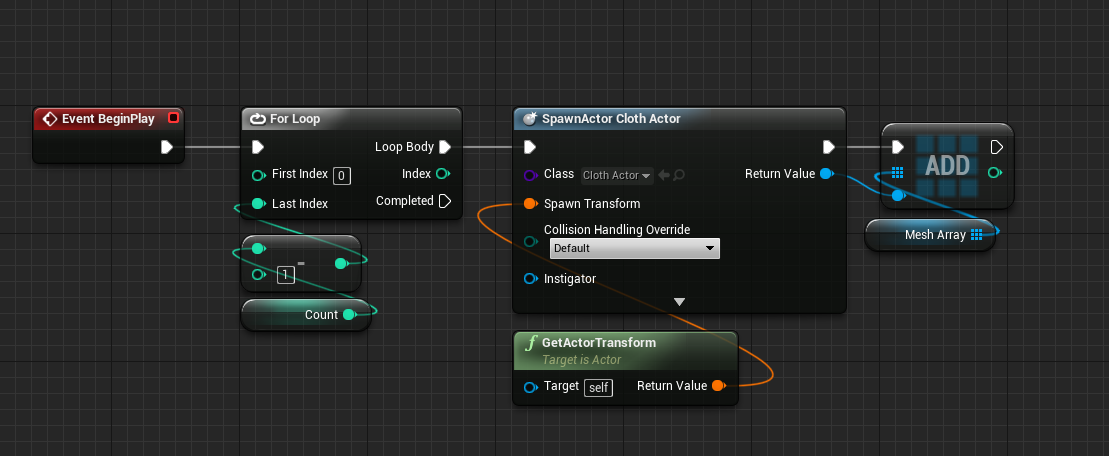
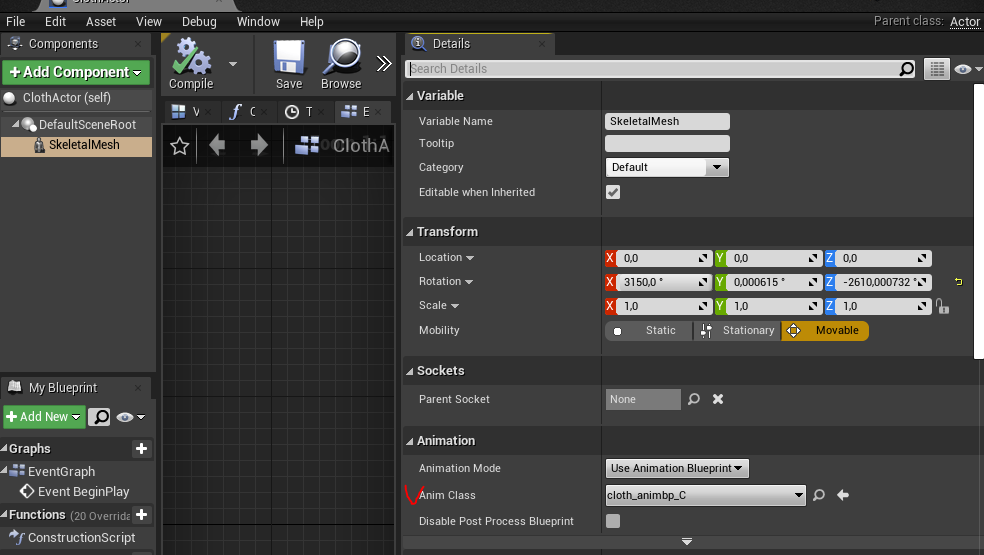
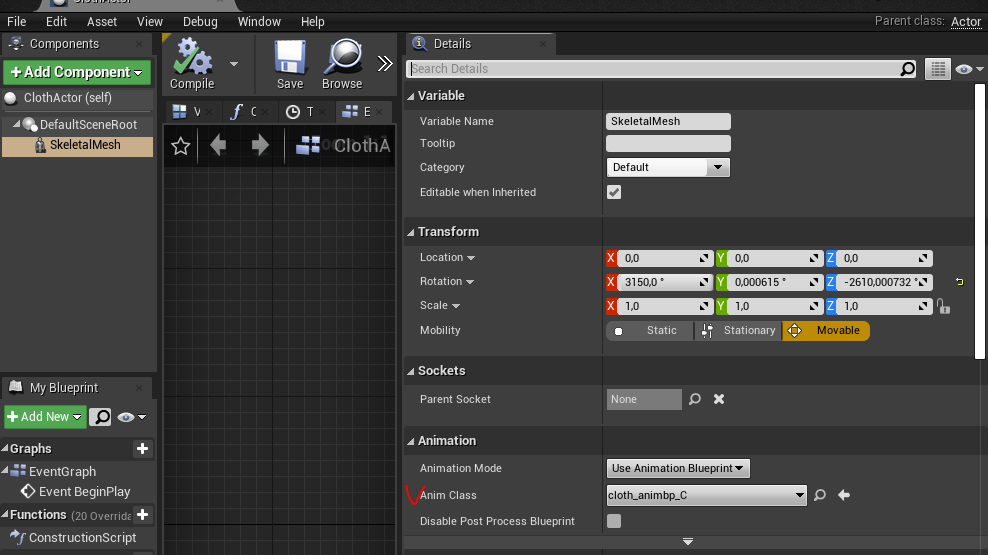
I made an Actor for the individual cloth. It consists of a single skeletal mesh component.
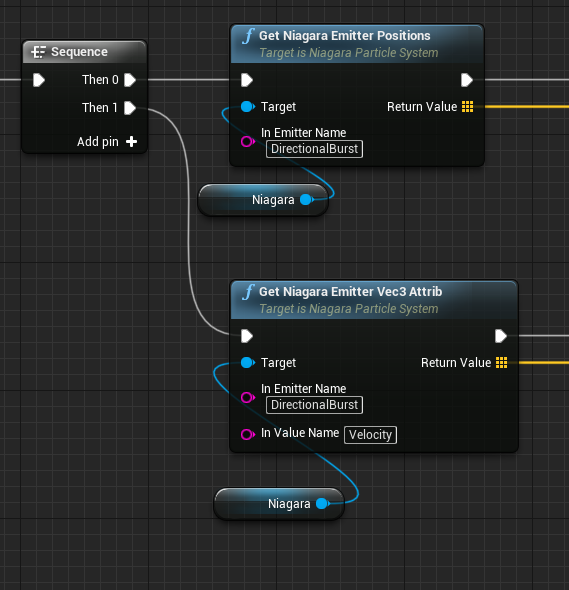
Then in the main effect actor I spawn these cloth actors to match particle count (around 15). I store these acors in array for later access.

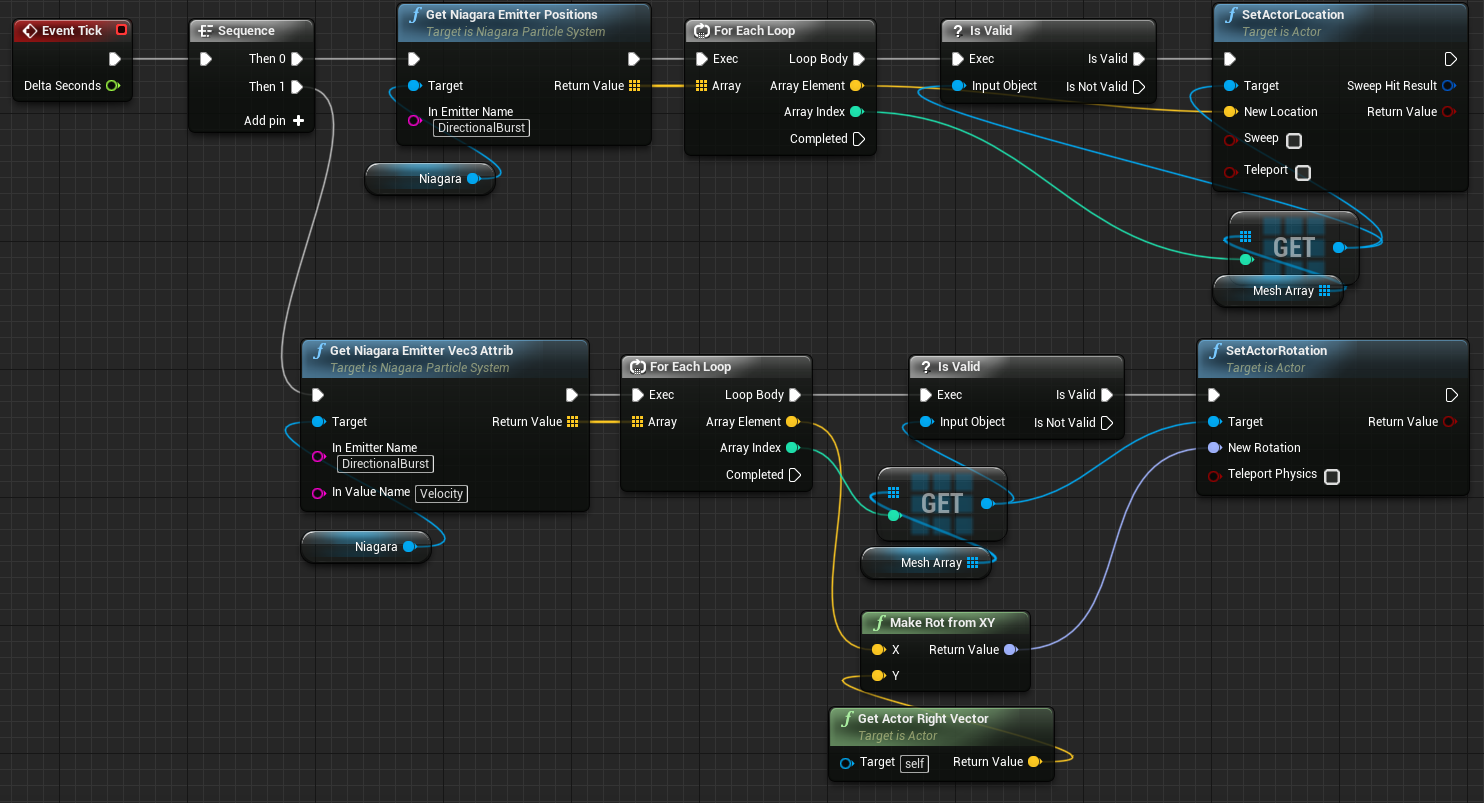
In every tick I gather particles position and velocity and transform cloth actors accordingly. There are special methods for getting emitter properties in blueprints.

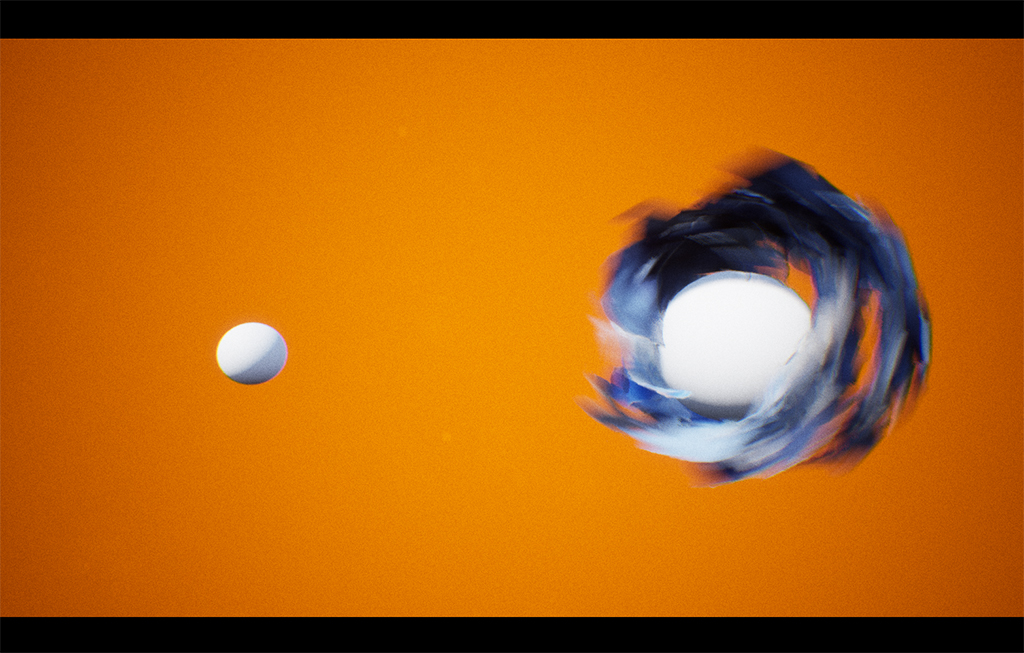
Now we can get something like this:

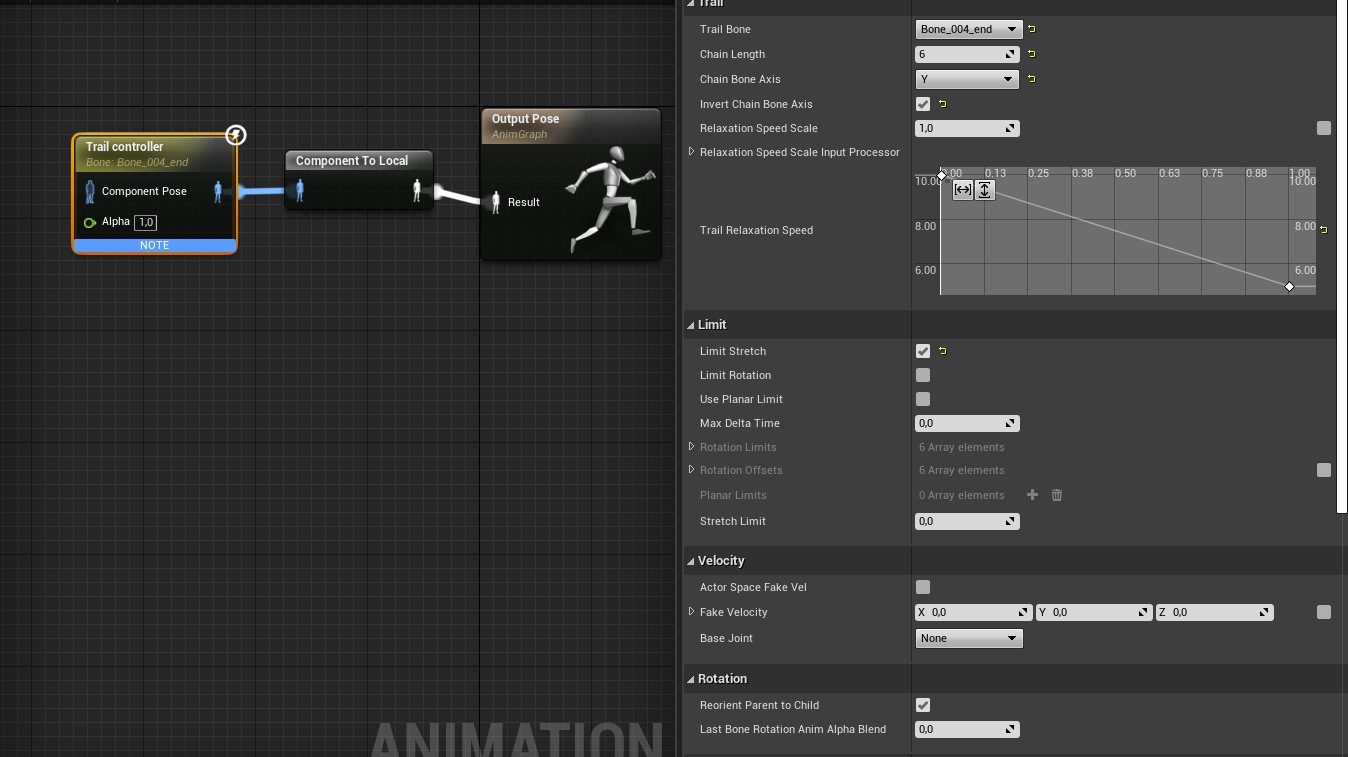
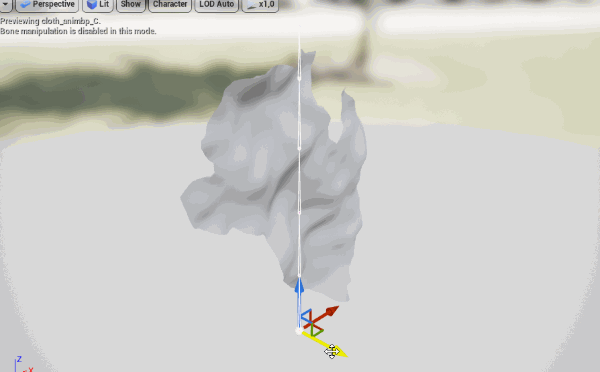
Now we need to set up a cloth skeletal mesh animation blueprint.
Set up is very simple:

What is important here:
Chain Bone Axis is set to Y - along the bone chain.
Invert Chain Bone Axis for a correct behaviour.
And Limit Stretch to disable stretching which was not very good looking at VFX speeds.
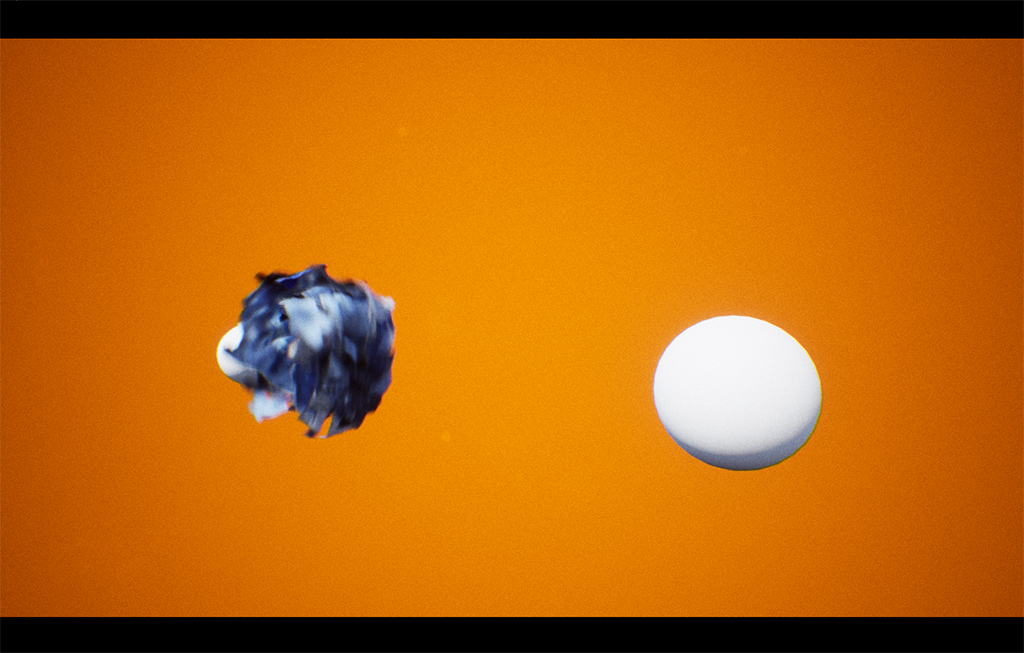
So we can get something like that:

dyn

Don’t forget to assign created animation blueprint to a skeletal mesh component in cloth actor.

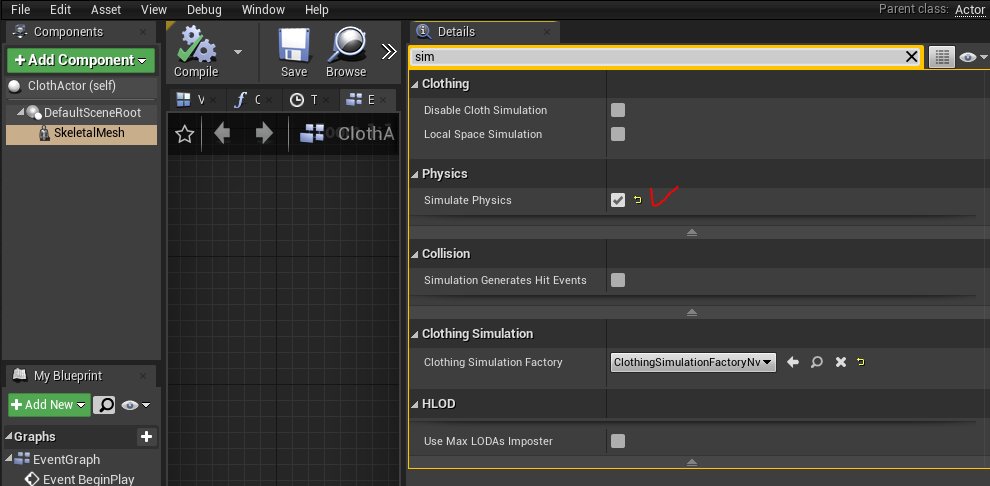
And parameter Simulate Physics should be turned On.

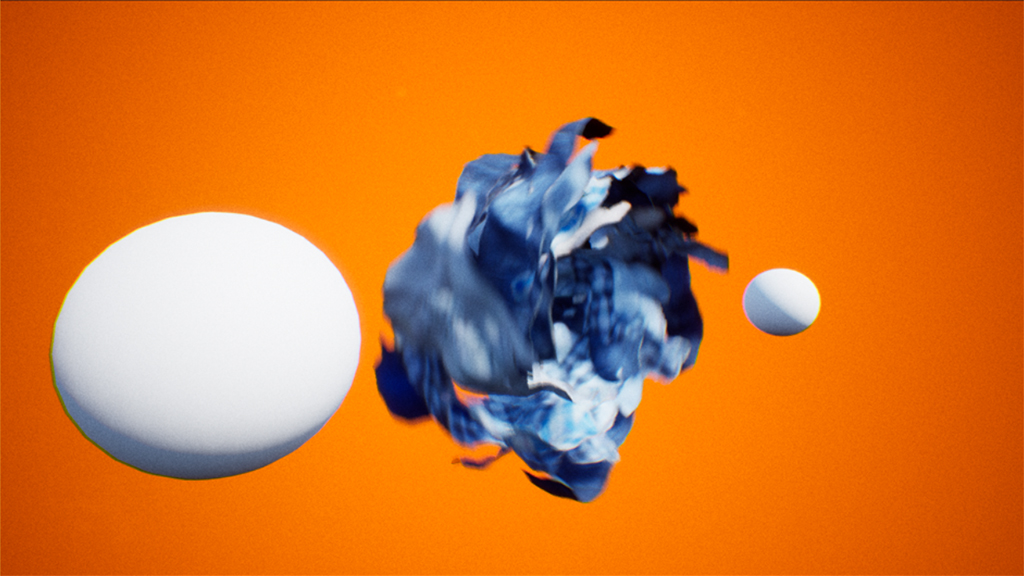
Now effect looks like that:

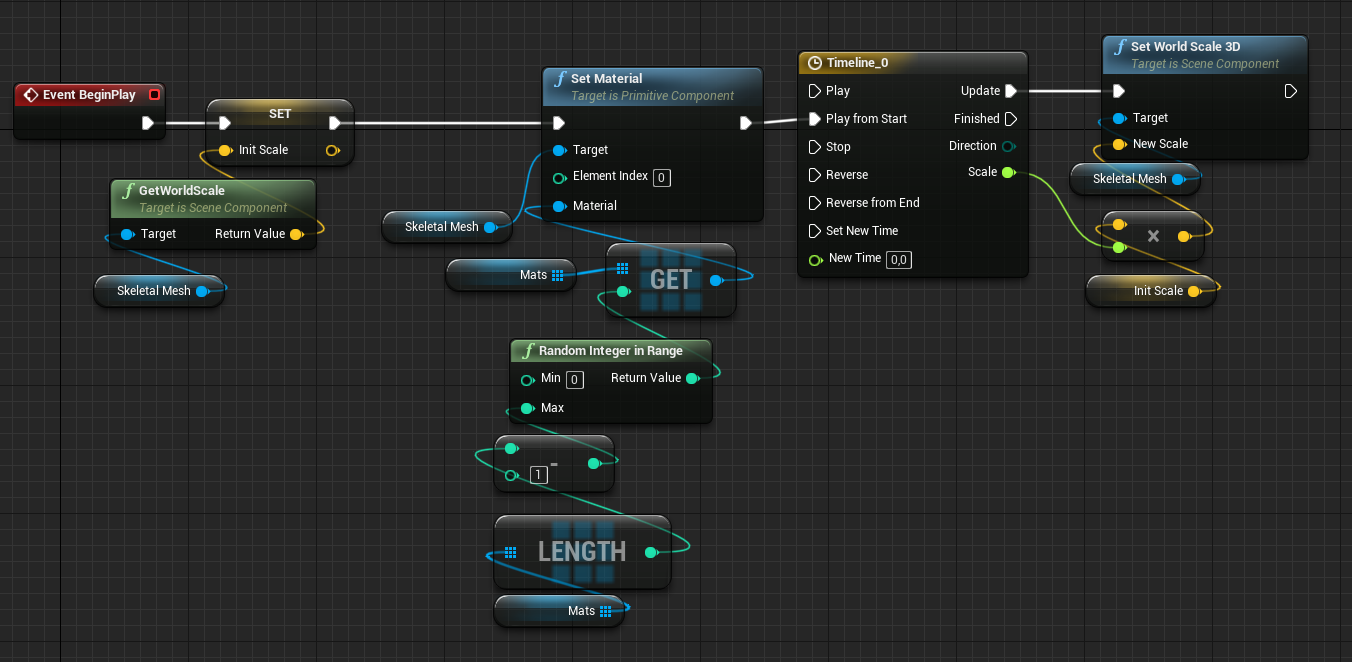
In cloth actor add a simple code to assign random material instances from an array. Also I added a timeline to control cloth scale at the start and end.

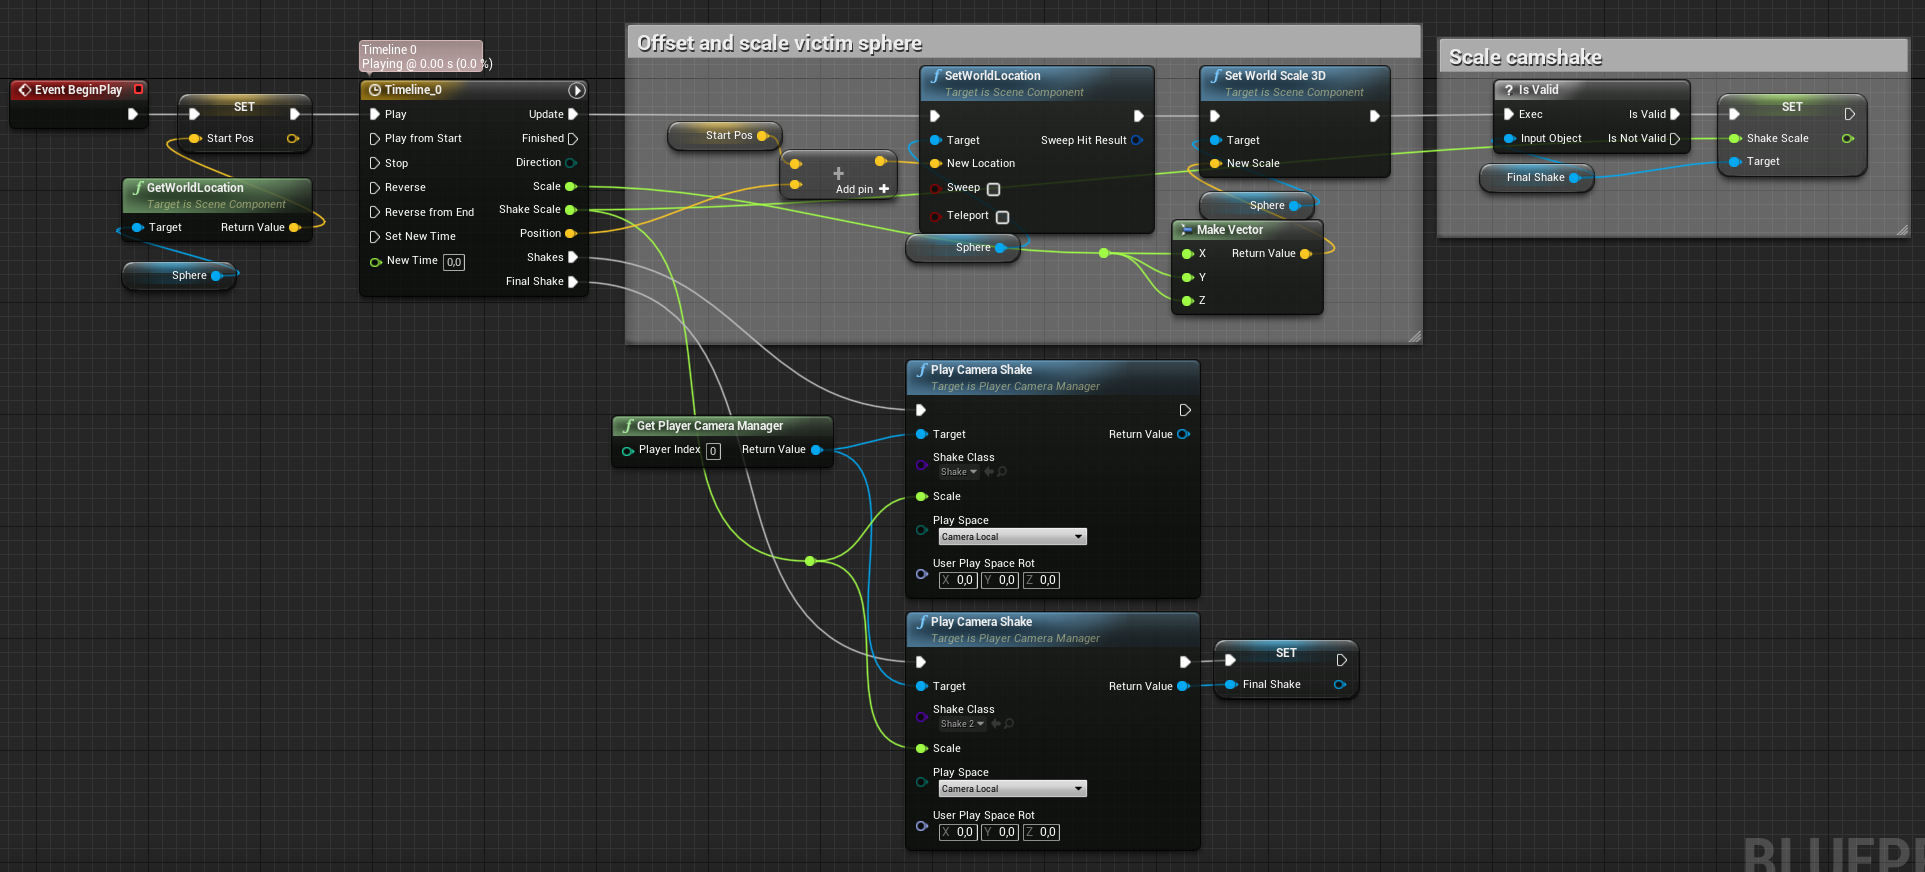
Camera Shakes and victim offset.
Victim is controlled via a simple timeline and transform change. Camera Shake uses a built in Unreal system for that.

And this is it! Thank you everyone for the great challenge! =)
Feel free to ask anything =)

10 Likes

Thanks so much Alex, this is WICKED! :smiley:

Looks fantastic Alex! So as I’m working through this, I’m wondering if the parameters that we’re getting from the Niagara system aren’t correct? I don’t see ‘DirectionalBurst’… I tried inputting other stuff but nothing is so far working.

I’m close though!

Also, do you have any tips for getting your skeletal mesh cloth into UE4? My bones don’t seem to want to behave like yours in the gif. :slight_smile:

Thank you. “DirectionalBurst” is the name of the Emitter in Particle System. And Value Name is a variable name without namespace. Particle.Velocity would be just Velocity.
Here you can see at the top left my emitter is called DirectionalBurst. Your emitter may be called differently.

About cloth mesh. It should be pretty simple, could you maybe show me images of what is happening? The main thing is: bone chain looks up. Mesh too. Mesh pivot is the same as the root bone position. Probably should add this one to the main post. Thank you!)
And this is it really.

2 Likes

Ahah!! Yes, I completely missed that you were naming the emitter, that part works great now, thanks!

RE: The cloth, here is my Blender setup:

A couple notes:

  • I seem to have an additional root bone that is named for the armature (which I changed the name of based on various online recommendations)
  • In the editor the bones just don’t seem to be following the Trail setup (which is identical to your image). I can post an additional image for clarity.

I’m very close to getting it, I’ve learned a lot already!

About the bone - usually if you keep names of the Armature object and Root bone (Armature) Unreal will automatically remove them on import.
Here is what I’ve got in Blender:
image
And here is what Unreal does on import:
image

About the cloth:

Did you assign an animation blueprint to a skeletal mesh component?

And also make sure to turn SimulatePhysics on on this component.

Will add this to the guide now, thank you! =)

4 Likes