(WIP) Realtime VDBs and destruction in Unreal engine 5

Final Result:
Untitledvideo-MadewithClipchamp16-ezgif.com-optimize (2)

Hello everyone,

Over the next few weeks, I’ll be working on a VFX project focused on creating a realistic cannon fire effect. This will include things like VDB simulations for the initial blast all the way to destruction for the impact.

I’ll be using this thread to document my progress along the way. Whether it’s breakdowns of specific techniques, iterations that didn’t work, or tools and plugins I find useful.

My goal is not only to finish a polished VFX shot but also to learn as much as I can in the process. I’d love to get your feedback, suggestions, or just general thoughts as I go.

Now, to get into my progress so far.

Unreal Engine has been improving how we can use VDBs so I wanted to see how viable they can be for a real-time project. That’s why I started this project in Embergen, which I found really intuitive and easy to use. I managed to get a pretty convincing result in a short amount of time.

Embergen simulation:
ezgif.com-optimize

3 Likes

Next up is getting the result in Unreal Engine. We start by exporting from Embergen to the OpenVDB format. We can export a few different channels but for Unreal engine Density and temperature get recommended. However this is where i ran into my first problem. The temperature channel didn’t translate to unreal properly for me. The solution I found was exporting the Flames channel instead and using that as the temperature channel when setting up the material in unreal.(more on this later)

Export channels:

First result with bad temperature channel:
ScreenRecording2025-09-19100043-ezgif.com-cut

Finally, we can start setting up the VDB in Unreal engine.
To start we have to import the VDB into the engine, important here is setting up the exported channels correctly. As mentioned before we use the density and flames channels. These have to be setup under the A attributes with Density in the R channel and Flames in the G channel.
This will be important to setup the VDB material later.

Import channels:

Now to render the imported VDB we need two things: A HeterogeneousVolume, this is a actor that renders VDBs in real-time. Then we need a Sparse volume material, here we can setup how the different VDB channels get rendered. Unreal engine provides a material you can use in the engine files. However I started with a material I found here: Unreal Engine 5.3 VDB Material Setup posted by Winbush | blueprintUE | PasteBin For Unreal Engine
I then edited the material slightly so i have more control over the result. I have made the edited material available here: VDB Material (Edited) posted by anonymous | blueprintUE | PasteBin For Unreal Engine

Unedited Material:

1 Like

Edited Material:

1 Like

There are definitely some improvements to be made still but for now i will leave it here with the final result for this week:
20250928-2139-00.5411188-ezgif.com-optimize

If you have any thoughts, suggestions, or questions about the workflow, setup, or results, I’d really appreciate the feedback.

2 Likes

The default Unreal Engine Sparse Texture/Heterogeneous Volume importing VDB, usually it loses some data about density, temperature and it doesn’t manage very well scattering data.
I suggest you to try Zibra AI to convert VBD.

Has a better result: https://www.youtube.com/watch?v=aW1d6KlPQDc

ZibraAI is free for personal use and revenue under 100K - https://www.zibra.ai/

There is also VQVDB, free alternative to Zibra;

Hey everyone,

I wanted to give a small update on the VDBs.
As suggested I looked into zibraAI to get my VDBs in engine.
Zibra is very easy to install and use with the unreal plugin and comes with its own rendering method. Visually however the results are fairly close compared to the default unreal engine VDB renderer. But because of Zibra’s compression and custom renderer there is a significant increase in performance. So there is very little reason to not use Zibra and thus i will continuing using it for this project.

Comparisons:
ezgif.com-video-to-gif-converter (13)

This week I will also be sharing my progress of the destruction part of this project where i will be exploring Unreal engine’s chaos system.

Everything has been rendered in Real-time in Unreal engine 5.

For the past few days I have been working on the destruction part of this project. I started with some test in Unreal engine’s Chaos system:
ScreenRecording2025-09-24103415-ezgif.com-optimize
The chaos system is pretty easy to use and setup, however the fracturing in Unreal Engine is somewhat limited. So i decided to do the fracturing in Houdini so i have better control over how the wall gets fractured and how the wall fragments get clustered. Then when the wall has been fractured in Houdini i will bring it back in the chaos system to keep everything real-time instead of baking and exporting an animation from Houdini.

I started with making the wall in Houdini as well so i can make a HDA that will generate a fractured wall directly in Unreal Engine. The wall generator is fairly simple but if anyone is interested in the Houdini files I can share them.
ezgif.com-optimize (1)

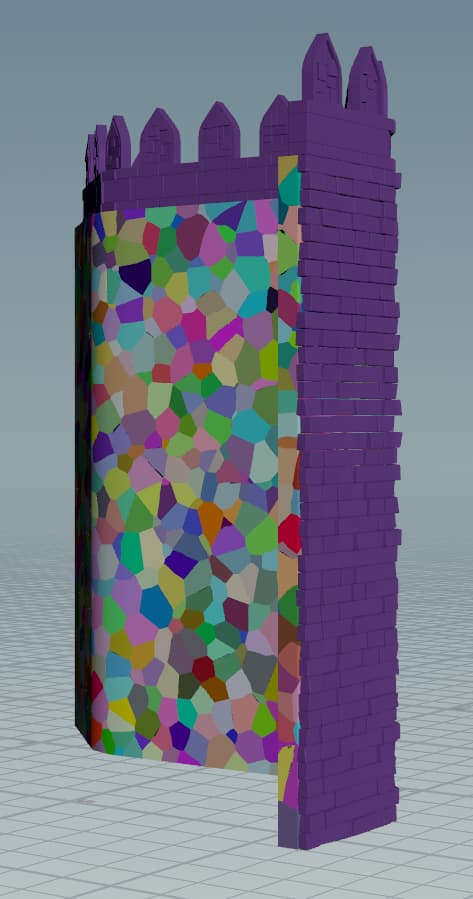
Next up is fracturing the wall and setting up geometry collections for Unreal Engine. The wall consists of two layers the bricks and the backing wall. I wanted to fracture these separately so the bricks would stay mostly intact and the backing wall would break and fracture. So I fractured the backing wall using the voronoi fracture node in Houdini. This node also creates an attribute for the different fractured pieces which is necessary if we want to use this in the chaos system later. however the bricks don’t have this attribute becuase the fracture only affects the backing wall. but the bricks still need to be affected by chaos. So I had to manually set this attribute to the bricks as well


Now that the wall is fractured and the pieces have been assigned to a attribute we can start preparing them so unreal engine can read them. For a more detailed documentation you can read this Houdini doc: Geometry Collections (Chaos)

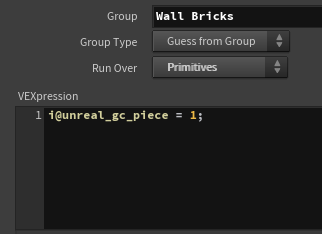
But to summarize we need to set a few attributes that unreal can understand. First we need to assign every single piece that has to be affected by chaos physics to the unreal_gc_piece attribute.

This way unreal engine can see the different pieces instead of the wall being one singular piece.
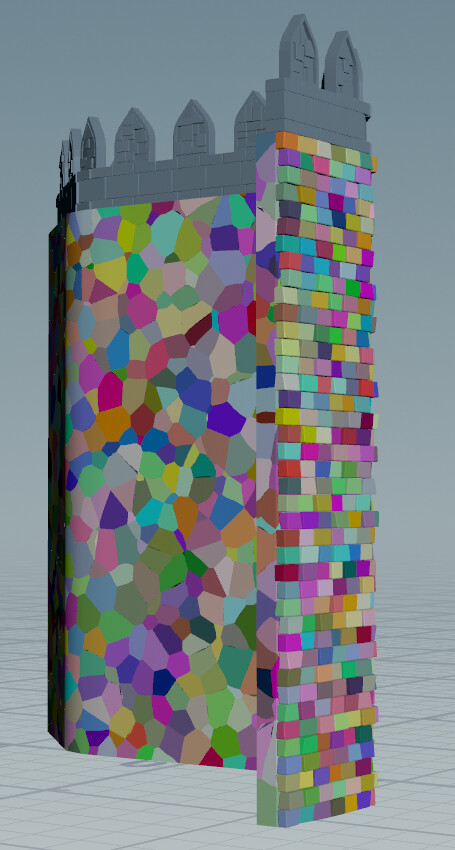
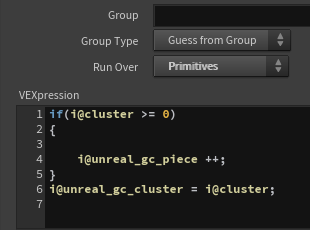
we can also setup clusters, this will group certain pieces together which will try to stay together longer during fracturing. we can do that using the unreal_gc_cluster attribute.

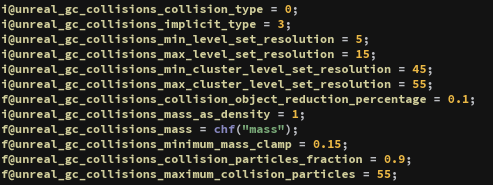
And finally we have to set some more attributes so unreal engine can see how the different pieces will behave inside the engine. These are mostly physics related:

Now we have everything we need to pack the HDA for use in Unreal engine. The HDA will now generate a wall, fracture it and automatically setup the chaos system.
Untitledvideo-MadewithClipchamp14-ezgif.com-optimize

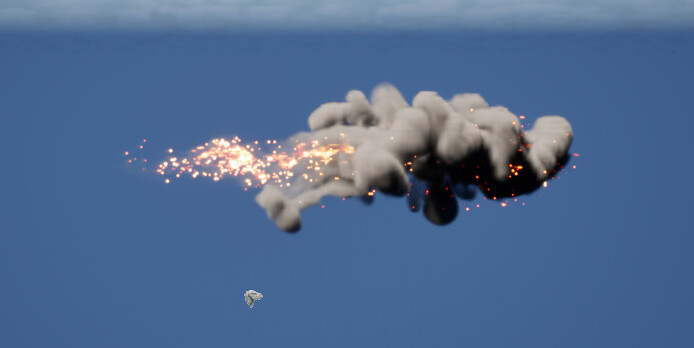
And besides that chaos is completely procedural and real-time it has another benefit. We can use chaos data inside Niagara to spawn particles. The data chaos data I will be using is: Breaking and trailing. Breaking data spawns particles when a break occurs in the chaos system while trailing continuously spawns particles on moving chaos pieces. For a quick visualization the red particles are breaking data and the green particles are trailing data:
Untitledvideo-MadewithClipchamp15-ezgif.com-crop

The final result for now:
ScreenRecording2025-10-09214931-ezgif.com-optimize
ScreenRecording2025-10-09220116-ezgif.com-optimize

Now that all the technical stuff is in place i will be focusing on polishing the visuals like textures and improving the VFX.

If you have any questions, feedback or if there are any files you want me to share please let me know!

Hello everyone,

Since the last time I posted I have been working on polishing the visuals for the project. To start I completely redid the VDB simulation in Embergen. The effect could use a lot more impact, it was slow and felt too small for a cannon shot. So i made the simulation more sudden and fast in the begging focusing more on the initial quick flash of energy coming from the cannon, which made it much more impactful. On top of that I added a secondary effect to really ground the effect in the world and make it feel like it is affecting the environment. In this case I added some dust that gets kicked up when the cannon fires.

The cannon model and animation also got a little update. I made some textures for the cannon and edited the animation to make the cannon feel heavier.
Showcase.0000-ezgif.com-optimize

The destruction also lacked impact. So i decided to also add a VDB to the impact for the wall. I cleaned up the dust a little bit and added some smaller rubble to the Niagara system.
WallShowcase.0000-ezgif.com-optimize

Finally to showcase everything I made a short cinematic in Unreal.

Putting everything together and seeing the final result was really fun, and overall i really enjoyed exploring some new techniques. I really hope there is some useful information in here for anyone. But if there are anymore questions or feedback please let me know!

2 Likes