I would like to translate this UE4 material into Unity Shaderforge :

Now, this tutorial uses material function in which I recognized some but not all Shaderforge nodes.
Could you tell me how to translate this into Shaderforge?
I would like to translate this UE4 material into Unity Shaderforge :
Now, this tutorial uses material function in which I recognized some but not all Shaderforge nodes.
Could you tell me how to translate this into Shaderforge?
Do you have a particular node that you were looking for? SF lets you write custom code nodes too
Just right now I’m translating many stuff from Unreal to Unity. I suggest you to go through Amplify Shader as it’s quite similar. Sometimes, however, there are some functions that a
re not the same. If it’s possible, I open them in Unreal, go deep inside and copy the shader function in Amplify, creating it for next use. I will put something here when I will have enough
Bounding box based UV, Input function, 1-x function, Ceil
What would be the nodes in SF ?
If you want I’m recreating the original teleport from Deep Space Banana (that I prefere to be sincere) within Amplifier Shader Editor… As it’s not so direct, I can post here, in the end, the resulting nodes…
Sure, thank you. I would try to make it in shaderforge then.
Not trying to egg on the video tutorial there but something about his implementation seems a bit off, the timing of the mask doesn’t seem right, you can see the mesh stretching, that kills the illusion, you need to make sure that the mesh masks off at the right time to give the illusion of dissipation, see below.
Hi DeepSpaceBanana,
first of all thank you for your amazing knowledge that you share within your tutorials…
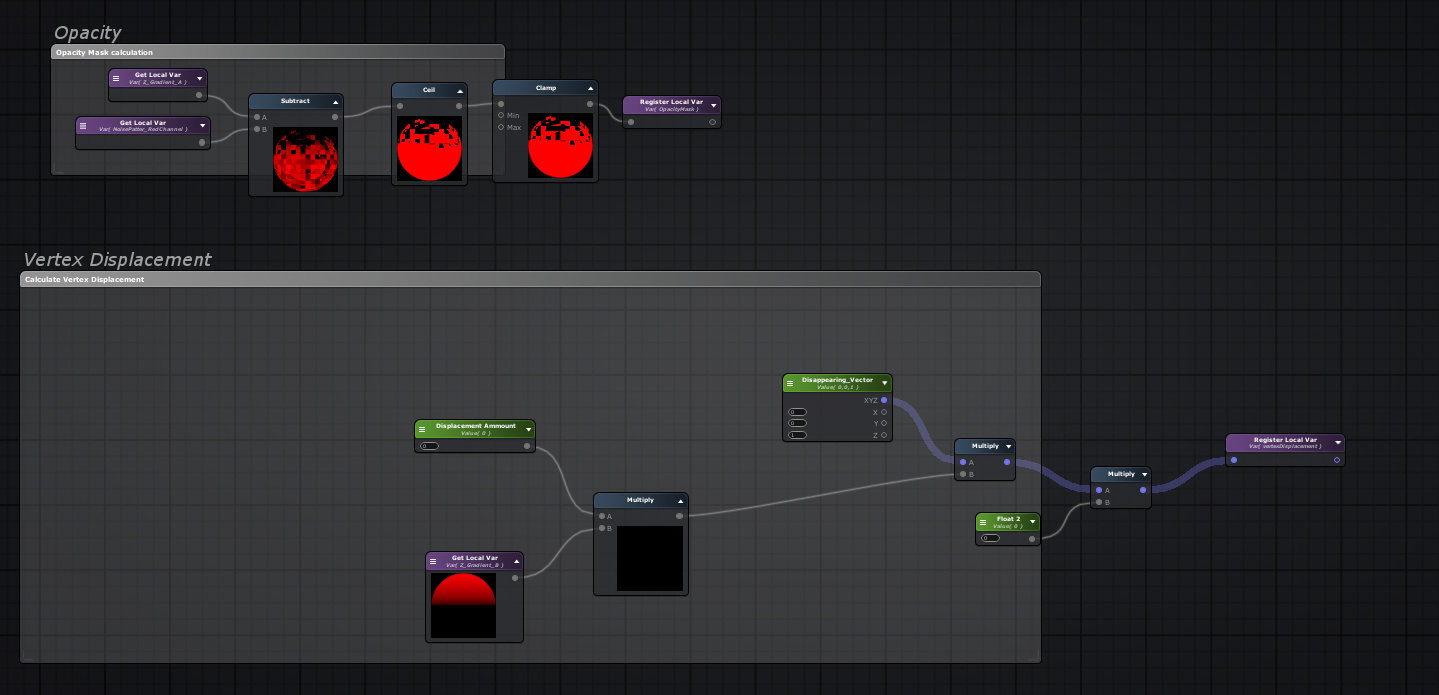
I’m trying to recreate the teleport shader but I’m a little bit stuck within the Vertex Deformation…
Here some steps…
Current result (without Vertex Deformation complete function)
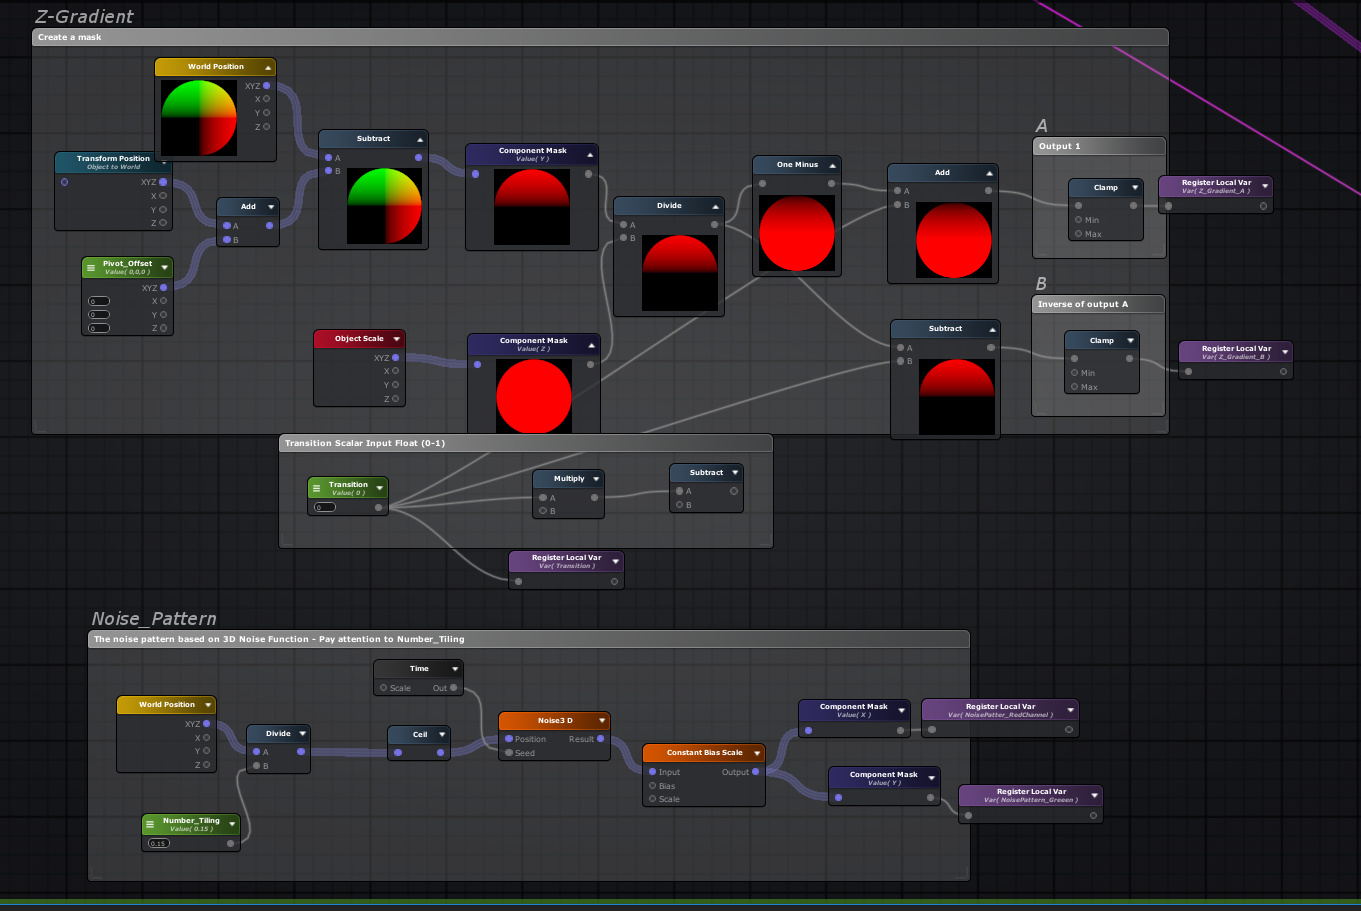
And here the nodes until now
I have also remade your 3DNoise within Amplify Function.
Problems until now:
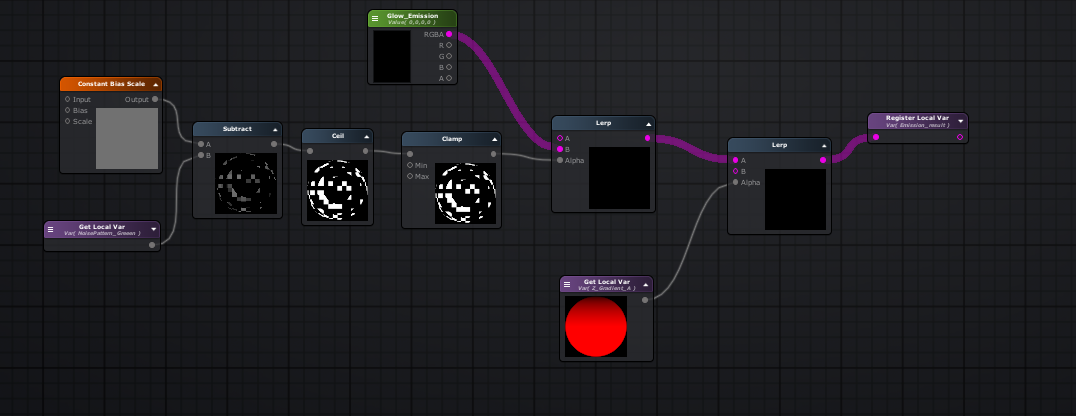
Meanwhile, waiting for suggestions, I’m reworking the shader. I made the gradient mask based on a general float with a smoothness value that can help to fine tune the effect on the mesh. I think that this setup doesn’t replicate exactly Unreal behaviour so I tries to personalize it a bit. Then I’m working on Vertex. I’m managing to give an higher suction but having some issues with alpha clamping, suggestions are welcome
Hi @gponzini
1.) As far as I can tell the Vertex deformation should go as high as the “Displacement value”. I think your mask falloff might just be too tight, so your not seeing any of the vertices that are displaced higher. a quick way to debug this would be to unplug the mask and see if the vertices are displacing the correct amount.
2.) The gradient calculation by default assumes the object pivot is at the base, this is what it uses to calculate the gradient, The “Offset Amount” was made in case of objects with different pivot locations, There is a way to make the gradient automatically align with every object regardless of size/pivot location, but it added a lot of extra instructions to the shader so I decided to go with the manual approach of entering an “offset value”.
3.) Sounds like you are getting some negative values out of the noise function, are you biasing it correctly? [noise output + 1)*0.5] should do the trick.
Thank you very much. I understood the manual offset but I think that Unreal nodes make some different calculations, as on some meshes the mask doesn’t cover everything if I clamp the transition from 0 to 1, even adjusting the pivot.
About negative values I’m sure that there are some negative stuf
f, but I checked the bias and was correct as you wrote. I think that maybe is something inside the vertex function of Amplify that is different?
https://www.artstation.com/artwork/qaZky
Here a mix of DeepSpaceBanana teleportation shader with some changes. I will fix soon the value, I need few times to go through some functions that are not work properly if I clamp the teleportation value from 0 to 1 as in Unreal… In this version, however, there is the possibility to change the lenght of stretching.