This is by no means the first or only tutorial for this technique, but I was not able to find one for the tools I work with so I thought I would share my method. As someone who just started getting into Unity, shaders and VFX, it took me a long time to figure out how to piece it together. If I can help another novice game designer / VFX artist, I’m happy. This tutorial will be aimed at beginners and I will try to keep it simple and not leave out anything that can not be easily googled.
If you have feedback or tips on any of the following, please lert me know. I’m here to learn.
- How to make this tutorial better
- Better ways to use these tools for this effect
- How to change which picture is shown as the preview in the forum
The effect we will recreate is found in this video, from around the 23rd minute mark. I highly recommend watching it before you start.

We will create it using Unity’s own free graphic tools for Shaders and VFX, Shader Graph and Visual Effect Graph. If you get stuck anywhere, you can load the shaders I created:
Shader Graph
Visual Effect Graph
First we will setup Unity. Do not skip any of these steps or you will have some very cryptic error messages and spend a lot of time googling them.
Start a new empty project from Unity Hub. In Unity, click Window > Package Manager and search for “Shader Graph” and install it. Do the same for “Visual Effect Graph” and “Universal RP”.
In the Assets folder in the Project tab, right click > Create > Rendering > Universal Render Pipeline > Pipeline Asset
Open Edit > Project settings > Graphics. At the top, under “Scriptable Render Pipeline Settings”, select the UniversalRenderPipelineAsset asset we just created.
Open Edit > Preferences. Select Visual Effects in the list and enable “Experimental Operators / Blocks”.
In the Hierarchy tab, select the Main Camera and change the Background Type from Skybox to a solid black color.
In the Assets folder in the Project tab, right click > Create > Shader > VFX Shader Graph. Call it whatever you like. Double click the shader to open Shader Graph.
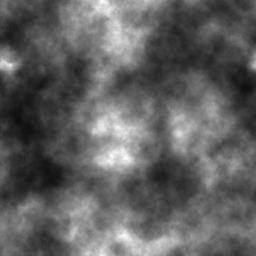
Now, start with creating a Sample Texture 2D node and use a simple cloud image for it.
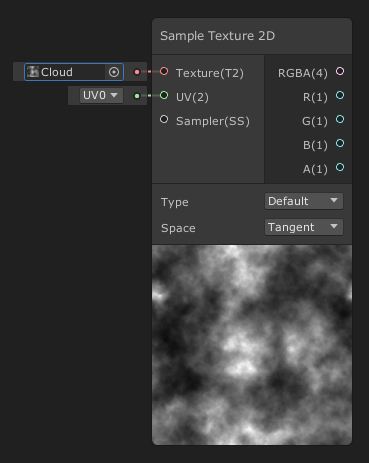
I created mine in Krita, a free image editor. I will not cover how to do that, but I will share the image I used:
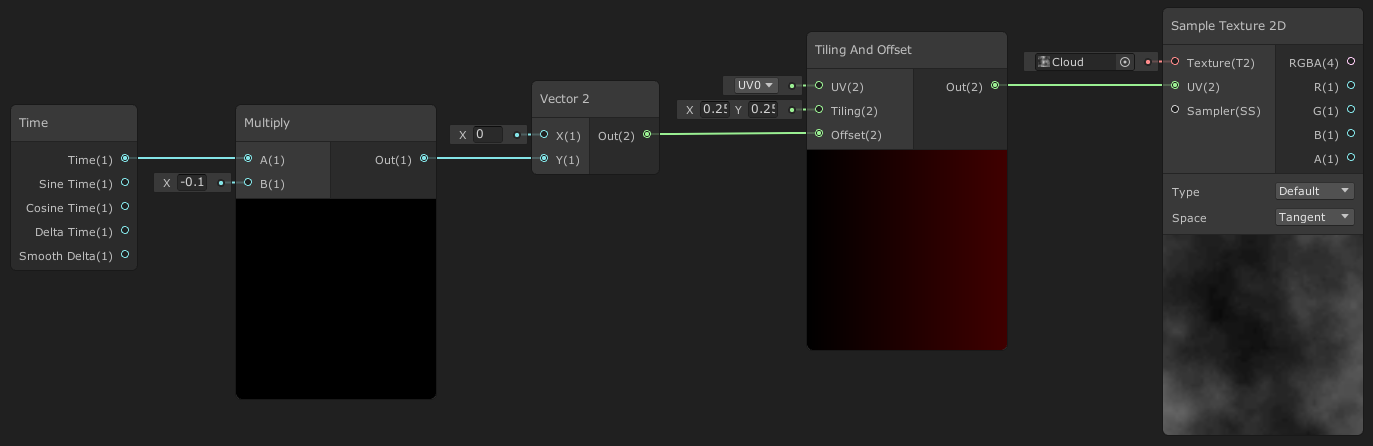
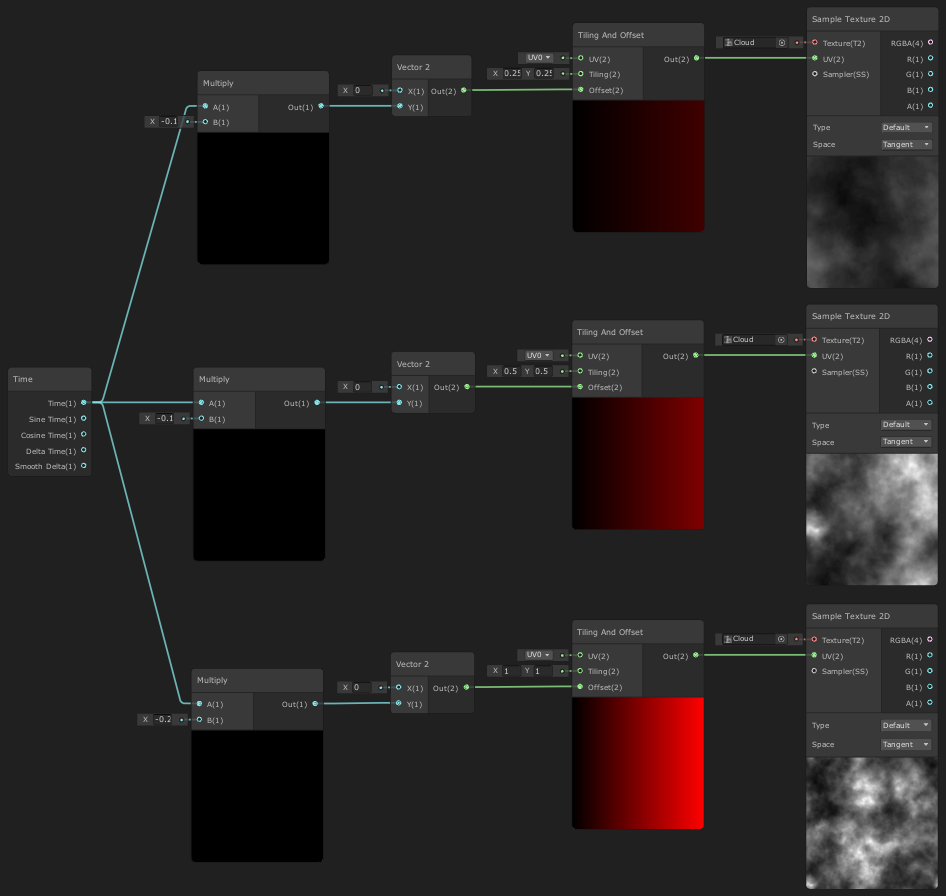
We need a Tiling and Offset node to control the scrolling of the cloud pattern, and a Time node to make it change the offset over time, in other words scroll.

The cloud pattern is now scrolling at an equal speed in both X and Y direction. We want it to only move upwards, so we will add a Vector2 node between the Time and Sample Texture 2D nodes to make the time value only apply to the Y axis. That’s a lot better, but it is still moving faster than we want and also in the wrong direction. For our smoke effect, we want the cloud pattern to move slowly upwards. To achieve this, we multiply the time value with a small negative number using a Multiply node.
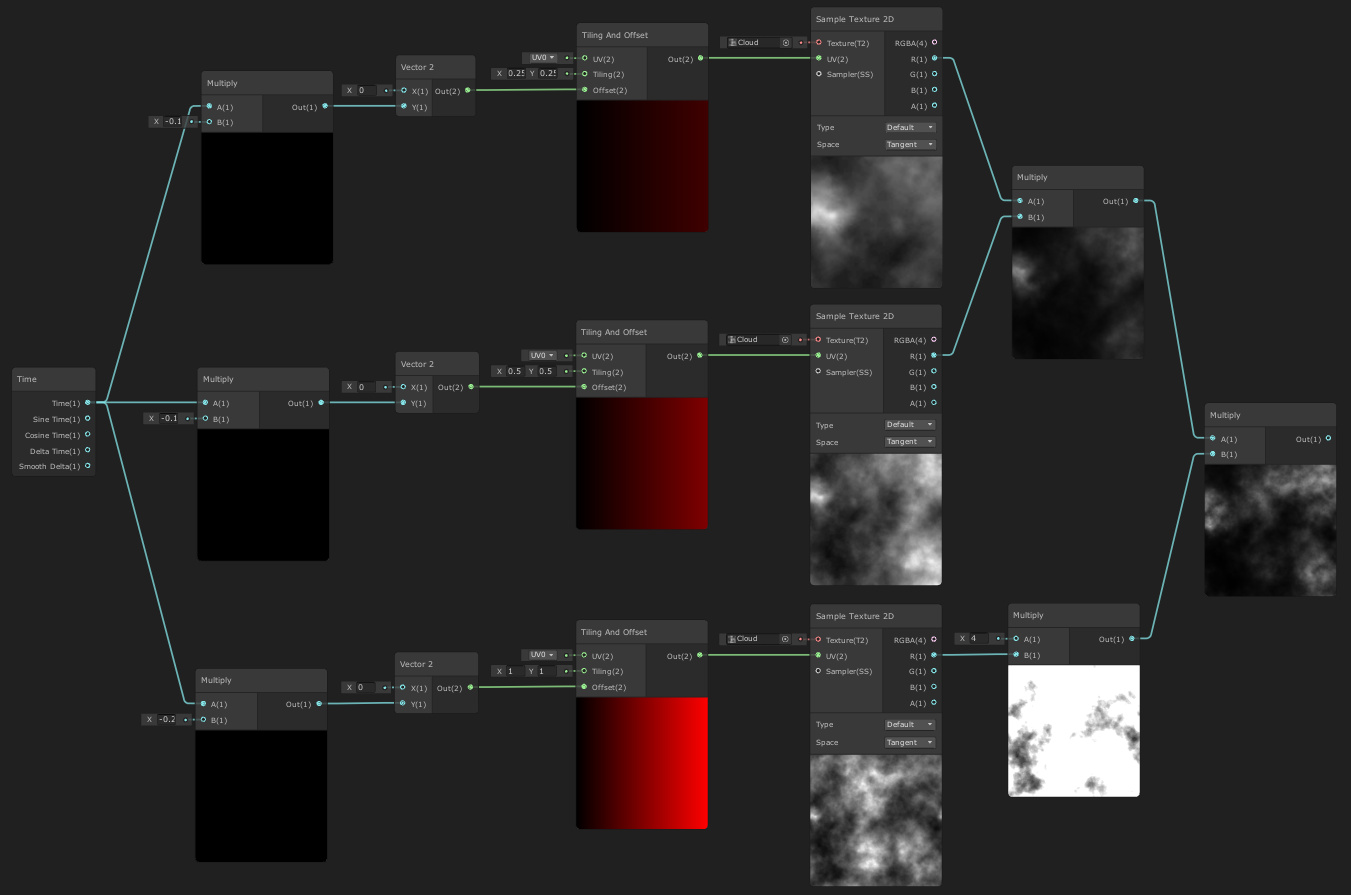
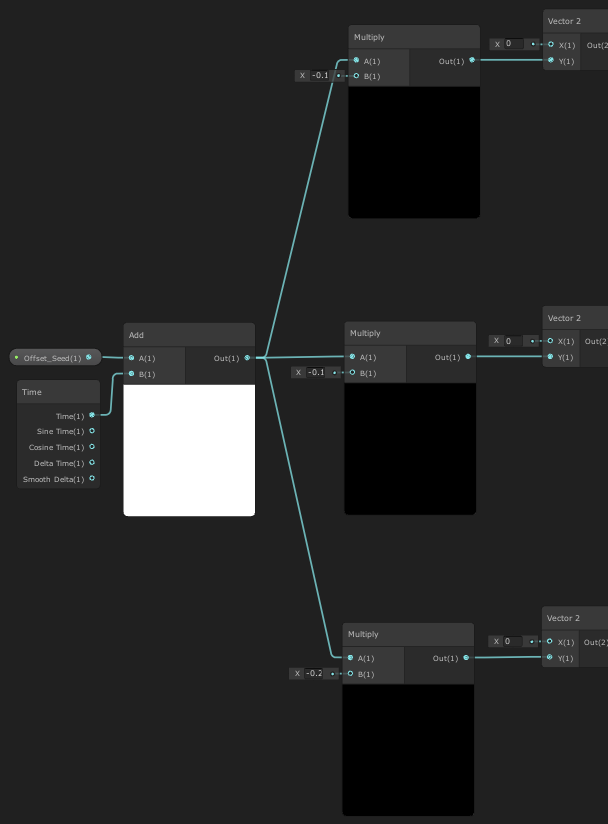
What we have now is the foundation of our smoke effect. Select all nodes but the Time node and copy them two times. Then connect the copies to the existing Time Node. Adjust the multipliers between the Time nodes and the Tiling and Offset nodes to create a variation in scroll speed. Also adjust the Tiling values of the Tiling and Offset nodes to create variations in scale. As shown in the video in the beginning of this tutorial. I used -0.1, -0.15 and -0.2 for the scroll speed. For Scale, I used .25, .5 and 1.
Create a Multiply node and connect two of the Sample Texure 2D nodes to it. Create one more Multiply and connect the last Sample Texture 2D. As the multiplier for that one we will use 4. Create one more multiply node and connect the results of the first two. What we have now is the example from 27:00 in the video.
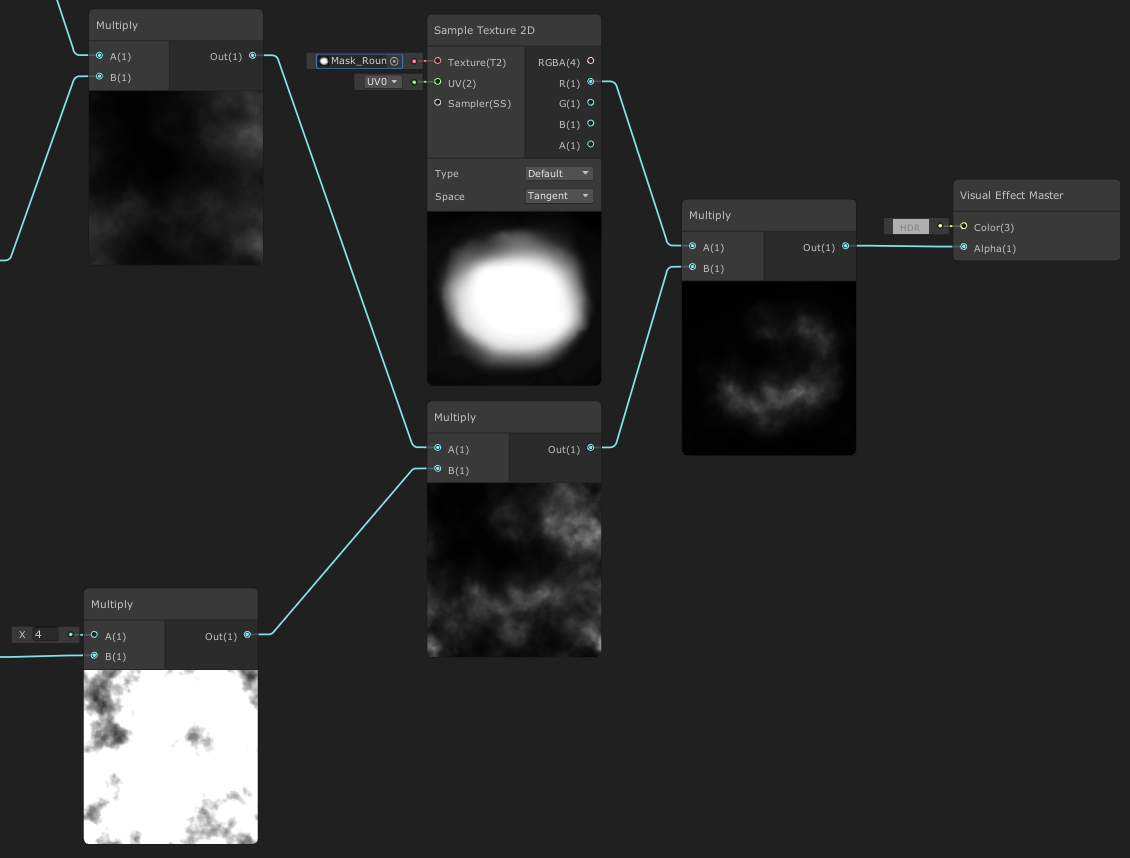
We will now mask this effect using another image.

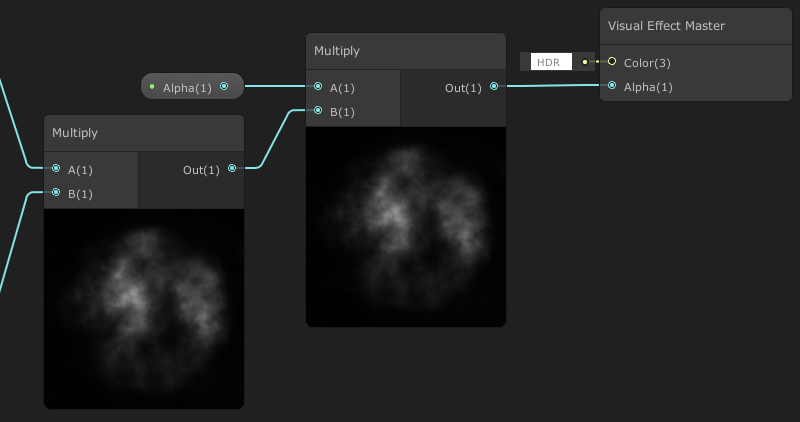
Create another Sample Texture 2D node and use the masking image. Then multiply it with the result from before and finally connect the result to the end node, Visual Effect Master. Choose a color of your liking for the smoke and save the asset before closing the Shader Graph window.
In the Assets folder in the Project tab, right click > Create > Visual Effects > Visual Effect Graph. Drag and drop the new VFX asset to the scene in the Hierarchy tab, creating a new game object. You will now see a particle system in your Game tab, using the deafult effect:
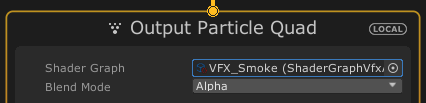
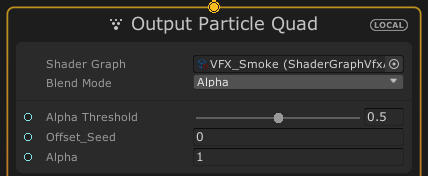
Double click the VFX asset to open the new particle effect in Visual Effects Graph. Go to the bottommost node, Output Particle Quad. Under “Shader Graph”, select the shader we created with Shader Graph. Notice how the particle effect in the Game tab instantly responds to this change and now shows something that starts to look a little like the smoke effect were going for.
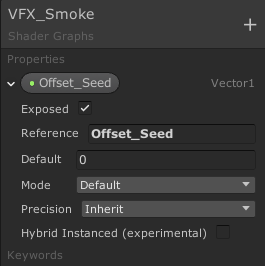
Notice how all the particles have the scrolling cloud shader, but they all have the exact same pattern. This will not look natural at all. Each particle needs a unique offset in the cloud pattern. The particles also “die” very abruptly instead of slowly fading out. To solve this, we close the Visual Effect Graph window and go back to Shader Graph. If it’s not already active, activate the Blackboard by toggling the option in the top right corner of Shader Graph. Then click the + on the Blackboard and select Vector1 to create a new exposed variable for the shader.
Drag and drop the new Vector1 next to your Time node. Create an Add node and connect both the Time node and the offset variable to it.
We will also create a Vector1 for the alpha of the particle. Create it using the same method and put it with a Multiply node just before the Visual Effect Master node. I set its default value to 1, fully visible.
Click “save asset” and go back to Visual Effect Graph. Now, we can see both the exposed variables in the end node.
Right click to the left of the Output Particle Quad node and create a new Random Number node. Set the max value to something that is high enough to ensure it can use the whole cloud texture.
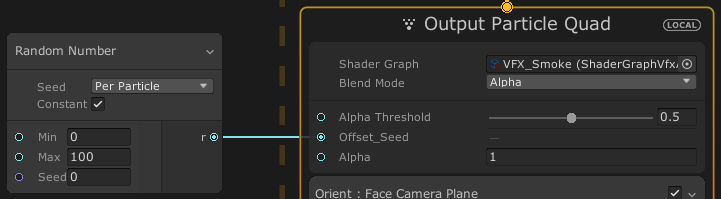
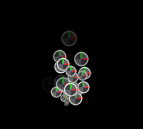
Now take a look in the Game tab. Notice how all the particles now have their own unique instance of the scrolling cloud shader and none of them look the same.
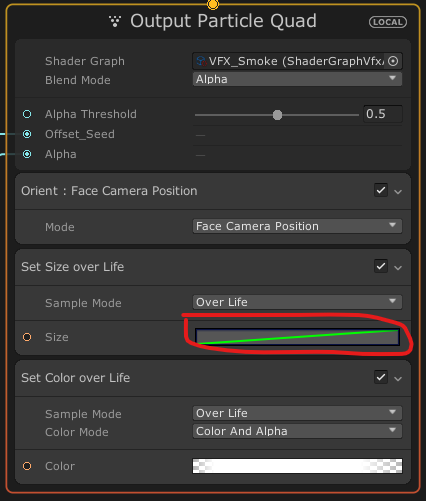
Create an Age Over Lifetime node and connect it to a Sample Curve node. Connect that to the Alpha input on the Output Particle Quad node. Now look at the Game tab again.
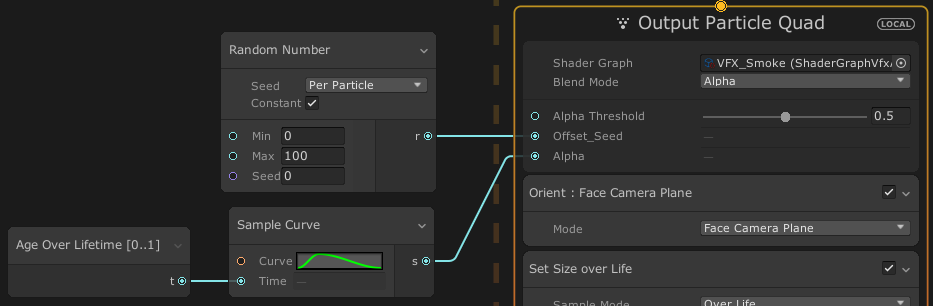
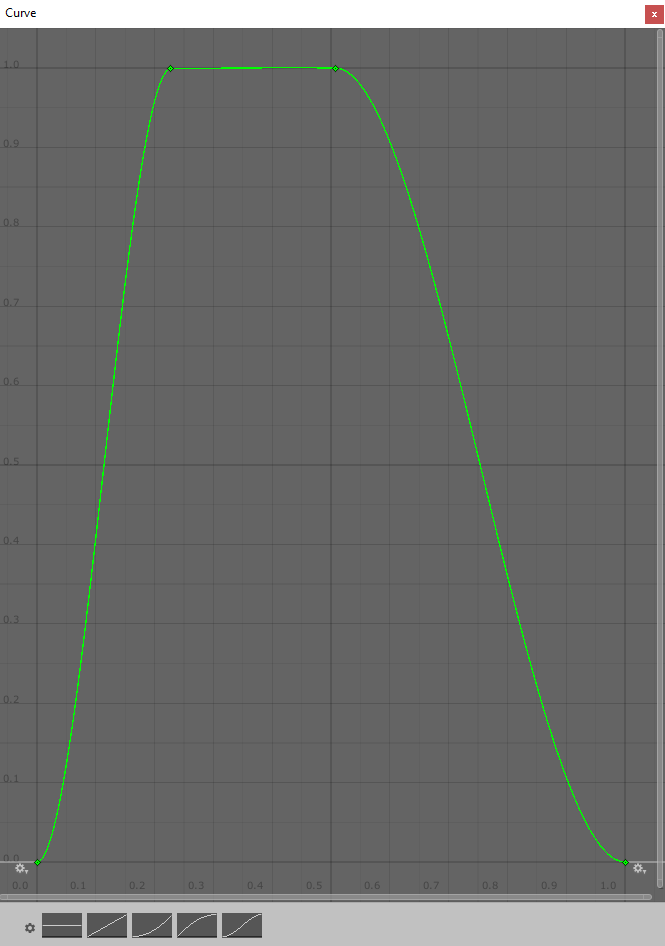
The particles now fade away nicely, but they need more opacity. Double click the green curve in the Sample Curve node to edit the alpha over lifetime curve. First of all you will notice that the maximum value it ever reaches is way below 1, so grab the key and drag it up to 1. Then right click the curve to add a new key and drag it to the top as well, creating a curve that goes from 0 to 1, stays there for a while, and then goes back to 0.
Now we’re getting somewhere, but the particles are still way to small. Double click the curve in the Set Size Over Life node inside the Output Particle Quad node. Drag the right end of the curve up to 3 or so.
There we go! Play around with the settings in both Shader Graph and Visual Effect Graph until you reach a result you are satisfied with.