Stylised Weapon VFX - Khaotic's Sketchbook

Hey everyone! I wanted to start this sketchbook to keep my work for this project organized and keep things like feedback and suggestions in one place.
I am new to VFX and this will be my first project where I plan to put all that I have been learning so far into practice to create some cool weapon VFX!

Desired Outcomes:
-Bullet Casings
-Muzzle Flash
-Impact Effect
-Impact Debris (A couple of different surfaces)
-Bullet Tracers

First, I’d like to share where I am currently with the project.
I have most recently created the bullet casing effect and have now moved to the muzzle flash which is still a WIP.

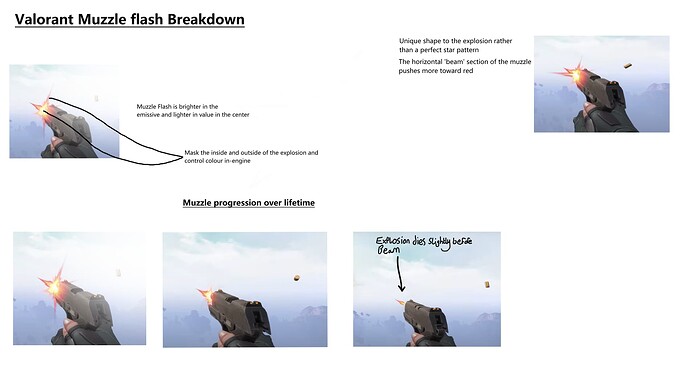
Before I started the muzzle, I made this little breakdown of the default muzzle flash from Valorant as I have been pretty inspired by their effects This helped break up the muzzle even further into smaller chunks to make it more manageable:

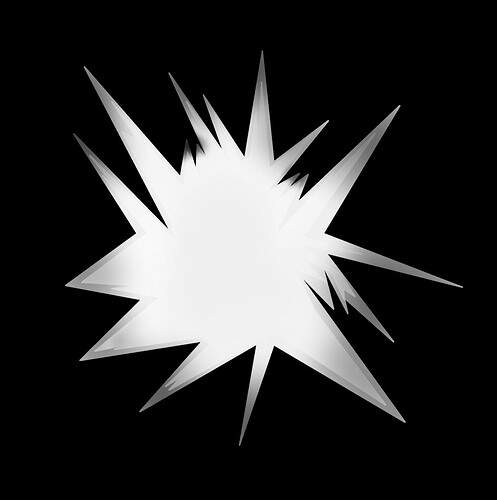
I then moved to creating a mockup of the muzzle I wanted to make in Krita (Which I will most likely redraw later as there is a lot to be improved):

I made sure that my inside and outside of the explosion were separate as I wanted to use them as masks in-engine to control their colour on-the-fly:

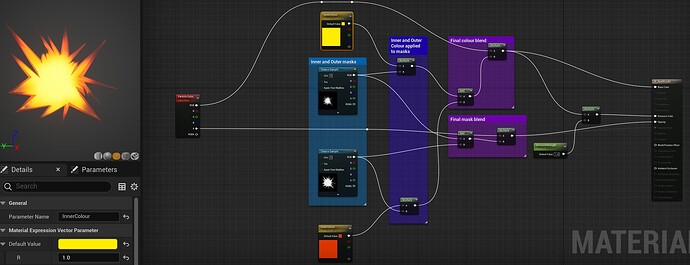
Here’s how this is looking so far:

The next thing I’d like to get down is the controlling of the emissive in the muzzle. At the moment I am controlling it via a parameter within the material but I would like to get it to work with a dynamic parameter so it can be controlled in Niagara. I just haven’t figured out how to use dynamic parameters for colour yet!

I am also going to mock-up the horizontal portion of the muzzle flash so that it fits better with the next style I am going for.

Feedback is always valued, I love to learn!
4 Likes

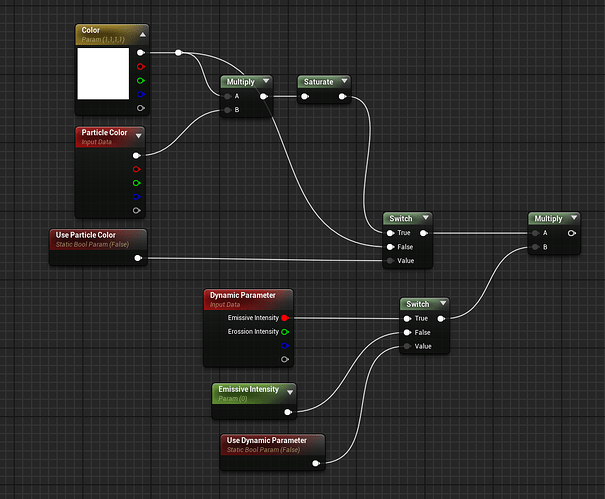
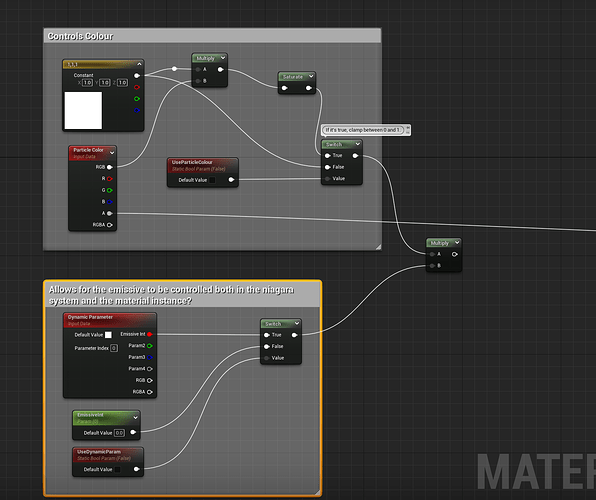
Controlling the whole color via dynamic parameters doesn’t make sense, since there is a particle colour, so I would just use additional intensity through the dynamic parameters.
And as an additional tip, to do this via a switch, this will allow you to use this material as a particle system with a dynamic parameter, and elsewhere with a normal parameter.

1 Like

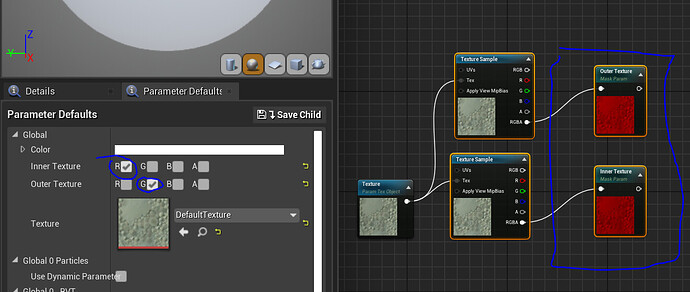
Another tip would be to use texture packing, add each gray texture to its own channel, and then turn on the one you need for the outer or inner as needed.

1 Like

I see, great tips! Thank you, sir! I really appreciate the feedback!

If you don’t mind, could you explain a little more what this is doing please? I’m quite confused. I also assume that this setup will need to be done twice and multiplied by each mask for inner and outer? I wrote it out myself to break it up and better understand it:

I’m also seeing erosion intensity there too. How can this be used and is that where the texture essentially ‘erodes’ away?

the switch is only there to toggle between being able to control the material via dynamic parameters OR via parameters in the material. The basic idea is that there is a base color, it is blended by multiplying it with a particle color so that it is possible to control the color change through the particle system, and the following emissive intensity parameter simply allows you to decrease or increase the intensity of the color, for example, make it too bright at the moment flash (more than 1)
Depending on the desired result, it can be multiplied with the inner and/or outer color, or use a separate channel for outer emissive in dynamic materials. :slight_smile:

1 Like