Hey Simon, I just watched this, thank you so much again! I have taken notes on all your points I can act on. It was great to see you use it and see what the pain points were. I have been working on updating the timeline widget as well which seems like the bit that’s really letting it down.
Let me address some of your points.
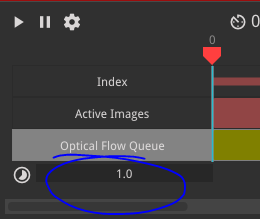
Timeline playback
Very embarrassing and I will resolve this with a timeline widget update. You can change playback speed here
It looks like in your UI, the default means you have to scroll to see it but with no hints to do so. Not really a good start on my end!!
Strong values being packed in to first/last frames as default:
This is actually intentional, however maybe the defaults should be to leave blank. What Slate’s actually doing, is by default, looping through your texture sheet. So at the last frame, it considers the neighbouring texture to be the first of your sequence. And at the first frame, it references the last frame. For things like a one shot effect, the start/end of your sequence is quite different hence the super strong values. For looping animations, the values should help naturally flow from end to start and back again. Hope that helps.
Changing your numbers for Unreal
The “Current Minimum/Current Maximum” readouts are there to show how far the optical flow process has had to search for motion (in pixels) on the entire sequence. So a value of -10.0, 10.0, normally shows that it’s had to search 10px either direction to calculate motion. Normally that value doesn’t have much use for shaders as it’s in raw pixel space rather than UV space. Instead, you can dial it in to your “Distance Limit” field for the next time you generate. This will ensure you get a nice range of data in your image, rather than clipped white/black values where the data range is clipping.
The actual shader numbers
This is pretty tricky territory. From your video you mentioned it’d be good to know what the preview is using? The good news is, I made all the shader files I use for Slate entirely public, and are visible in the /ProgramFolder/Assets/Shaders/ folder.
The asset you’ll want to inspect is Shaders/UI/AnimationPlayback.glsl
It’s quite a messy shader (sorry!) as it has to do every type of animation playback but the key is, all I’m doing is using the uFlowStrength uniform, which is just the Shader Estimate values that are shown in the UI.
I’m not completely familiar with Unreal’s shipping motion vector shader, I think it came a little after I released Slate initially so the two may not play nicely together.
I threw up a shader on Github for using optical flow from Slate.
With this setup, the main thing I seem to do differently, is setting my Optical flow textures to “Normal Maps” to take advantage of unpacking the data to -1.0, 1.0 automatically.
I’ve just noticed that this set up tends to want the magic number from Slate, to be multiplied by 2 for better results. I imagine this is due to the texture data being expanded from 0.0-1.0 to -1.0,1.0, which would mean an increase of a factor of 2. I will fix this from Slate’s side for the next update.