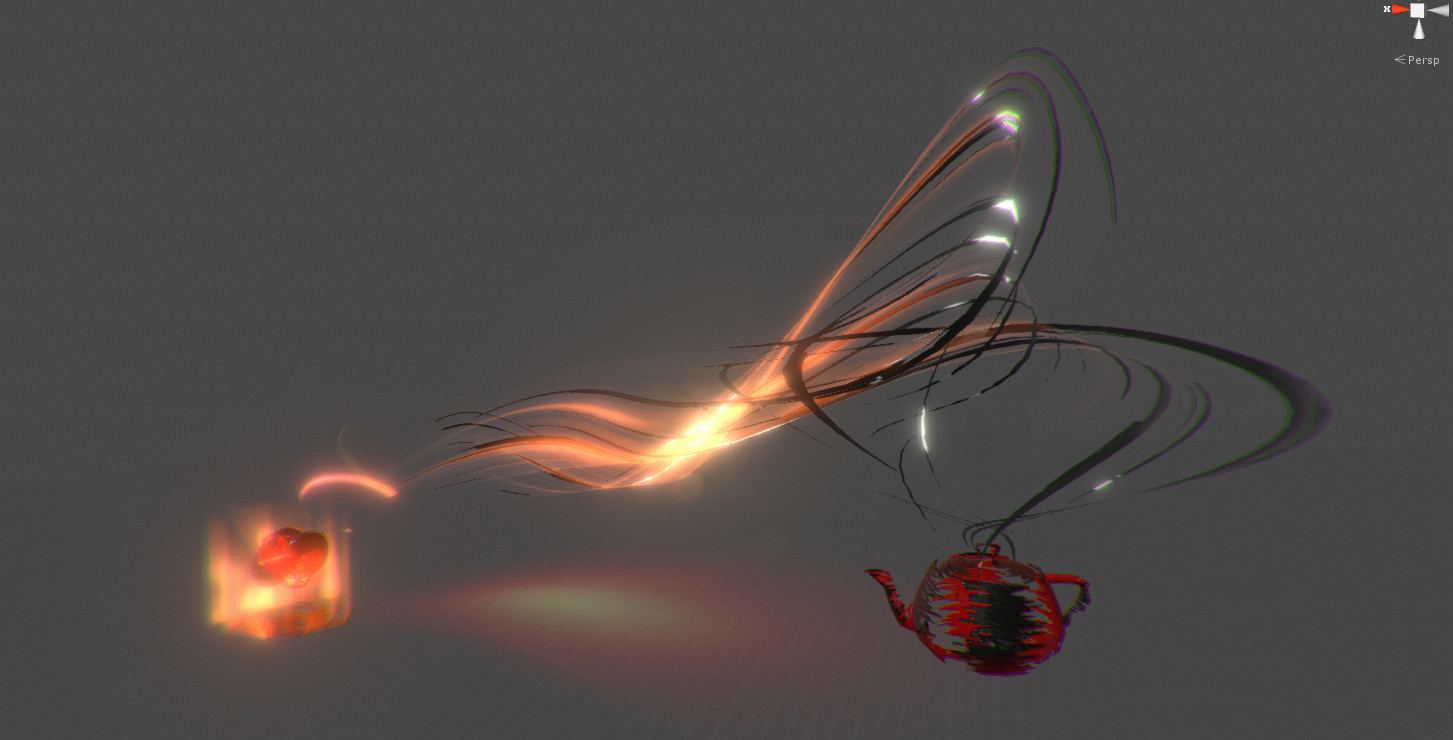
Finally got some tome to finish this baby. Anyway, I was working on the final piece of the puzzle - the integration effect. I feel like it’s done and that the spiraling motion will fit in nicely with the end of the trails. Might tweak it a bit more once I start combining everything together or if you guys have some cool feedback
Really cool looking! Is it basically 1-2 side meshes wrapped around the pot for the trail swirls and the rest some panning with your textures on the pot itself?
In the nutshell - yes - you are right on the money.
I don’t use the exactly same mesh for every element but I offset some parts and UVs to get variation and desired effect. I plan to do a proper breakdown once the competition is over.
I’m not sure if you have already shared this info:
Are your splines done with ribbon/trail particles in whatever engine you are in? Or do you generate them offline and just animate the UVs? The smoothness of the curves is really great.
They look really really really good.
The integration looks great. The lid dropping in while still integrating is a great touch.
I don’t rely too much on trail renderer, it is not that good in Unity (upcoming versions might change that), so I prefer to make them offline. I simply have more control that way, over everything - mesh density, UVs, curves…etc.
In all fairness, it does impact the iteration and flexibility of the vfx, but I also mitigate that by building those meshes semi-procedural. I use 3dsmax with instanced/referenced objects and a lot of modifier stack trickery, so changes propagate fast.
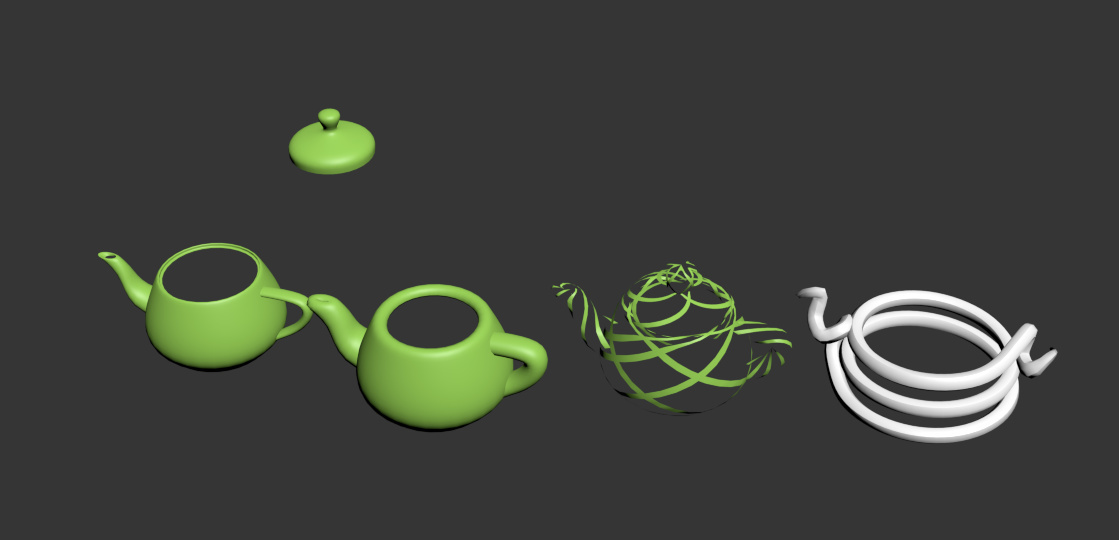
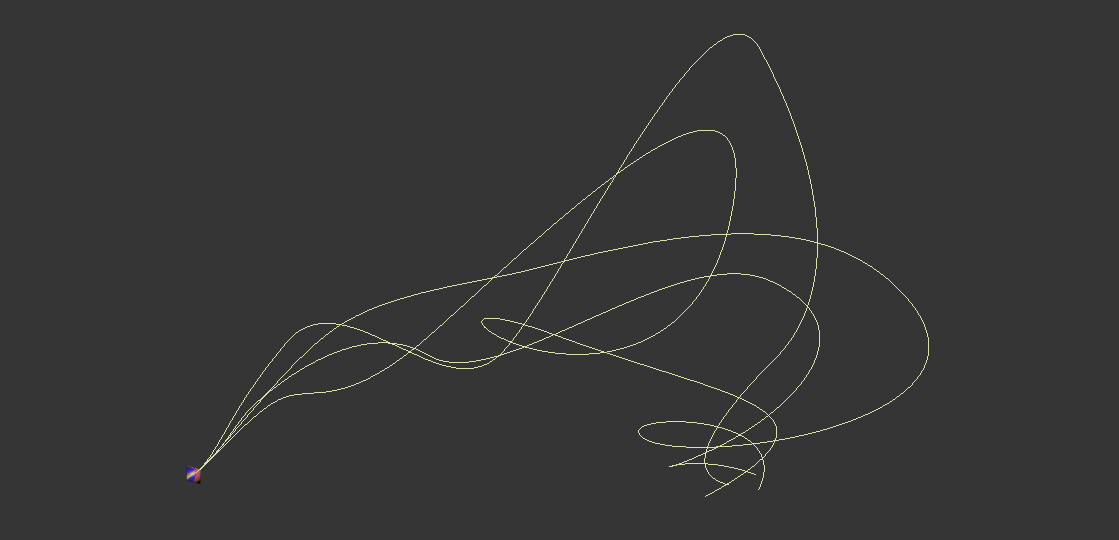
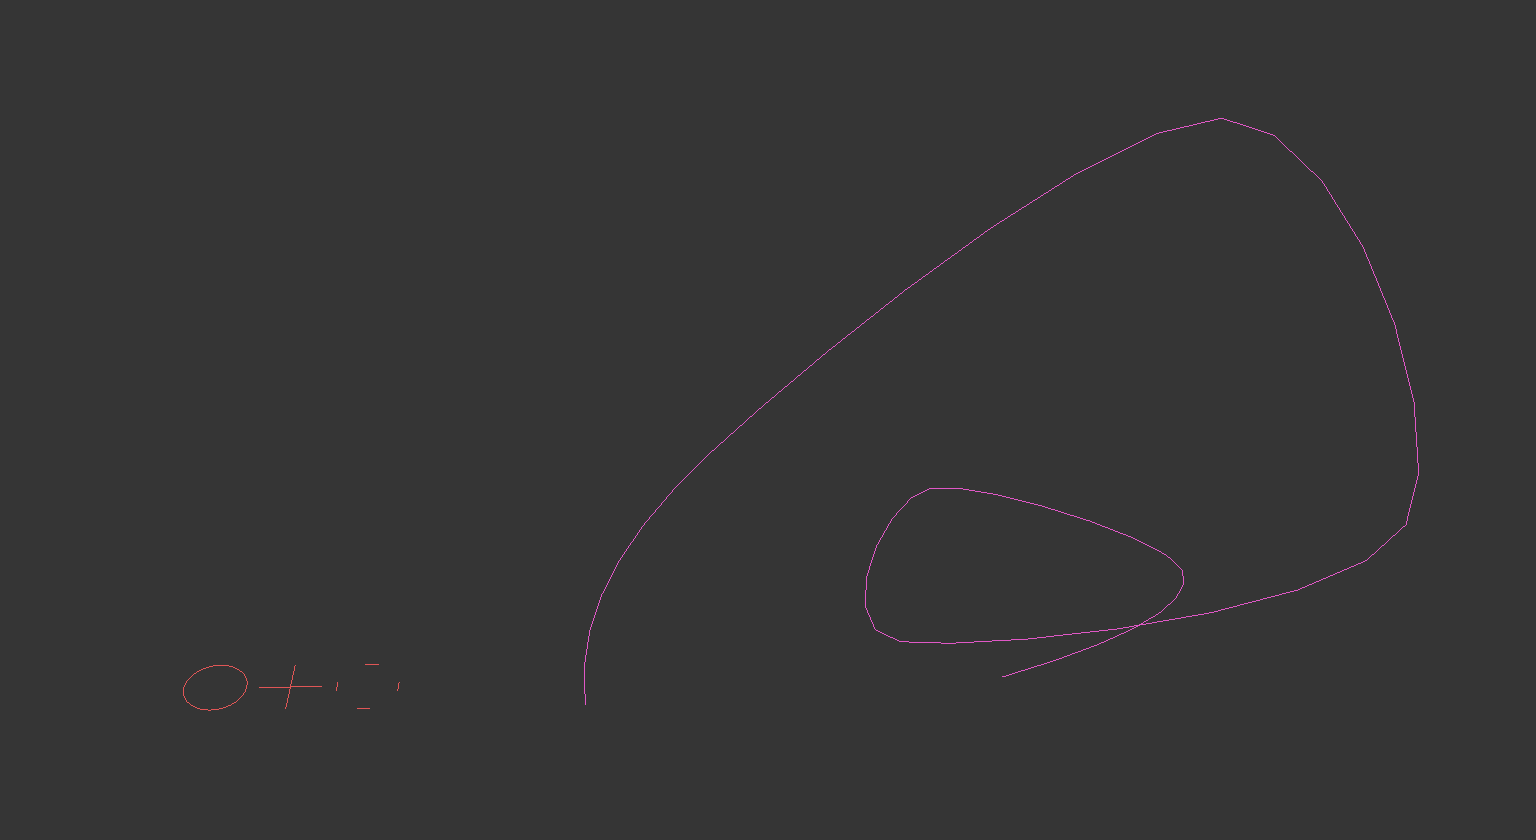
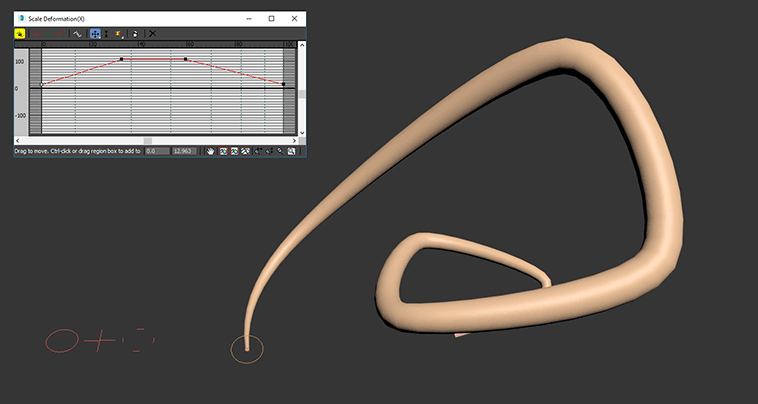
Here are all my meshes for the start object, initial torus and spiral drive the rest:
Damn dude! Id be interested to know how you made all those funky trail meshes. I get the cross sections that follow the curves but how did you make all the spirals that branch off from them? Building this one curve at a time would take me foreeeeeever haha.
Your videos looking great too : PI like the pot lid drop
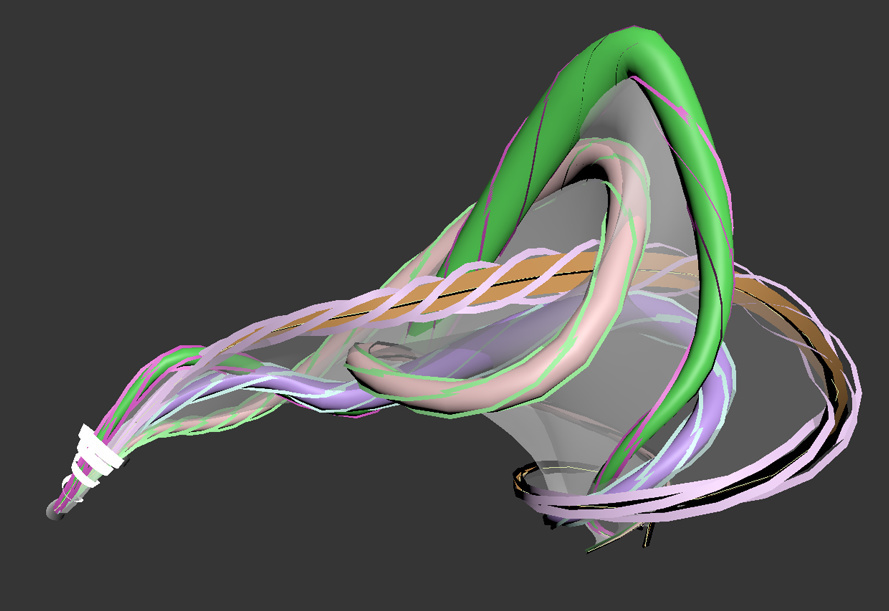
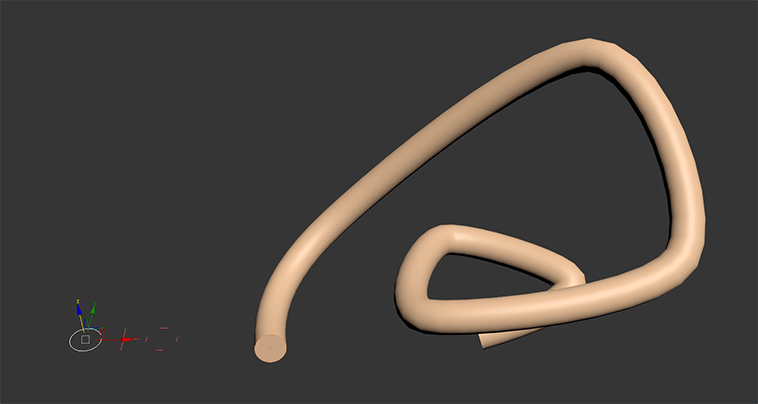
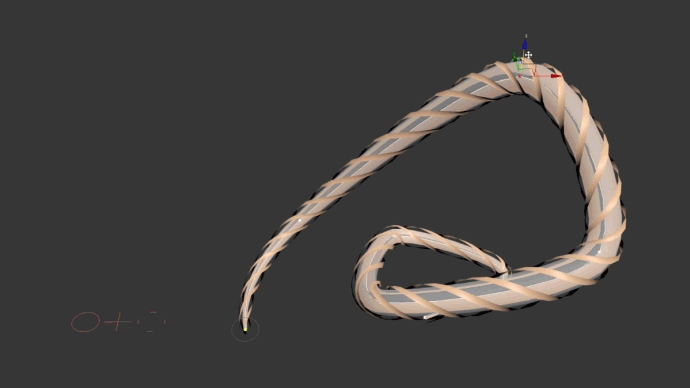
Then in 3dsMax I make a compound object called Loft, which basically extrudes one shape over the path of another. So I get these:
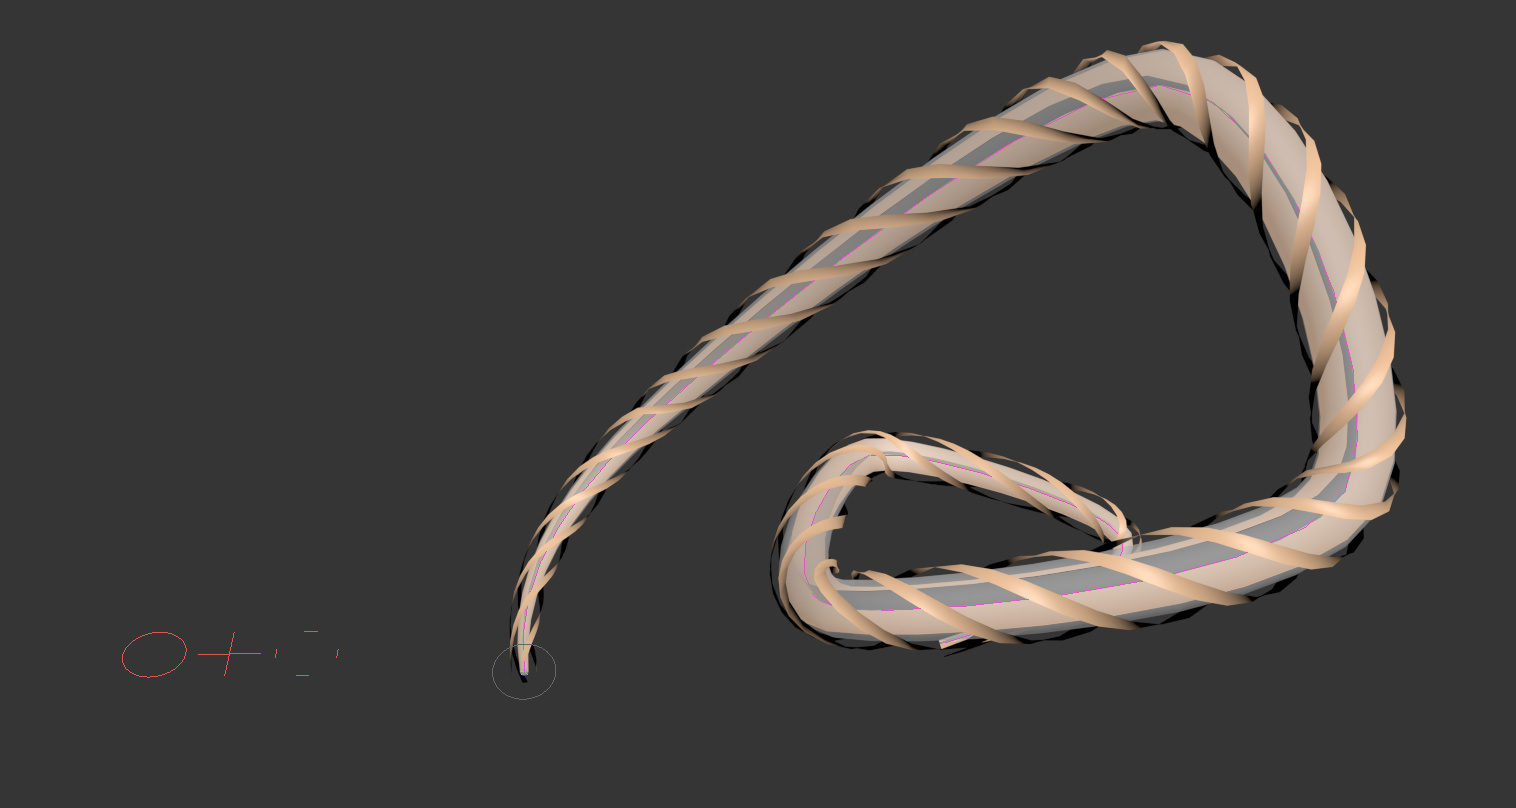
Cool thing about Lofts is that you get control over some things over the length of the spline. Things like scale and twist, so by adjusting those curves you get this:
And the cool thing is they are all referencing the original spline in their Lofts so changes are easy:
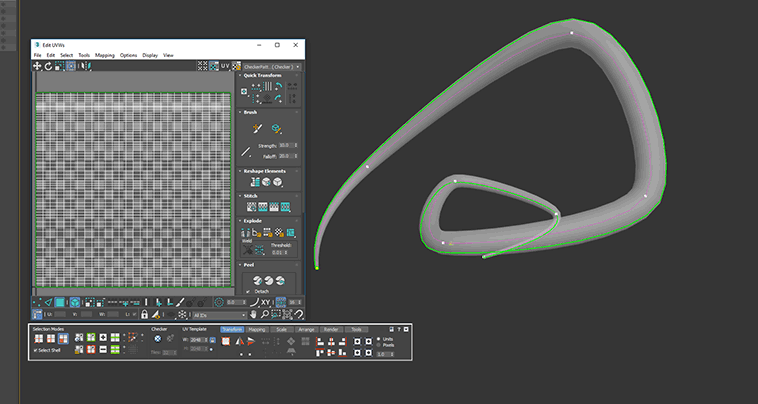
Another uber-cool things about Lofts is that they can generate UVs for you, all nice and tidy.
That is the base of it all. After that I sometimes adjust UVs if I aim for specific effect, apply vertex colors/alpha and manually tweak some parts if necessary.
WOH! Was not expecting that man! Thanks so much. Gah, another reason I need both Maya and Max. Im going to give this one a shot tonight. It looks very powerful!. That workflow looks so clean and customizable. I love how it essentially rebuilds the curve as you move the curves. In Maya I have to rebuild the curve constantly and the outcome is always different.
I’m planning a Houdini tutorial to create a Digital Asset so you can do all of this in the unreal editor (or maya) using splines. Perhaps I should bump that up my priolist…