Niagara Player Interaction Mini Tutorial


In this tutorial we’ll quickly go over the basics of setting up Player-Particle interaction using NPC.
The basic idea is fairly simple.
- We use BP/C++ to get the location of the player character, and save that to an NPC we have setup.
- We use a module, or direct fetch to calculate an influence radius.
- We can then apply that influence as to any number of things, like changing the velocity, or pulling particles towards the player.
Setting up the NPC
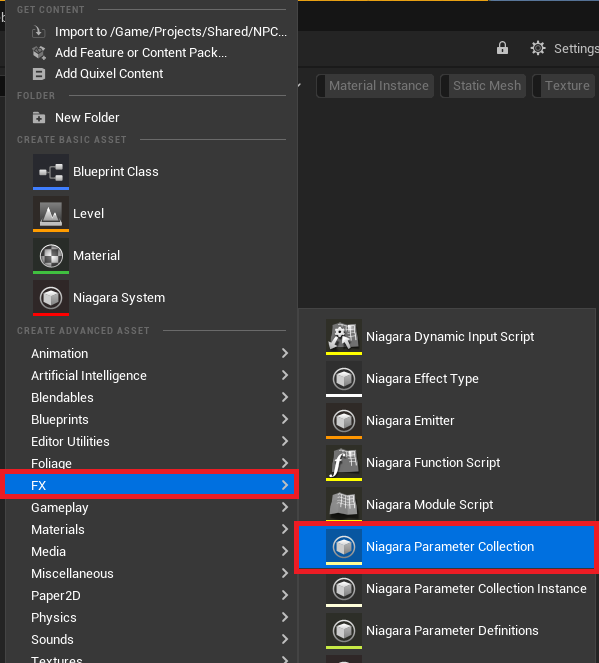
From the content browser, select right click → FX → Niagara Parameter Collision
And give it a good readable name
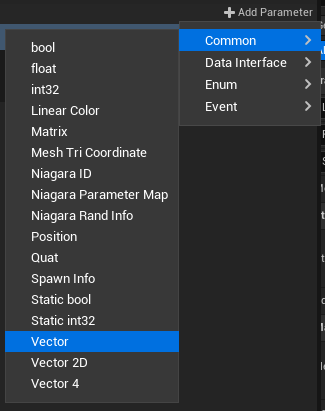
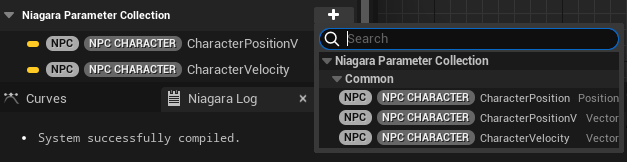
Open the NPC, click +Add Parameter → Common → Vector to add 2 vector parameters, Position and Velocity.
We would use Position in case of lwc, but unfortunately that doesn’t work.
Building the Blueprint
If you are part of a larger team, it is best to contact your engineers at this point, and ask them to update the NPC for you using a manager structure.
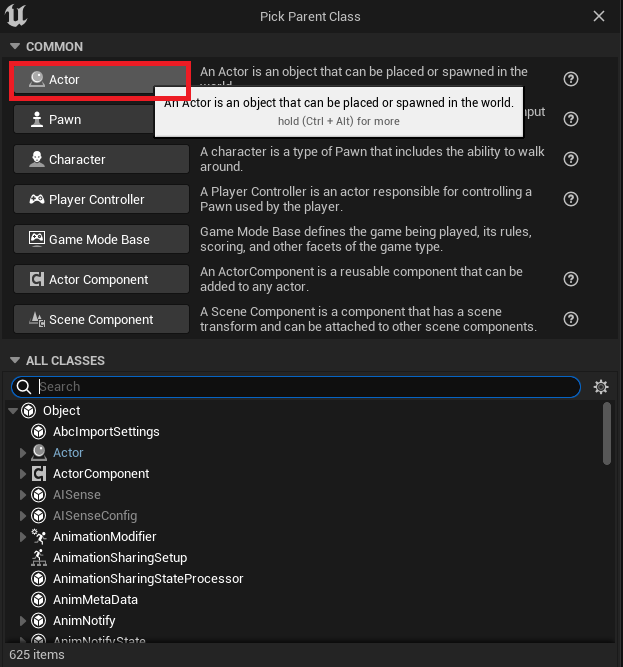
If however you are making a project at home, it should be ok to just sample the position using a simple actor BP
Add one from the content browser and give it a good name. For example BP_CharacterInteraction
Then add the following nodes to collect the location, and derive the velocity.
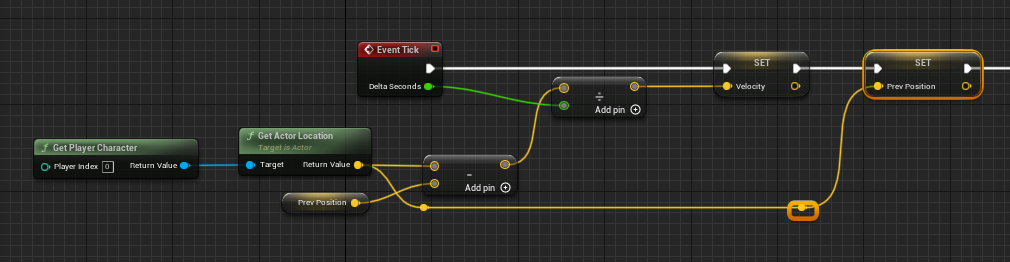
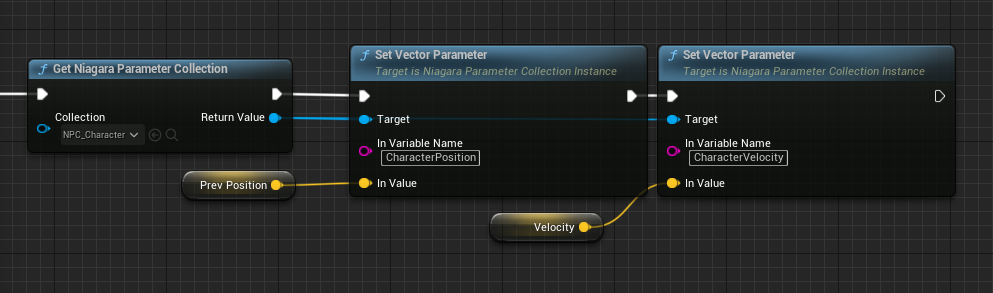
Then set those in the NPC
Compile, save, and place this BP in the level you need player interaction in.
Using it in Niagara
Now for the fun part.
Once you’ve setup all of the above, and opened a new Niagara System, you can add NPC parameters from the Niagara Parameter Collision Section of the Parameters Window.
While you can obviously write adhoc solutions per emitter, I would recommend at least adding a basic PlayerInteraction module to do the most basic work for you.
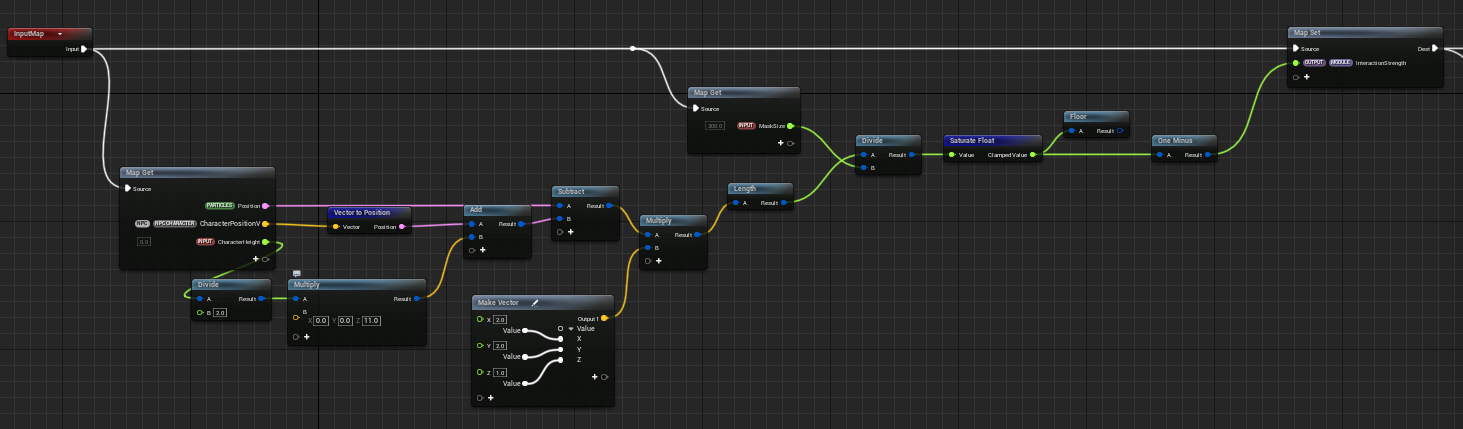
For example mine looks like this:
- I read the character position from NPC and the currents particle position
- add an adjustable character height (in case the character origin is at the feet)
- Multiply by (2,2,1) to squash the data and create create a more oblong interactive shape
- Get the length and divide it by an adjustable input to adjust the size of the interaction
- Saturate and oneminus to make the data between 1 and 0 where 1 is closest to the character
- I also lerp between the current particle velocity and a scaled character velocity vector to add adjustable wind.
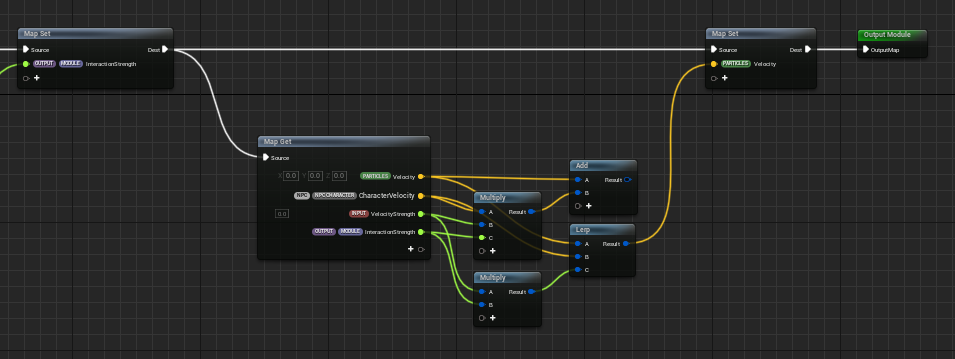
I recommend setting the influence as a module output so it can be easily fetched from other modules/ dynamic input, etc…
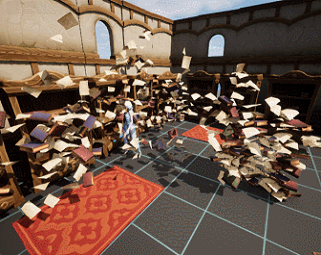
And that’s it. This can be used very simply to add some wind on particle near the player, or to attract magical orbs into it.
Or as I showed in the video above for complicated animation setups.
If you have any questions, be sure to leave them in the thread so I, and others can help you.