Hello.
I’m Murokun.
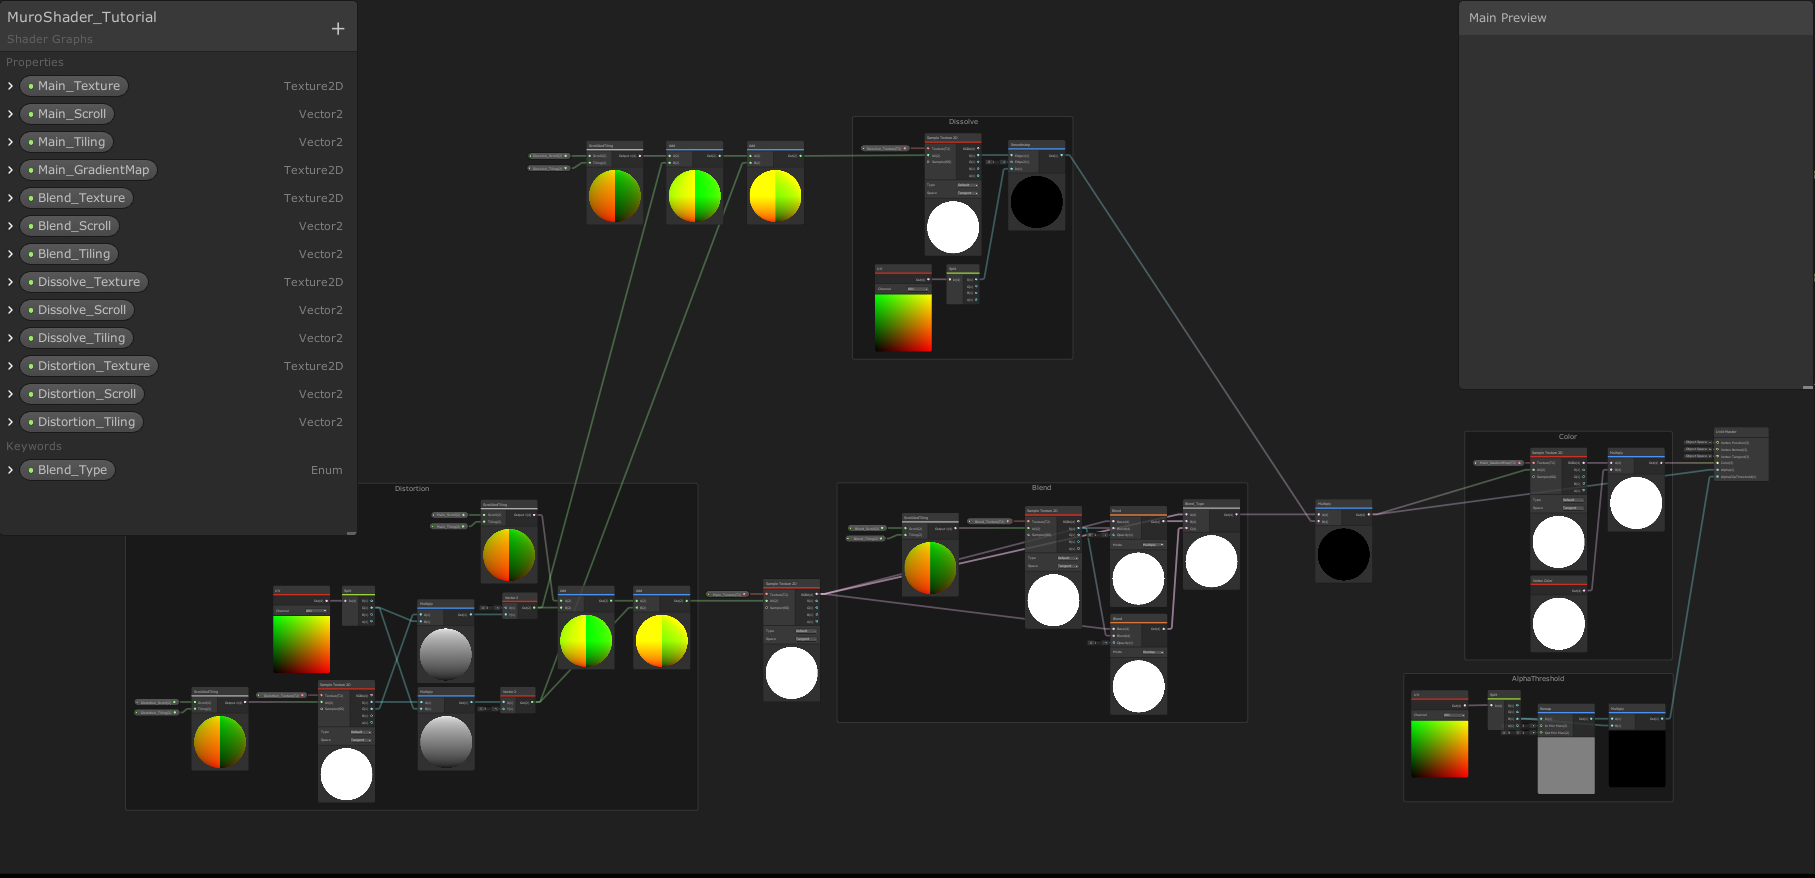
In this thread, I will explain the Shader Graph I use to create my work.
This Shader Graph consists of UV scroll, Gradient Map, Blend, Dissolve and Distortion.
I will explain these functions.
Hello.
I’m Murokun.
In this thread, I will explain the Shader Graph I use to create my work.
This Shader Graph consists of UV scroll, Gradient Map, Blend, Dissolve and Distortion.
I will explain these functions.
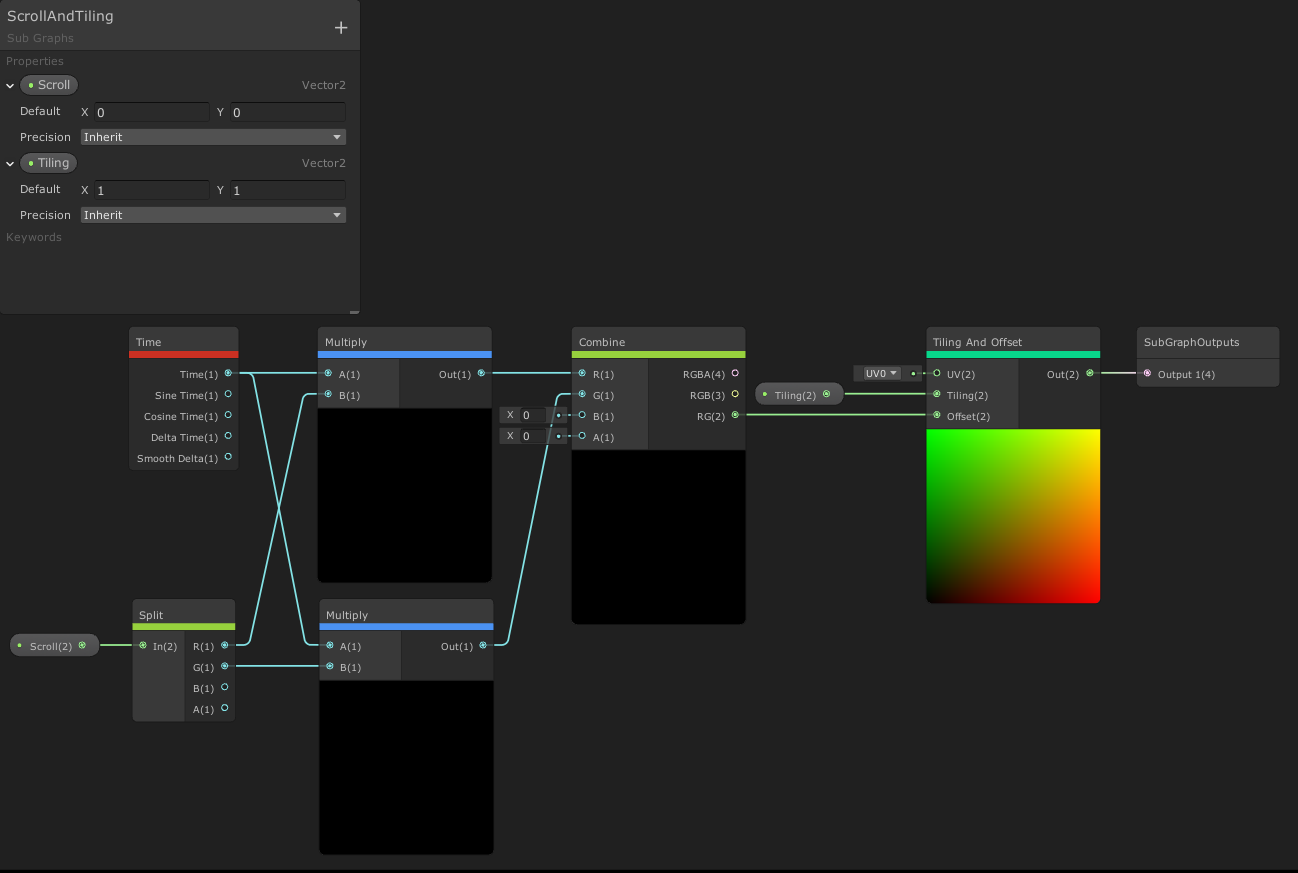
First, I will explain the UV scroll created with Sub Graph.
Here is the whole picture of the node.
In addition to UV scroll, we also implemented Tiling.
It can be used for general purposes by creating it with Sub Graph.
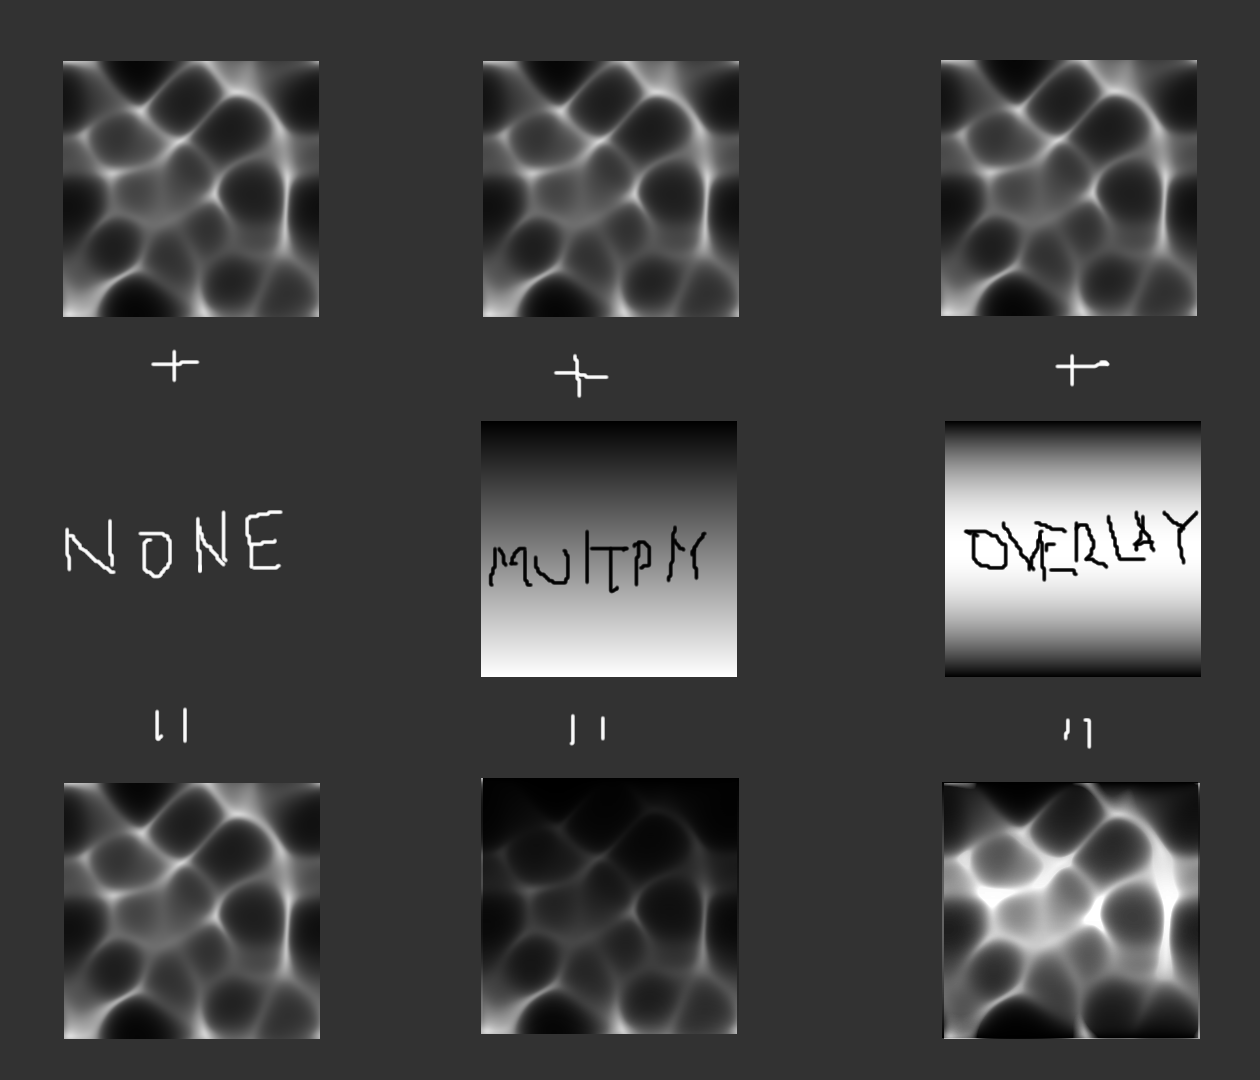
Next, I will explain the Blend function.
Layer another texture on top of the main texture.
Use the Enum node to allow you to select the blend type from [Multiply] or [Overlay].
This time, we have prepared a total of three options, including [Do not stack] textures.
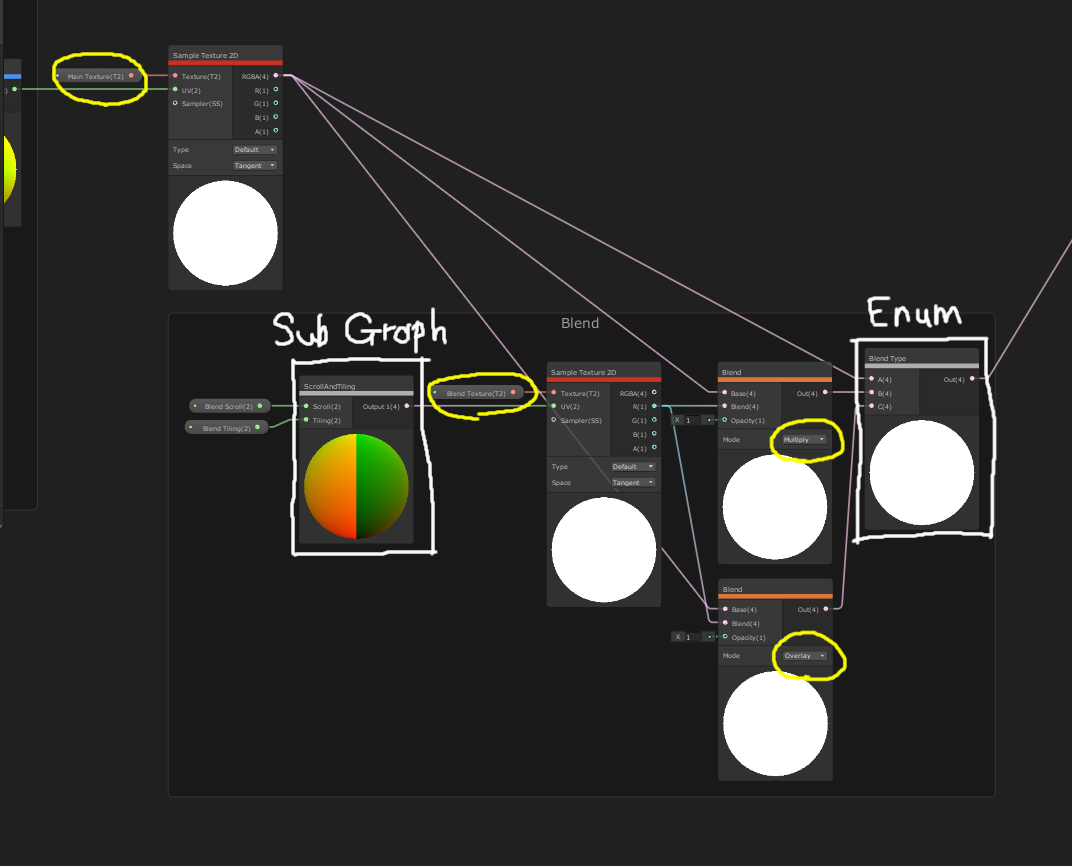
Connect the nodes as shown in the image.
Connect the previously created Sub Graph to the blend texture’s [UV].
Now you can UV scroll and Tiling the blend texture.
This completes the implementation of the Blend function.
Thank you for sharing:heart_eyes:![]()
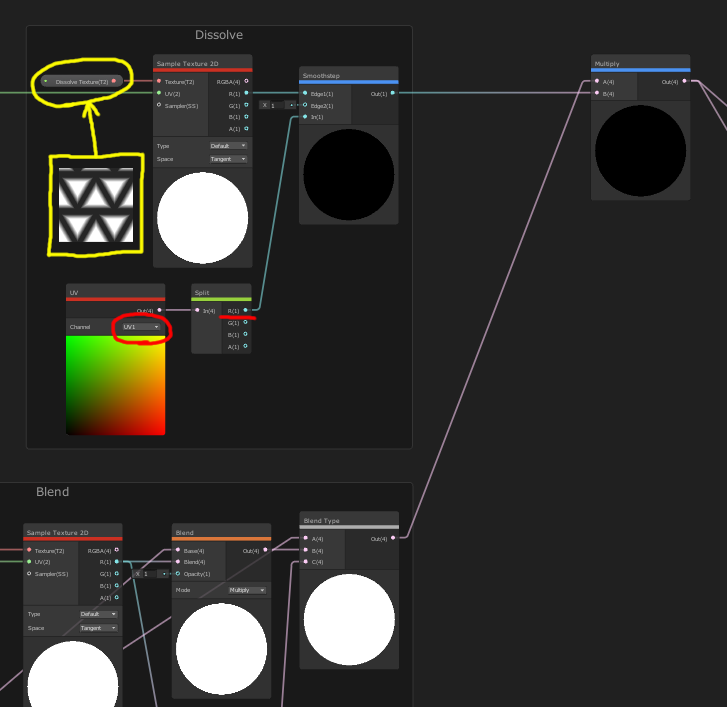
Next, I will explain the Dissolve function.
Nodes connect this way.
[Multiply] the Blend function created last time, and the work in Shader Graph is completed.
If you connect the [UV] node like an image, you can control the state of dissolve for each particle with [Custom Data] of Particle System.
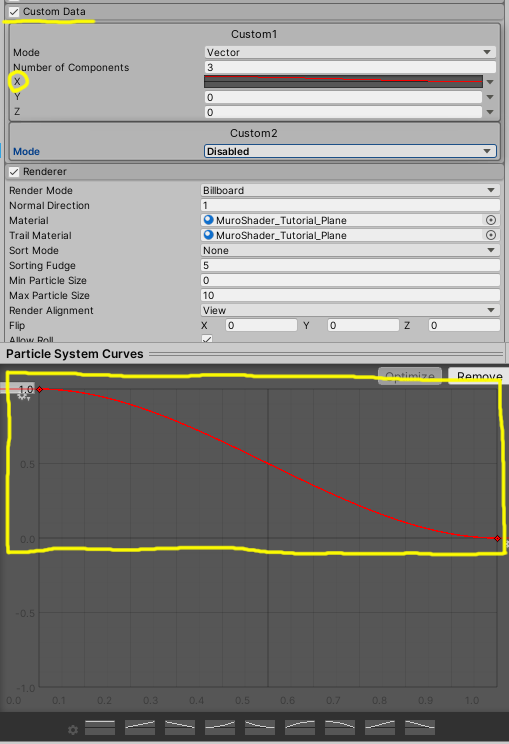
Now, let’s move on to the Particle System settings.
To use [Custom Data], first enable [Custom Vertex Streams].
Next, set the [Renderer] settings as shown in the image.
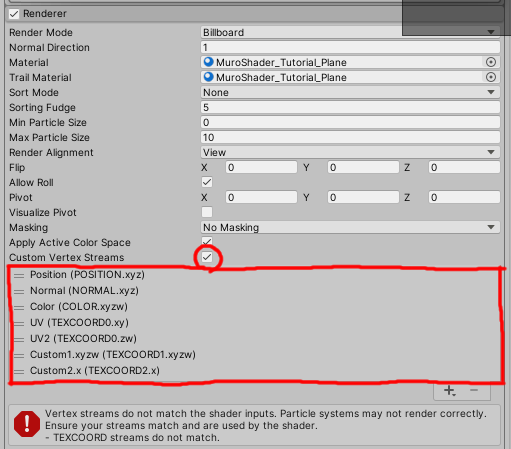
You can now control the dissolve state with the [X] of [Custom Data].
1 = no dissolve, 0 = completely dissolve.
Setting a curve that goes from 1 to 0 will cause the dissolve animation to play as the particles age.
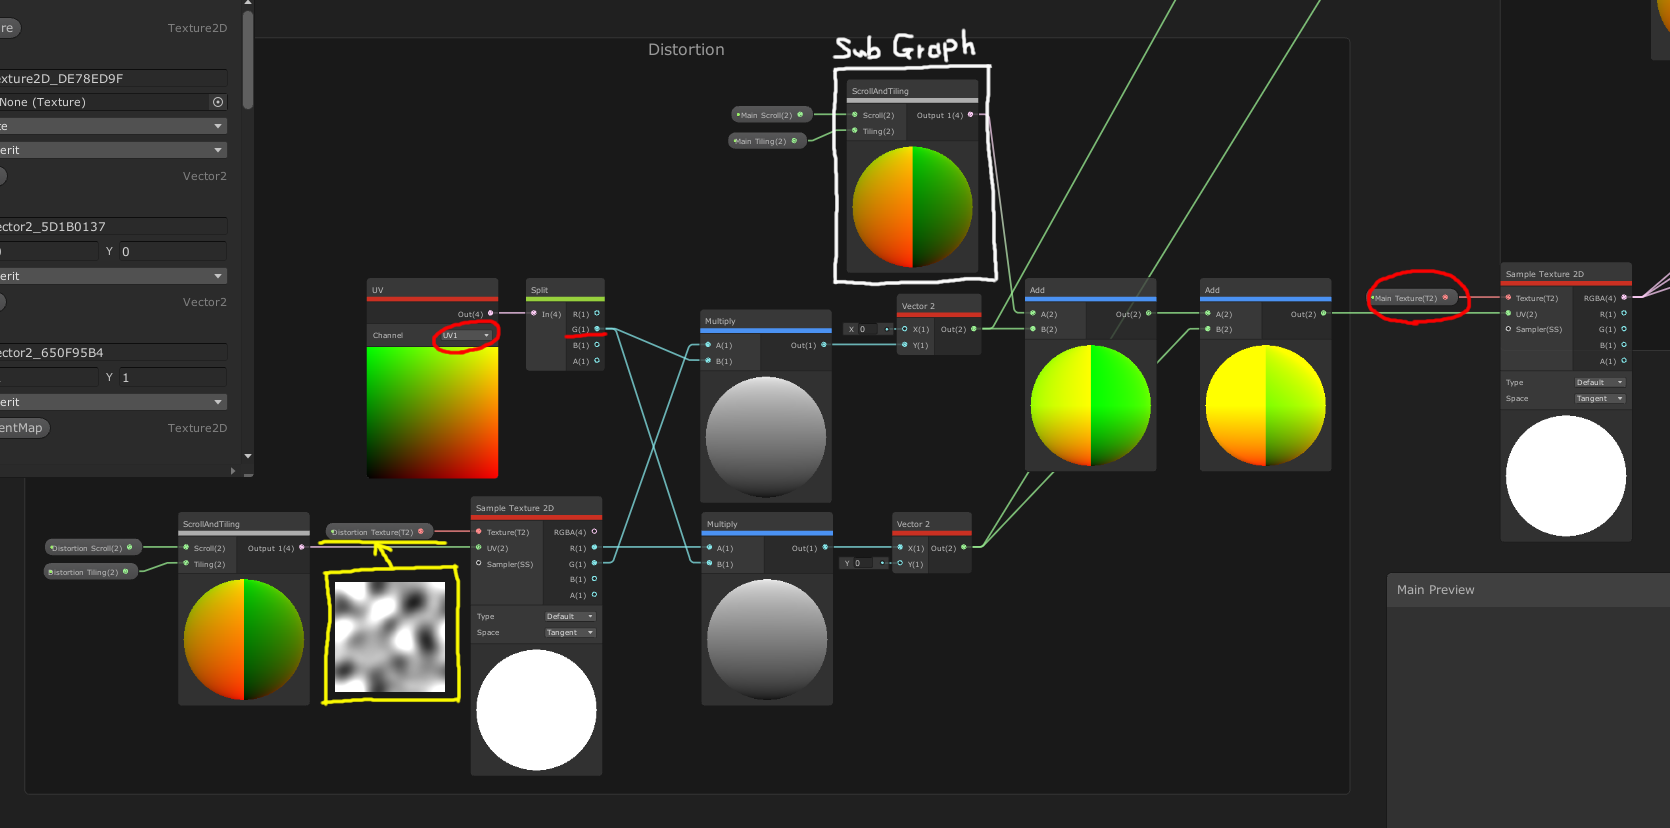
Next, I will explain the Distortion function.
Add one process between the main texture and Sub Graph.
Please connect as shown in the image.
The main texture is distorted by connecting the distortion texture to the [UV] of the main texture.
The UV is shifted by adding [Add] a distortion texture to the UV of the main texture.
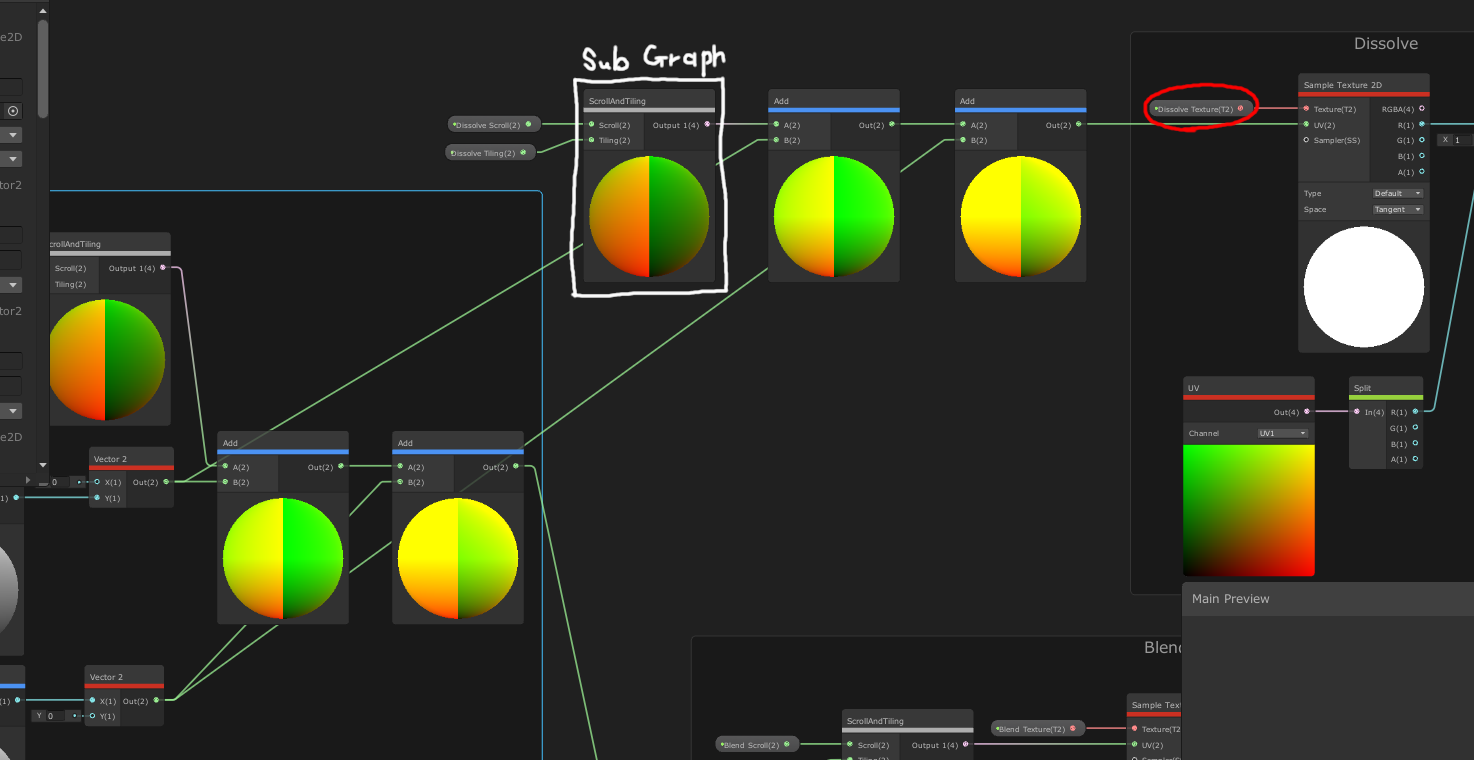
If you add similar processing between the dissolve texture and the Sub Graph, it will look like an image.
[UV] node is [Multiply] to control the distortion strength with [Custom Data].
You can adjust the strength of the distortion with [Y] of [Custom Data].
The image is an example.
The higher the value, the stronger the distortion.
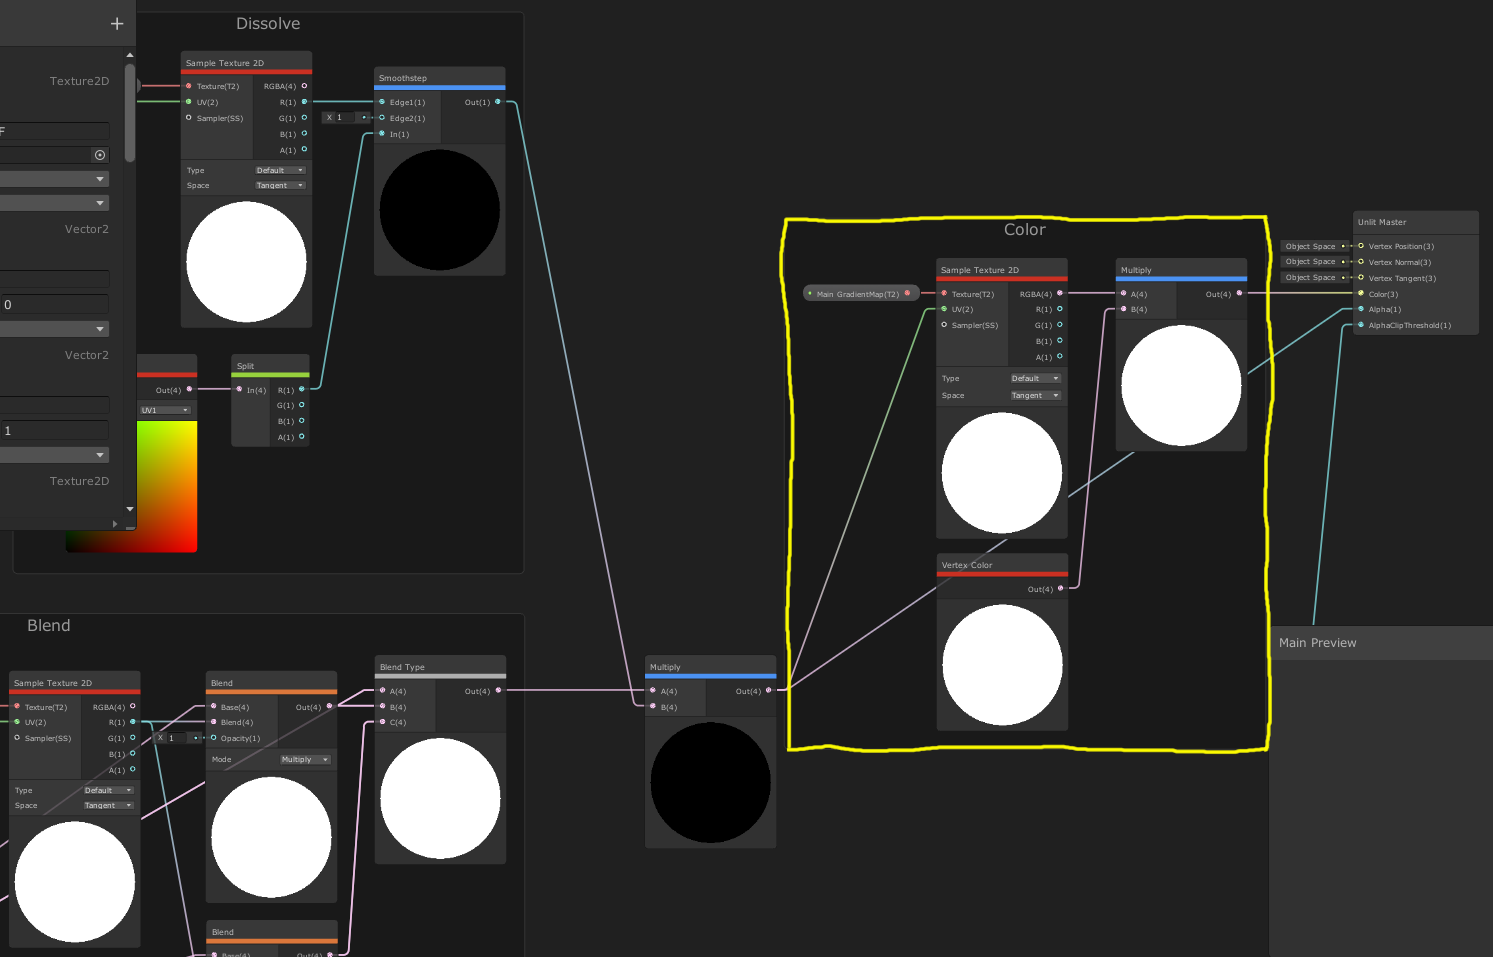
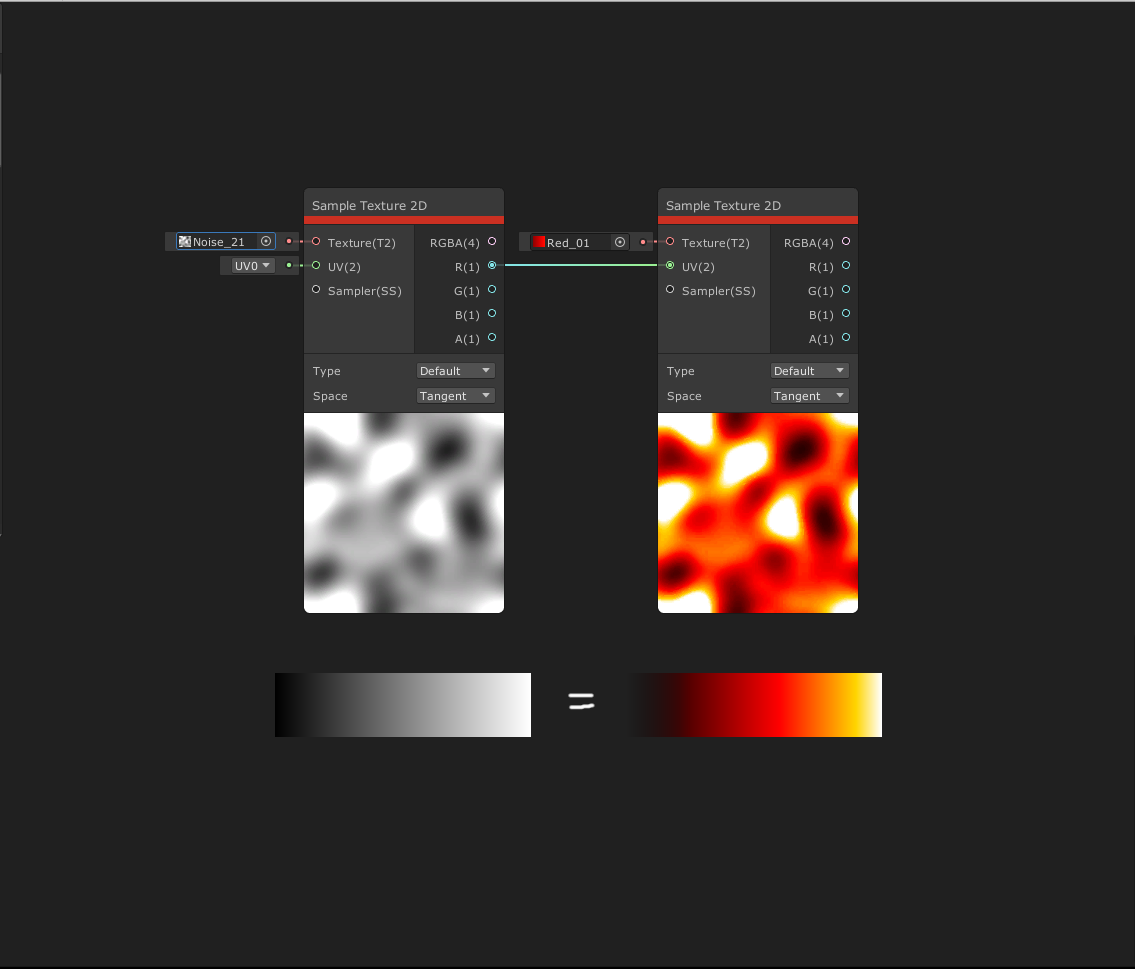
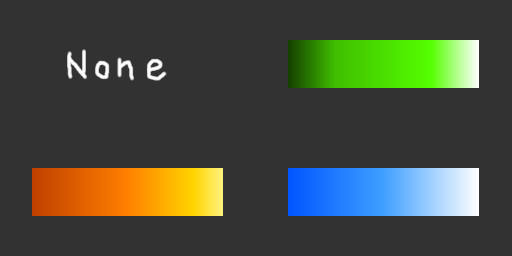
Finally, I will explain the Gradation Map function.
Each of these has a gradient map texture applied to it.
Shader Graph implements the functions installed in Photoshop and Substance Designer.
This feature is very convenient because you can change only the color without changing the texture.
Implementation is very easy.
After finishing all of UV Scroll, Distortion, Dissolve, just add image-like processing.
The color gradation of the main texture is replaced by the color gradation of the gradation map texture.
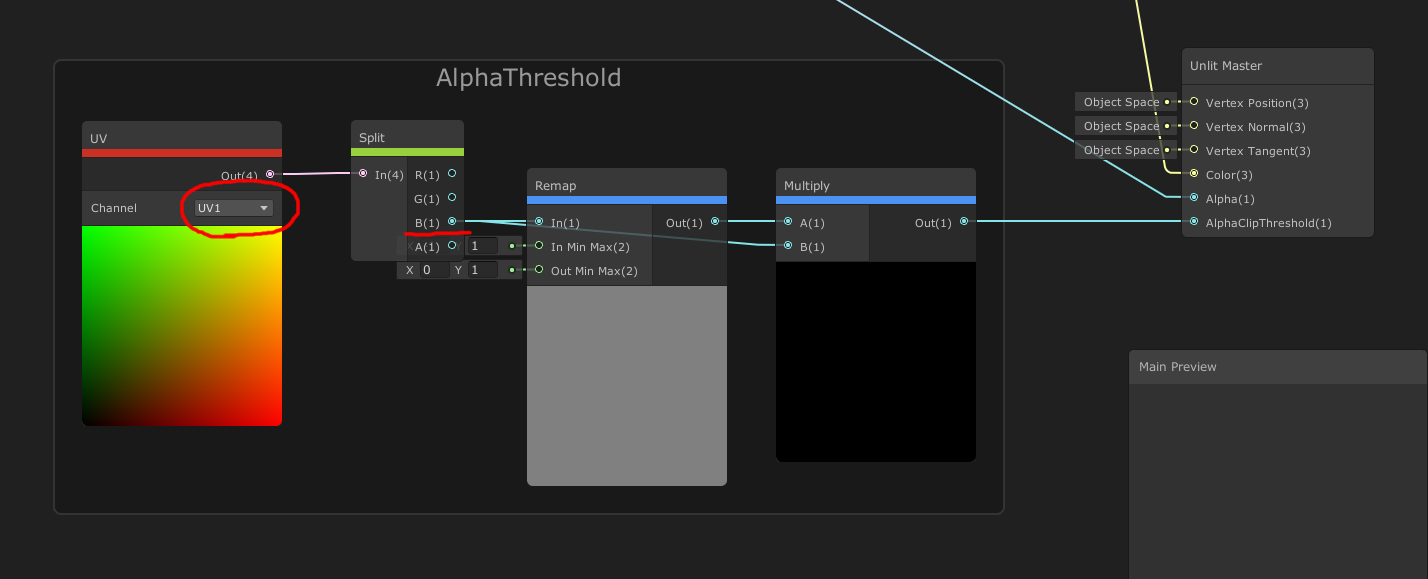
Finally, connect such a node to the AlphaClipThreshold of the [Unlit Master] node.
The higher the value of [Z] of [Custom Data], the more the transparent part of the texture increases.
Thank you for watching.
That concludes the tutorial.
Thank you for your hard work.