This is somewhat of a brain dump, a couple of notes from my RnD into optical flow. Probably has some duplicate info, but hopefully some useful info as well. 
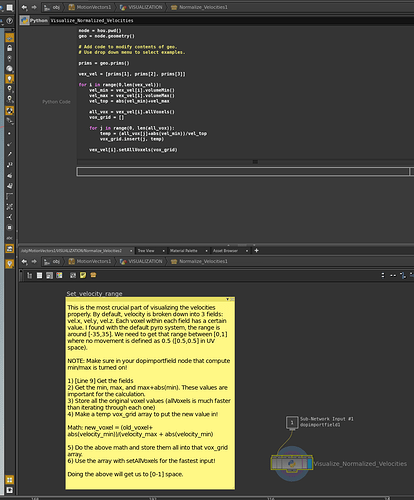
Despite looking and working very similar to each other, there is actually an important difference between the two. The velocity data coming out of your 3d package has arbitrary values assigned to it. The engine doesn’t know if your max velocity is 10cm or 100m, it only knows the velocities in relation to itself. Its also doesn’t know the difference from one frame to the next.
A proper optical flow maps strength values are directly tied to its frame resolution. By using the frame resolution as a sort of measuring stick, it can figure out the exact amount of displacement required to achieve a perfect blend. This is why i prefer to use a program like twixtor to generate my optical flow maps. Using a little bit of math we can figure out the exact value required for our shader. The formula is your displacement strength, (assuming your using twixtor or a similar program.) divided by your frame resolution. (not the total resolution of your flipbook, only 1 frame. Resizing the final flipbook afterwards does not change the required values)
IE: 128 strength / 1024 = 0.125 in the shader.
Since the velocity info coming from your 3d package isn’t in relation to anything other than itself, there is no easy formula for calculating the required strength for the shader. The best way iv’e found is just to import your velocity data and manually adjust the shader until its smooth. Setting the lifetime of your sprite to something crazy high (100-200 seconds) helps you narrow down the required value. Once you have your value you can multiply that with the frame resolution to get the corresponding value for twixtor. (in case you wanted to combine the 2)
Since the strength values are directly tied to the frame resolution, you can’t scale your vectors in post. You need to do all scaling actions before your vectors are created, either by a keyframed camera in your scene or using twixtor to regenerate after your scaling operations.
Velocity info from your package doesn’t have the edge padding required to deal with the silhouette of your effect. When an optical flow map is calculated, it compares each frame to the next in sequence to find out exactly how the pixels have moved in comparison to the previous frame. It then adds a sort of edge padding so it can properly distort the silhouette. Without this you will see the same stepping artifacts on the silhouettes as you do with traditional frame blending.
I’m not sure if this is the case for all iterations of the shader, but the way our shader works is the flowmap is always 1 frame ahead. So when its on frame 1 of the effect, the flowmap its using is actually the one from frame 2. Because of this we have to do a shuffle with all our flowmaps before compiling the flipbook. I just delete the first frame and have an empty flowmap on the last frame. (127,127,0) This way the first frame of my flowmap flipbook is actually frame 2 of my sequence. Usually your effect has almost totally faded out by your last frame so missing the last vector doesn’t matter too much, unless your looping your sequence.
You can use optical flow maps to reduce the amount of frames in your flipbook while still keeping smooth motion, but it does have limitations. The main thing to keep an eye on is how much the effect changes from frame one to the next. Ideally you wont want the effect to move more than 5-10% the width of the frame. Also keep in mind that although the frame is being distorted towards the position of the next, there is still a frame blend that happens as the frames switch. If the frames are too different from one to the next, you will still get blending artifacts. (ie: Imagine an A trying to change into a B) Think of the motion vectors as a direct linier translation of the pixels from one frame to the next.
Doing extreme camera movements between frames can produce bad results from twixtor. (raw velocity maps are much more accurate in this situation) Things such as keyframing the camera so the effect fills as much of the frame as possible, regardless of how much it moves. You must keep in mind the differences between frames, as well as the pixel positions between frames. Things such as explosions that expand a lot at the start can sometimes cause weird motions in your vector info if you keyframe to compensate for the rapid expansion . (vectors moving in directions opposite of what you would expect) I’ve found it helps in those situations if you leave a little bit of room for the effect to expand in each frame. (IE: the effect is slightly bigger in frame 2 than frame 1 etc.) This will help the vectors to flow outward as the effect expands instead of flowing inward due to the effect of the camera zooming in. You can still keyframe the camera, just as long as the effect expands in your frames. The first couple frame are always the trickiest.
You can still have frames that are not power of 2, as long as the final texture is a power of 2. (ie: 2048x2048 flipbook, 9 frames wide and 12 frames tall.) In this situation the same equation to calculate the shader strength is used, the only thing to keep in mind is to use the larger resolution number of your frame to calculate the value. (ie: a 1024x768 frame, use the 1024 in the equation)
Now go forth and…


